Affiliate links on Android Authority may earn us a commission. Learn more.
How to create a table of contents in Microsoft Word
If you have a long document and need to make it easier to navigate, here’s how to add a table of contents in Microsoft Word.
QUICK ANSWER
To make a table of contents, put the cursor where you want to insert the table of contents. Then, open the References tab, click Table of Contents, and choose an automatic table of contents. The table of contents will appear with page numbers and sections inserted automatically.
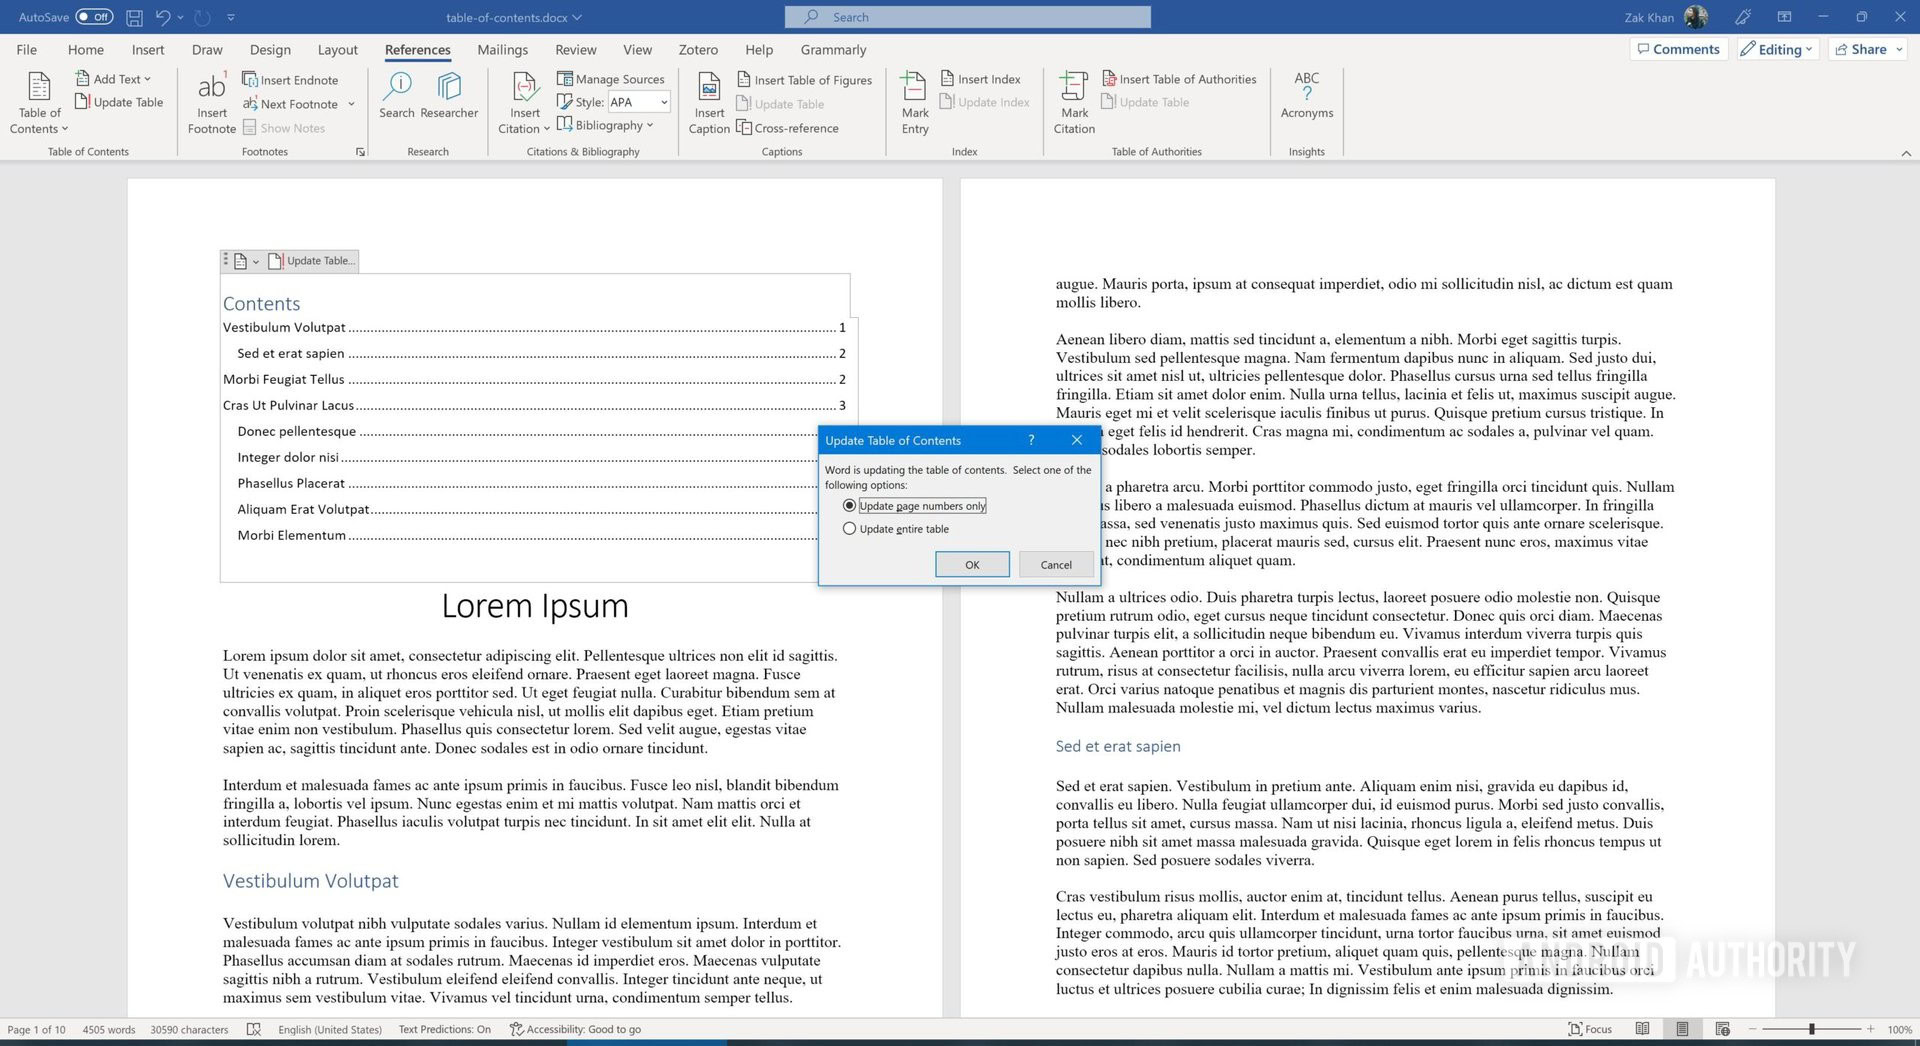
If you want to update a table of contents, put your cursor in the table of contents and click on the References tab. Then, click on Update Table in the toolbar or the pop-up tab that appears on the table. Choose Update page numbers only or Update entire table.
To remove a table of contents, put your cursor in the table of contents, click on the References tab, and click on Table of Contents. Choose Remove Table of Contents.
JUMP TO KEY SECTIONS
How to make a table of contents in Word
To make a table of contents in Word, you need to have headings and subheadings in place beforehand. These must be in Heading 1, Heading 2, and Heading 3 styles to appear in the table of contents. Anything set to Heading 1 will appear as an individual entry while Heading 2 and 3 will appear as subsections beneath a Heading 1 entry. Anything not marked with these styles will not appear in the table of contents.
With that in mind, here’s what to do:
- Put the cursor where you want to insert the table of contents.
- Open the References tab and then click Table of Contents. From the menu that appears, choose an automatic table of contents. The first entry is titled “Contents,” while the second is “Table of Contents.”
- The table of contents will appear with page numbers and sections inserted automatically.
How to update a table of contents in Word

Microsoft Word automatically creates a table of contents based on your chosen section formatting, but these are not dynamic. That is, if you change or remove sections or type more text and things shift around, you will have to update the table of contents to reflect this. Here’s how:
- Put your cursor in the table of contents and click on the References tab.
- Click on Update Table in the toolbar or the pop-up tab that appears on the table.
- You can choose to Update page numbers only or Update entire table. The first option only updates page numbers on case sections have shifted around, while the second reflects any changes you made to the names of sections themselves.
How to remove a table of contents in Word
If you no longer want a table of contents, you can remove it. Here’s what to do:
- Put your cursor in the table of contents and click on the References tab.
- Click on Table of Contents.
- Choose Remove Table of Contents.
FAQs
Only sections formatted with Heading 1, Heading 2, or Heading 3 will appear in the table of contents.
No, you will have to follow the instructions above to update the table of contents.
The table of contents will be inserted wherever you currently have your cursor positioned.