Affiliate links on Android Authority may earn us a commission. Learn more.
How to use Google Calendar — everything you need to know
Google Calendar is a great tool for keeping track of appointments, events, birthdays, and more. It’s free of charge and can be accessed from your computer, smartphone, and tablet.
Read Next: Google turns 20: The 20 biggest milestones in Google’s history
If you’re wondering how to use Google Calendar on your PC or mobile device, keep reading. You’ll find detailed instructions on how to create events, set goals, share your calendar with others, and much more below.
The basics

Before you can learn how to use Googel calendar, you will need a Google account. It’s free of charge and only takes a few minutes to set up. The account gives you access to all of Google’s services that, in addition to Calendar, include Gmail, YouTube, Drive, Play Store, and many others.
Read next: How to use Google Drive
You can access Google Calendar online by visiting calendar.google.com or via the Android app — download here. Both more or less offer the same set of features, with the data automatically synchronizing between the two in the blink of an eye.
Gmail events
One of the best features of Google Calendar is that it automatically displays events from Gmail. For example, the service will create an even when you receive a confirmation email after booking a hotel room or flight. The feature is enabled by default, but you can turn it off in the settings. Notifications are also enabled by default and can easily be toggled off as well.
Design (Android and Web)
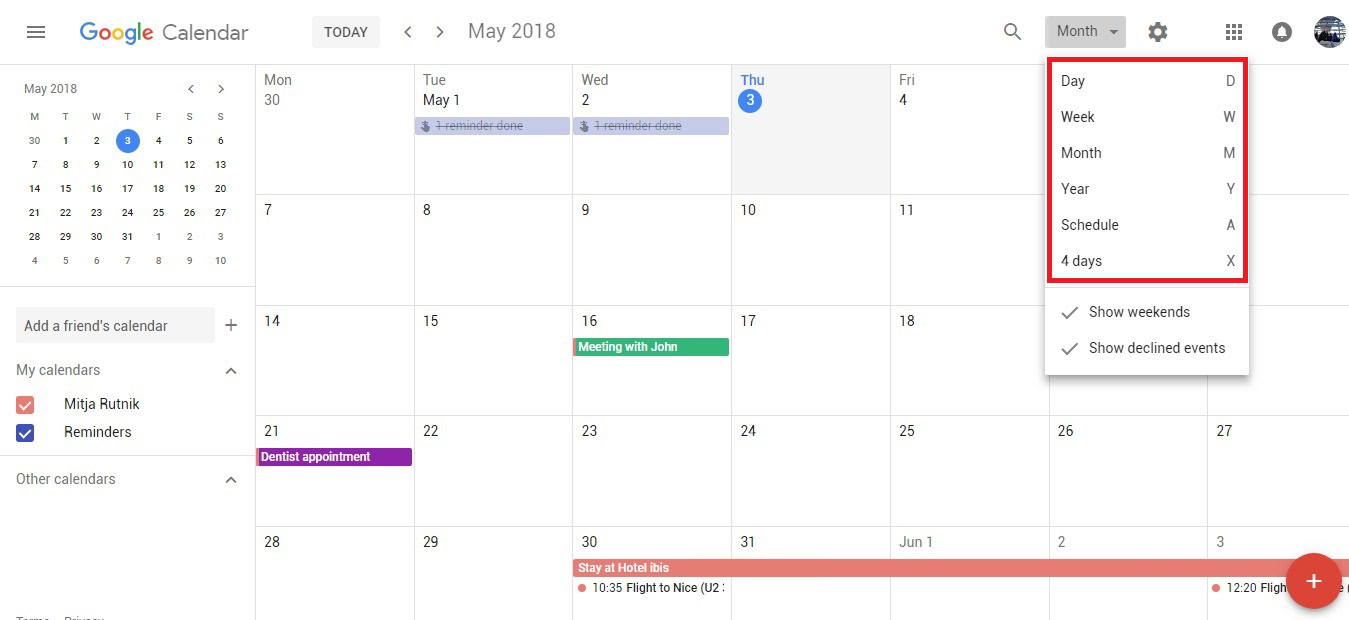
When it comes to design, the web client and Android app keep things simple, which is a good thing. The interface looks clean and gives you various customization options. You can switch between day, week, month, and year view (image above), add different colors to event and reminders to make the whole thing a bit more lively, reduce the brightness of past events, and more. There’s also a handy search box on top for quickly finding a specific event or reminder.
Now that we got some of the basic stuff out of the way, let’s take a closer look at how to use Google Calendar and its robust set of features.
Create events
Web client
There are two ways you can create events via the web client. The first is by clicking on a date of choice in the calendar, after which you’ll be able to add the name of the event and set the date and time in the pop-up window. Once that’s finished, just click “Done” to save the event in the calendar.
The second way of creating an event takes more time, as it offers more options. To get started, click on the red “+” button in the bottom-right corner of your screen, which will bring up a page where you’ll enter the event’s details. These include the name of the event, date, time, description, and location. You can also set a reminder, select a color for the event to differentiate it from others, and share the event with other people by creating a guest list.
Keep in mind that both methods for creating an event do exactly the same thing — the second just gives you more options. You can also jump from the first to the second method by clicking “More options” when the pop-up window shows up.
Step-by-step-instructions – Web client
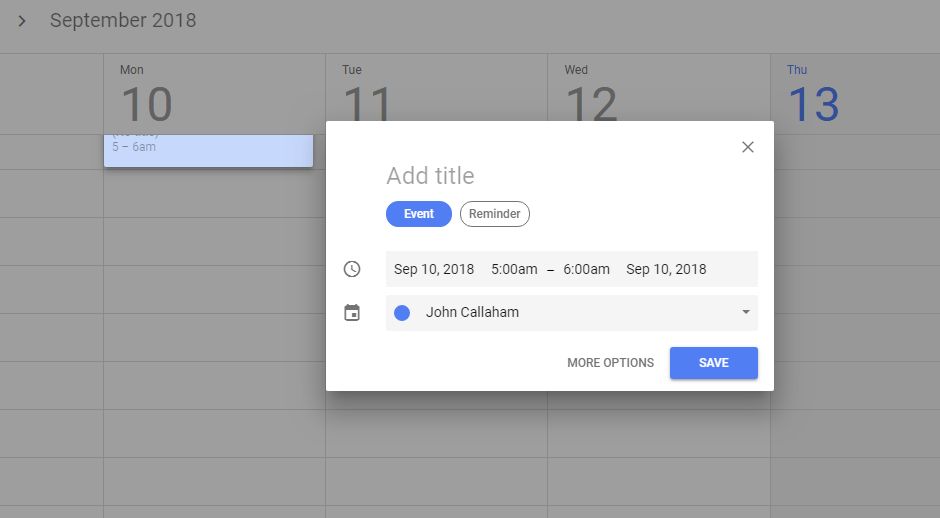
1. Click a date on the calendar.
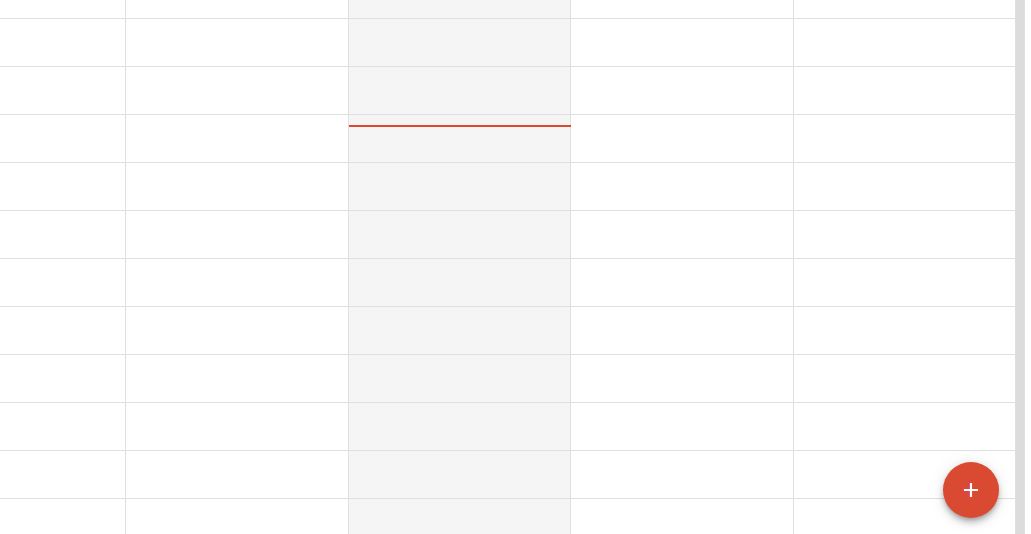
2. You can also click on the red “‘+” button in the bottom-right corner to do the same thing.
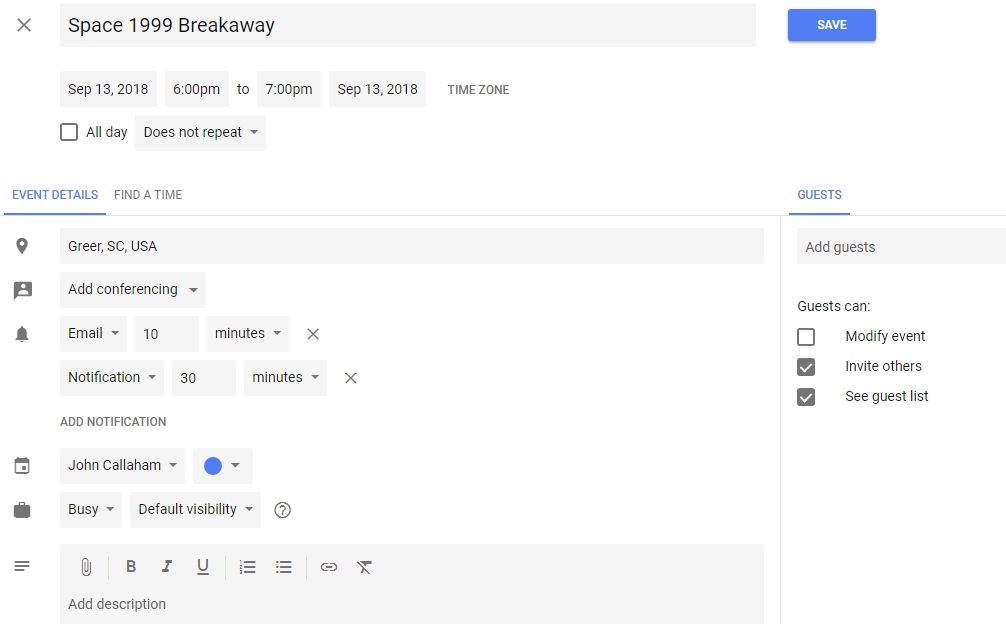
3. Whichever method you choose above, you can then enter the event’s details, including the name, date, time, and so forth. Click “Save” to complete the process.
Mobile devices
Just like on the web, there are also two ways you can create an event on a mobile device. The first is by tapping the red “+” icon in the bottom-right corner and selecting “Event”. Then fill out all the details including the event’s name, date, time, and so forth, tap “Save”, and you’re good to go — see above.
The second option is to select a specific date in the app, and then tap the hour (twice) when the event will start. This will bring up the same page as the first method, where you’ll enter all the required details and then select “Save” to finish the process.
The app offers the same features as the web client, allowing you to set a notification for the event, select a color, invite people, and more.
Step-by-step-instructions – Mobile devices
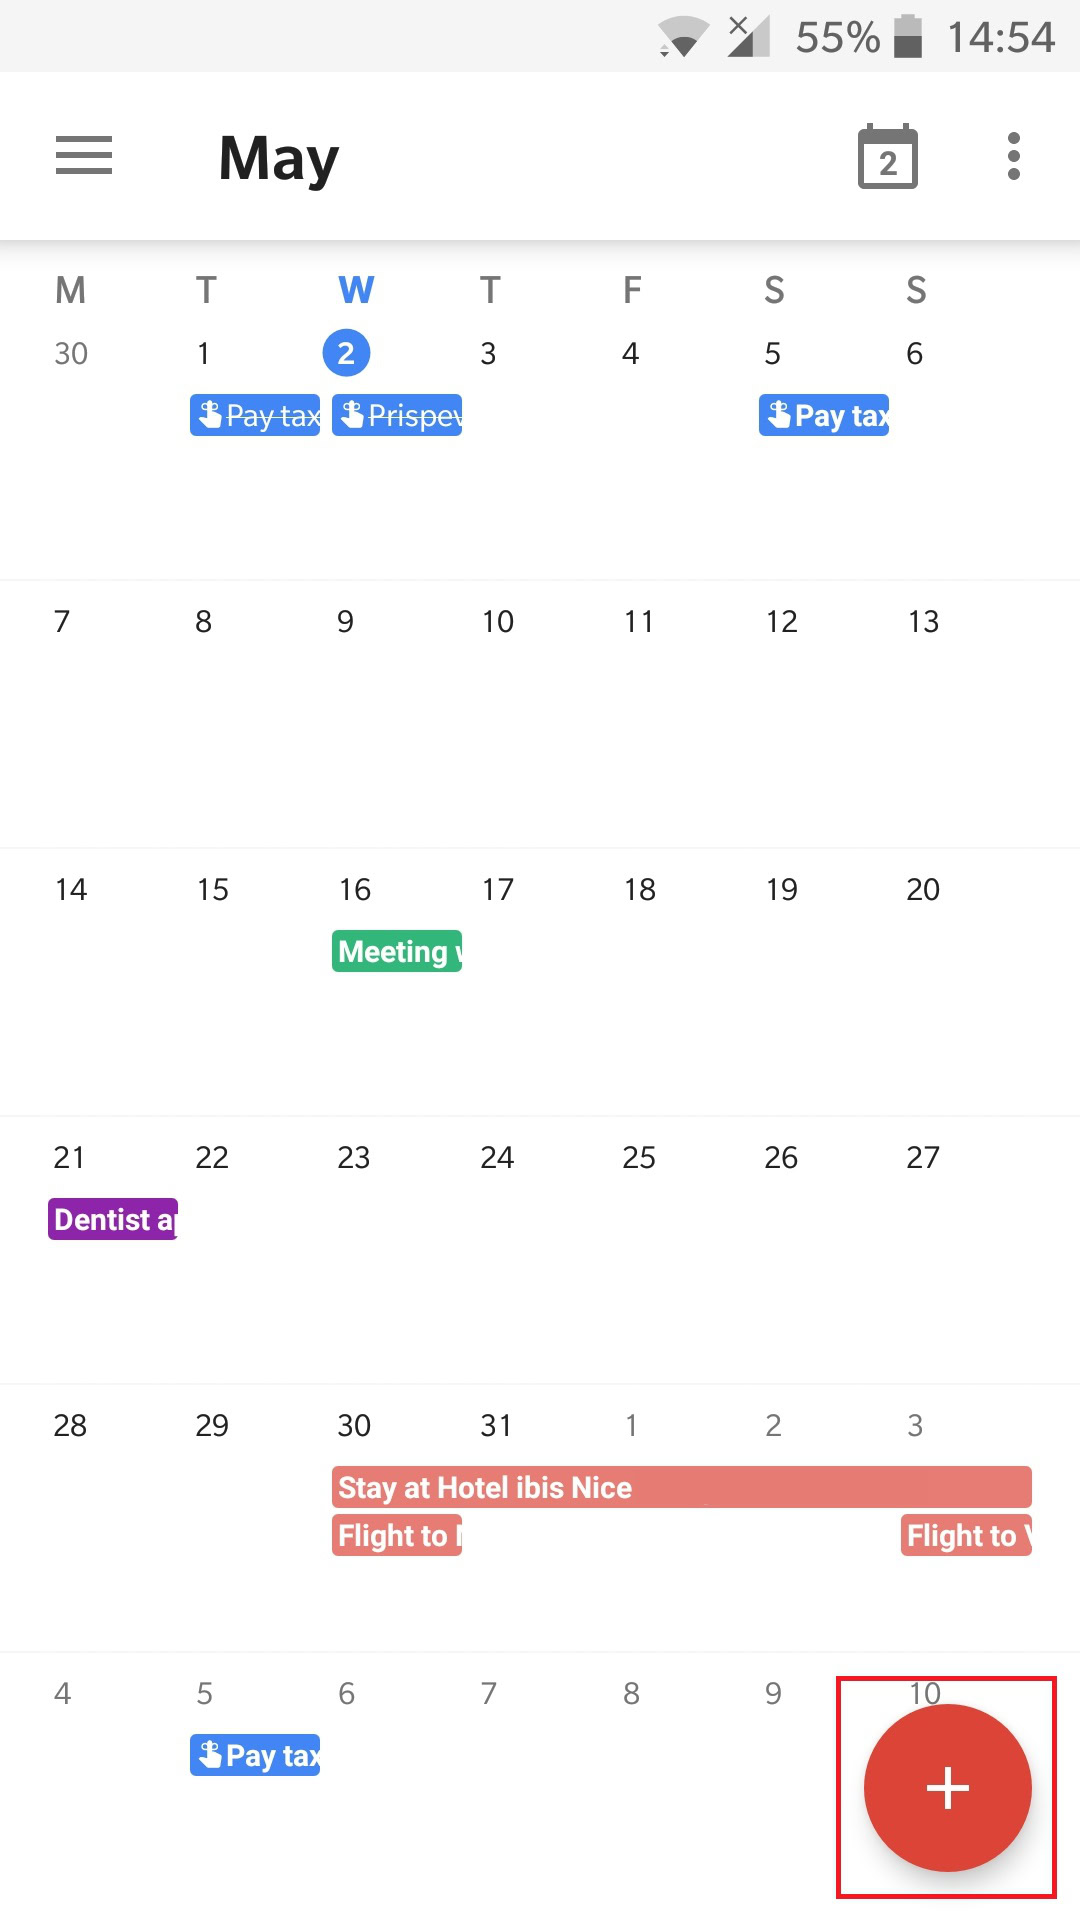
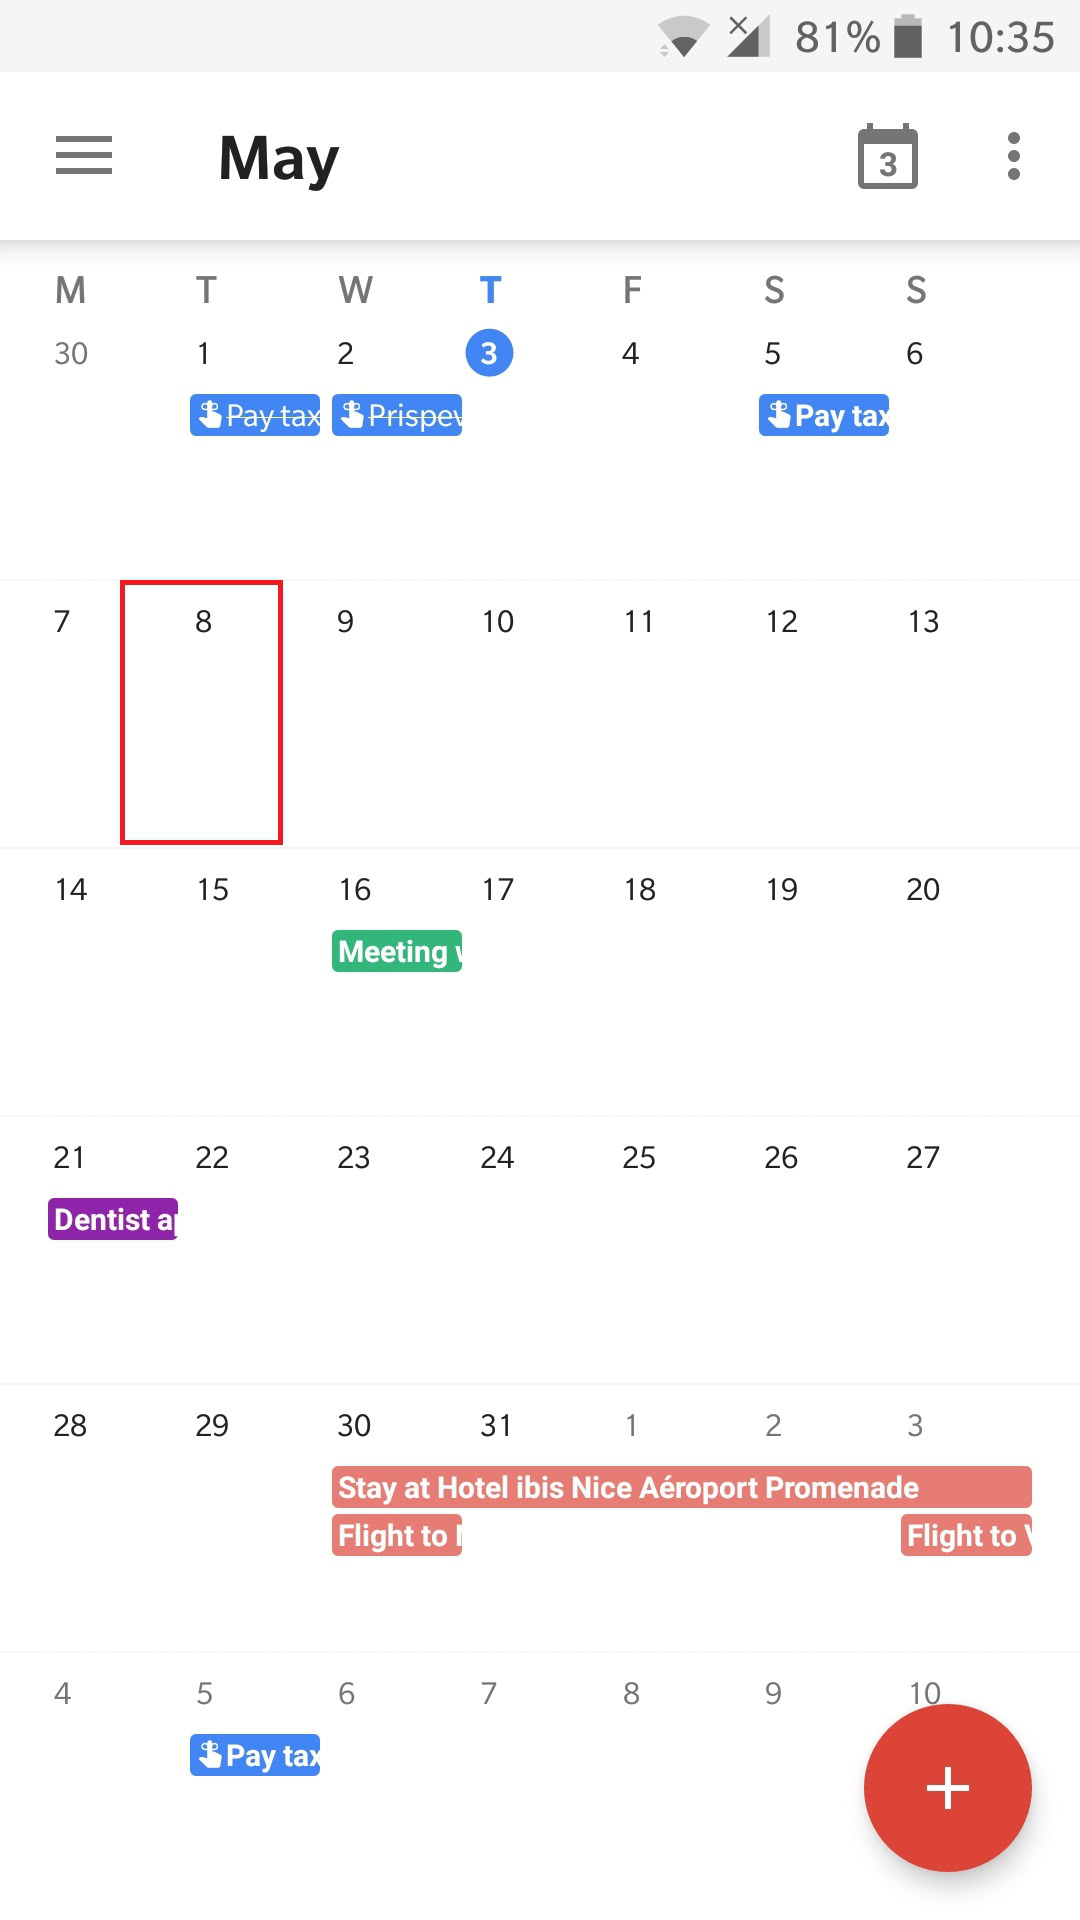
2. You can also tap on a specific date in the app, followed by the hour when the event will start.
3. Whichever method you choose, you can then enter the event’s details including the name, date, time, and so forth. Select “Save to complete the process”.
Create reminders
Creating a reminder is similar to creating an event, although there’s only one way to do it. There are fewer details to enter, as they only serve to remind you to pick up some milk, pay the bills, call your grandma, and take on other day-to-day activities.
Unlike events, reminders carry over to the next day until you mark them as done. So the one about calling your grandma will pop up on your phone every day until you give that sweet old lady a ring — or at least until you delete it. Also, reminders are private and can’t be shared with anyone else.
Web client
To create a reminder using Calendar’s web client, click a specific date and then choose the “Reminder” option. Then just add the name of the reminder, change the date if you need to, and either select the hour or make sure the “All day” box is checked. All that’s left to do is to set the “Repeat” option if needed and click the blue “Save” button.
Step-by-step-instructions – Web client
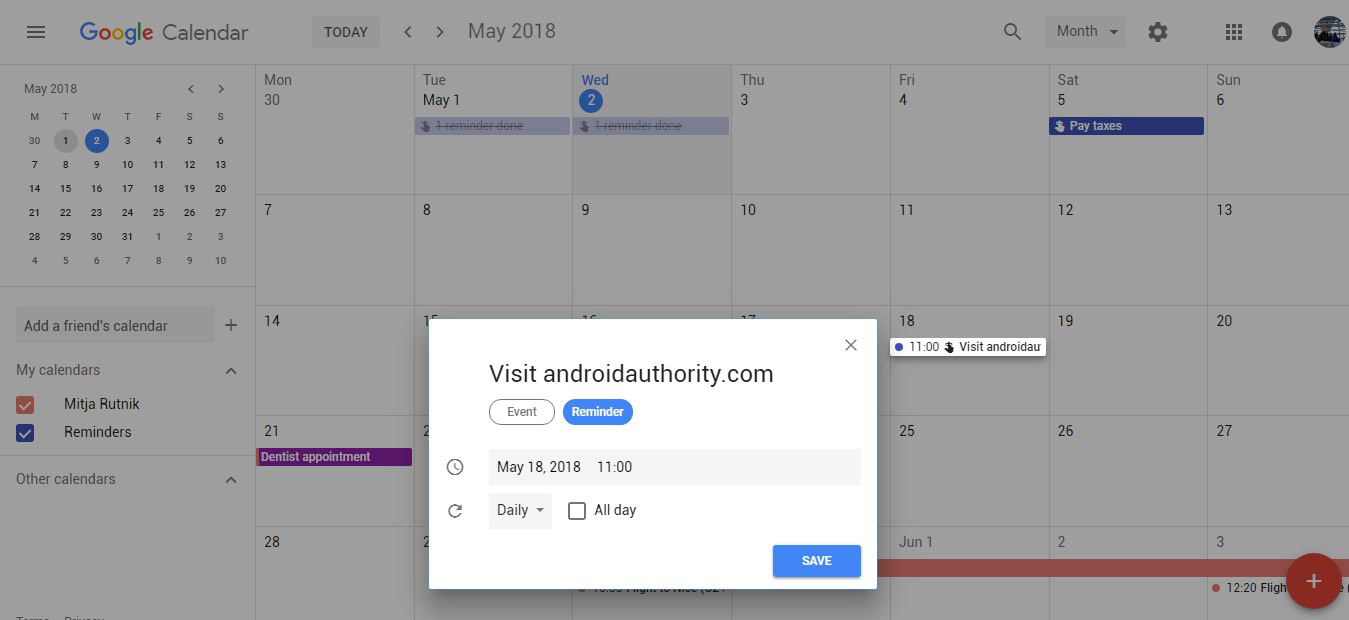
1. Select a specific date on the calendar and then choose the “Reminder” option.
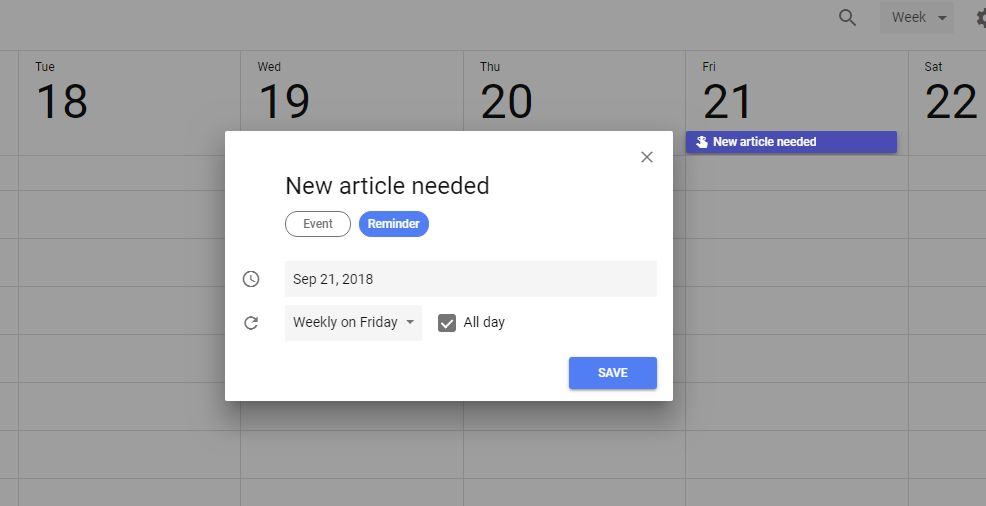
2. Enter details including the name of the reminder, date, time, and so forth. Click “Save” to complete the process.
Mobile devices
Creating a reminder on your phone is just as easy as making it on your computer. Tap the red “+” icon in the bottom-right corner of your screen, select “Reminder”, and start by entering the name of the reminder. The app gives you a hand with loads of suggestions that can speed up the process. You can then also select a date, add the exact time, and put the reminder on repeat (every day, every week, every month…). Tap “Done” when finished.
Step-by-step-instructions – Mobile devices

1. Tap the red “+” icon in the bottom-right corner.
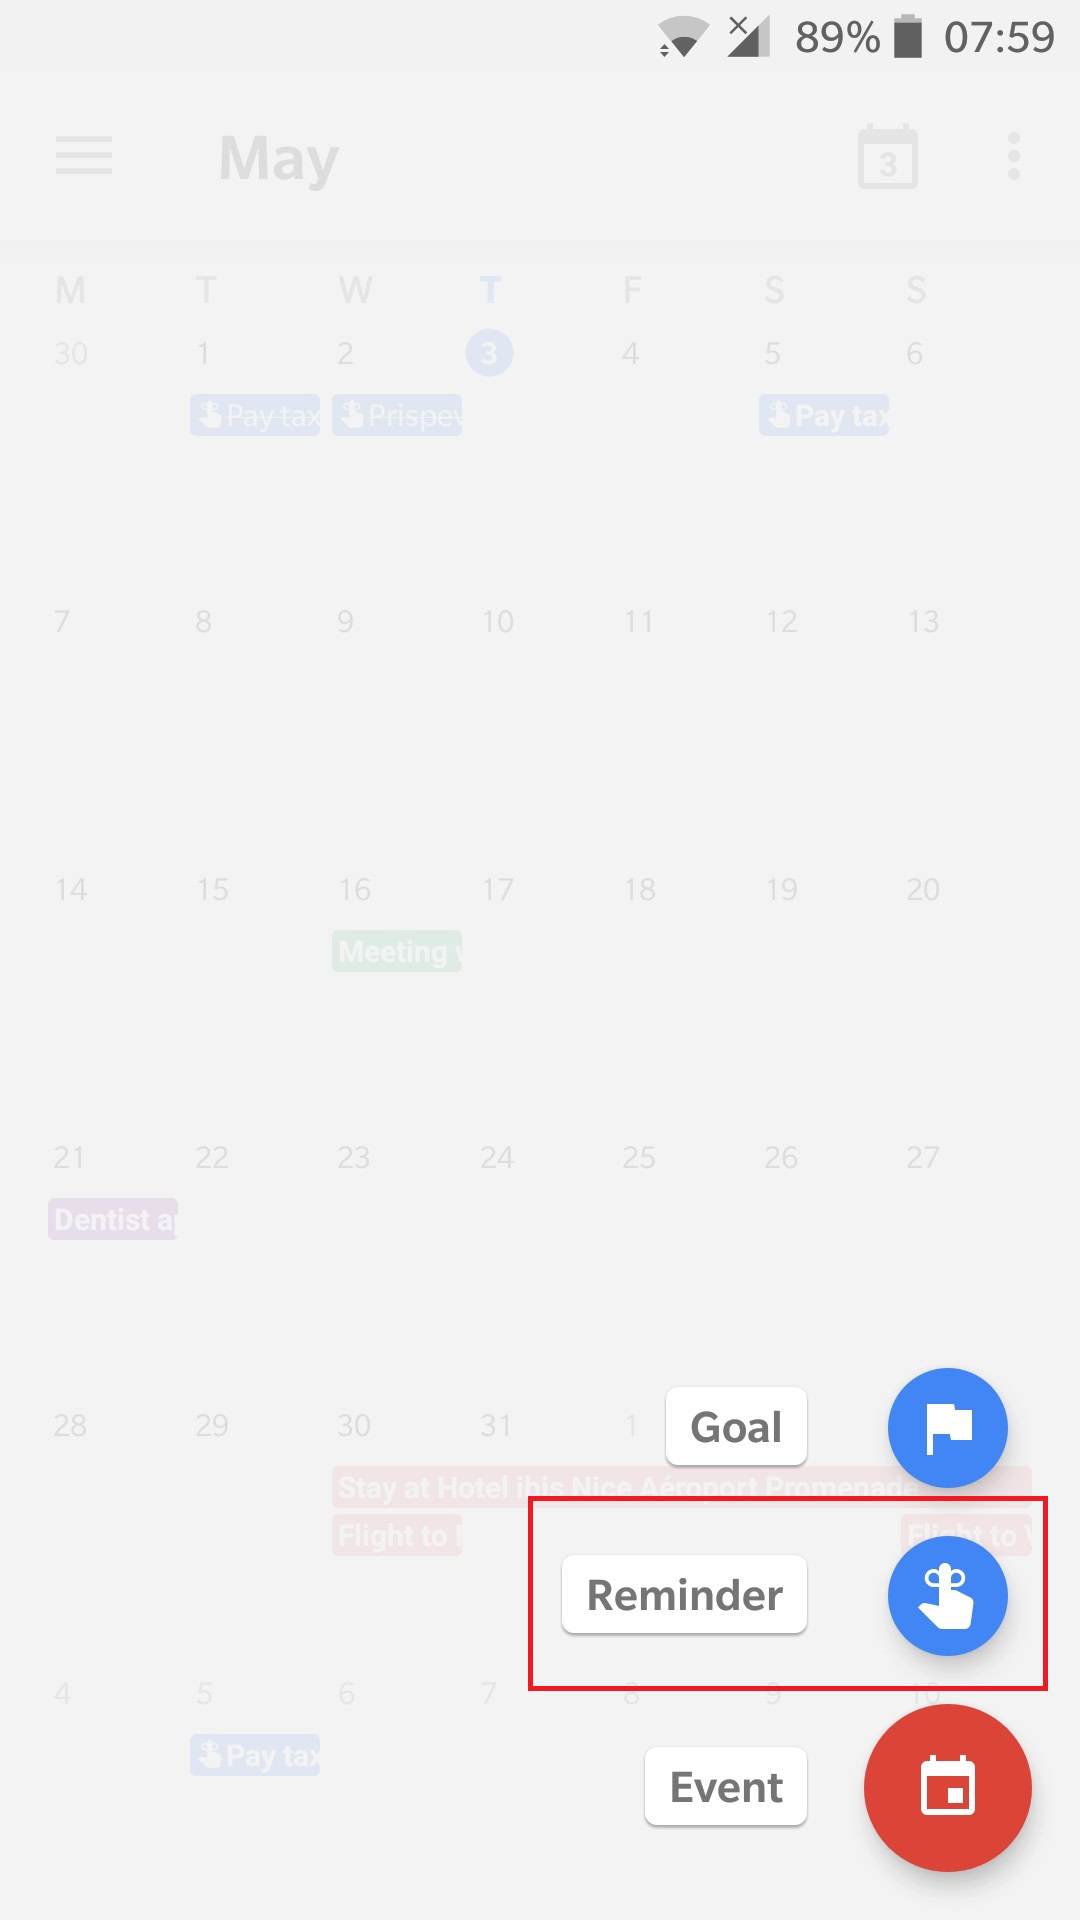
2. Select the “Reminder” option.
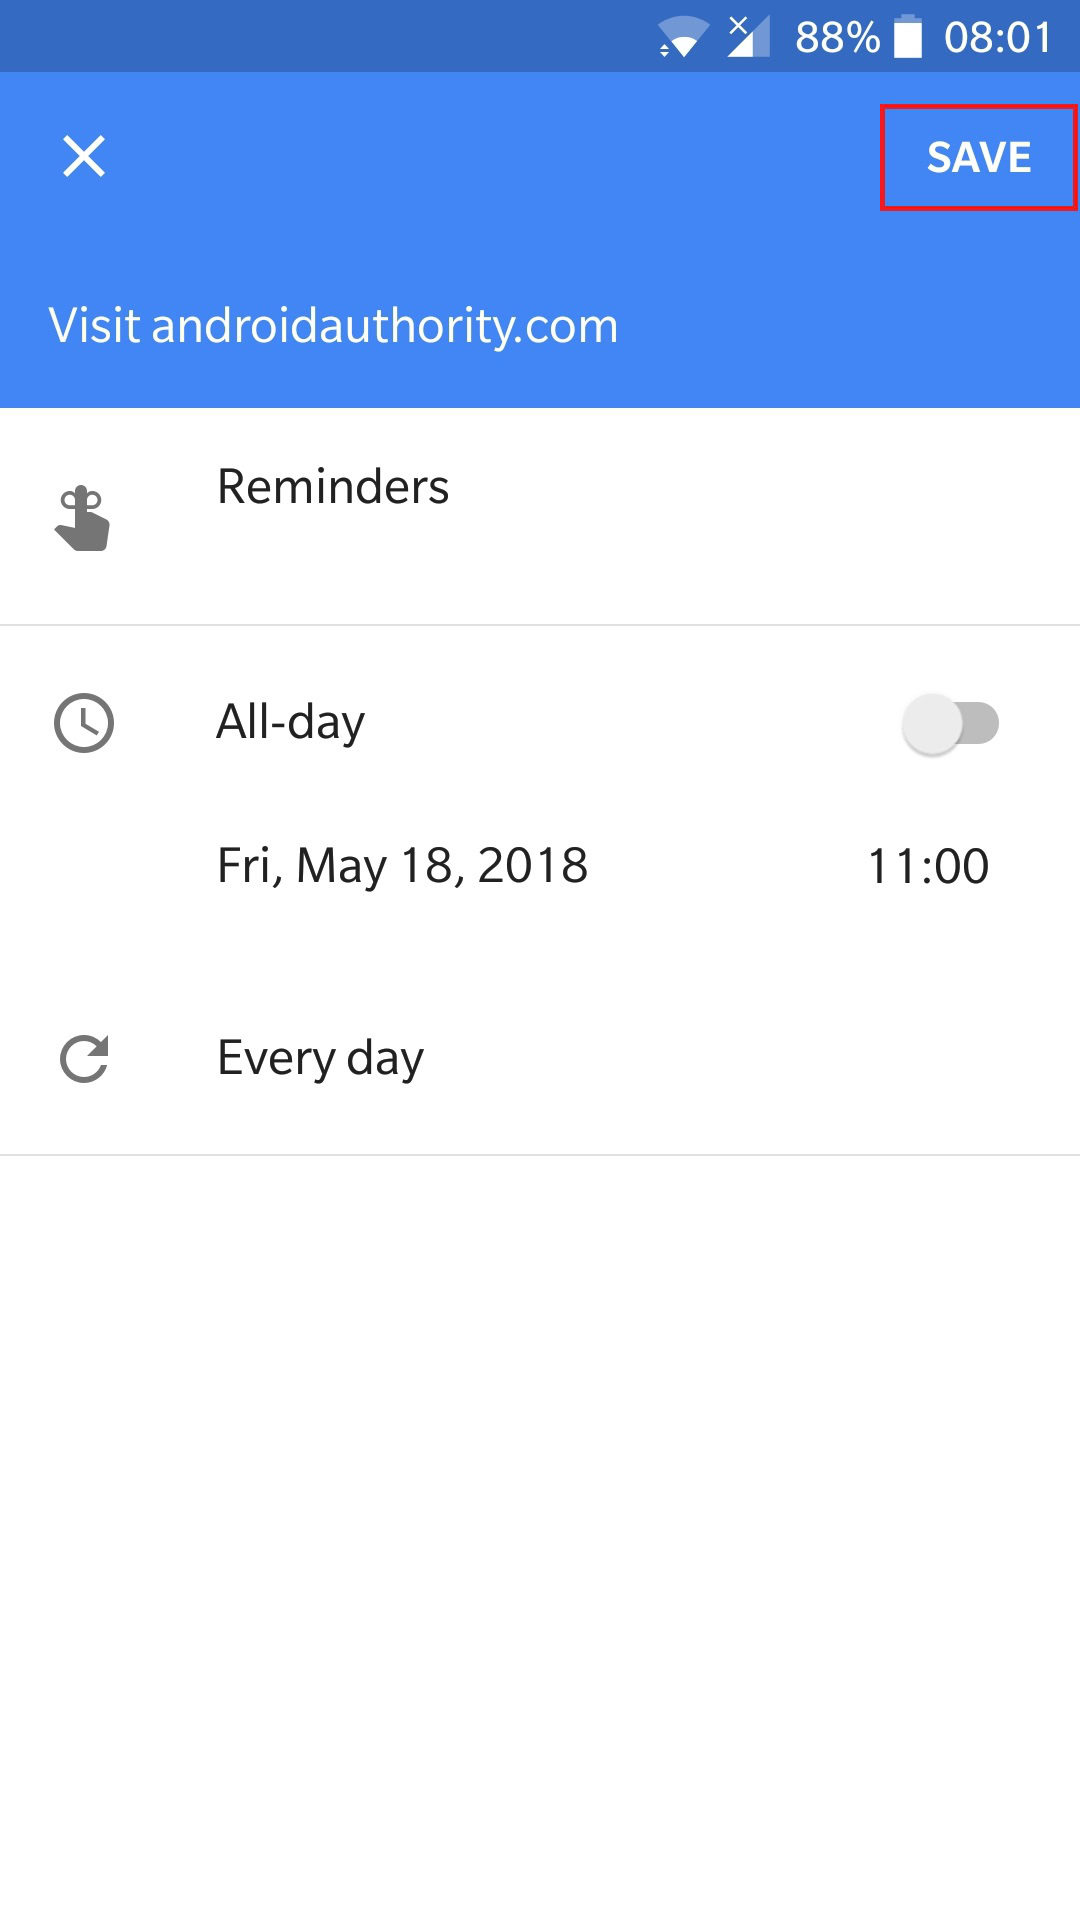
3. Enter your details including the name of the reminder, date, time, and so forth. Tap on “Save” to complete the process.
Create goals
Unlike events and reminders, you can only create goals with the Android app. There are plenty of different goals to choose from that help you get fit, connect more with others, meditate on a regular basis, and more.
The first step it to tap the red “+” button in the bottom-right corner of the screen and select the “Goals” option. Then select a goal from one of the categories available: exercise, build a skill, family and friends, me time, and organize my life. The next step is to choose how often you will work on your new goal (once a week, three times per week…), for how long each time (15 minutes, 30 minutes…), and the best time to take it on (morning, afternoon…). The service will then schedule your new activity and make entries into the calendar — all you have to do is confirm it.
Step-by-step-instructions:

1. Tap the red “+” icon in the bottom-right corner.
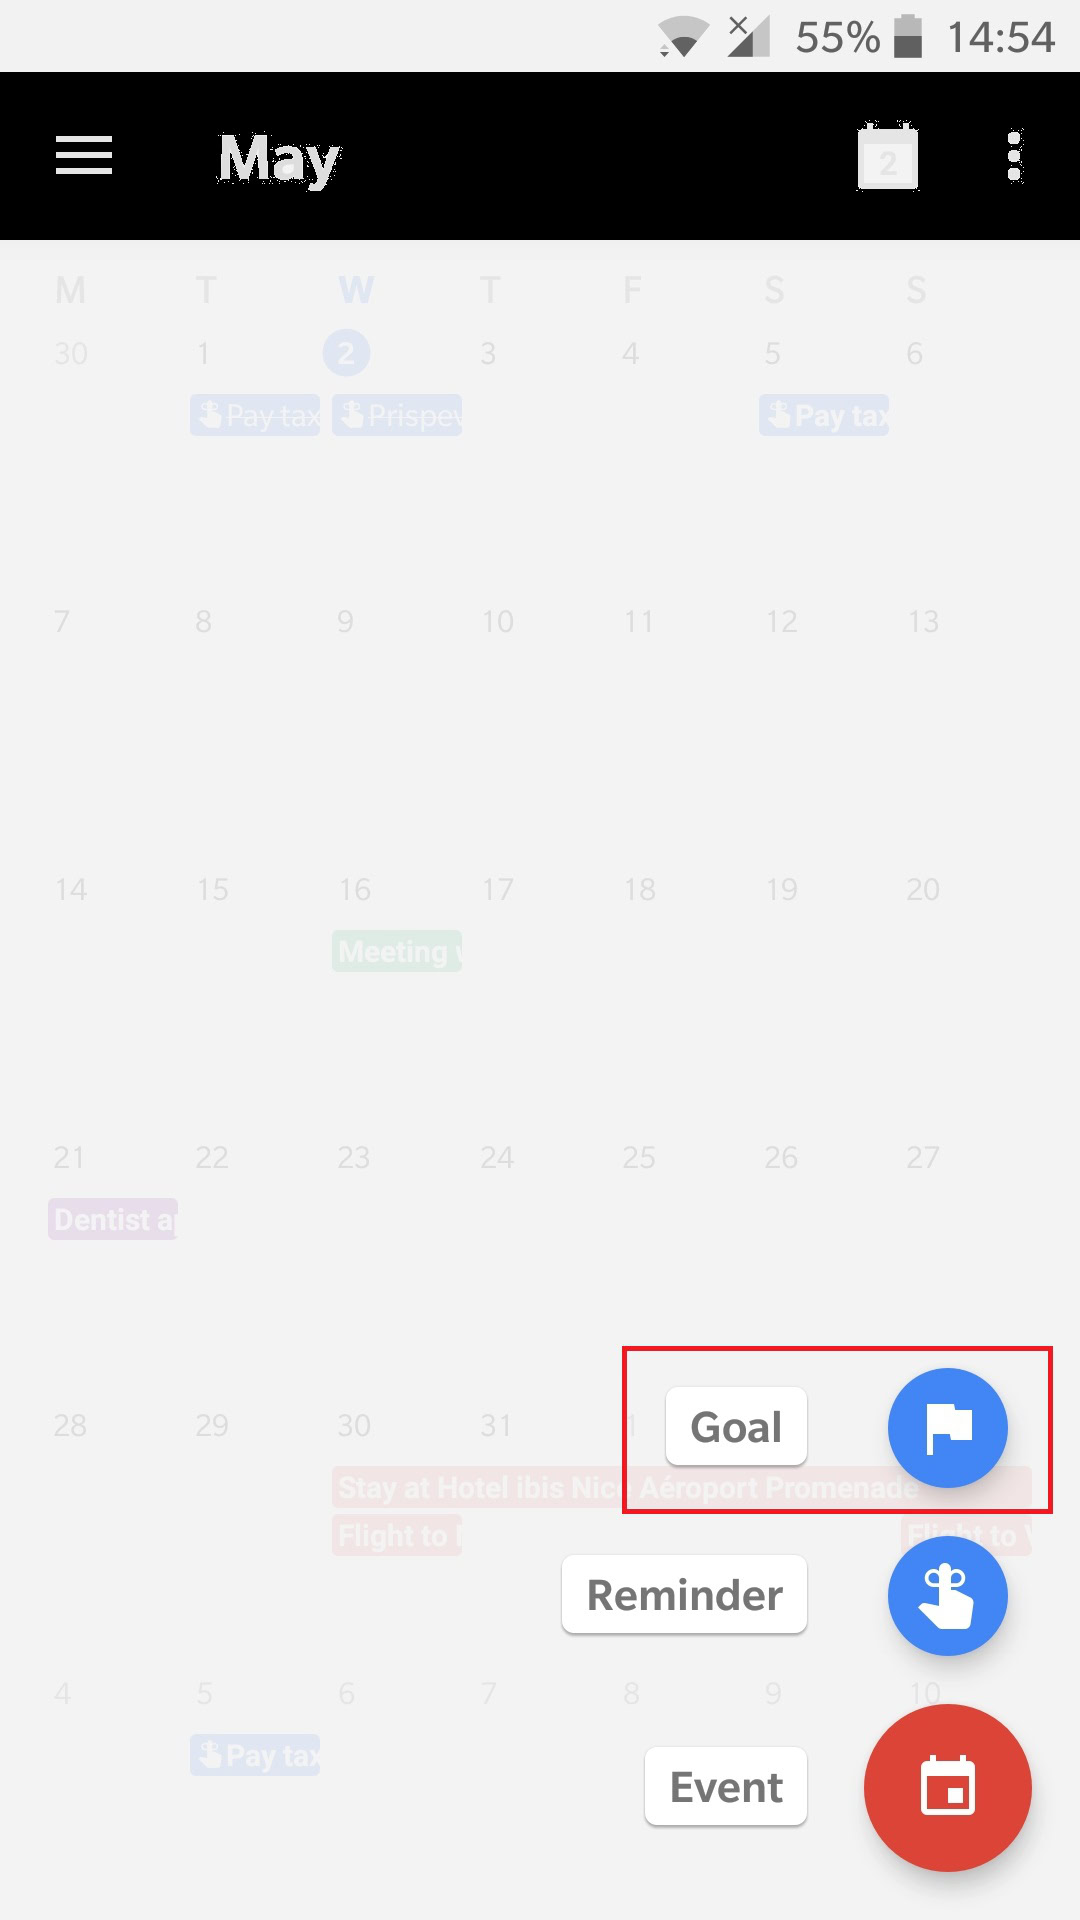
2. Select the “Goal” option.
3. Choose a goal from one of the lists or create your own.
4. Define how often, for how long, and when you’ll work on your goal.
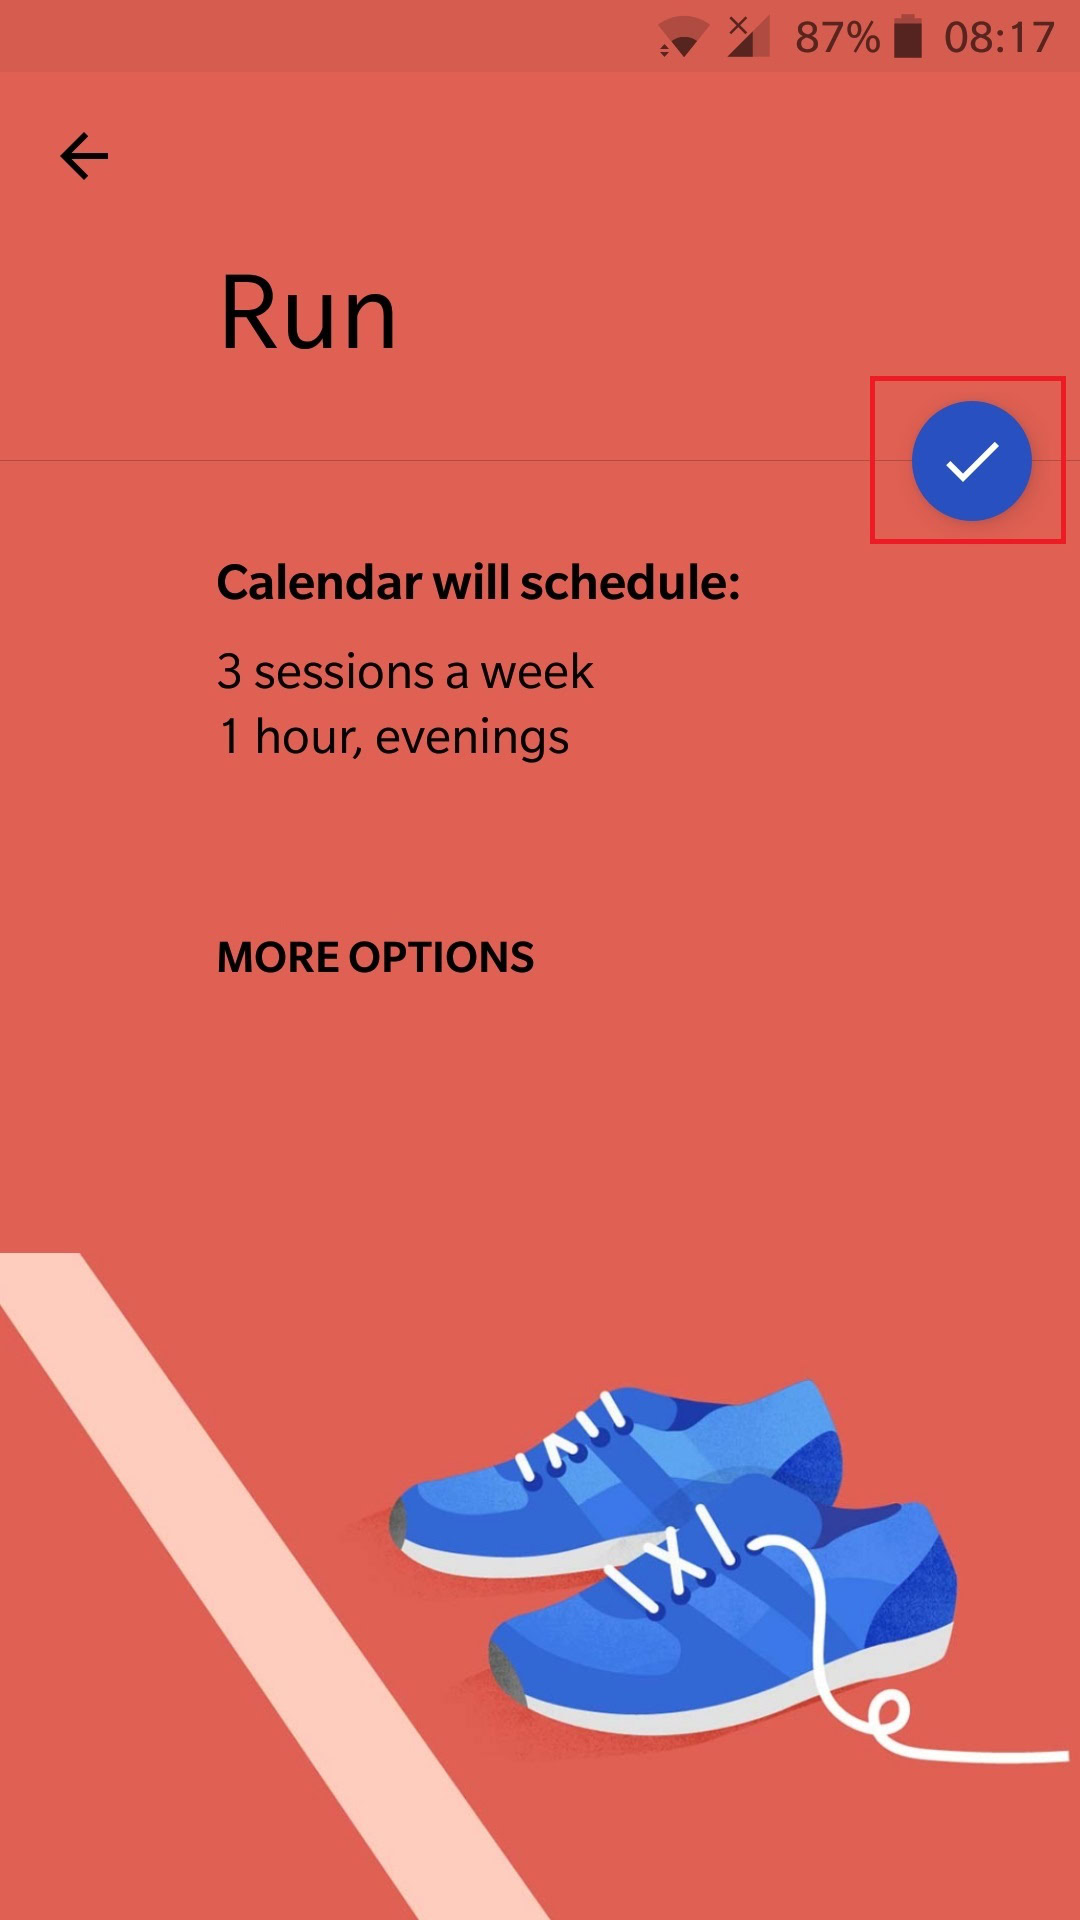
5. Save your choices by tapping on the blue check icon.
Share your calendar
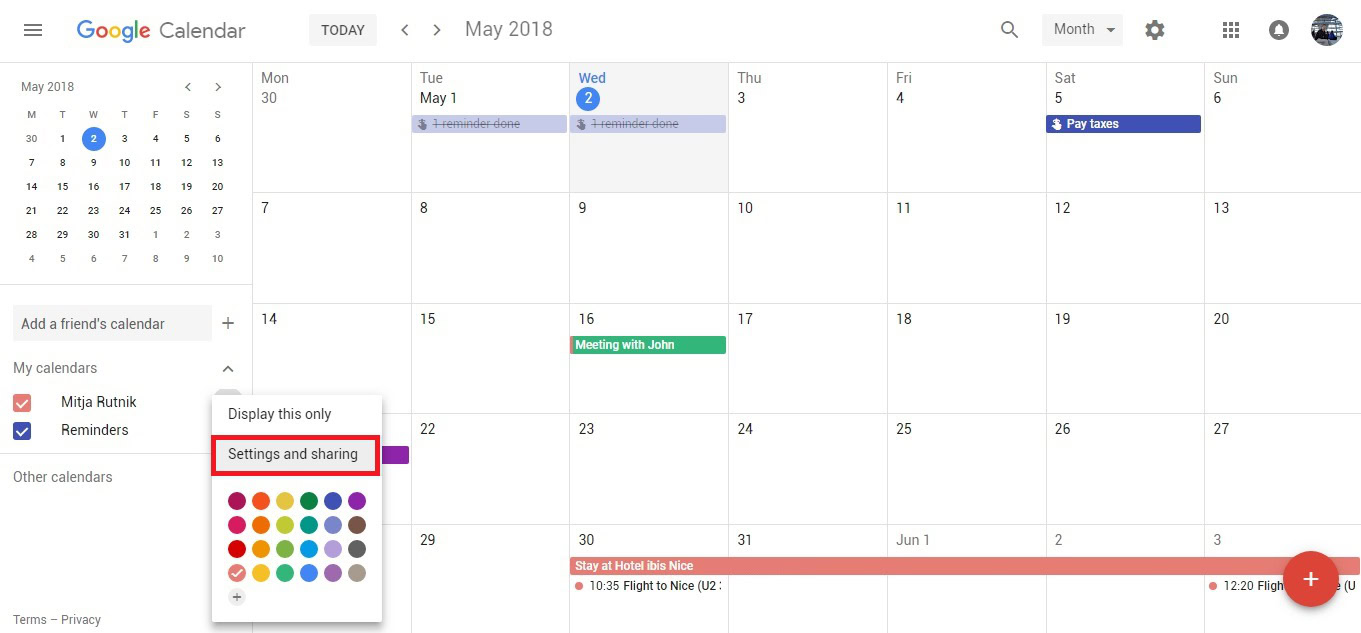
You can only share your Google calendar from a computer — the Android app doesn’t support this feature. The first thing to do is visit the Google Calendar website at the link and locate the “My calendars” section on the left side of the interface. Hover the mouse over the calendar you want to share, click the options icon (three vertical dots), and then select “Settings and sharing”.
Read next: How to share Google Calendar
From there, you can choose between two different sharing options. The first is the one that makes the most sense to the majority of users, as it lets you share your calendar with specific people only. Click on “Add people” under the “Share with specific people” section, write in email addresses of the people you want to share your calendar with, and define their permissions (see only, edit…).
After that’s done, hit the send button to ship out emails to the people you’ve selected. Google will then automatically add your calendar to their accounts, which they’ll be able to access from the “Other calendars” section.
The second sharing option is quite different: it allows anyone with a link to see your calendar. This likely isn’t the best option for most people, as the calendar can also pop up when someone Googles your name. If that doesn’t scare you off, you can enable this by checking the “Make available to public” box. Then select “Get shareable link”, copy it, and send it to whoever you like.
Step-by-step instructions:
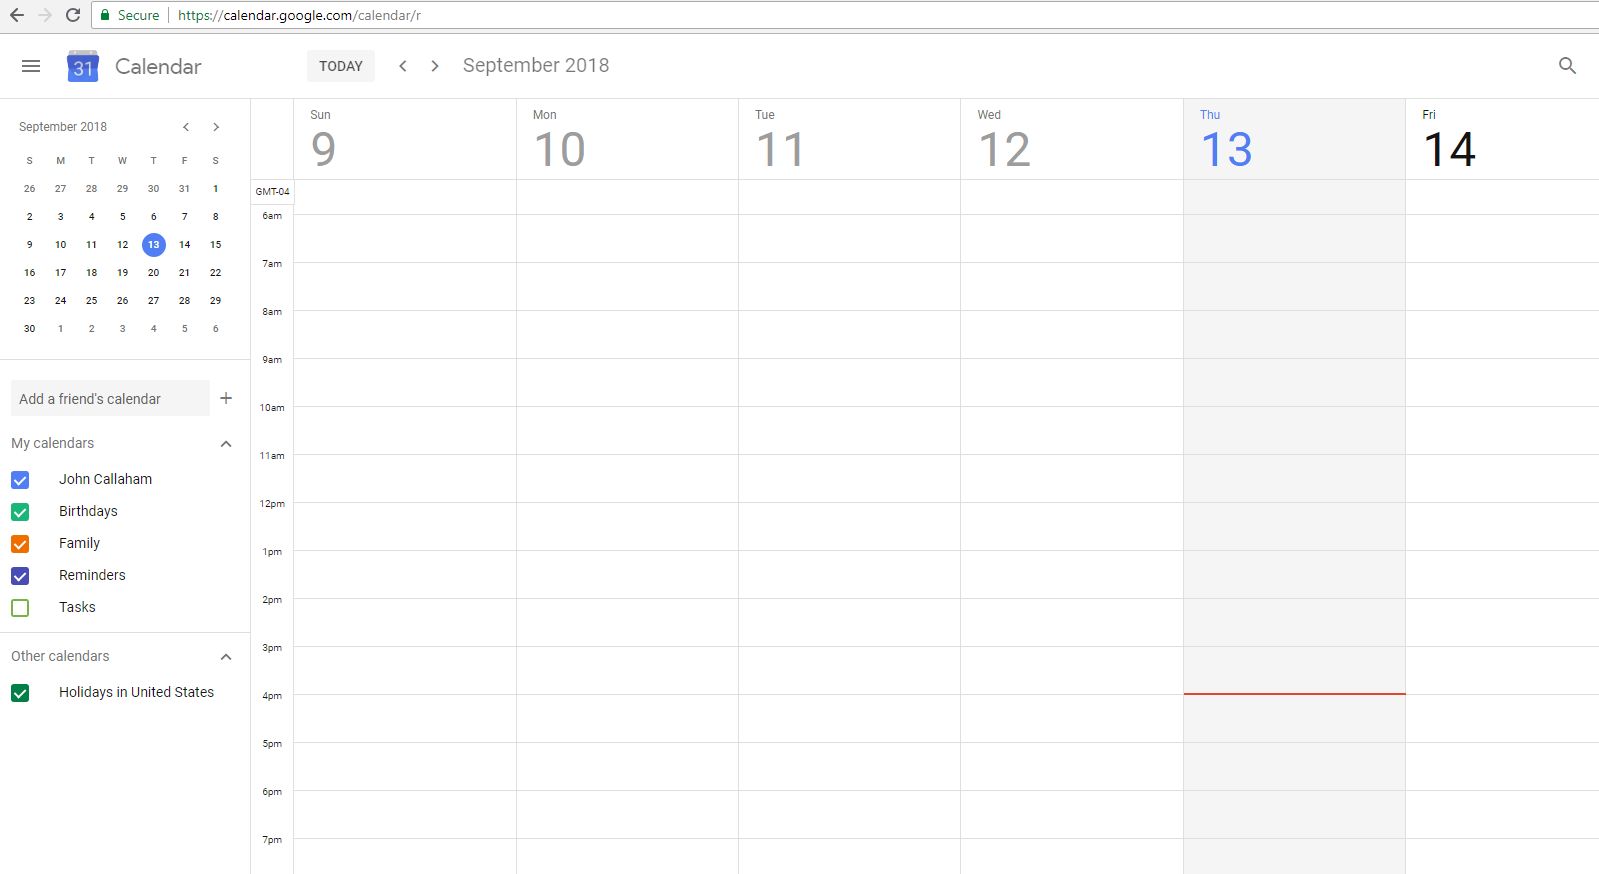
1. Visit calendar.google.com.
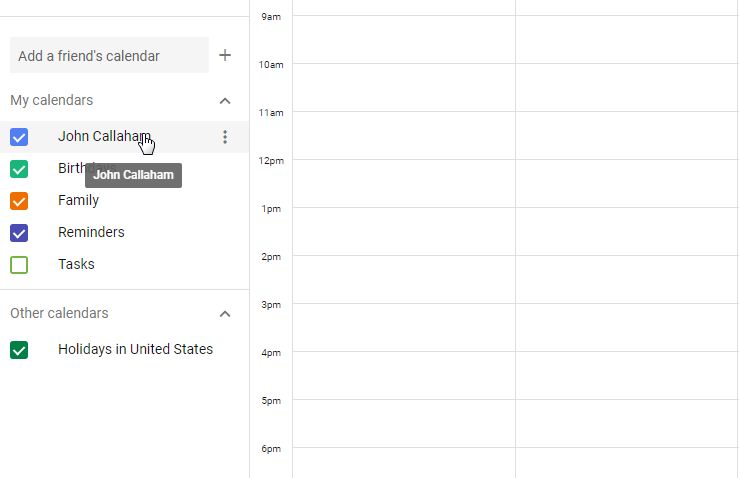
2. Locate the “My calendars” section on the left side of the interface and hover the mouse over the calendar you want to share.
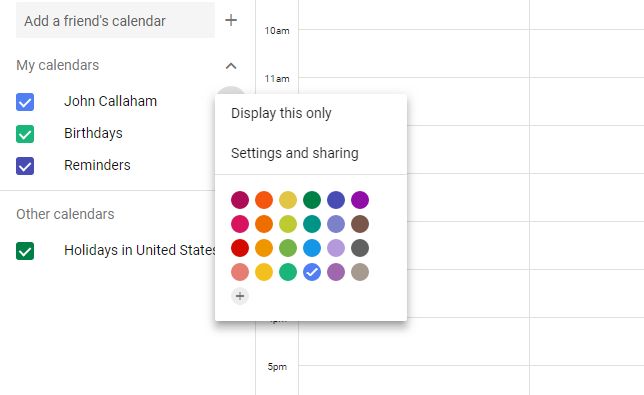
3. Click the options icon (three vertical dots), followed by “Settings and sharing”.
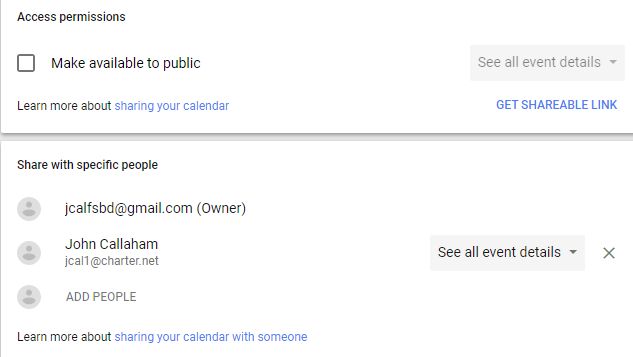
4. Choose between two different sharing options: check the “Make available to public” box to share the calendar with everyone who has a link, or click on “Add people” to share it with only those you choose so.
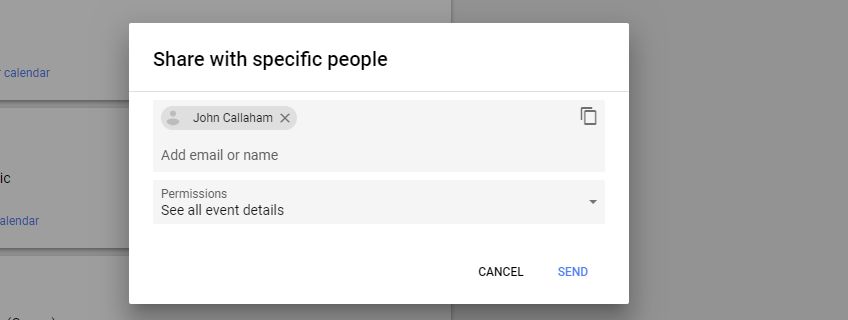
5. If you choose the “Add people” option, type in the email addresses of the people you want to share your calendar with, define their permissions, and hit “Send”.
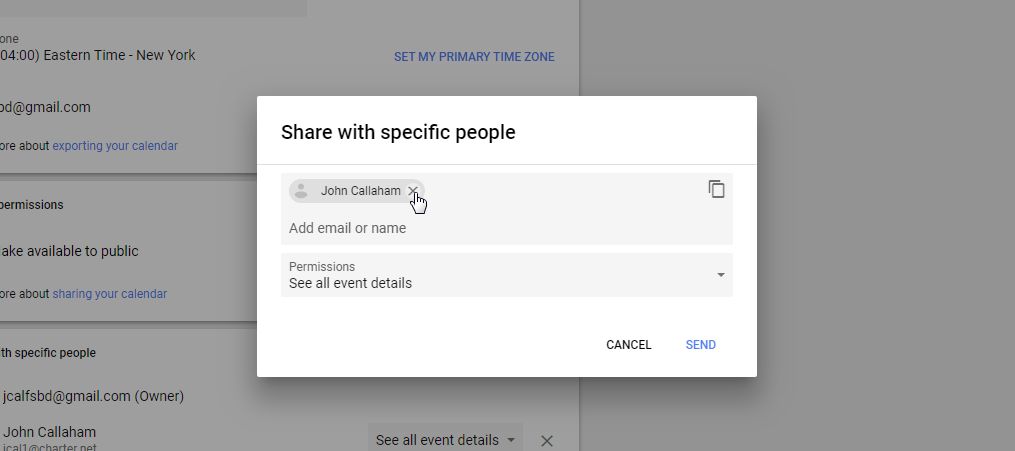
6. You can always make your calendar private again by unsharing it. To do so, simply delete the email addresses under the “Share with specific people” by clicking on the “x” next to the person or persons you want to remove. You can also uncheck the “Make available to public” box again to keep your calendar private.
How to use Google Calendar – Conclusion
There you have it, folks — this is how to use Google Calendar. We took a closer look at the most important features the service has to offer in this post, but there are a few more you’ll discover once you start using it.
Any thoughts or questions? Leave them in the comments!