Affiliate links on Android Authority may earn us a commission. Learn more.
How to spell-check in Google Chrome
Published onMay 11, 2022
Spell checkers are an excellent way to avoid embarrassing mistakes in emails, messages, and social media posts. You can opt for more feature-filled options like Grammarly to get the most out of your writing, but Google has a spell-check baked into the Chrome browser that helps catch simple mistakes. Here’s how to spell-check in Google Chrome.
Read more: The best grammar apps for Android
QUICK ANSWER
To spell-check on Google Chrome, click the three vertical dots at the top right corner and open Settings. Click Advanced in the left-hand menu and go to Languages. Enable Spell check.
JUMP TO KEY SECTIONS
How to enable and use spell check in Google Chrome
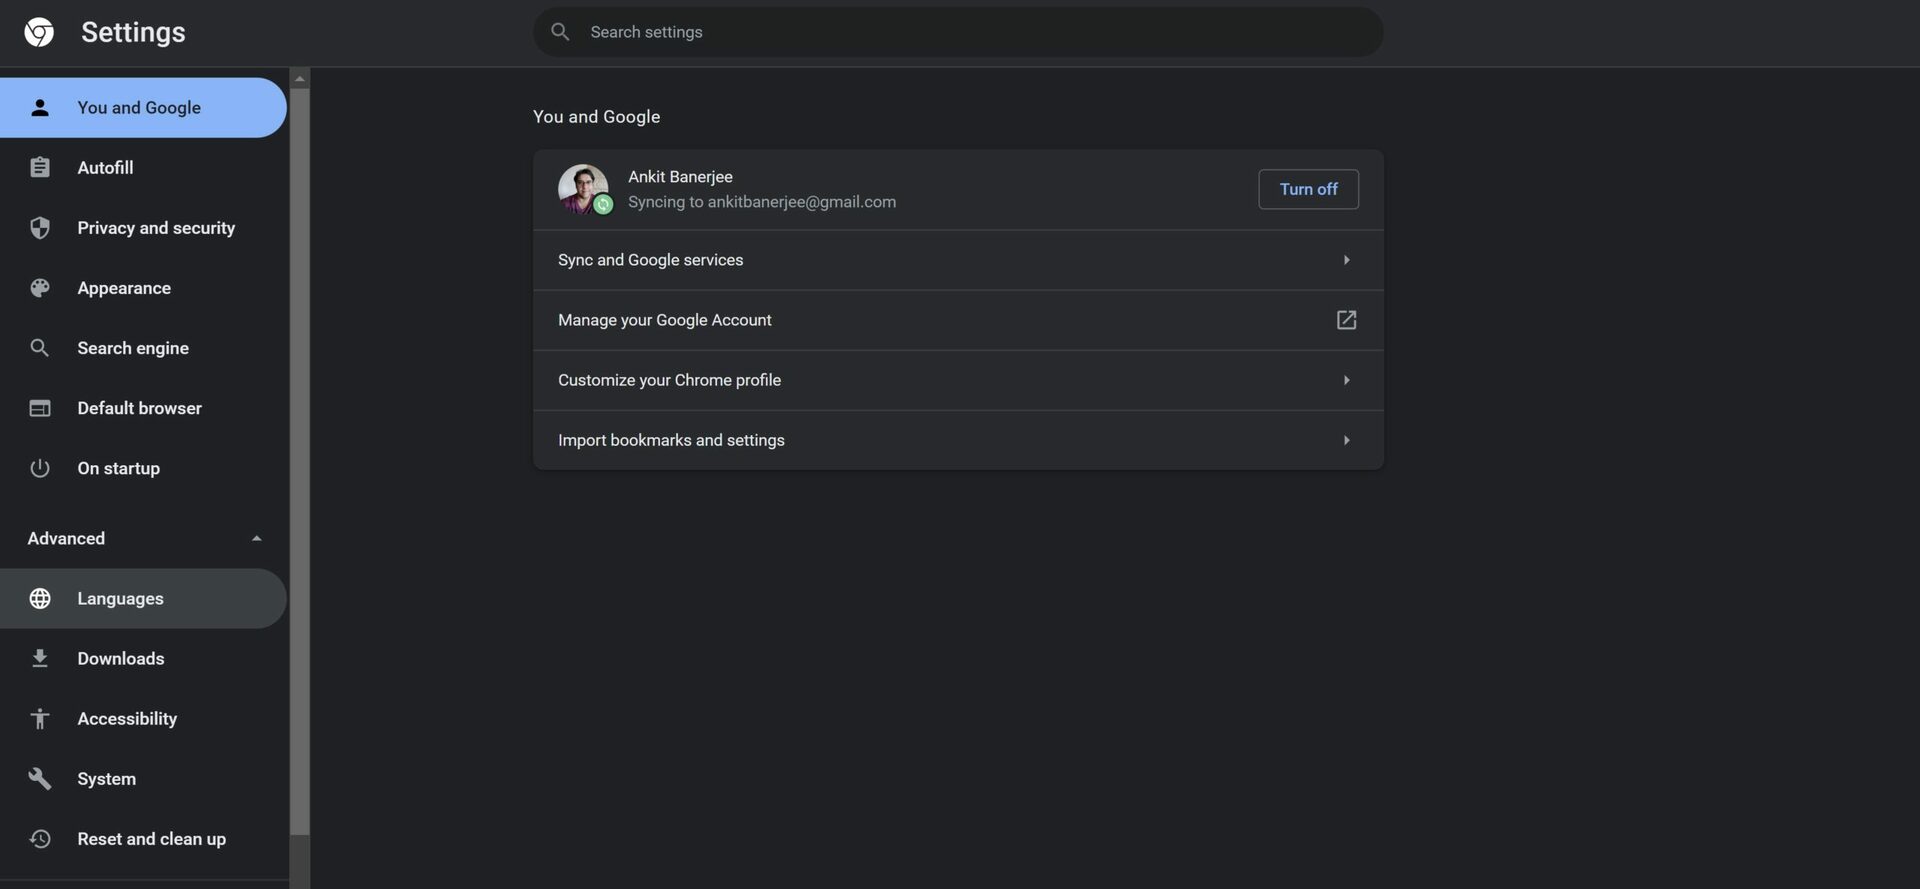
Open the Chrome browser, click the three vertical dots at the top right corner next to your profile icon, and click Settings. In the left-hand menu, click Advanced and go to Languages.

Ensure that Spell check is enabled. You will see two spell check options available — basic and enhanced. The basic version will check spelling errors from the built-in dictionaries, while the enhanced spell check uses the same feature used with Google Search. It’s more advanced, but Chrome will send any text you type to Google. The basic spell check is more than enough for most users. You can set the spell check for different languages and add custom words by clicking on Customize spell check.
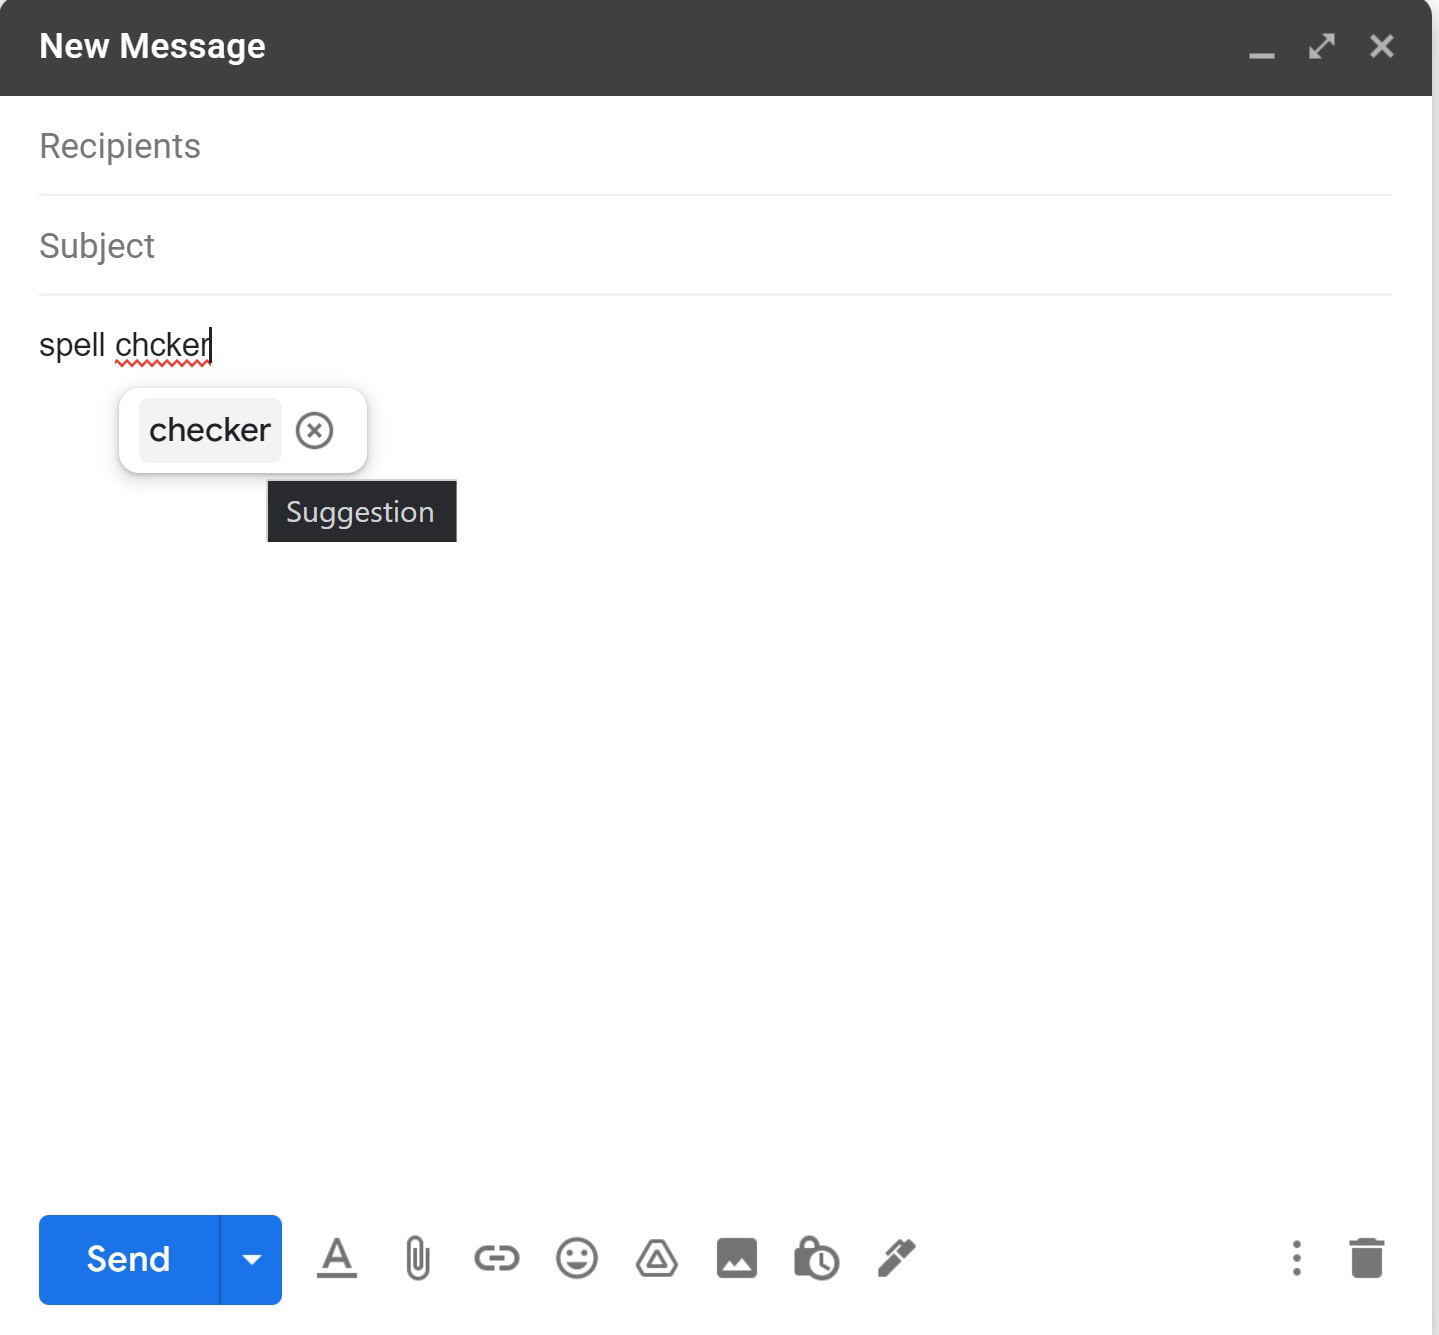
Using spell check in Google Chrome is automatic. It will track what you type in the browser, including emails and third-party websites. Look for the squiggly red line below a misspelled word and click on it to get suggestions.
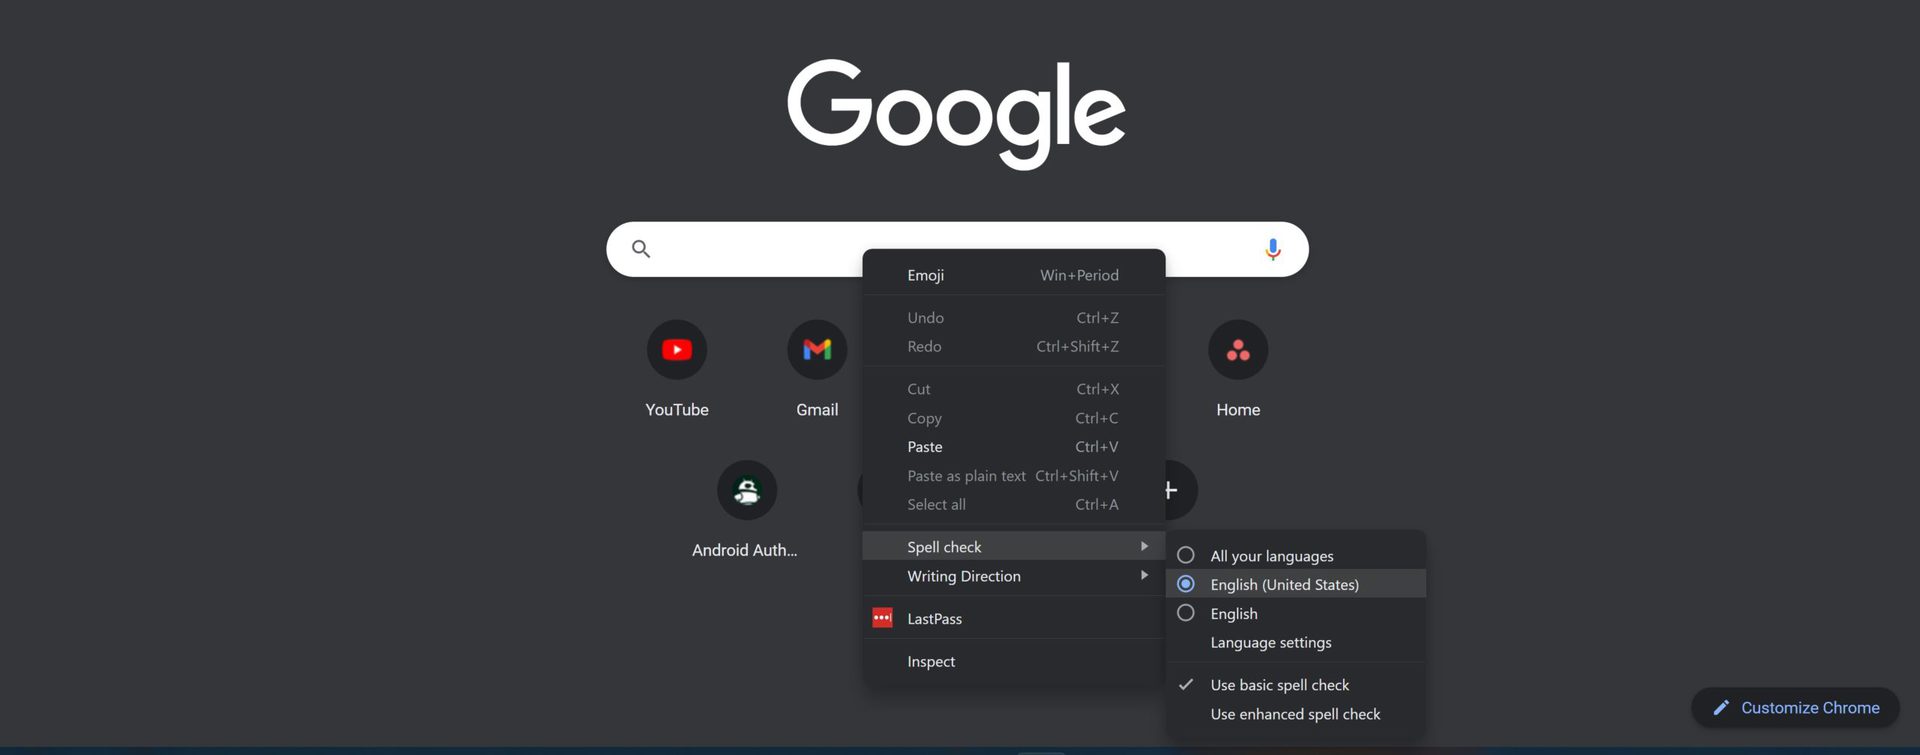
You can see if the feature is already enabled on Chrome by right-clicking on the Google Search bar on the homepage. If spell check is enabled, it will show in the menu. You can adjust basic settings like the language and choose between basic and enhanced spell checks.
Change and add new spell check languages in Chrome
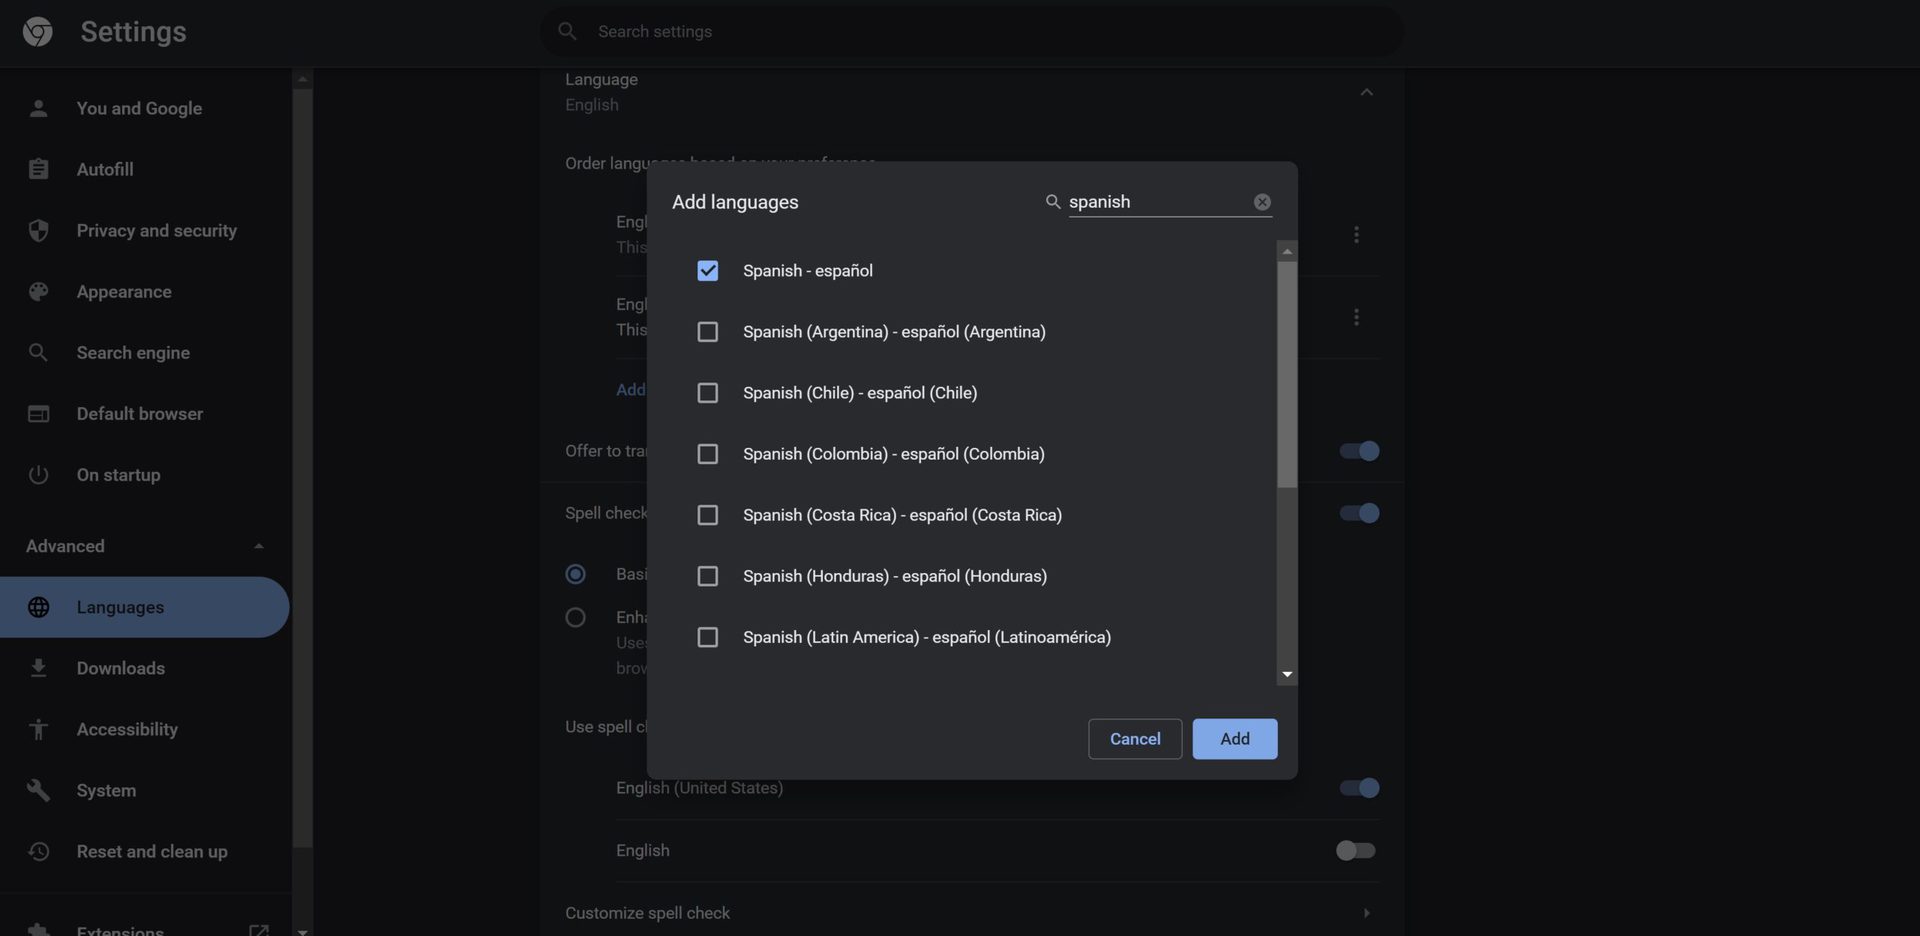
In the languages section, click Add language to add more options. Scroll through the list or search for the language you want to add, select it, and click Add.
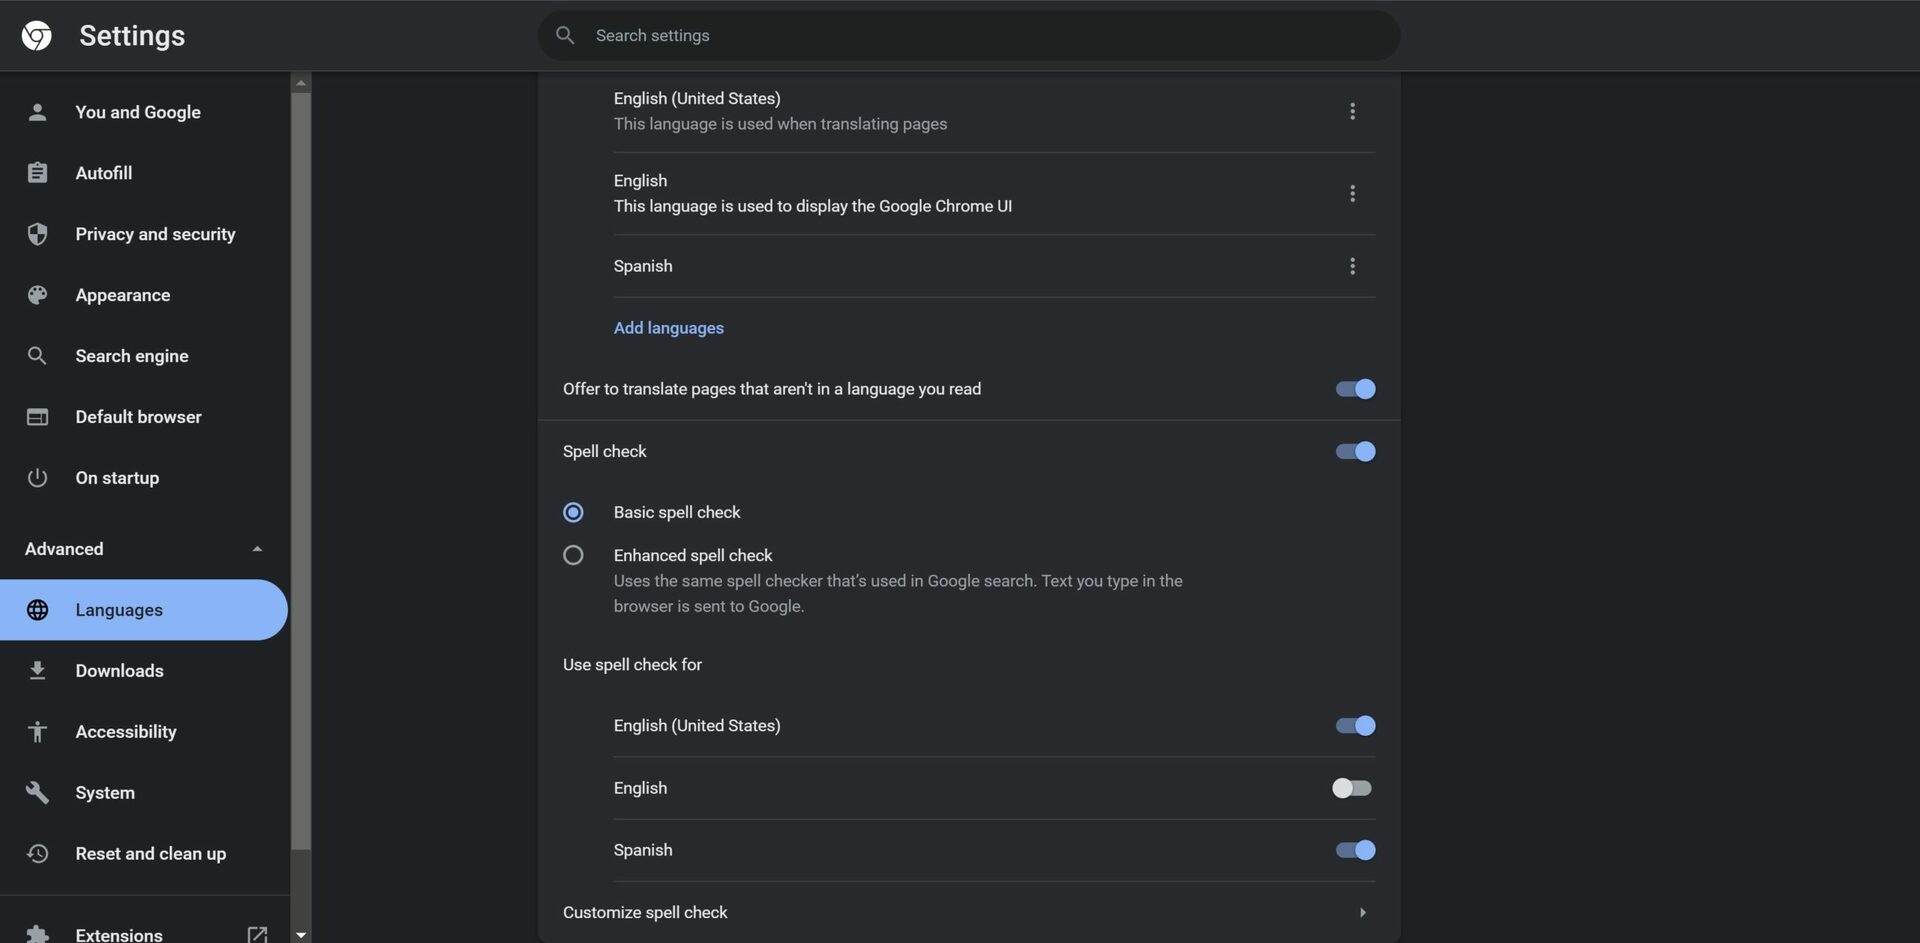
In the Use spell check for section, you will see the language you’ve added. Enable it to use the checker for the new language. Remember that spell check isn’t available for every language on the list. It will only appear in the section if spell check is available.
How to turn off spell check in Chrome
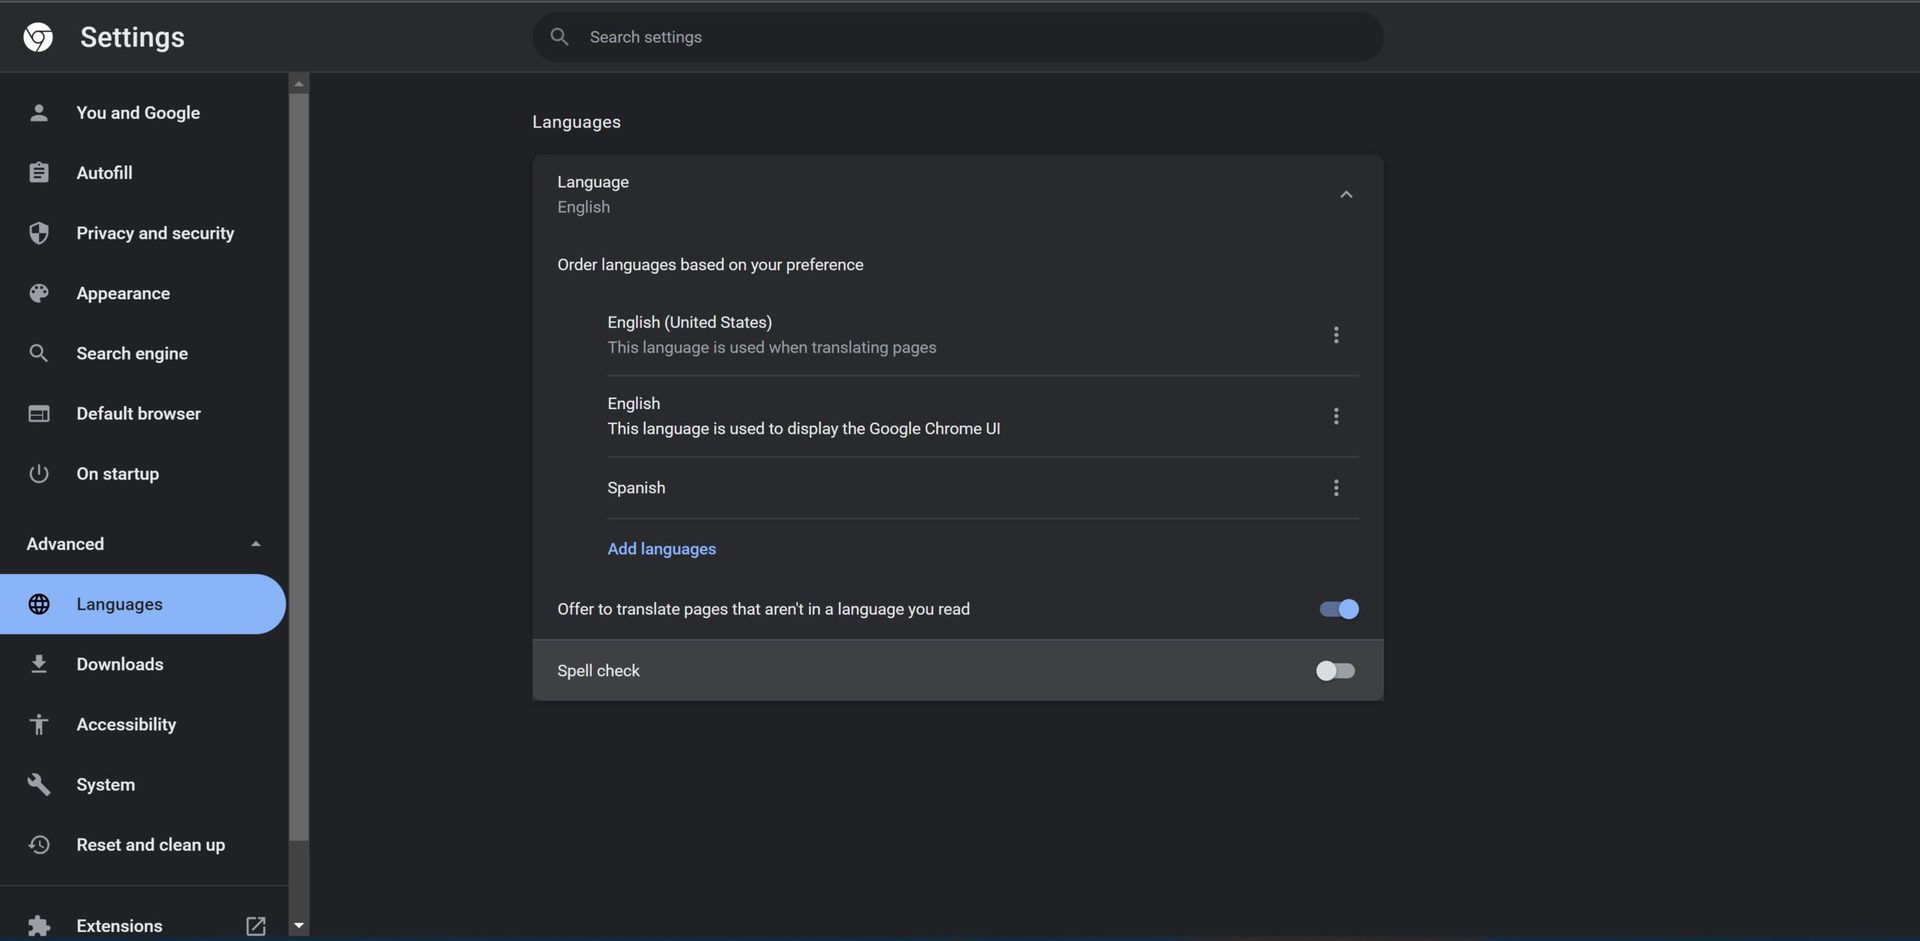
Click the three vertical dots at the top right corner and Settings. In the left-hand menu, go to Advanced–>Languages and disable Spell check.
Read more: How to change the default search engine on Google Chrome
FAQs
Why is spell check not working?
Ensure that you have enabled spell check on Chrome. Grammarly or another spell checker or grammar app will take priority and stop the browser spell-check. You can also try clearing the browser cache by going to History–>Clear browsing data and selecting Cached images and files and Cookies and other stored data.