Affiliate links on Android Authority may earn us a commission. Learn more.
How to make a PDF document on an iPhone or iPad
Published onApril 10, 2024
PDF is one of the most widely used file formats, so there will come a time when you need to create a PDF on your iPhone or iPad. You may think the process is probably a bit awkward with the iPhone’s small screen, but in actual fact, Apple makes it an extremely simple process. Let’s look at a few ways to make a PDF on iPhone or iPad.
QUICK ANSWER
To create a PDF file on an iPhone or iPad, send it to the Print menu via Share. This will turn the document into a PDF. Alternatively, you can send the file to the Files app or Google Docs to convert it into a PDF on those platforms.
JUMP TO KEY SECTIONS
How to make a PDF on iPhone via the Print menu
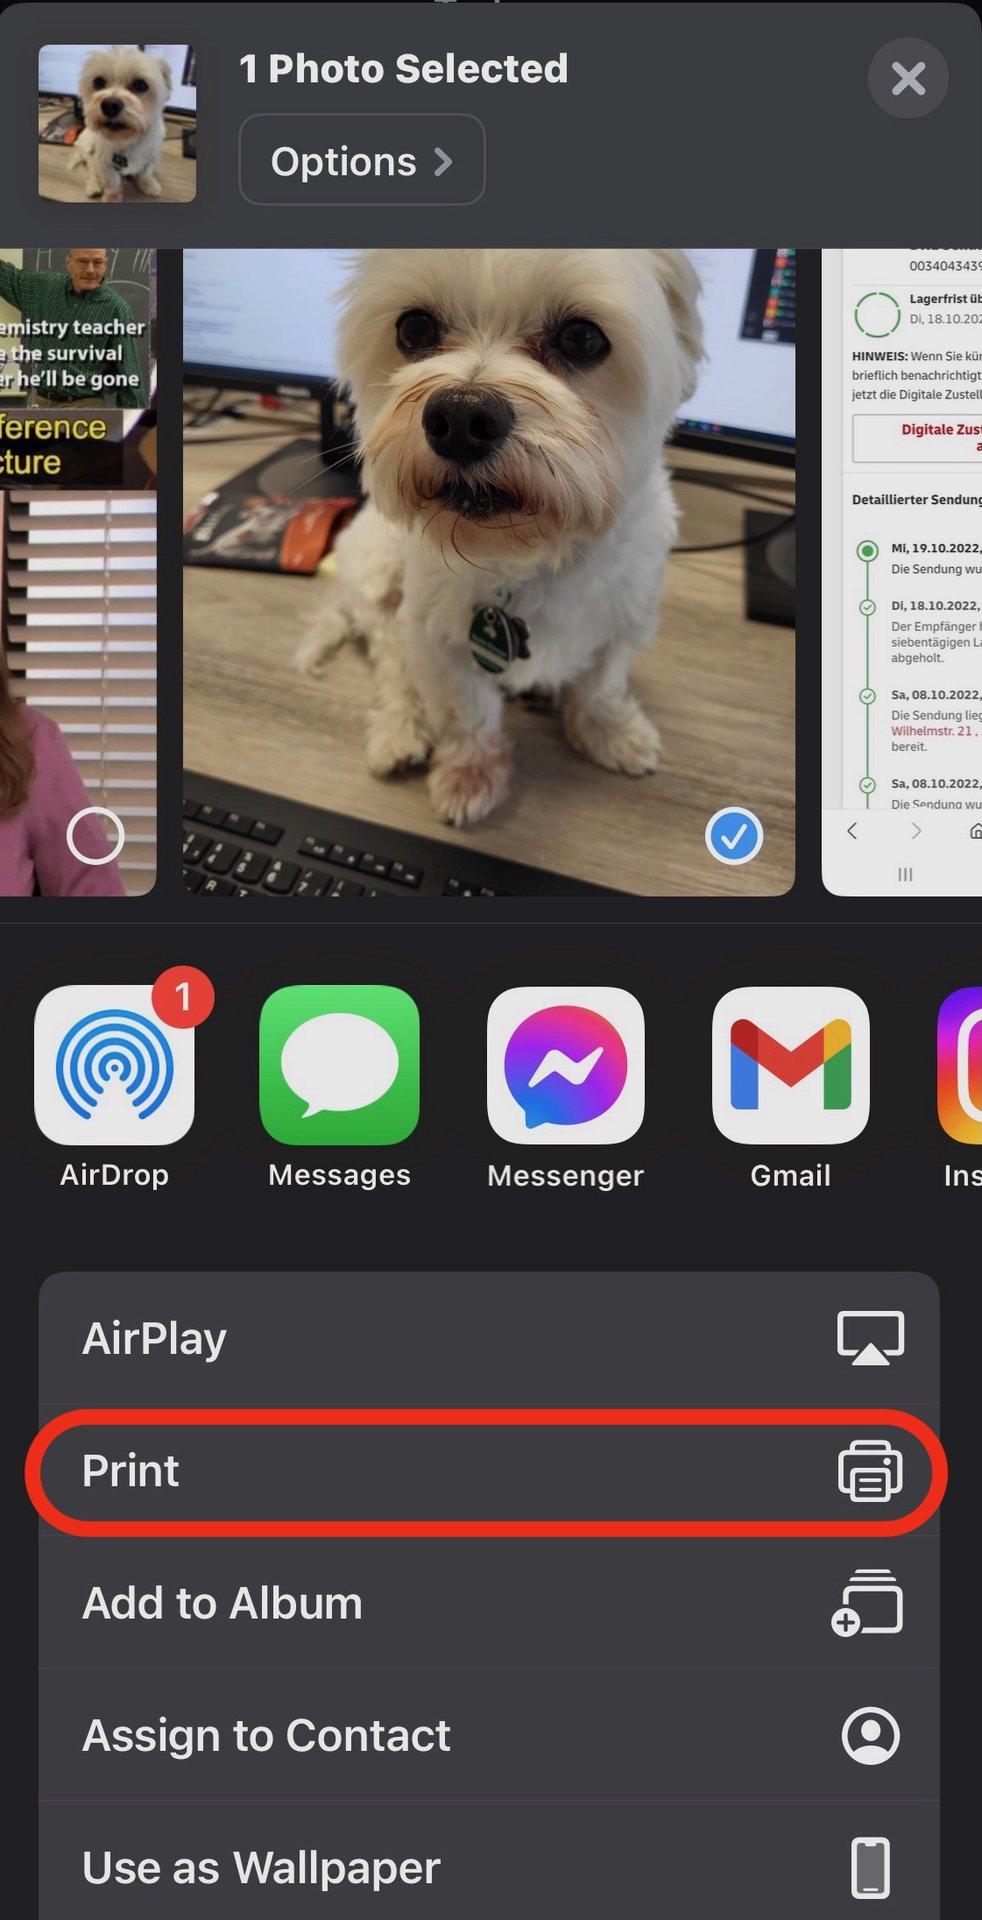
Apple makes the PDF creation process easy by baking it into the print options in the Share menu. Anything that can be sent to print can also be saved as a PDF file. Whether saving a webpage as a PDF or turning a photo into a PDF, all roads lead to the printer options.
- In this example, we’ll turn a photo into a PDF. Open the photo in the Photos app, tap the Share button, and select Print.
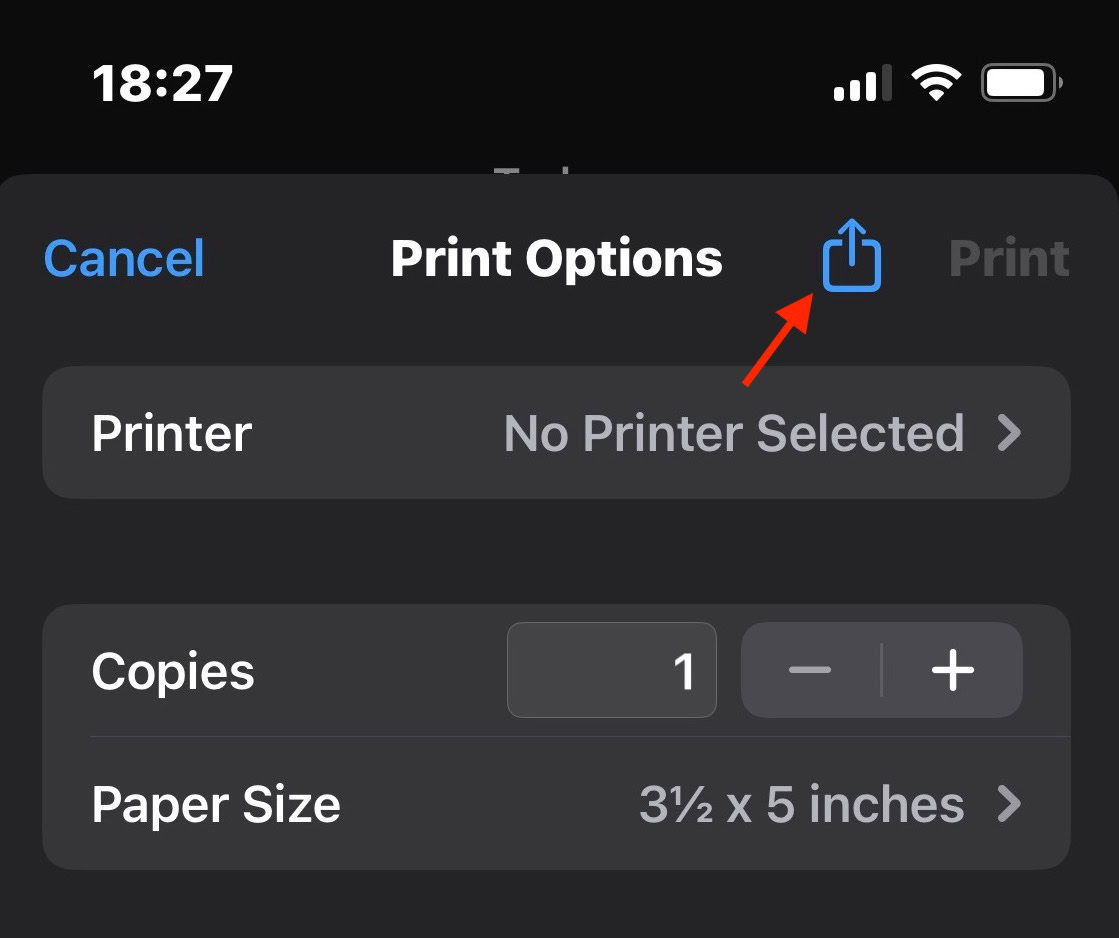
- Now tap the second Share button at the top-right corner of the screen. This takes you away from AirPrint printers since we don’t need them.
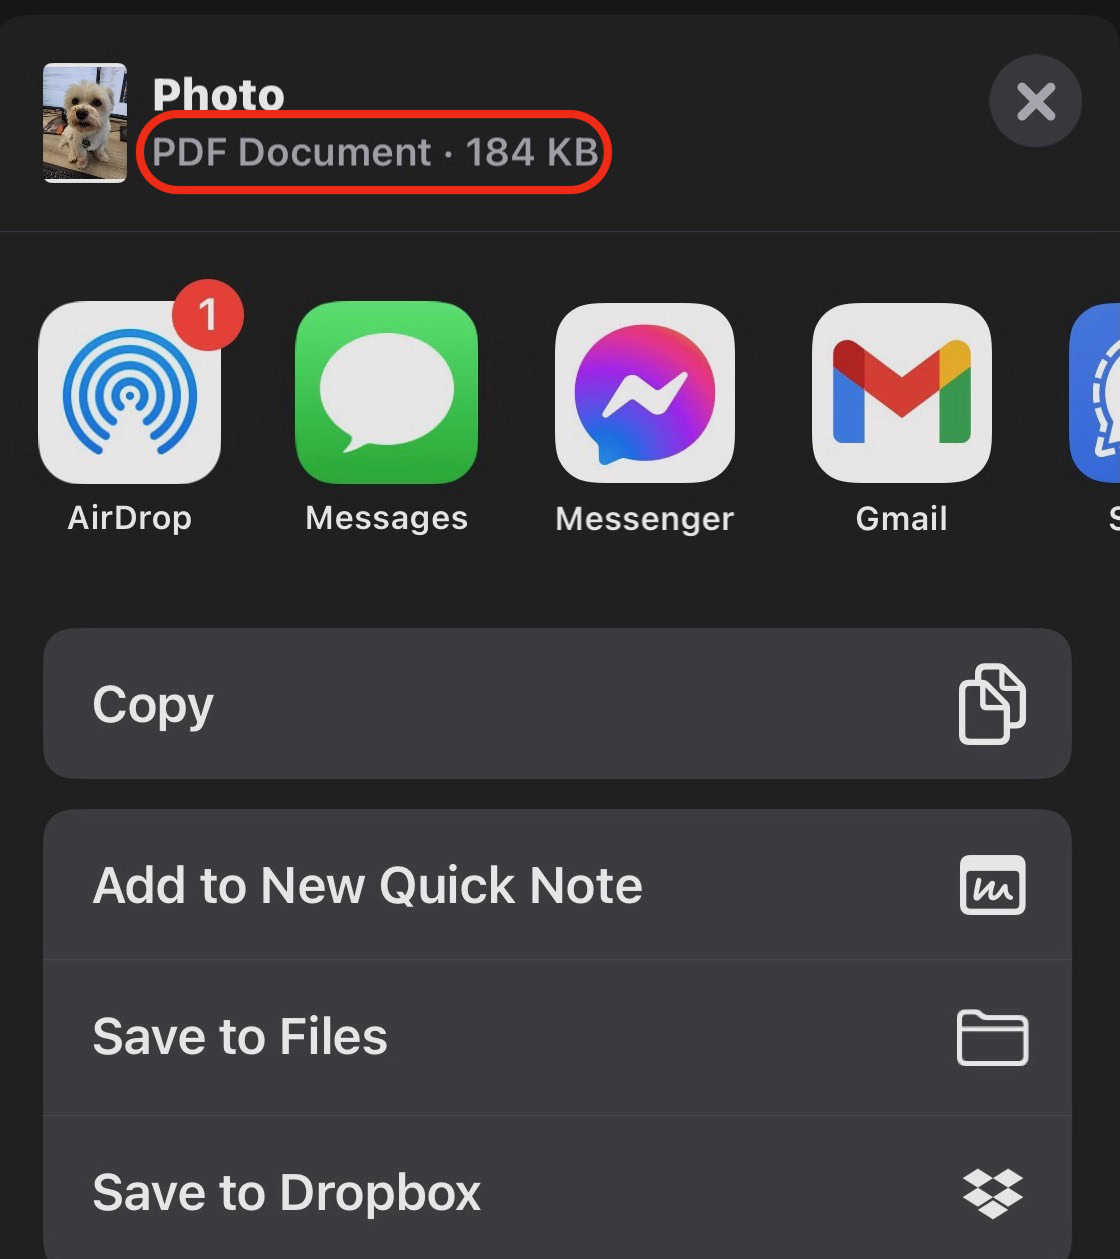
- You’ll see that tapping that icon has turned the photo into a PDF file. Select where you want the PDF to go. You can send it to someone using an installed app or keep it on your phone by sending it to the Files or Dropbox app.
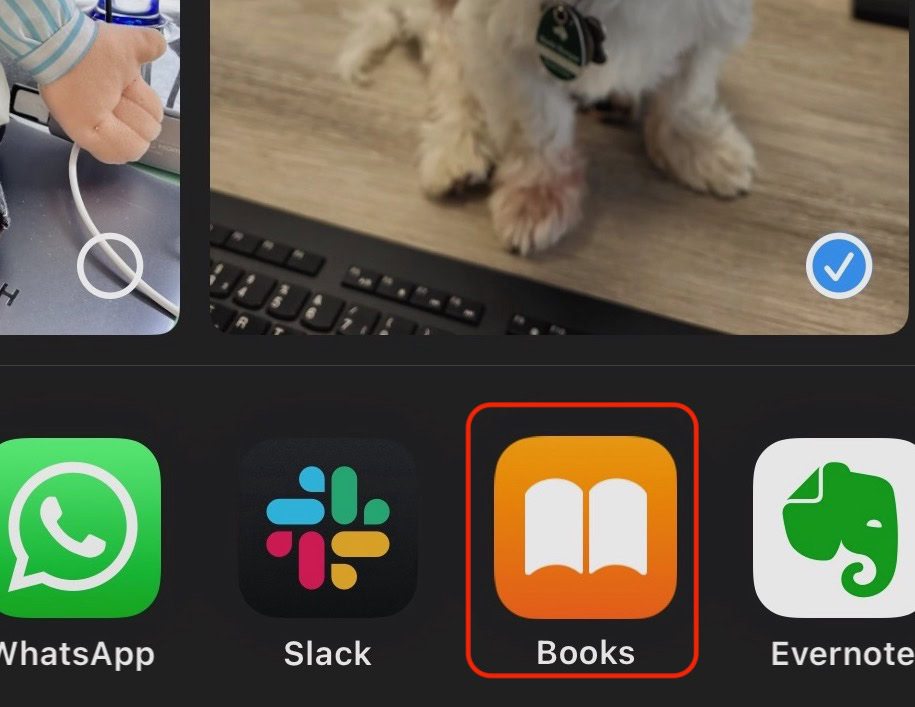
- You can also turn photos into PDFs by following the same process, but instead of the Print option, select to open them in Books. They will now be exported to Books as a PDF file.
How to make a PDF on iPhone using the Files app
If you have a text document, the best bet is to move it to the Files app. You can make a PDF from the document using the same method as the previous section for images.
Once the document has been moved to the Files app:
- Open it and tap the Share menu. Select Print.
- Tap the second Share menu at the top of the screen.
- The document is now a PDF file. Select where to send it to.
How to make a PDF on iPhone using Google Docs
Finally, there’s the good old standby — Google Docs. If the document is already in Google Docs, or you can import it into the app, you can easily spit out a PDF version.
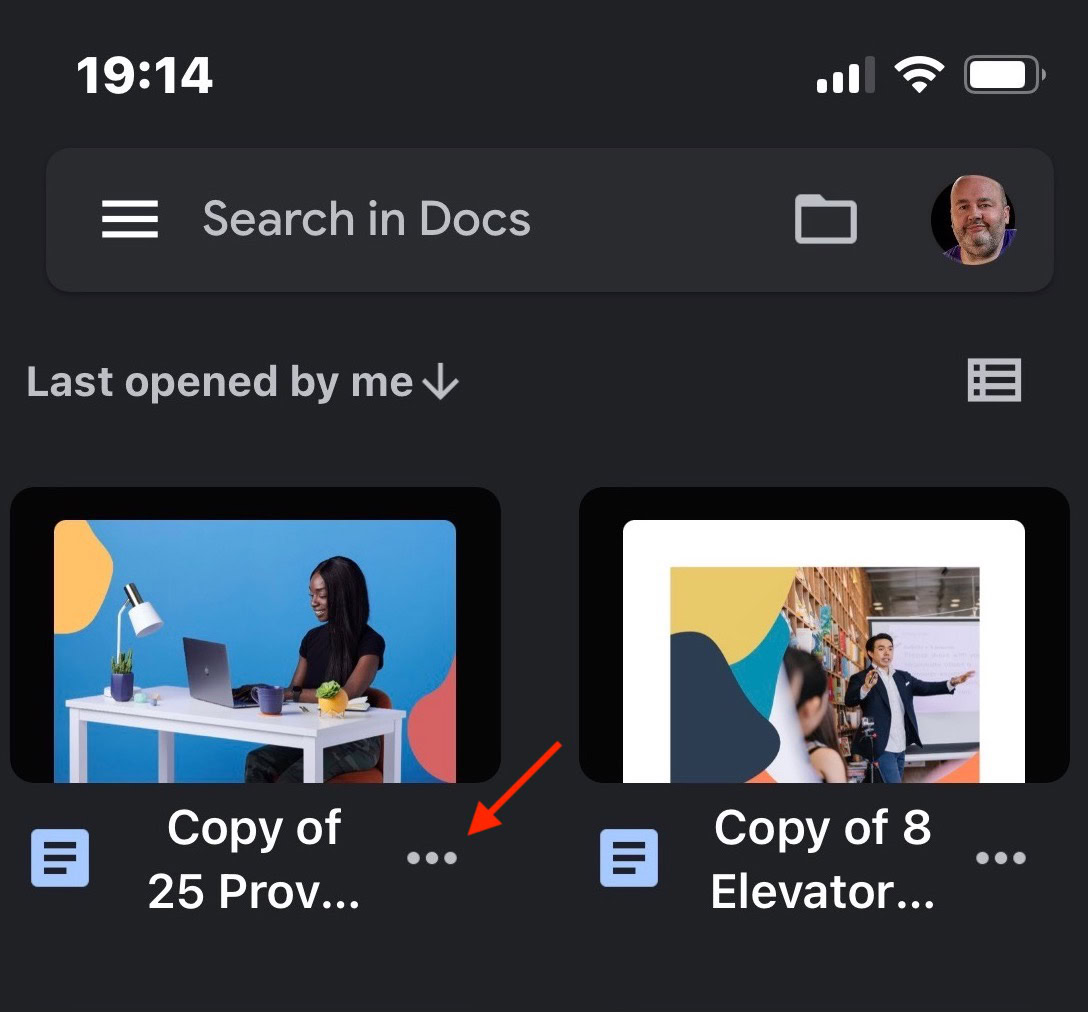
- In Google Docs, find your document and tap the three dots underneath it.
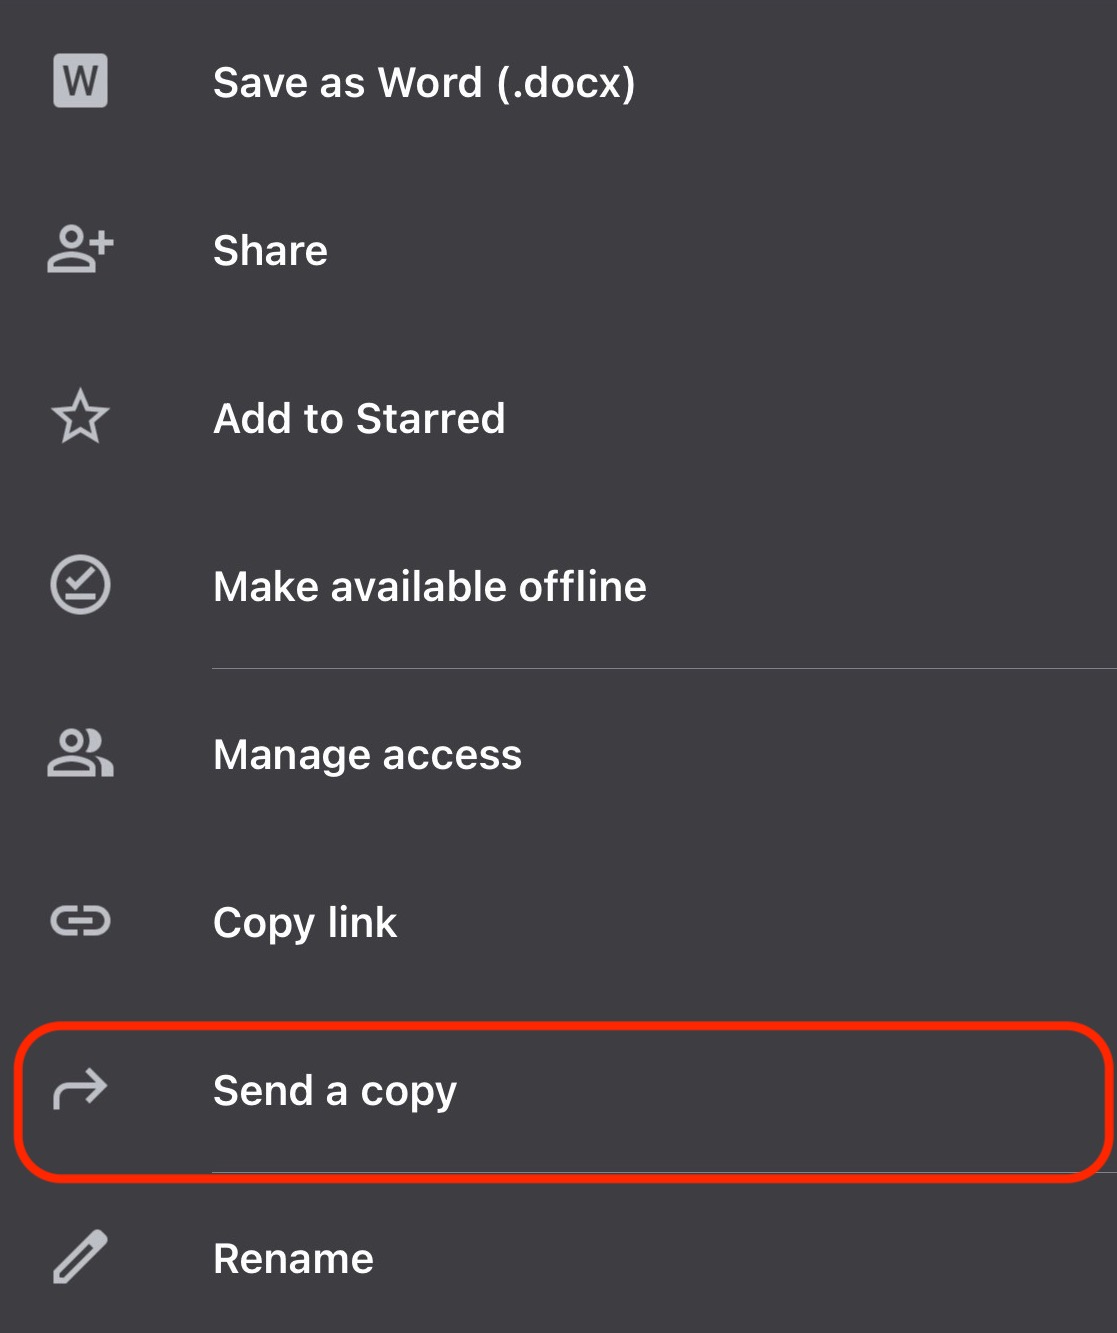
- In the menu that appears, select Send a copy.
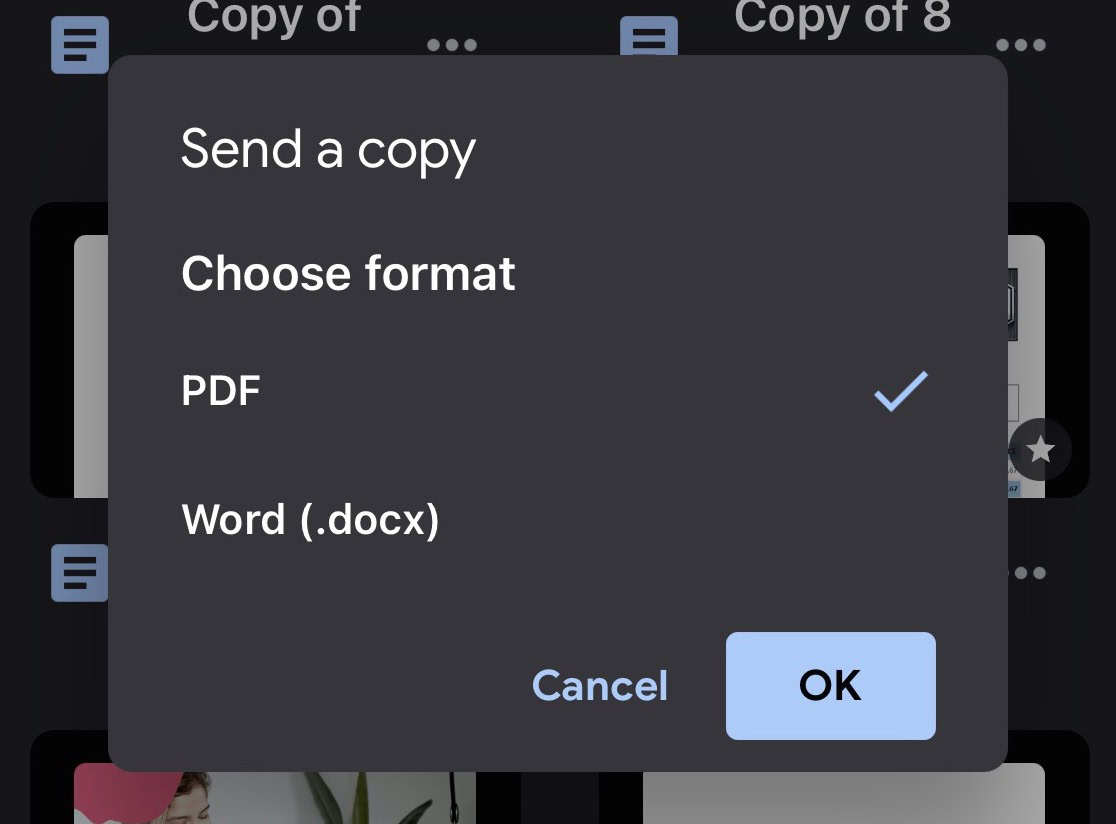
- Select PDF from the next menu, then tap OK.
- The PDF will now be generated, and you can select where to send it via the Share menu.
FAQs
Yes, if you use a PDF document signing app, such as DocuSign.
The easiest way would be to send it to cloud storage, such as Dropbox. Or email it to yourself.
The Files app enables quick edits for various file types, including PDFs.