Affiliate links on Android Authority may earn us a commission. Learn more.
How to use fragments in your Android apps for a powerful and dynamic UI
Note: This article assumes you are familiar with the basics of Android development and Java. You should already be able to create basic layouts and use views, onClick and findViewByID. If you grasp those concepts, you’re ready to learn to use fragments!
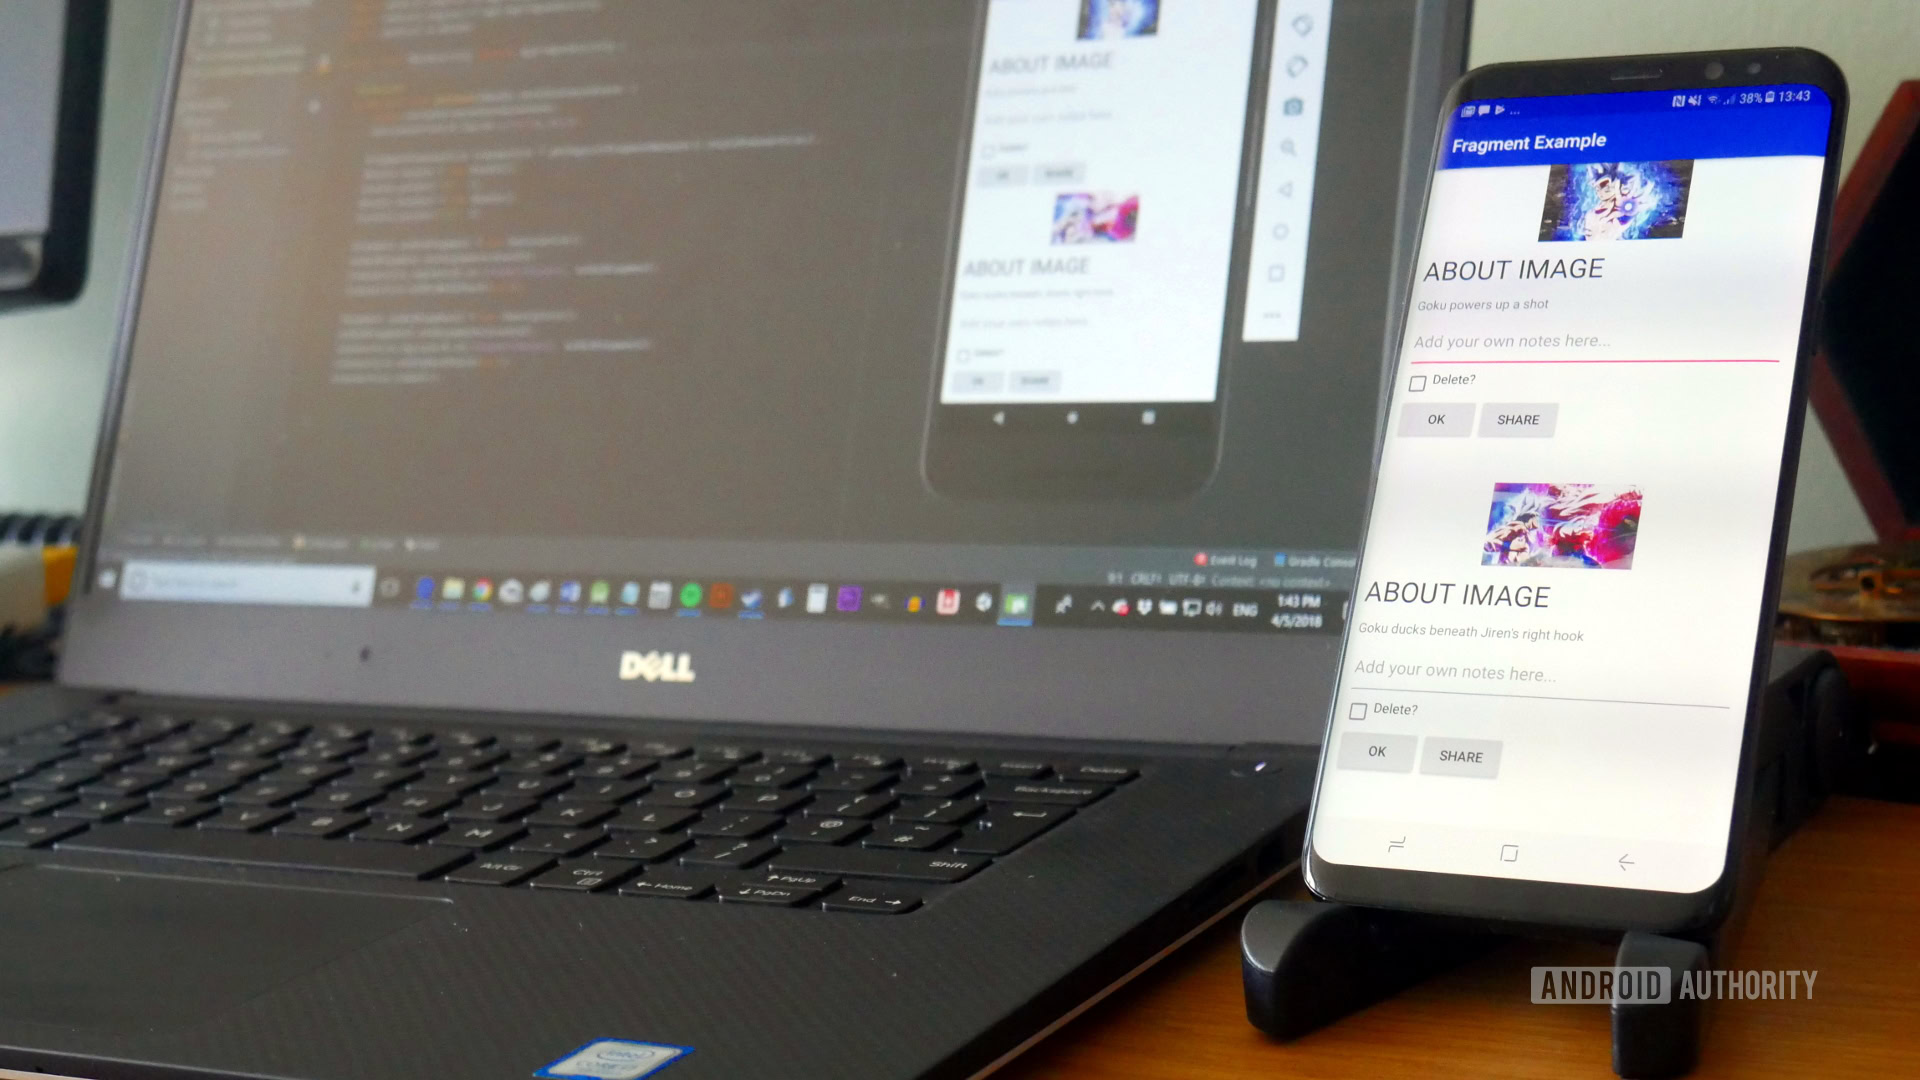
Fragments are a powerful feature of good Android UI that allow you to approach app design in a modular manner. These are distinct views that can contain entire layouts and that come with their own accompanying Java code. By breaking your UI down this way, you can create more logical layouts that are easier for your users to understand. You can provide them with additional information and controls without them having to leave the activity.
See also: Hassle-free fragments: Using Android’s Navigation Architecture Component
Fragments grant you considerably more options in your app design and can substantially improve the user experience
What’s more, is that fragments act like classes and objects in that you can have multiple instances of the same fragment. That means you can re-use the same layout over and over again without having to rewrite code, or even show two different versions side-by-side.
In short, while this is yet another thing to learn when it comes to the seemingly endless to-do-list involved with Android apps, it is something that can grant you considerably more options in your app design and substantially improve the user experience – making it more than worth the time spent familiarizing.
How to build your first Android fragment
So, what could we do with fragments that wouldn’t make sense any other way?
Perhaps we have a list of files – maybe this is an image gallery – and we want to show a description and give the user the option to delete or share. That kind of thing. We could send them to a new ‘Description’ page each time by using a separate activity, but if you use fragments we can keep them on the one page which will be less jarring.
Open up Android Studio and create a list of random images in activity_main.xml. I’m using pictures of Dragon Ball Super because I’m a nerd and that’s what I have lying around on my PC…
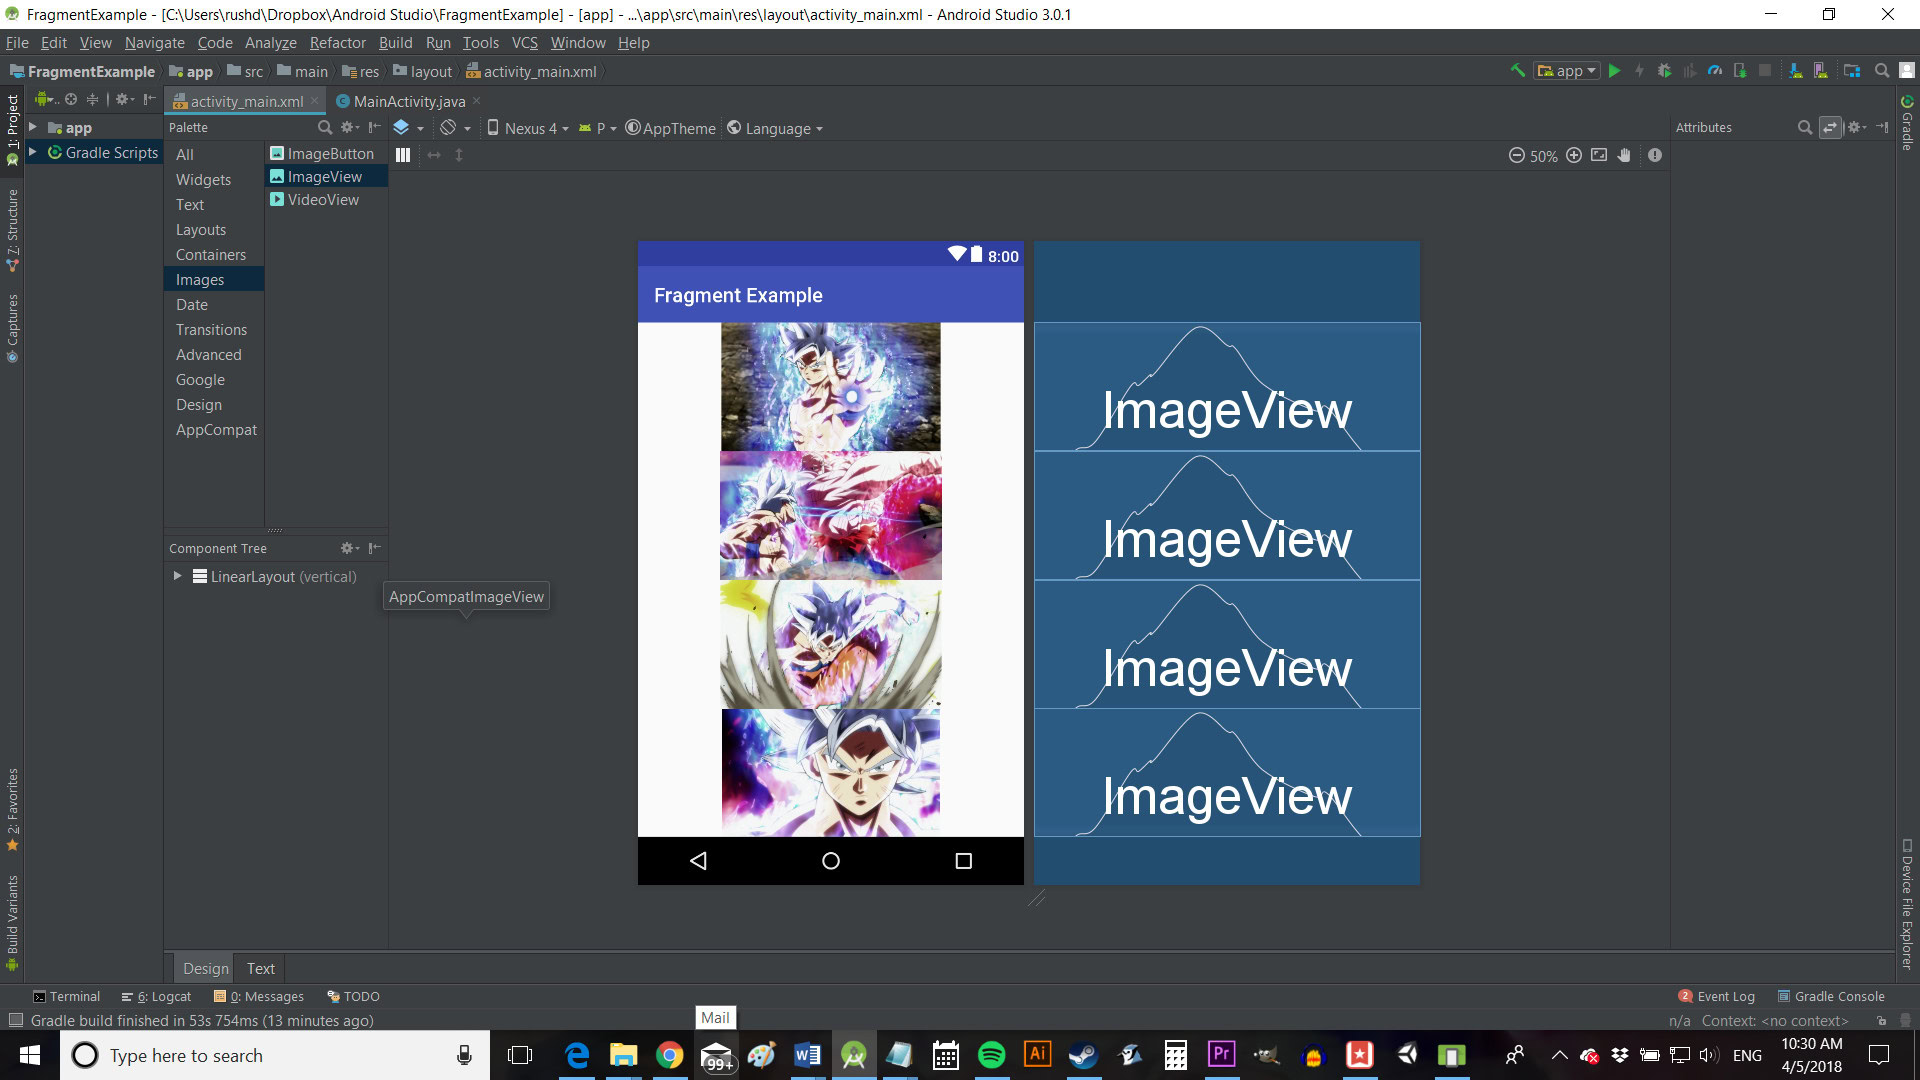
Now we’re going to create our first fragment.
To do this, you’re going to head to File > New > Fragment. MainActivity.java needs to be selected on the left when you do this, and you’ll be choosing an ‘blank’ fragment for now. You’ll then be able to choose a name for you’re the new creation, which we’ll call ‘Description’. Untick the two boxes underneath – we don’t need that right now.
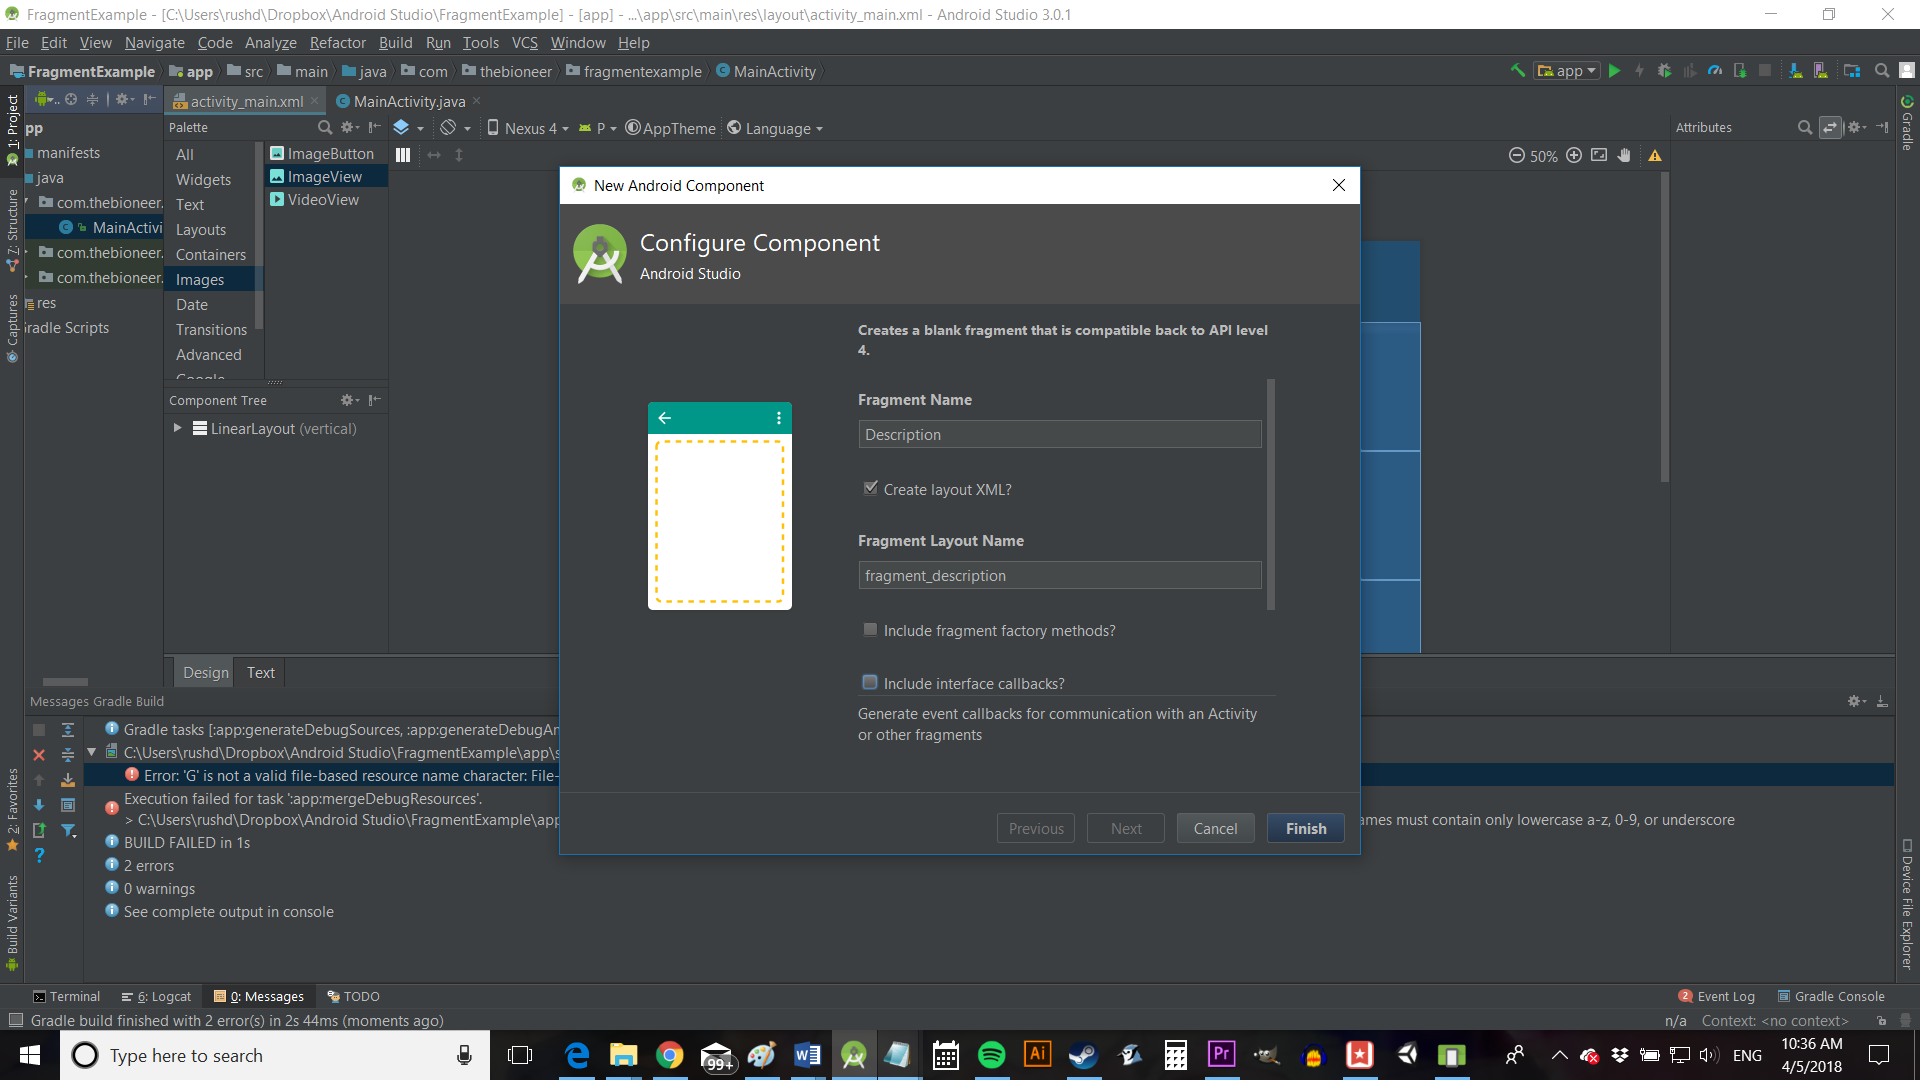
Once this is done, you’ll find you now have not only a new java file called Description.java, but also a new layout file called fragment_description.xml – just as though you had created a new class! This means that you’ll be placing the code that goes with your new fragment in its own separate java file.
Adding layouts, views and code
The good news is that it’s very easy for us to add views and a layout when we use fragments. We’ll do this just as we would normally by editing the fragment_timer.xml.
Let’s use a linear layout again and this time add some controls and descriptive text. You can stick anything here for now.
So now the next question is: how do you make this actually show up in your app?
You can do this by adding the fragment to the activity, just as you would do any other view. So, head to activity_main.xml and add the view so that it takes up a portion of the screen – perhaps down the bottom.
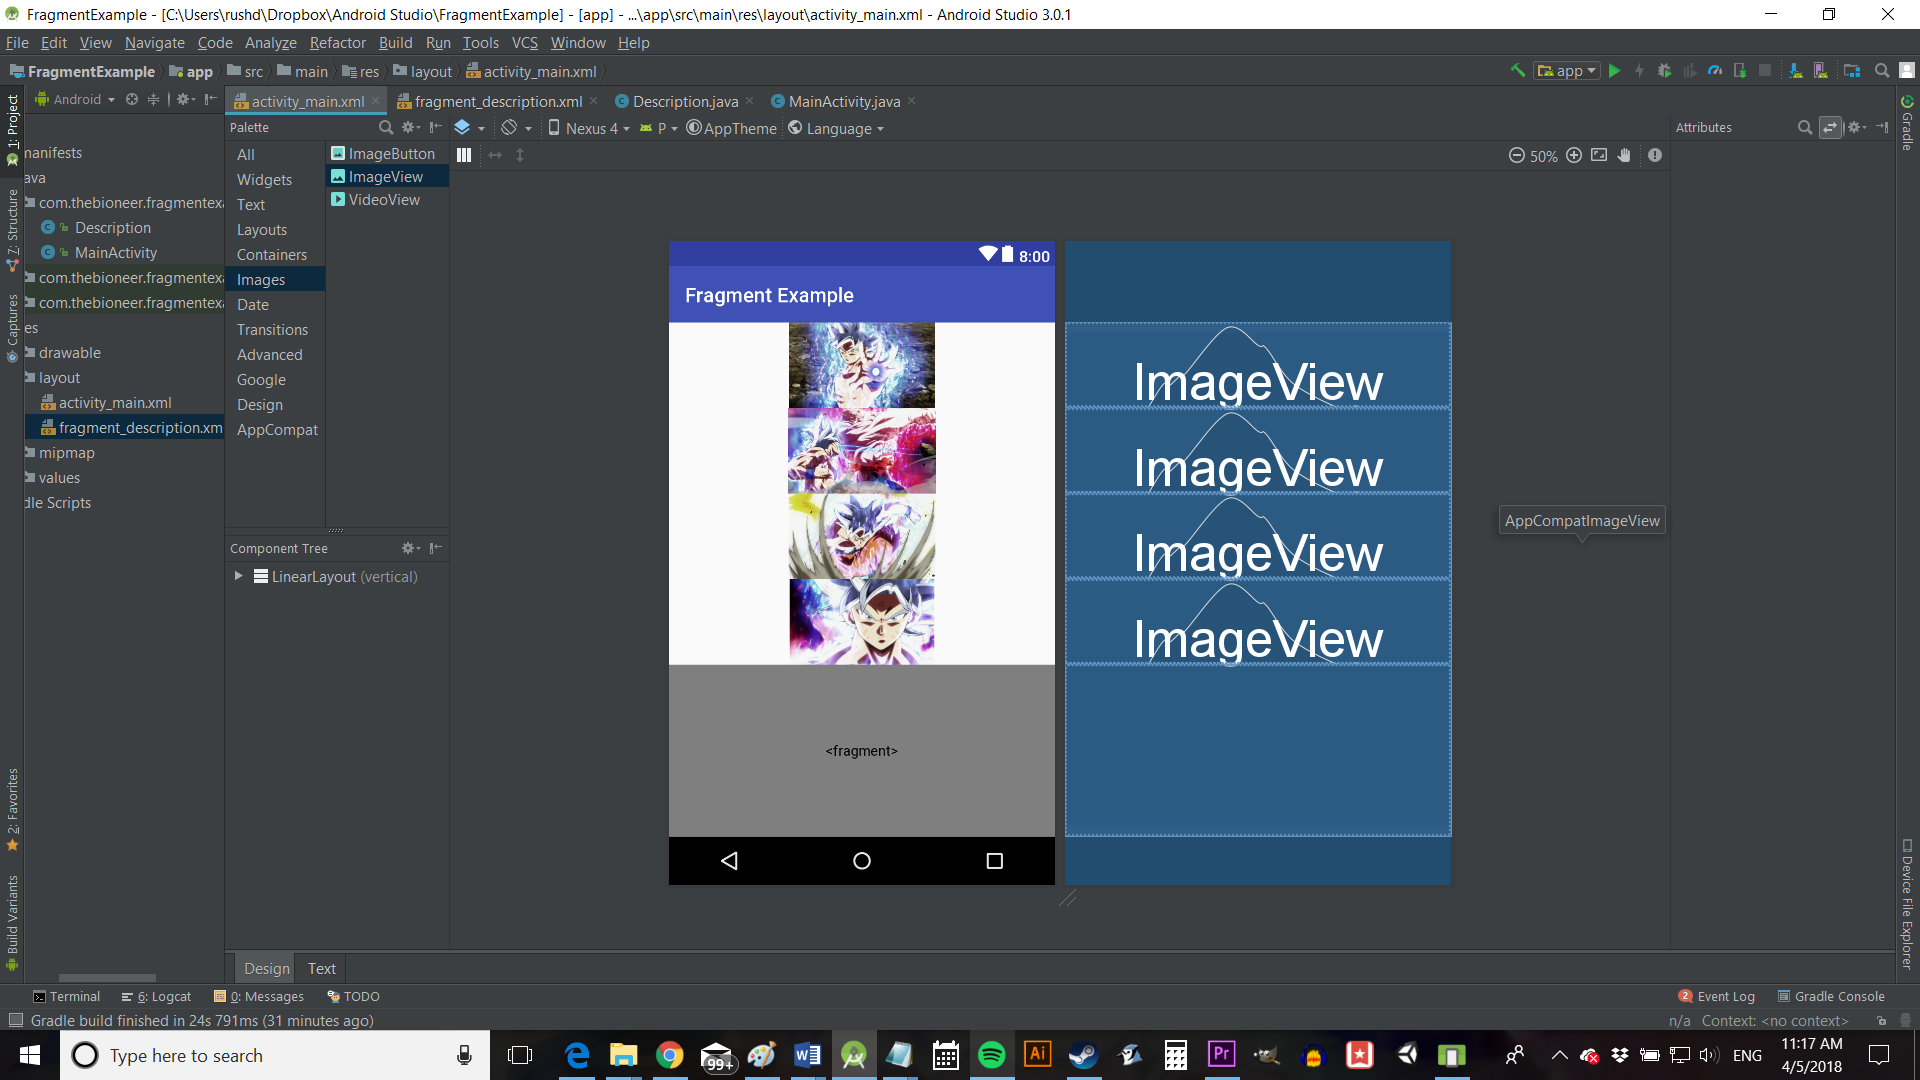
If you want to do it the way I did, I used a vertical linear layout and gave all the images a weight of 1 and the fragment a weight of 2.
<fragment
     android:name="com.thebioneer.fragmentexample.Description"
     android:layout_weight="2"
     android:layout_width="fill_parent"
     android:layout_height="0dp"
     android:id="@+id/fragment1" />
You’ll notice that the preview doesn’t show you the actual fragment, just a place-holder. Likewise, notice that I’ve had to include the name of the fragment in the XML, so that Android knows where to find it. You also need an ID for every fragment.
The code
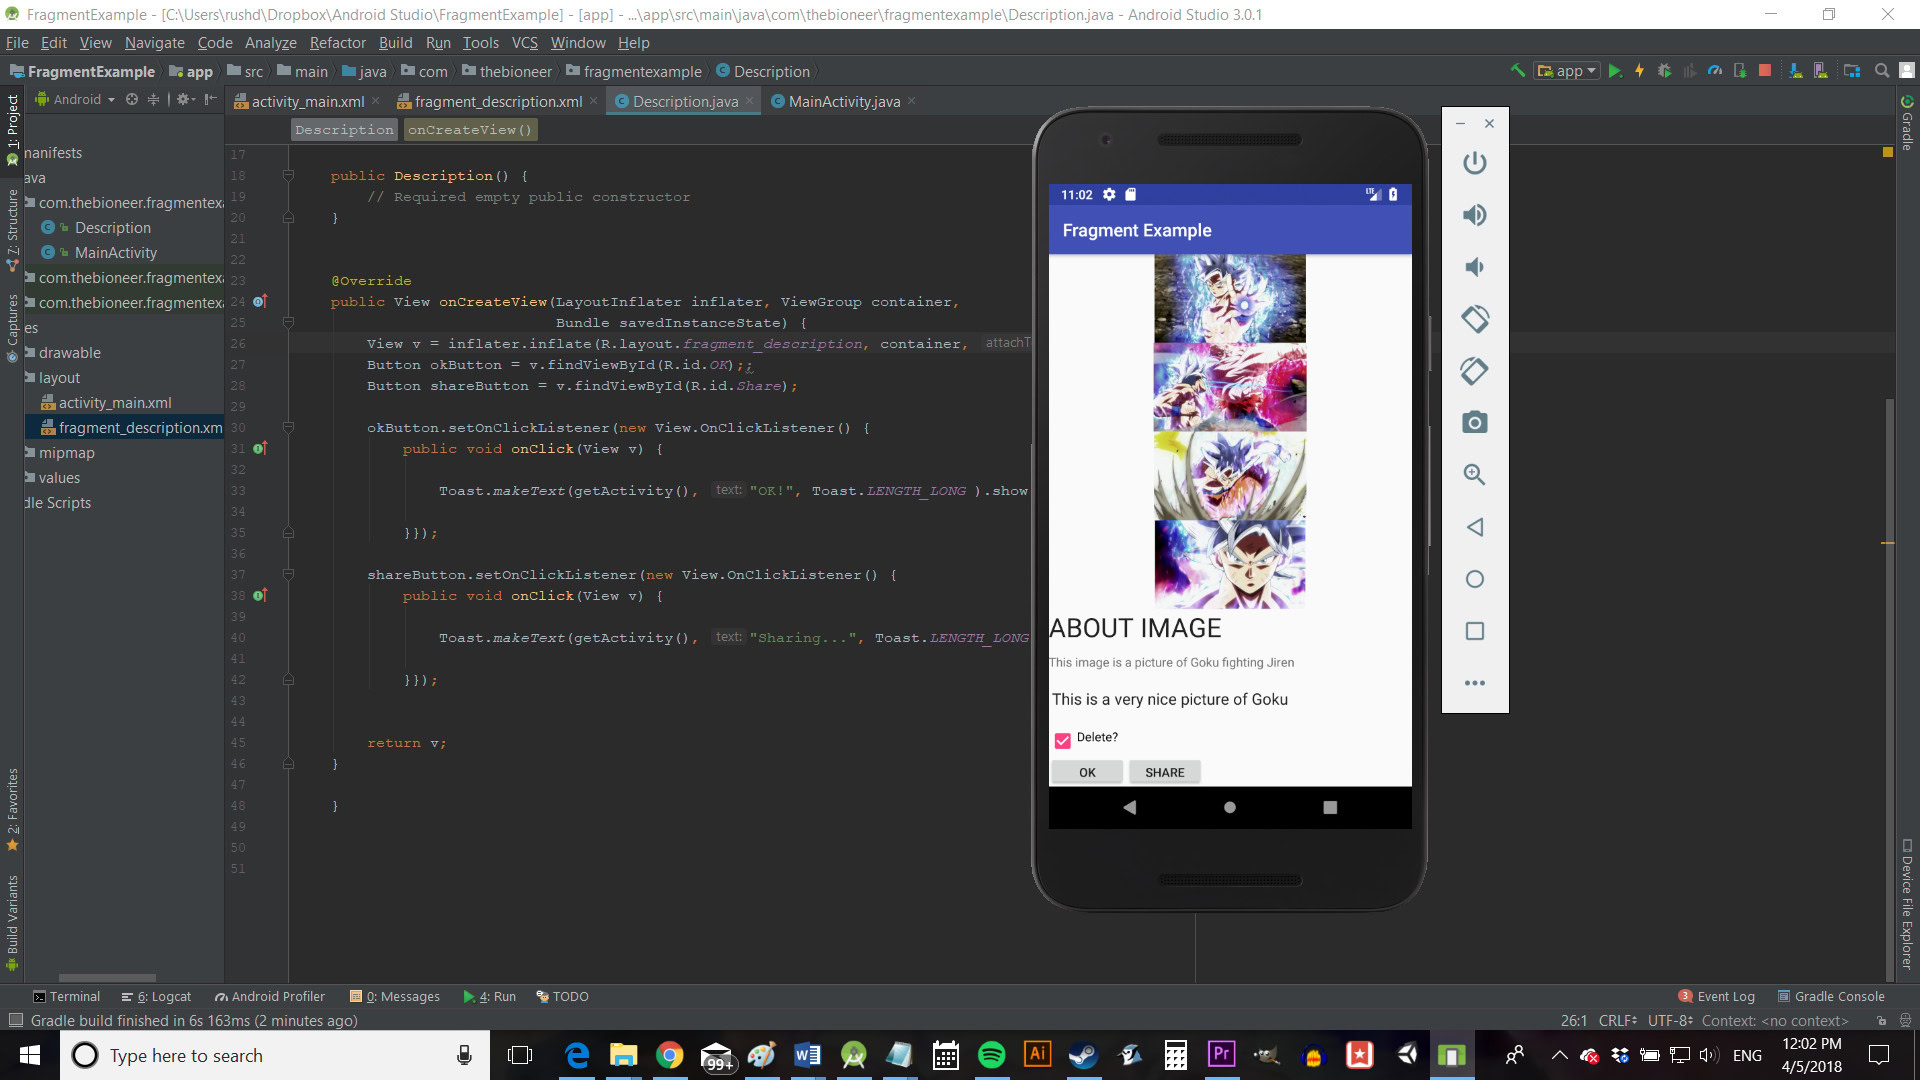
As discussed, the code we need to use fragments is going to go in its own java file. In this case, that’s the Description.java file.
If you check this page out, you’ll see that there is a constructor (just as in any class that creates an object) and a method called onCreateView. That method is where the xml is used to inflate that view and it’s also the equivalent of your usual onCreate method in a standard activity.
For the most part, you can do things as you would normally in here. findViewByID works and you can use this to change text etc. but you will need to get the reference slightly differently. Change the line that reads:
return inflater.inflate(R.layout.fragment_description, container, false);To:
View v = inflater.inflate(R.layout.fragment_description, container, false);And then use:
v.findViewByID.Now you can access your views as you normally would:
public View onCreateView(LayoutInflater inflater, ViewGroup container,
                          Bundle savedInstanceState) {
     View v = inflater.inflate(R.layout.fragment_description, container, false);
     Button okButton = v.findViewById(R.id.OK);;
     Button shareButton = v.findViewById(R.id.Share);

     okButton.setOnClickListener(new View.OnClickListener() {
         public void onClick(View v) {

             Toast.makeText(getActivity(), "OK!", Toast.LENGTH_LONG ).show();

         }});

     shareButton.setOnClickListener(new View.OnClickListener() {
         public void onClick(View v) {

             Toast.makeText(getActivity(), "Sharing...", Toast.LENGTH_LONG ).show();

         }});


     return v;
 }

 }
Use fragments with multiples instances
You can see how it is much easier to create a streamlined UI and code when we use fragments. Instead of using layouts-within-layouts and then juggling lots of clicks all within a single Java file. What’s more is that this ‘modular’ approach would allow you to use this view across activities and even in menus and other dynamic locations.
But the really cool part is the fact that you can have multiple instances of this very same fragment all existing at the same time.
To do this is simple: you just add more than one view and inflate with the precise same code.
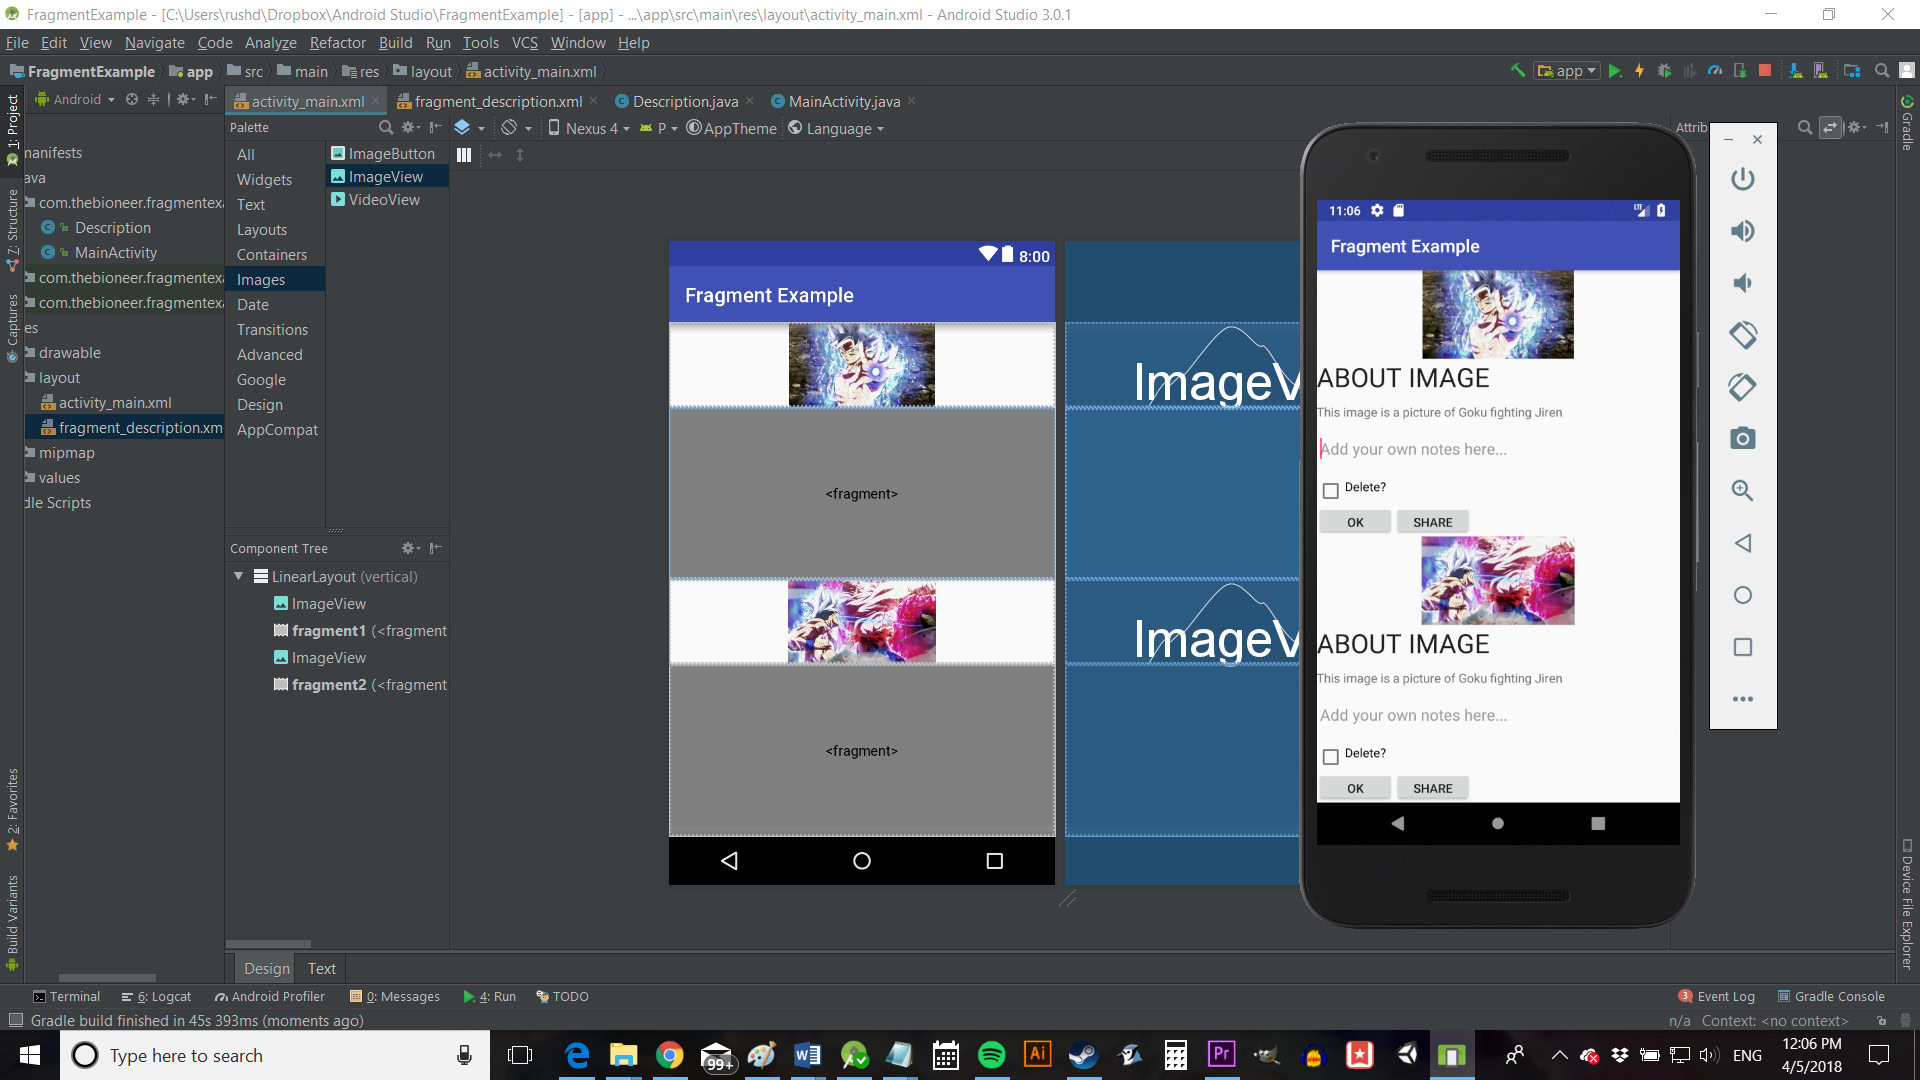
Now hopefully you can begin to see some of the power of using fragments: imagine having a Recycler View (a scrolling list) of images, each one with the details and controls just beneath. There’d be no need to create a whole new layout each time and you could hide the views until the user clicked on the picture!
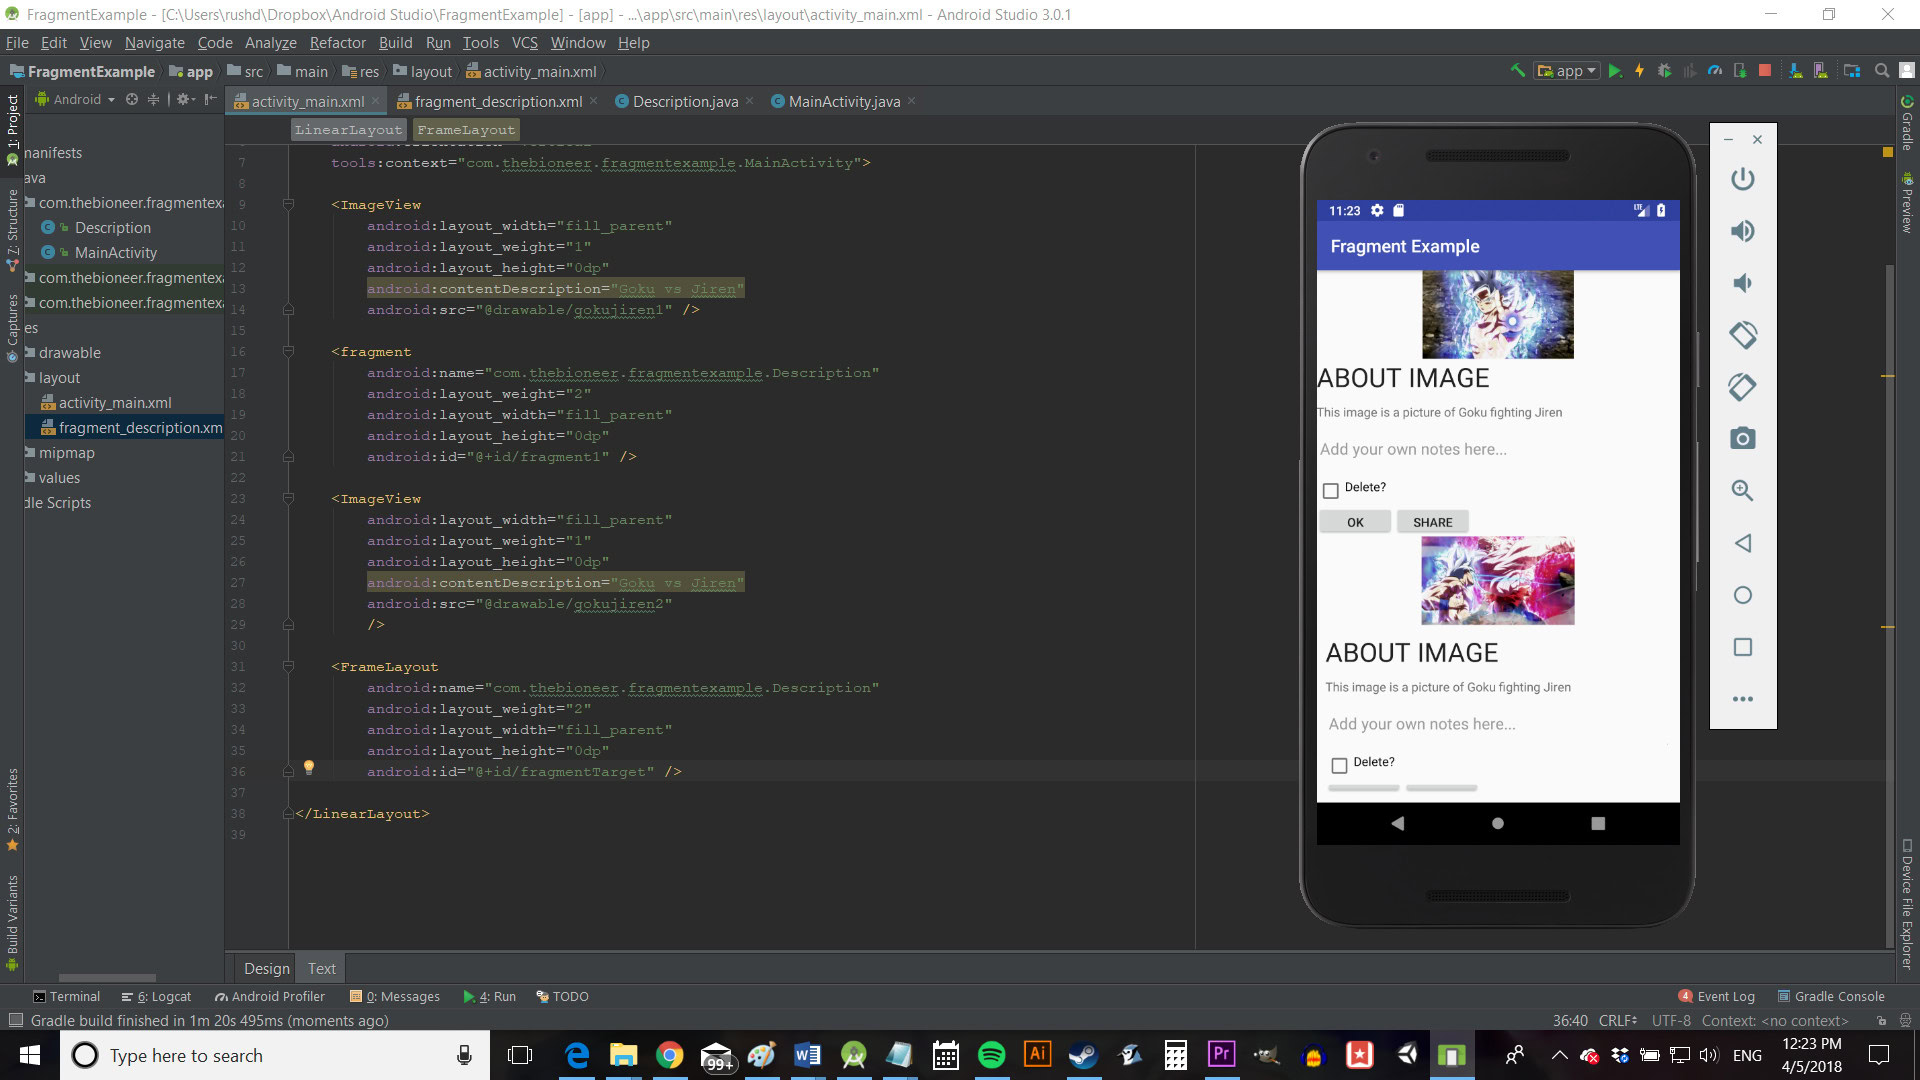
What’s more is that you can also generate new fragments programmatically. All you need is somewhere for the fragment to go in your layout – such as a frame layout (which I will call fragmentTarget) and then you can do the following:
Fragment addedFragment = new Description();
FragmentTransaction transaction = getSupportFragmentManager().beginTransaction();

transaction.replace(R.id.fragmentTarget, addedFragment);
transaction.addToBackStack(null);
transaction.commit();
Make sure to import the necessary classes – you’ll be prompted whenever you try to use fragments in your code. Just make sure to pick the top option that says ‘v4’.
Being able to add fragments programmatically is important because it means that we could generate a dynamic list of images (that we have downloaded, that are located in a specific folder etc.) and then have the details pop up for us immediately.
So, in this new example, the second fragment has been added programmatically.
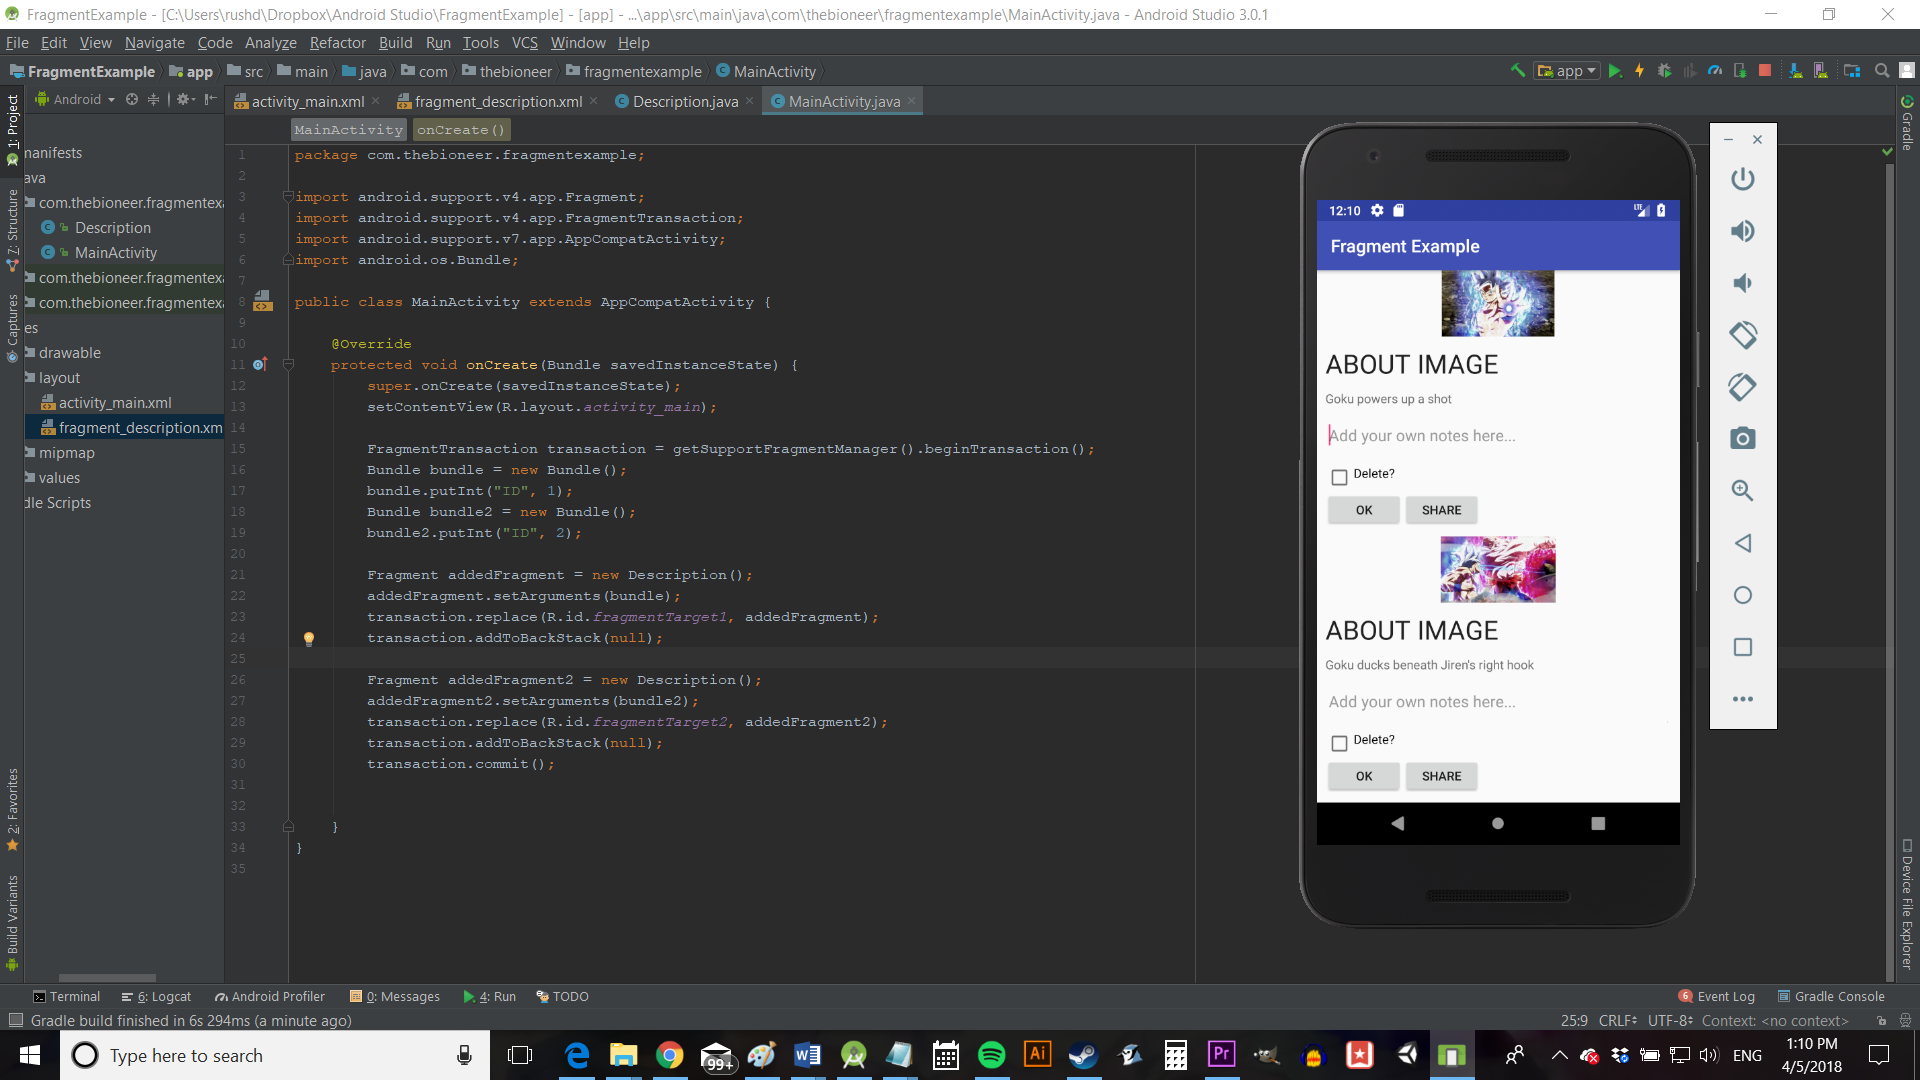
Finally, you may find yourself wanting to change the look of your fragments depending on where they are located. The good news is that you can do this easily by passing an ID as a bundle when you create the fragment and then extracting that value at the other end.
In the MainActivity.java use:
Bundle bundle = new Bundle();
 bundle.putInt("ID", 1);
 addedFragment.setArguments(bundle);
And then in the Description.java add:
int eyeD = 0;
 Bundle bundle = this.getArguments();
 if (bundle !=null) {
     eyeD = bundle.getInt("ID",0);
 }

 switch (eyeD) {
     case 1:
     …
You could then – for example – get your app to show different notes for each image.
Closing comments
So that’s how you use fragments. Hopefully you grasp the basics and this post has given you enough of an understanding that you can go ahead and figure out the rest. More importantly, I hope it has shown you some of the possible uses of fragments and the potential they offer for smarter app design.
If you want to see another example of fragments in action, then be sure to check out my recent post on creating a custom launcher!