Affiliate links on Android Authority may earn us a commission. Learn more.
How to remove the background from pictures in PowerPoint
There are several ways to remove the background from an image. You could go into an application like Photoshop or Clip Studio Paint and carry out the necessary procedure to create a PNG from a base image. You could also manually erase the background from an image with a simple paint tool. However, if you use PowerPoint regularly, you should know that there’s a tool that allows you to remove the background from an image in PowerPoint. It’s not the first program to implement this feature, but let’s review how to remove backgrounds from pictures in PowerPoint.
Read more: How to add or remove a watermark in a PowerPoint presentation
QUICK ANSWER
To remove the background from a picture in PowerPoint, go to Picture Format > Remove Background. Use the Mark Areas to Keep and Mark Areas to Remove markers to customize the image. You can choose what is and isn't removed from your image's background. When finished, select Keep Changes.
How to remove the background from an image in PowerPoint
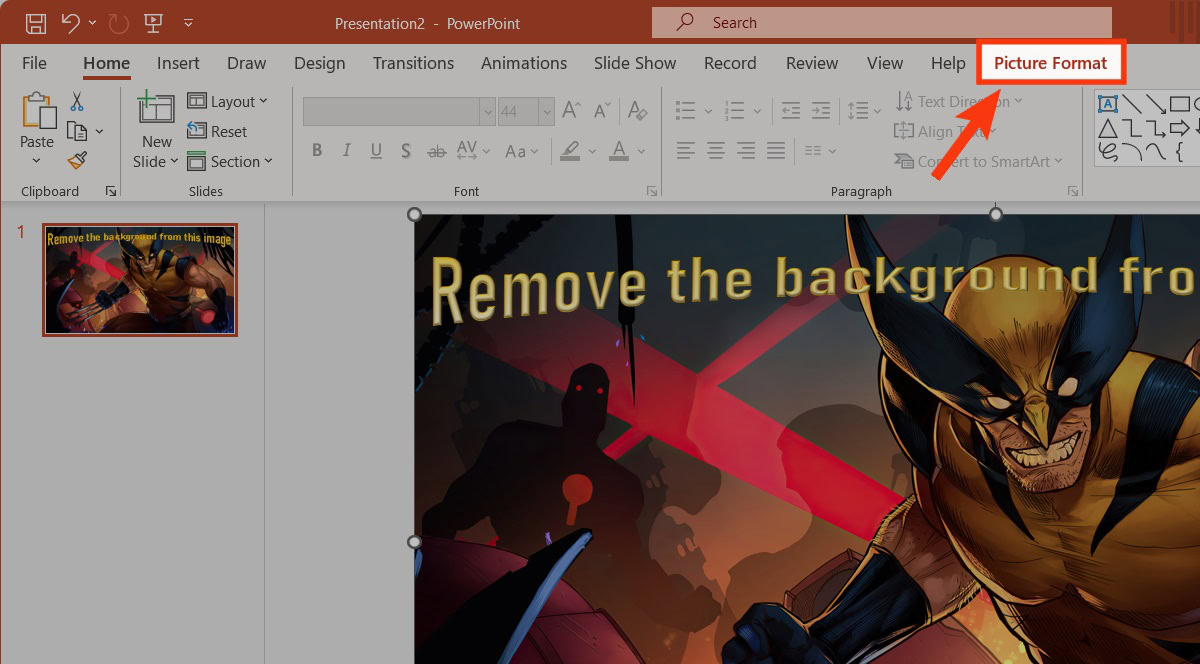
Click your picture in PowerPoint. When it appears, click the Picture Format tab at the top.

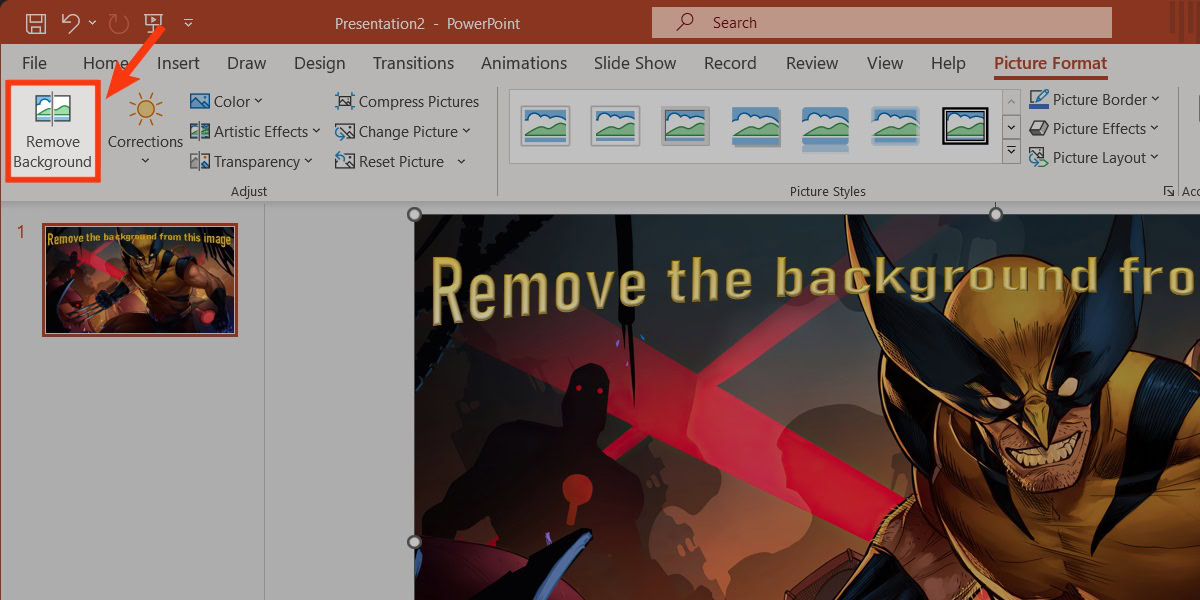
Within the Adjust section, select Remove Background.

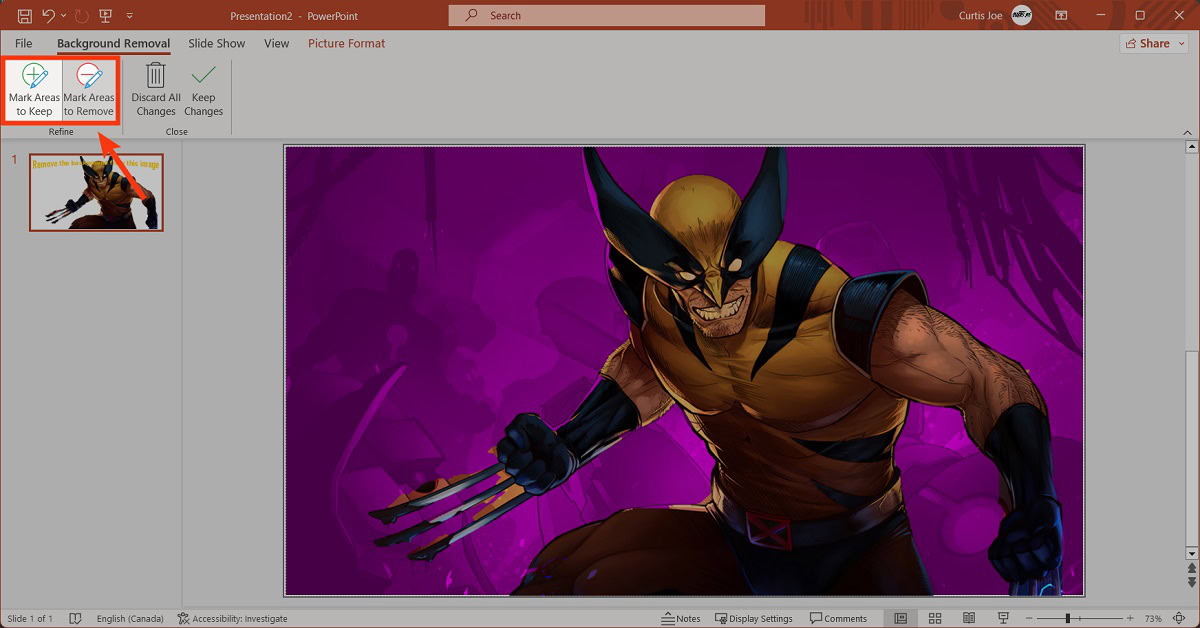
Use the Mark Areas to Keep and Mark Areas to Remove markers to customize the image. You can choose what is and isn’t removed from your image’s background.

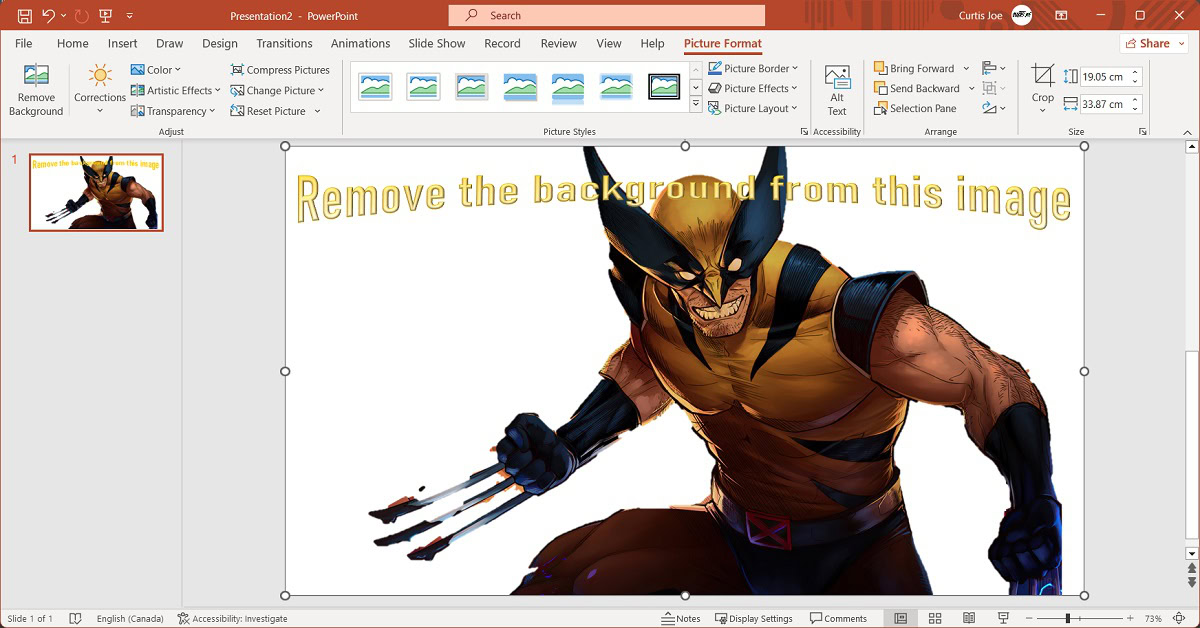
When finished, click Keep Changes.

Your picture will have its background removed in PowerPoint.

Read more: How to turn a PowerPoint into a video