Affiliate links on Android Authority may earn us a commission. Learn more.
Android customization - how to set up two-factor authentication on your Google account
Did you get the chance to follow along our Android customization series for the last few weeks? We covered the Android SDK developer tool ADB. While designed for, well, developers, it is actually a solid tool for file transfers, installing apps from your PC, taking screen recording and even for hunting down rogue battery killer apps on your device.
This week we shift gears, we would like to look at device security, or rather, securing your entire Google account using Google Authenticator.
Before we begin
You will need an Android device and your PC to follow along today. Make sure you know your Google account password and are prepared for your Google Account to log out of all of your devices, be they Android phones, other smartphones, computers, TVs and more.
I should be more specific, the Android device you need today should be your own personal device, and it should be secured itself with a PIN, pattern or passphrase.

Google Authenticator
Google Authenticator is more than just a fleeting application, this tool turns your Android device into the master key to your entire Google experience. The premise is simple enough, Google Authenticator uses what we call two-factor authentication. In this implementation, you will sign into your PC, for example, with your standard Google email and password, but before you can continue to access your account, you will need to enter an additional access number, as provided by Google Authenticator on your Android device.
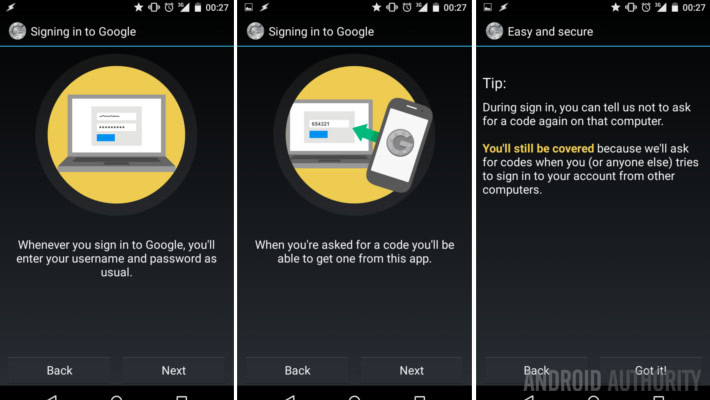
Once again, the moment you activate Google Authenticator, your Google Account will log out, or lock up, absolutely everywhere you have it signed in. Your home or work computers, all of your smartphones and tablets and more. Make sure you know your password, and can trust that your Android device with Authenticator installed is reliable and can always be connected to the internet to get you your access codes.
Set up two-factor authentication on your Google Account
Part 1: Enable two-factor on your PC
Once you have Google Authenticator installed on your device, but before you fire up the app, sit at your PC and head over to your Google Account at https://myaccount.google.com/
Your Google Account Settings page is absolutely full of great security tools and measures that you should be familiar with, do at least take the Security Checkup at the top of the page, if you have not already.
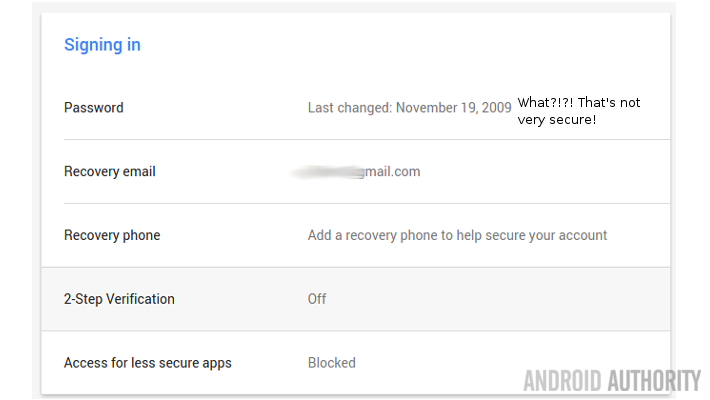
Scroll down a little way, look for 2-step verification and click into it.
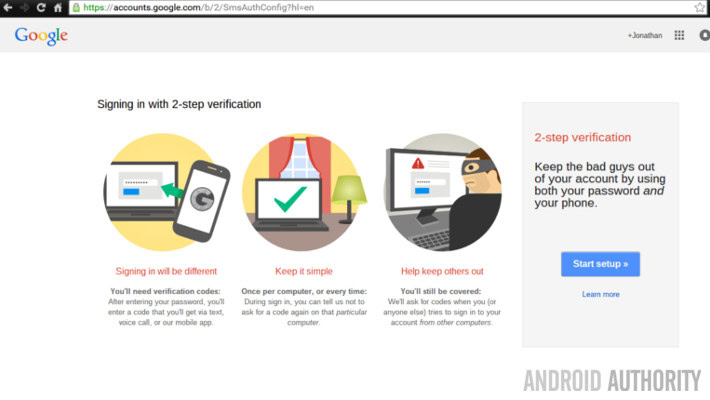
Click Start Setup.
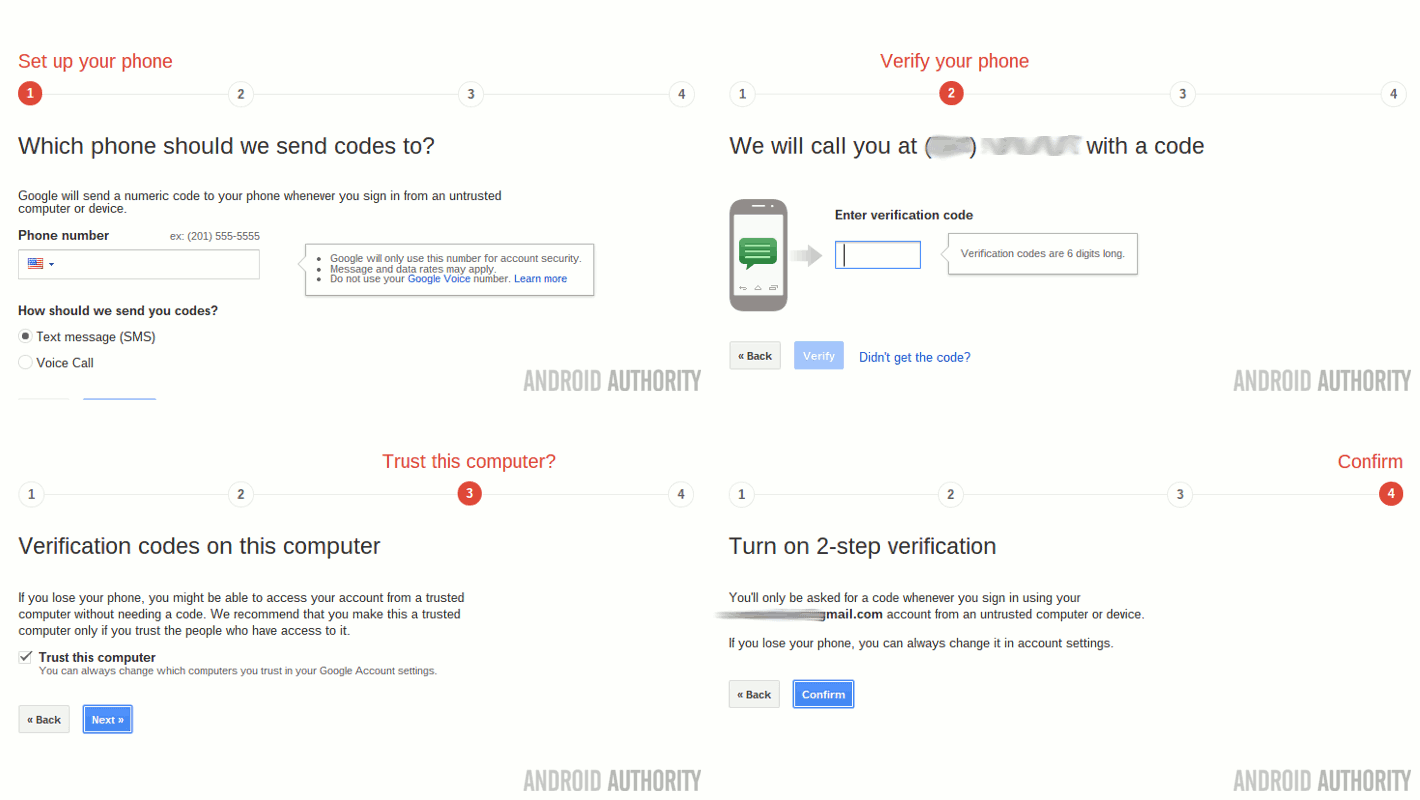
Enter a valid mobile phone number. This does not exactly have to be your phone that you are setting up Authenticator on, it will be used as a backup to Authenticator if anything goes wrong. Tap Send code and take this opportunity to time your provider, to see how long it takes them to process an SMS message. If your patience is stretched too thin, go ahead and use the Voice Call feature.
In step 2, you will enter the provided code.
In step 3, you are asked if you wish to use this computer as a Trusted computer. We are not talking about by-passing the two-factor authentication here. This will establish this computer as a backup to your phone and to the above provided phone number, if you lose them, you can use this PC to access your account.
Finally, in step 4, you will need to verify that you wish to go through with this setup. Trust me, you can very easily turn it all back off later, if you don’t like how it all works.
Part 2: Log into your Android device with the new credentials
As mentioned, you will now need to log back into all of your phones, computers and more that use your Google Account. You can tap Reconnect my apps to get on that, but I think it is easier to just head to the phone first.
Do not close your Google Account on your computer yet, but pick up your Android phone to continue.
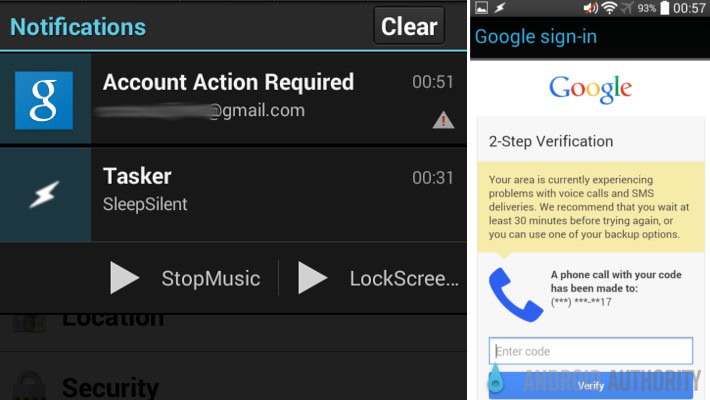
Your Android device will be going a little crazy on you now. Your Google Account is unable to connect, but don’t worry, just tap on the error notification and follow the instructions.
For this first device, you will enter your Google Account password, which will fail, and then you’ll be asked to use a web login, just hit next to continue.
Enter your password again, then you’ll be directed to the two-factor verification page, in which you are going to need to enter a 6 digit numeric code. Google is going to send an SMS, or phone you with the code.
Enter the verification code.
Check off the box that asks if you want to trust this device in the future. If you do not turn on Don’t ask for codes again on this computer, you will need to go through all this again and again.
Finally, tap Verify.
Good news, your Google Account is configured and your Android device is Verified. Only one last step remains, to configure Google Authenticator so that you can setup all of your other devices.
Part 3: Install and configure Google Authenticator on your Android device
Head back to your computer. Head back into the Two-factor Authentication section, if it bumped you out.
You will see that your current Primary method of receiving codes is your phone number, just below that is the option to enable the mobile app instead. Tap Switch to app.
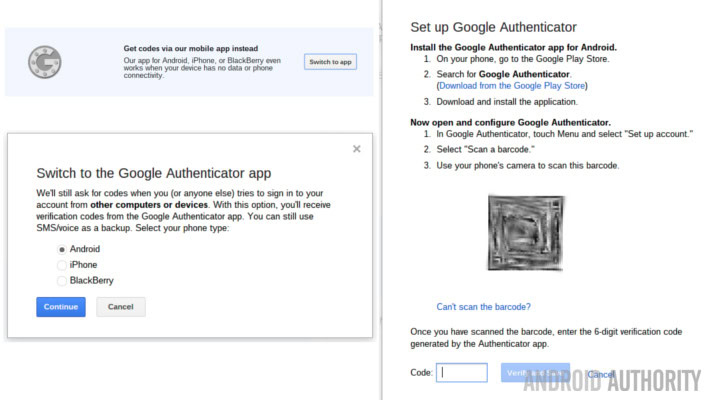
I presume you are on Android, but as you can see, a few other mobile operating systems are also supported. Choose Android and hit Continue.
Open the Google Authenticator app on your Android device.
Tap Begin setup to, well, begin set up.
If so equipped, use your Android device to scan the QR code on your computer screen. There is a link right there to help you if you cannot scan codes.
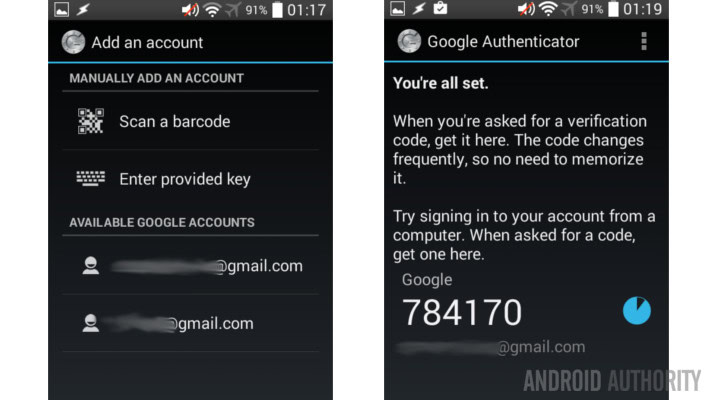
Once the QR code is scanned, it will provide a verification code, enter that into your computer and hit Verify and Save.
In the words of the app on your device, You’re all set!
What’s next
Are you still with me? That was a bit crazy, but now comes the hard part – I am sure I mentioned that you will now need to have your Android device with you everywhere you go and try to log into your account. Let the process begin.
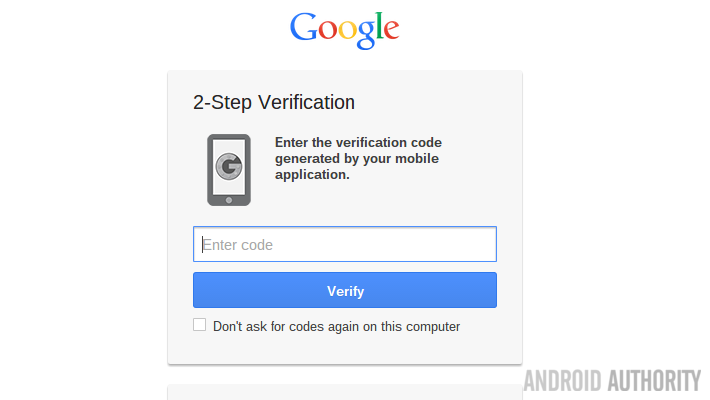
As you log into your devices, computers and more, take careful note of which ones you choose to trust implicitly by selecting the Do not ask for a code again on this computer option. Yes, you will still need to have your password to access the devices, so you are still covered there, you just won’t be asked for the second layer of security on those machines.
Using the Google Authenticator app is really easy, simply open it and use the provided access code. Check out the video below for what Google has to say on the subject. You can see that the code resets every 30 seconds or so, which is how the system keeps your gear secure. It is well beyond modern day consumer computing equipment to reasonably anticipate a successful brute force attack in this amount of time. I hope.
Google has a thorough set of resources available surrounding two-factor authentication, be sure to hit their support pages for more details on just what this whole security tool is and how to use it.
You can use the same Authenticator app on your device to work with several different Google Accounts at the same time, just go through the setup on your computer, then scan in the secondary QR code to proceed. That is not all, you can even use the Google Authenticator app on other accounts. For example, I use it for the two-factor authentication for our team communications portal over at Slack.
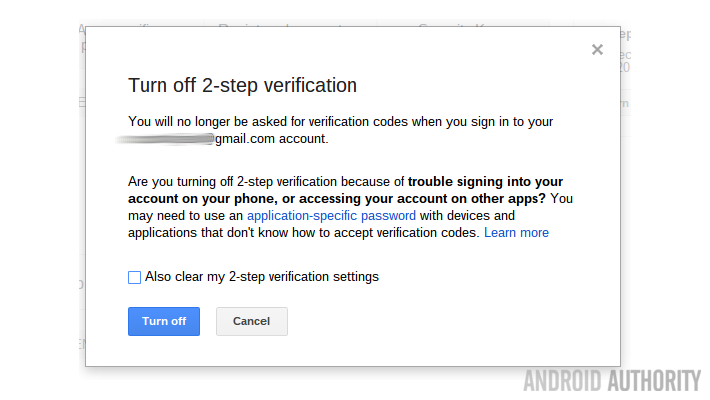
Finally, remember how I told you two factor authentication is simple to disable if you don’t like it? Just head into the settings on your PC, and hit the Turn off button on the far right hand side. Please do give it a chance before you give up on it. Convenience is always sacrificed for the sake of security, but we think it is worth the trouble in this case.
Next week
I hope you got through our Android customization post this week, setting up two-factor authentication for your Google Account is much easier than it looks on paper, and more than important enough to be worth the trouble. Now that your Google Account is doubly secured, let’s dive into it – we’ll take a look at managing your Google Location History next week.
Do you use the Google Authenticator app to provide two-factor authentication for your Google Account?