Affiliate links on Android Authority may earn us a commission. Learn more.
How to upload photos to Instagram on your PC
Instagram is one of the most popular social media platforms around, whether you use it to follow loved ones or simply want to be amazed by jaw-dropping snaps.
There’s plenty to like about the platform, but one of the biggest disappointments is just how tough it is to upload photos to Instagram on PC. Fortunately, there are a number of ways to accomplish this without relying on questionable third-party apps.
1. Using your browser’s developer mode
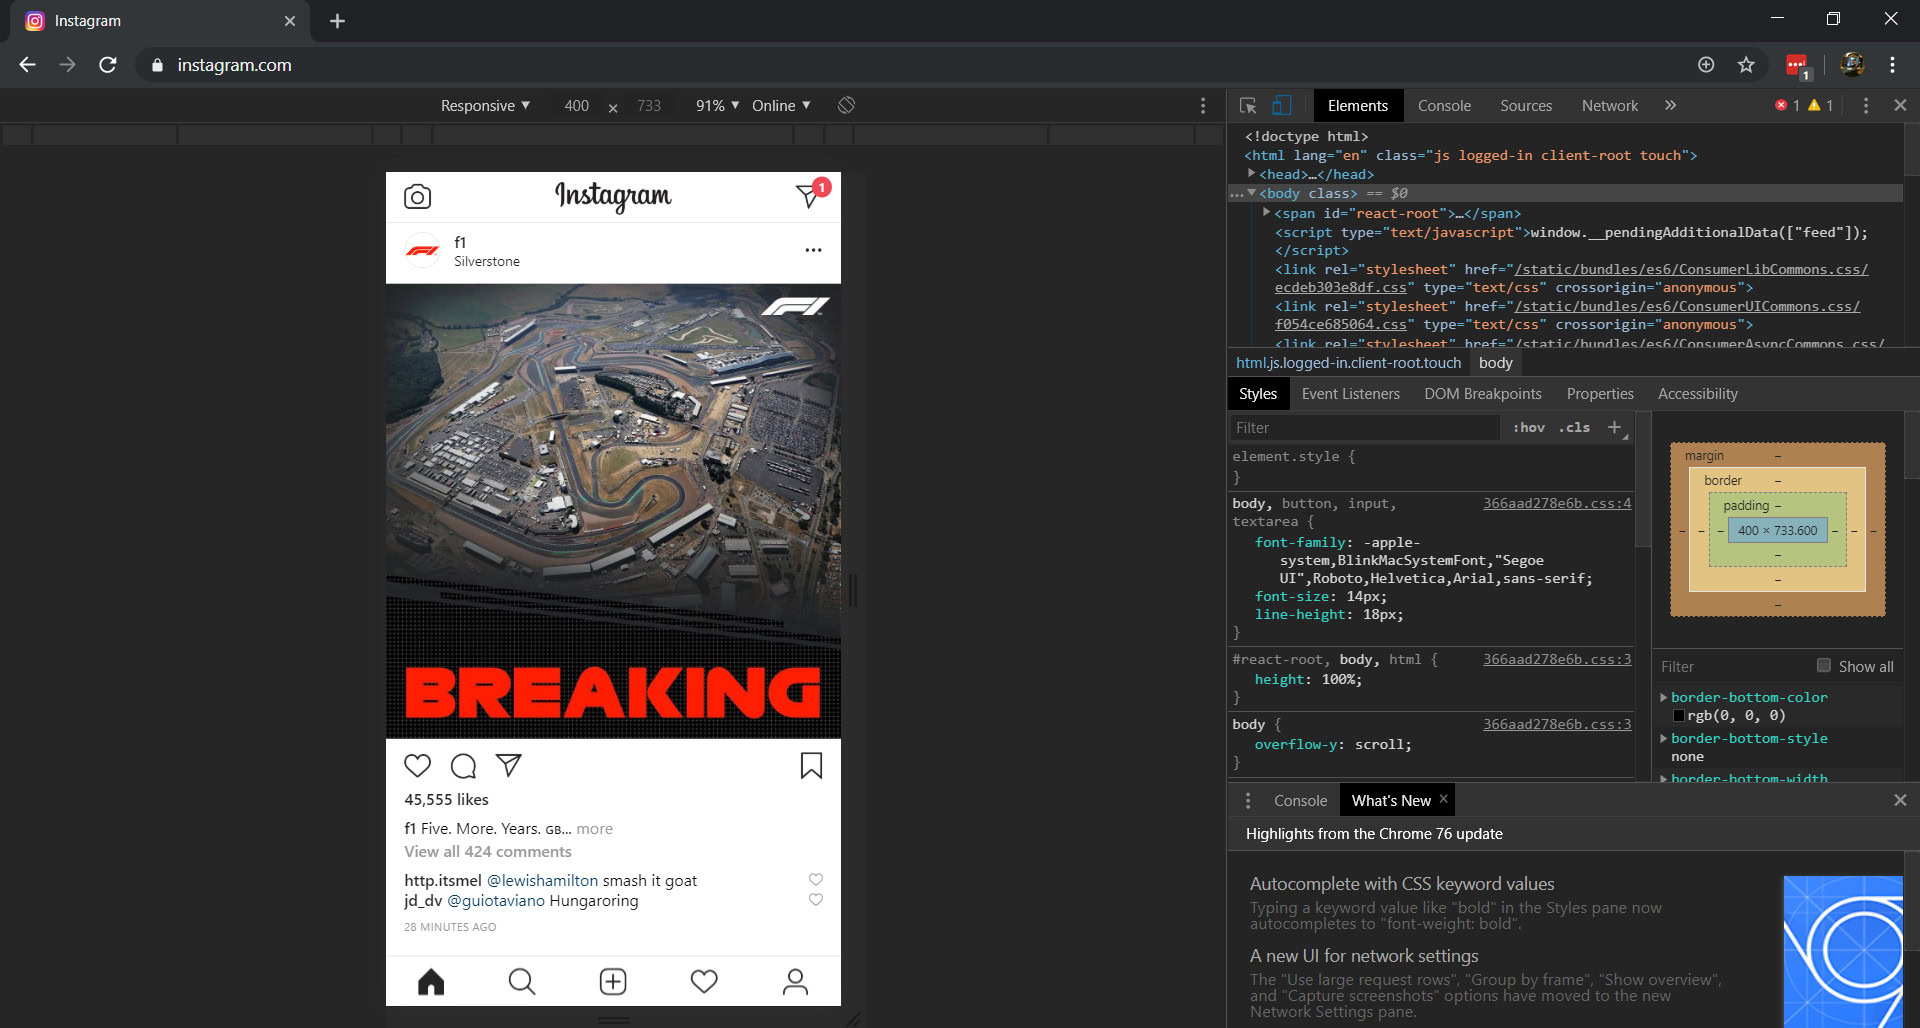
Probably the best way to upload photos to Instagram on PC is to use your browser’s developer mode. It’s my favorite solution because it’s relatively easy for the average consumer and doesn’t require any downloads.
You first need to log in to your Instagram account on PC, then enter your browser’s developer mode. Google Chrome users can simply hit F12 to enter this mode (or visit the three-dot menu > more tools > developer tools).
Not using Chrome? Well, Firefox users can access this option via the three-line/hamburger menu > web developer > toggle tools. Firefox users should also tap the icon that looks like a smartphone and tablet on the right-hand side of the resulting panel (near the X to close the window). Opera users can enable developer options via menu > developer > developer tools. Microsoft Edge user? You can activate the mode by pressing F12 and then choosing emulation from the arrow pointing downwards (see this screenshot for a better idea). From here, change the device category to a Lumia smartphone.

Once you’ve activated developer mode/tools, your browser window should then be formatted for a mobile device. Furthermore, Instagram should now look like the mobile app — this is actually the progressive web app. You should also see the familiar plus sign (along with home, search, activity, and profile icons) in a dock at the bottom of the page.
Hit the plus sign and the standard Windows file explorer will pop up, allowing you to choose an image or video from your PC to upload to Instagram. You might not always see the plus sign and other icons after entering developer mode, but reloading the website usually does the trick. Still not seeing the plus sign? Then try changing your user-agent from “responsive” to another smartphone. This option should be seen above the Instagram window but below the address bar in most browsers, as seen above.
2. Use BlueStacks Android emulator
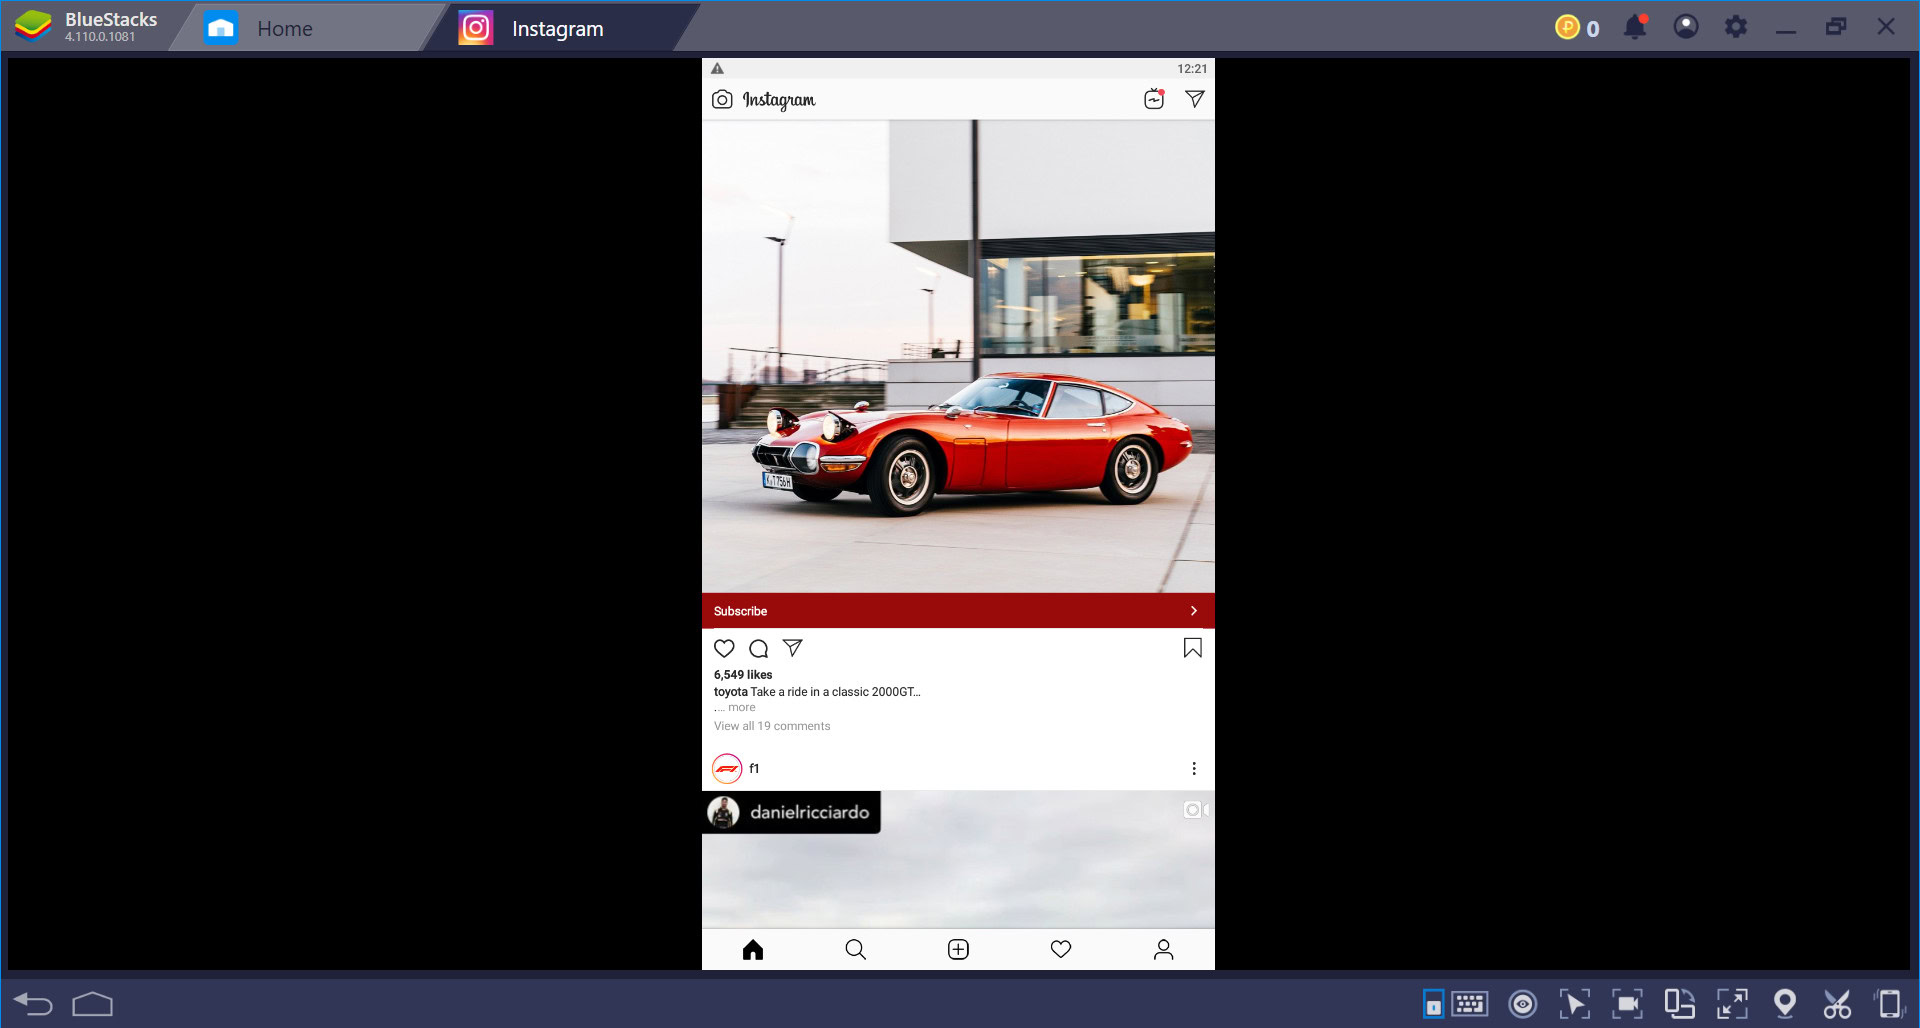
Another solid way to upload photos to Instagram on PC is to use an Android emulator. An Android emulator is a program that lets you run Android apps on PC, so what we’re doing is running the actual Instagram Android app on your desktop.
BlueStacks is one of the most popular Android emulators out there, so we’d recommend you download this emulator for your PC. Once you’ve got it installed, you’ll need to download the Instagram app to your PC. Fortunately, BlueStacks has out-of-the-box access to the Play Store, allowing you to install Instagram as if you were downloading it to your phone.
Once you’ve installed Instagram, go ahead and open it from the BlueStacks home menu and enter your login details. From here, it’s an identical approach to uploading photos on your smartphone, albeit with the Windows file explorer rather than your phone’s gallery app.
I initially had problems getting Instagram to run via this method, only seeing a white screen when launching the app. A redditor noted that you have to download an older version of the app (APKMirror is your best bet), and that indeed solved the issue for me.
3. Using the Windows 10 app
Instagram also has a Windows 10 app available via the Windows Store, and it seems like a fairly solid app at first glance. But those using a traditional desktop or laptop will be disappointed to hear that upload functionality is completely missing within the app.
Unfortunately, the Facebook-owned company has restricted uploads to Windows 10 devices with touchscreens (e.g. tablets and convertibles). It’s all rather silly, especially as many people back up their photos to PC or edit on the bigger screen first.
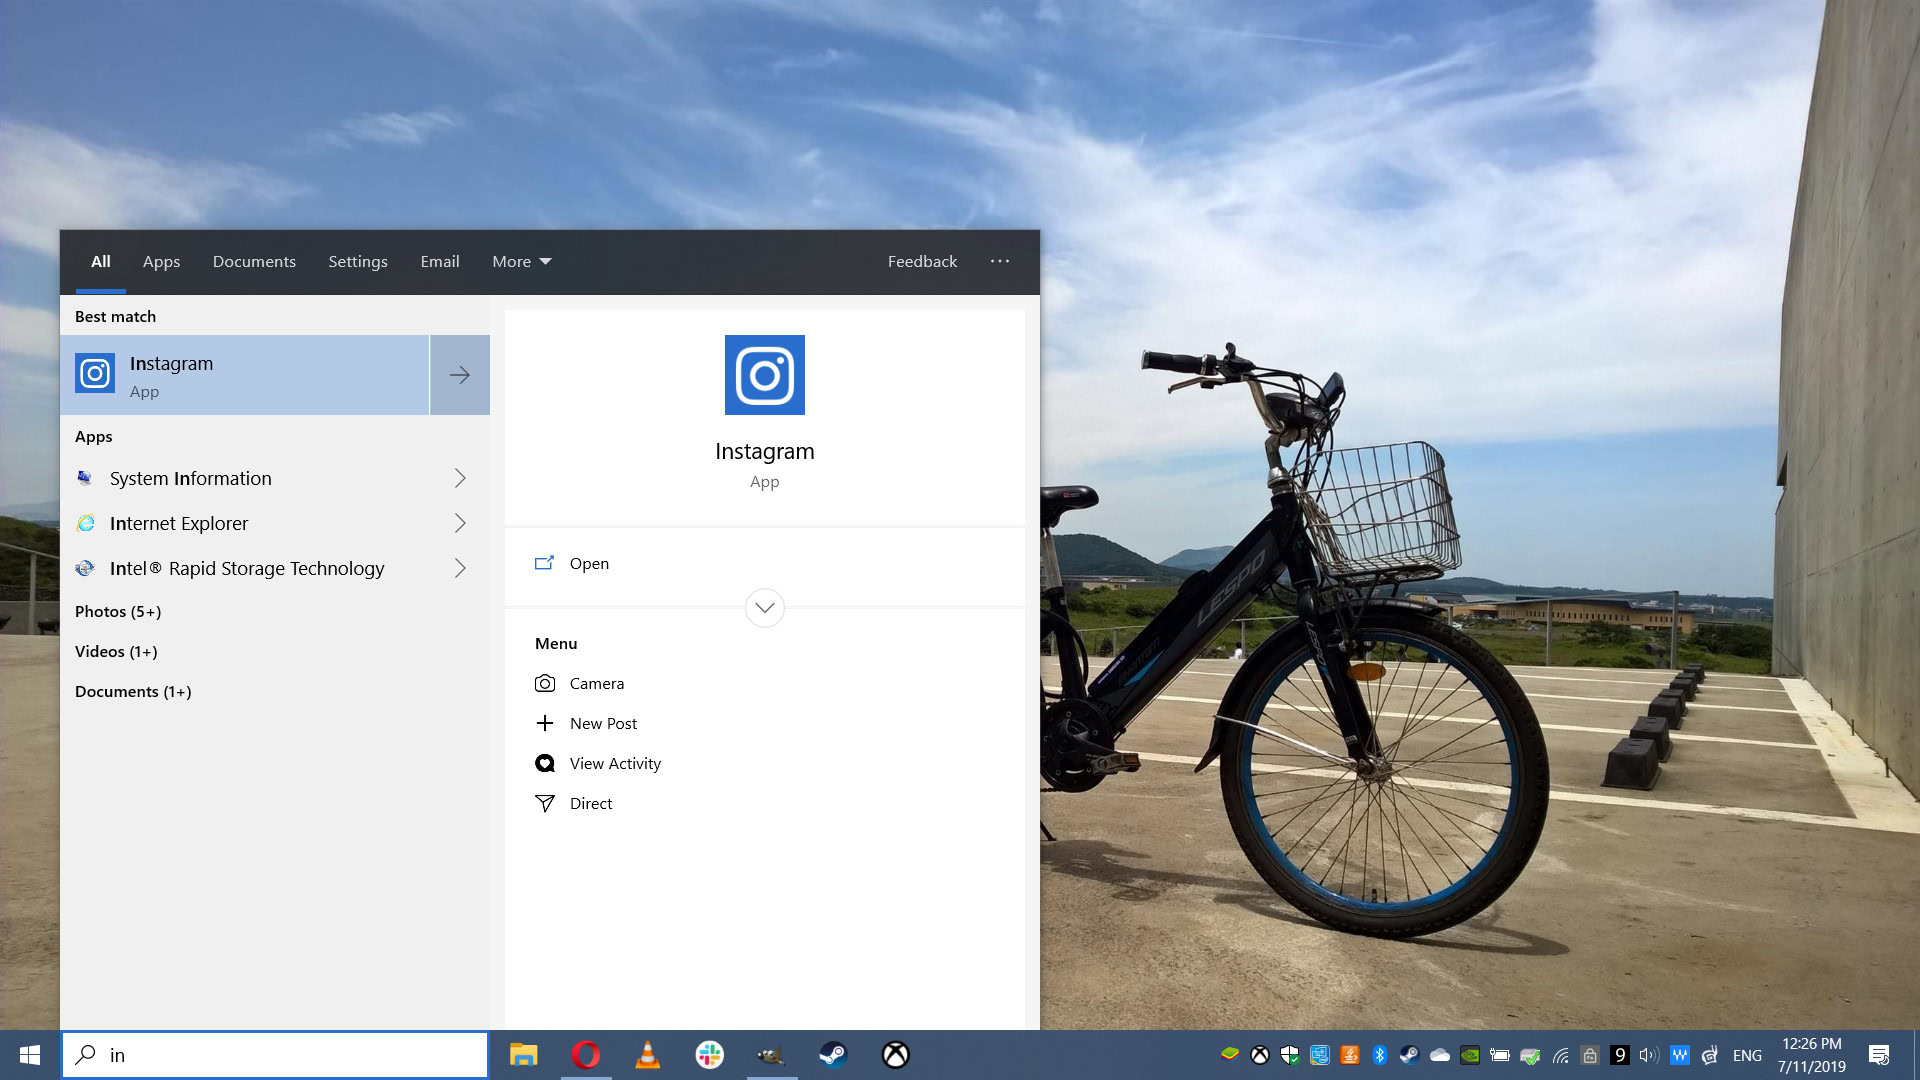
All isn’t lost though, as it’s possible to find and use the app’s upload functionality (regardless of screen type) by searching for Instagram in the Windows 10 search bar next to the start/Windows button. Simply search for Instagram in the search bar, and you should see a few app shortcuts appear. You should then select new post to open a very rudimentary file picker. This doesn’t activate the Windows file explorer, as it only serves up a few folders (e.g. Pictures, Downloads, Saved Pictures, Camera Roll), but it’s still far better than nothing.
Not seeing the new post functionality when searching for Instagram in the search bar? Then right-click on the app and choose pin to taskbar to pin it to your, well… taskbar. Now, right-click the pinned Instagram icon and you should see new post. Click this and you should see the aforementioned file picker, allowing you to initiate the upload process.

Are there any other cool ways to upload photos to Instagram on PC? Then let us know in the comments!