Affiliate links on Android Authority may earn us a commission. Learn more.
How to show and create hidden files on any Mac
Accessing hidden files on a Mac is useful for a lot of troubleshooting. It can help find files you need to fix problems, and it’s also where Apple hides some of the more sensitive system files. After all, you can’t break what you can’t see. In any case, we’ll show you how to lift the veil and check out hidden files on any Mac.
This tutorial was written on a 2020 MacBook Air running macOS Monterey 12.4.
Read more: How to look up charge cycles on any Mac
QUICK ANSWER
To show hidden files on any Mac, open a folder and press Command + Shift + . (period). The hidden files will show up in that folder. You need to repeat this process in any older folder with hidden files.
JUMP TO KEY SECTIONS
How to show hidden files on a Mac
There are two simple ways to show hidden files.
With a keyboard shortcut
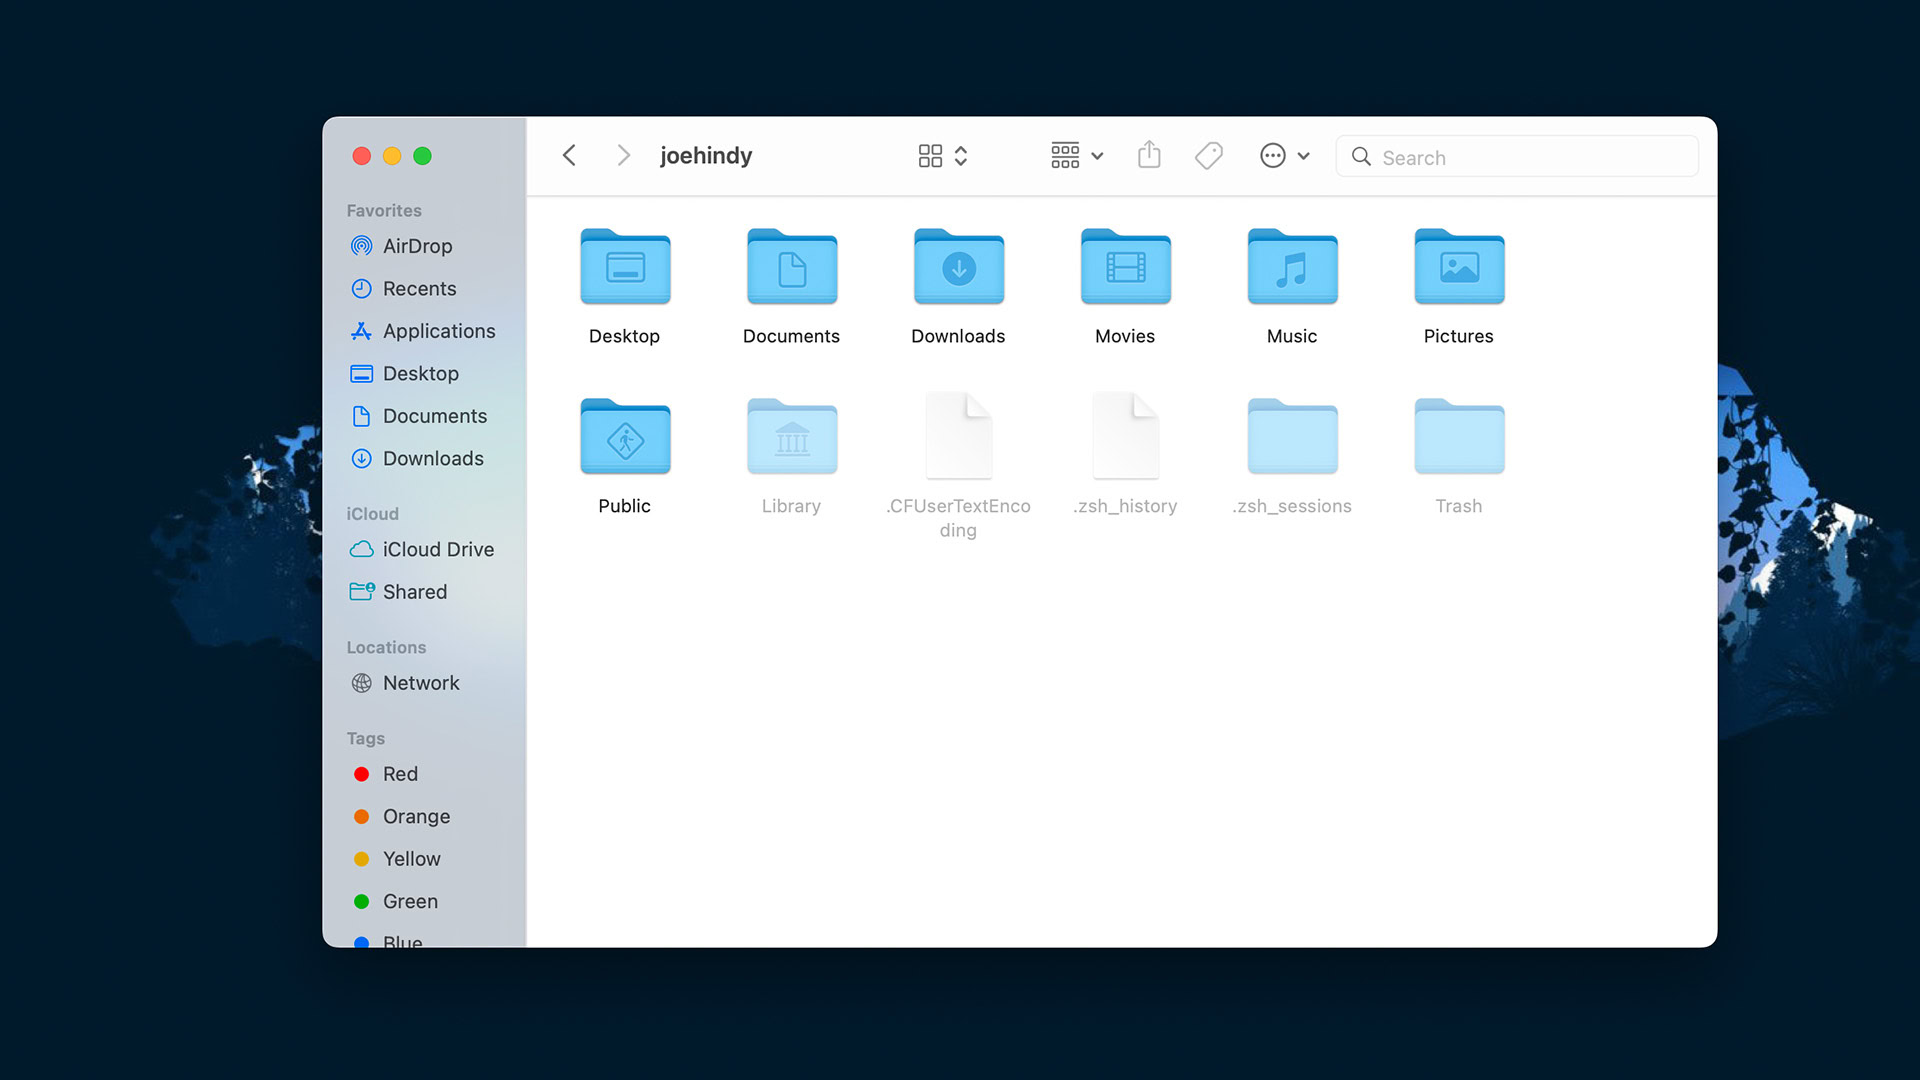
- Open any folder in Finder and tap Command + Shift + . (period). If there are any hidden files, they will appear.
- You can test this yourself by going to Macintosh HD on your Mac and hitting the above combination. You’ll see the files appear.
- Press the combo a second time to re-hide the files.
With the Terminal
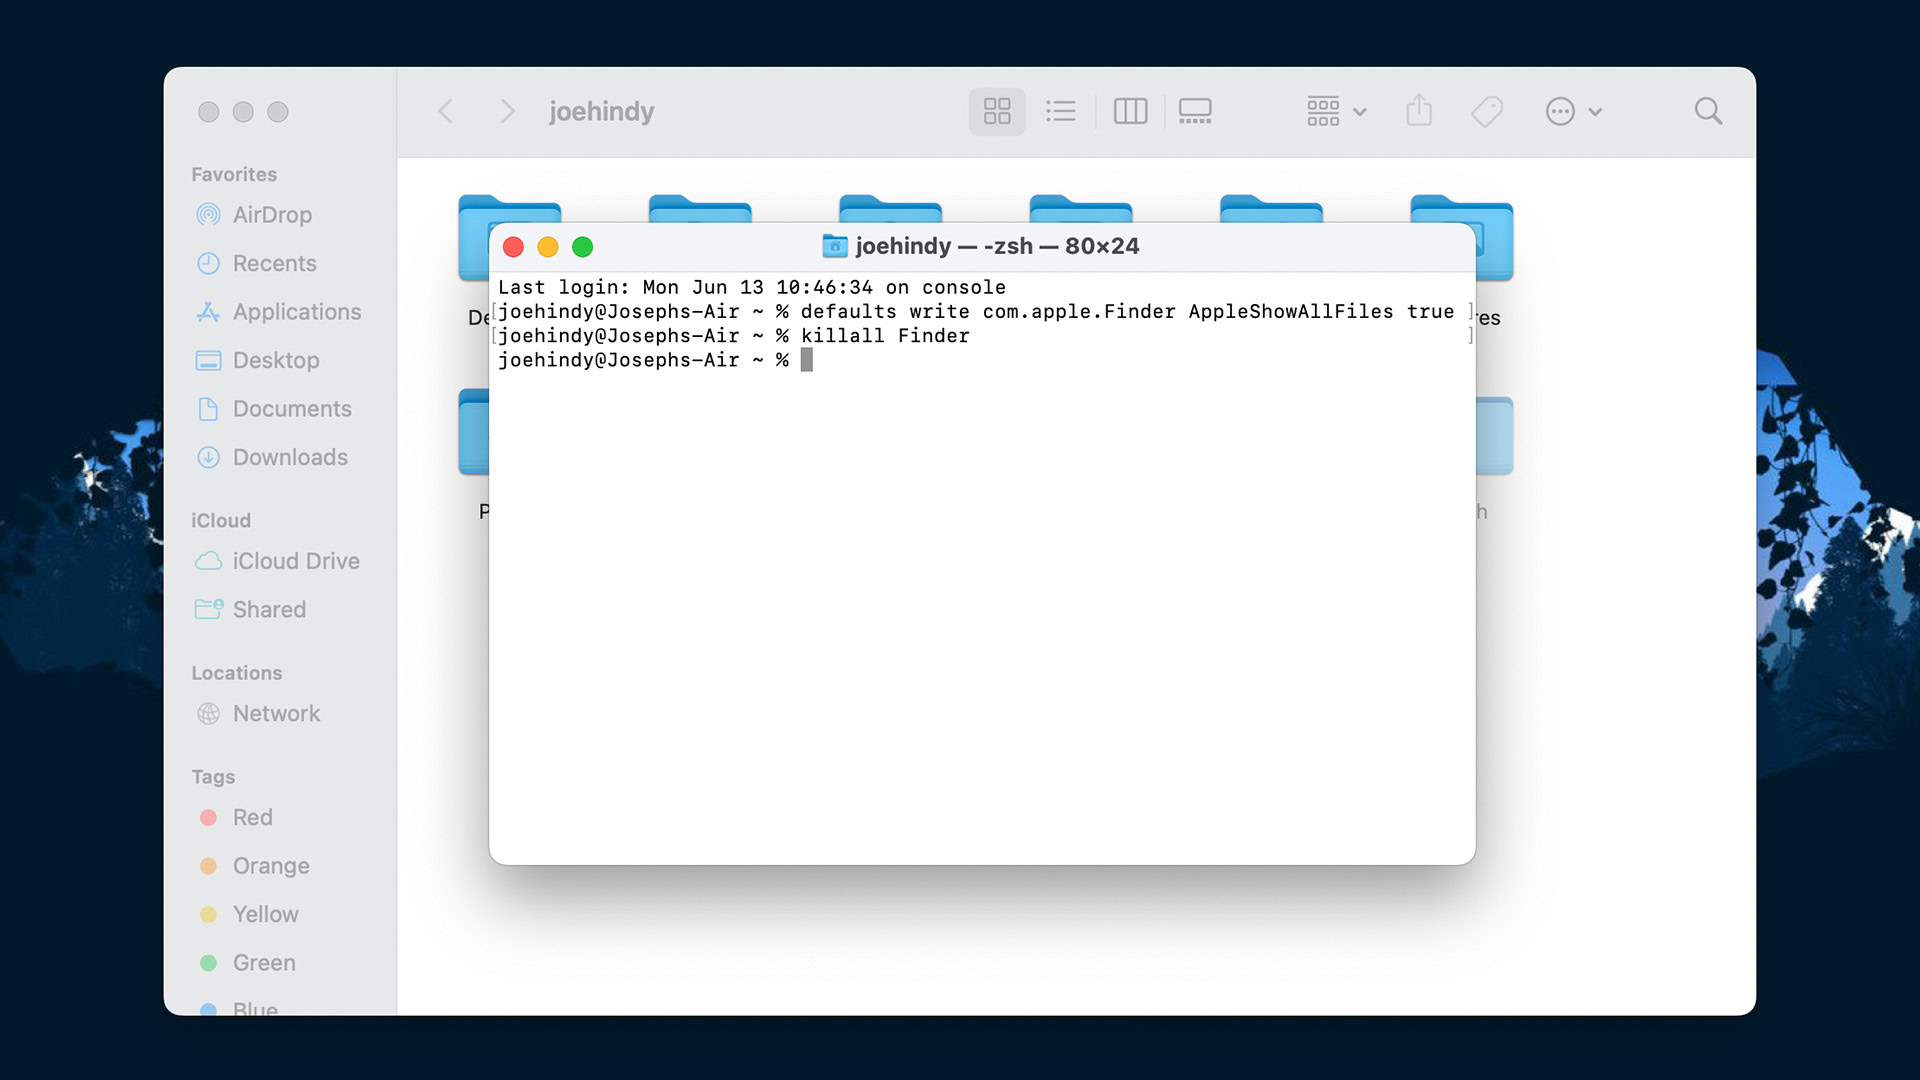
- Open Launchpad and type Terminal into the search box. Open up Terminal.
- Type defaults write com.apple.Finder AppleShowAllFiles true and hit enter.
- Type killall Finder and hit enter again. The second command closes and restarts Finder, so your changes take effect.
- From here, any hidden file should show in Finder, and you should also see any hidden files on your desktop.
- To reverse the process, repeat the above steps, but replace true with false in the first command.
How to permanently hide and unhide files on a Mac
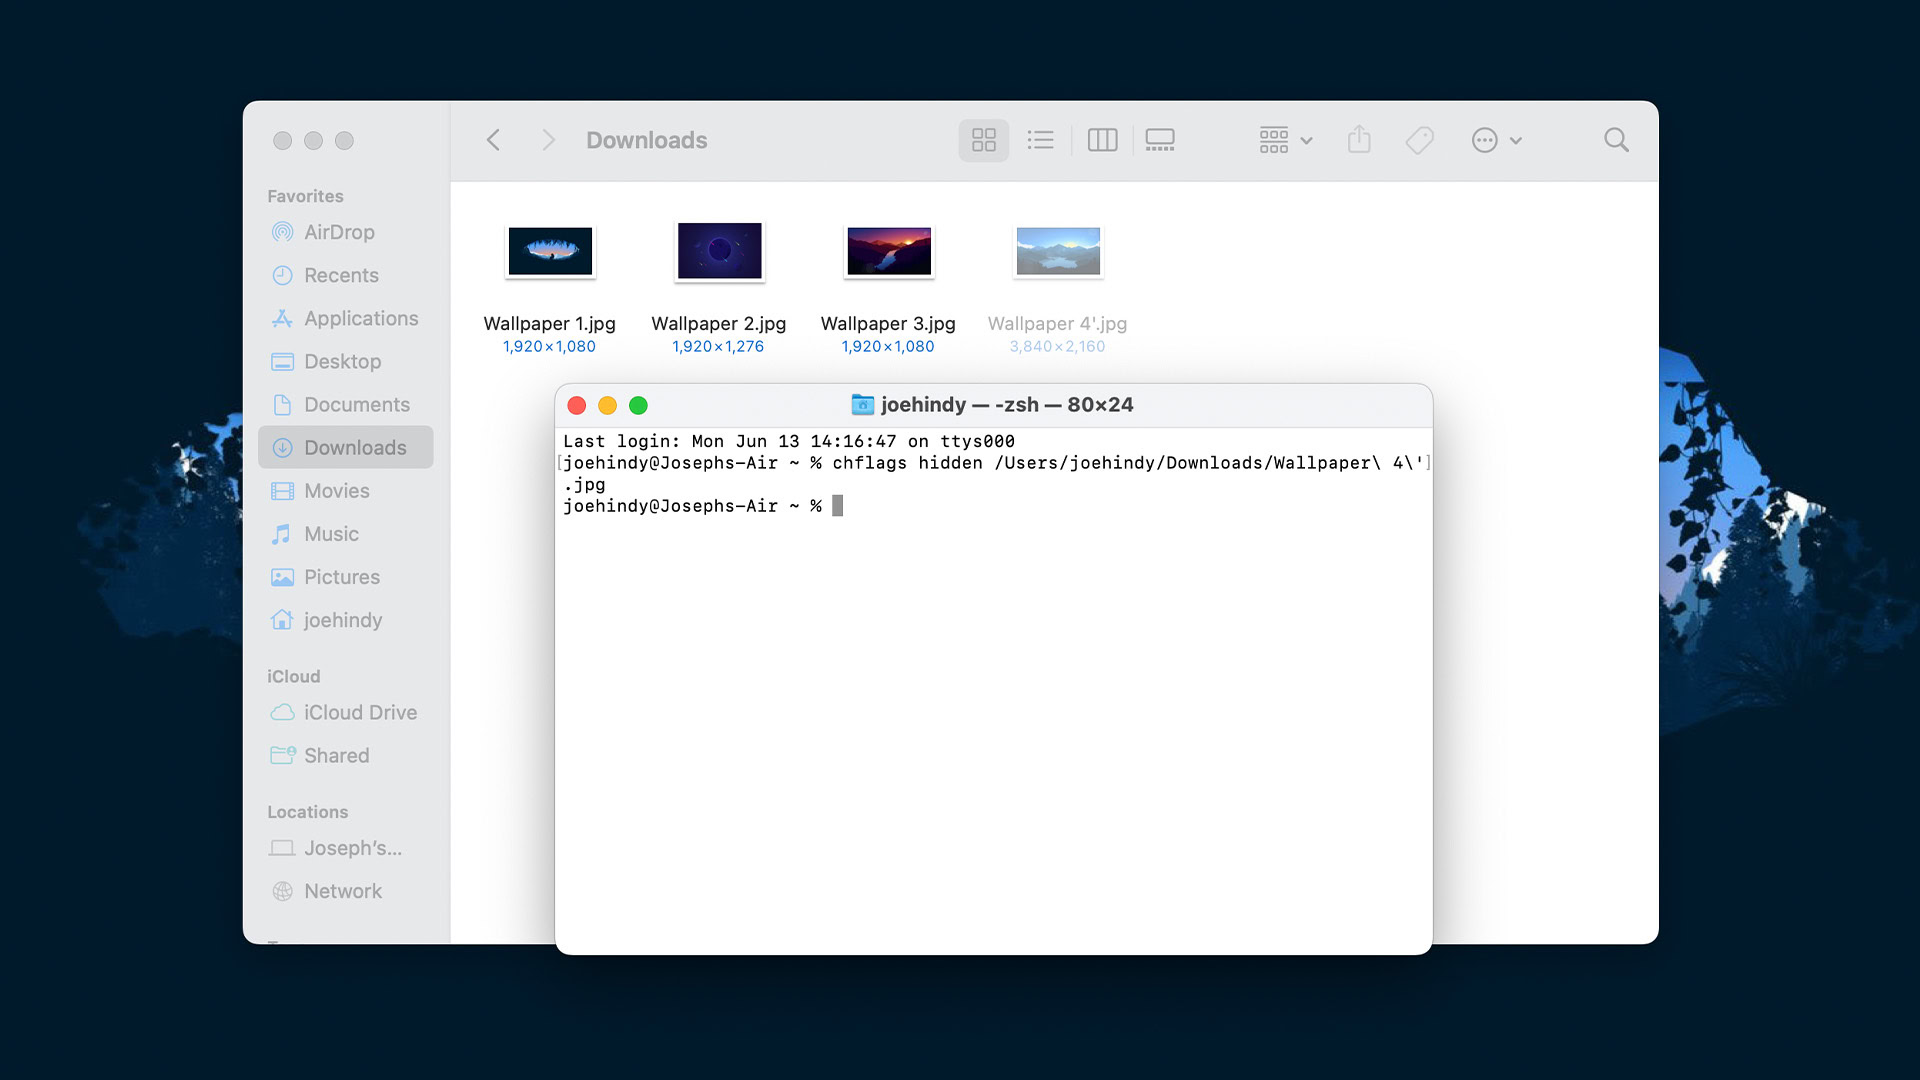
You can also hide your own files. Here’s how to do it.
- Open Launchpad and type Terminal into the search box. Open up Terminal.
- Type chflags hidden and hit the space bar once.
- Open Finder and find the file you want to hide. Click and drag that file into the Terminal. Doing this shows you the file path of the file, which is exactly what you want in there. It should look like the screenshot above.
- Return to Terminal and press enter to complete the command.
- Type killall Finder into Terminal to shut down and restart Finder.
- To reverse this (unhide files permanently): Type sudo chflags nohidden and add a space. Click and drag the file into Terminal like before to show its path and hit enter. This will permanently remove its hidden status.
From here, your file will behave like any other hidden file. This works wonders for hiding sensitive stuff as long as your hiding place isn’t somewhere people typically go.
Other methods to make hidden stuff visible
Some things don’t count as hidden files but are still invisible to many folks. You may be here to find a specific file or folder. We can help.
Finding the library folder
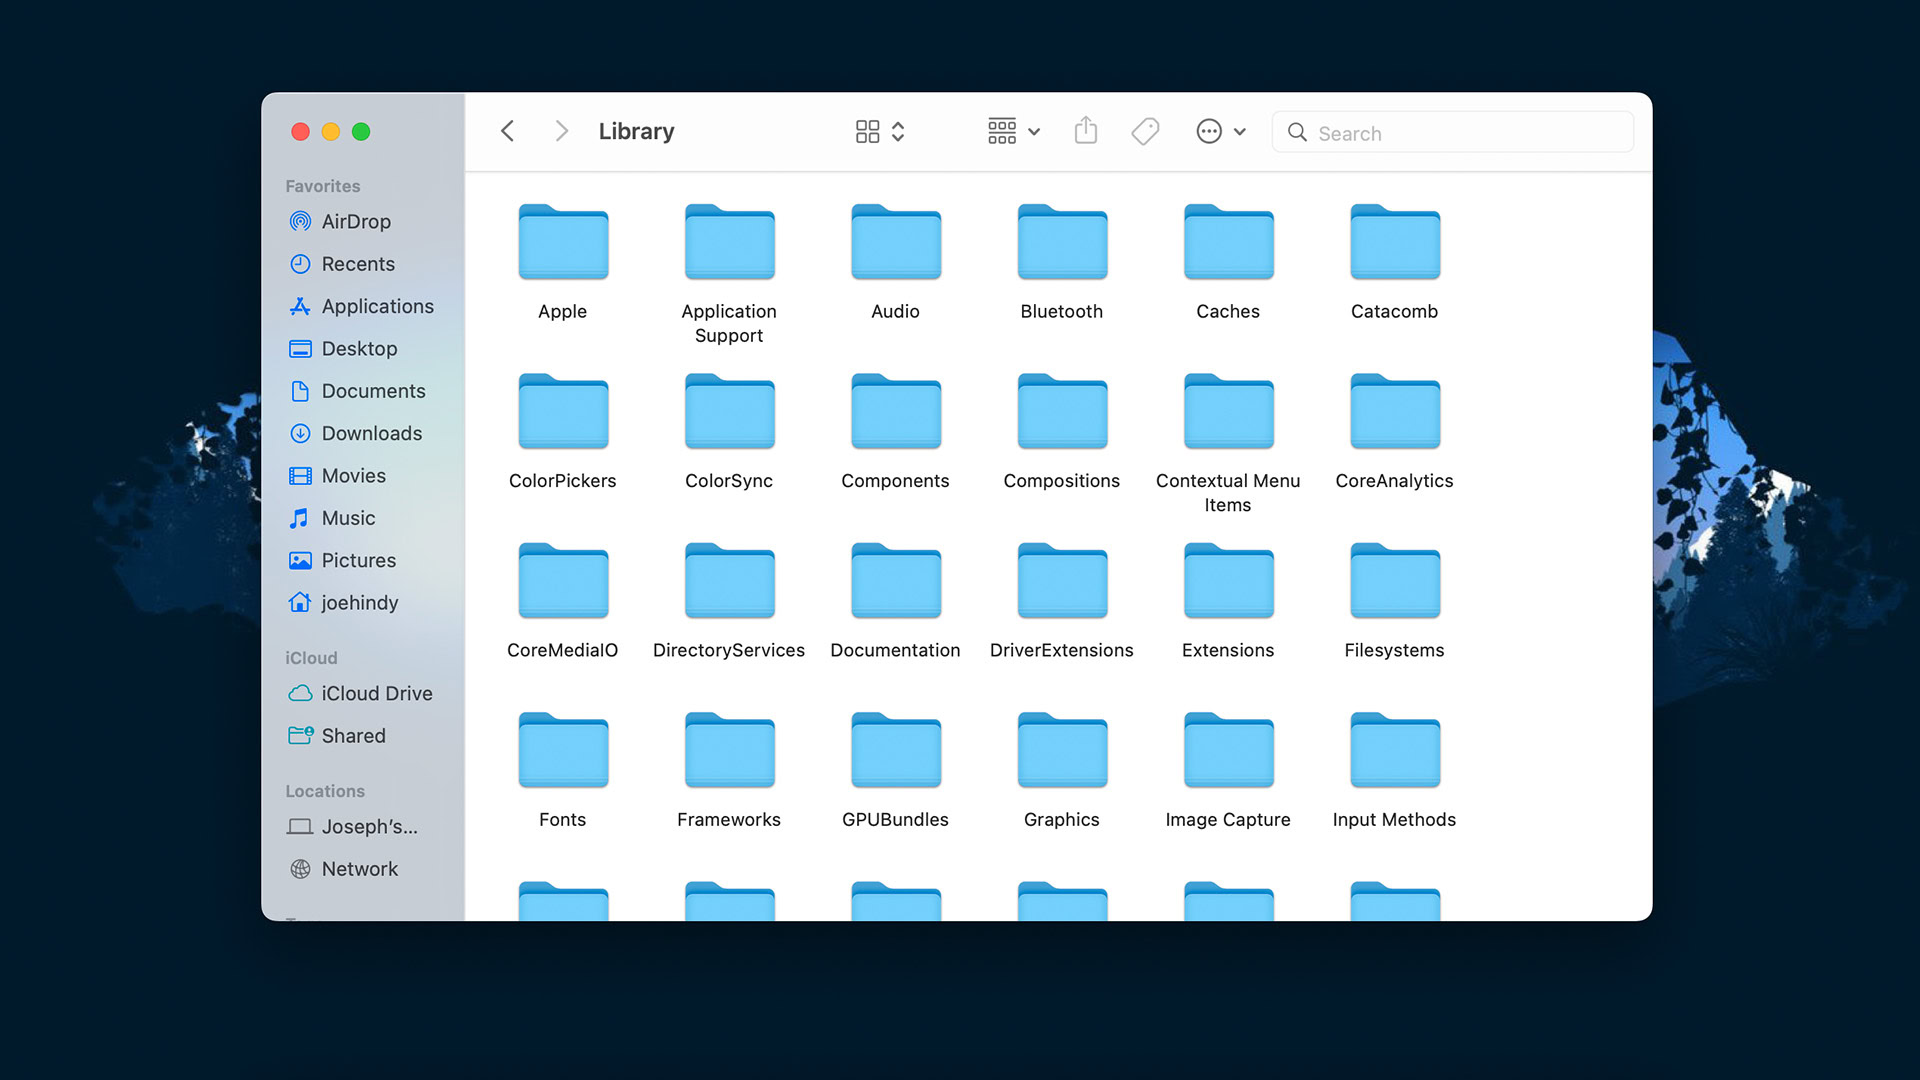
There are three different Library folders on Mac. We’ll show you how to find each one.
- First library folder — Open Finder. At the top of the screen, tap the Go option and then Library. This is the first library folder.
- Second library folder — Alternatively, you can open Finder and Macintosh HD, and the second Library is right there.
- Third library folder — Open Macintosh HD again, but this time, head to System. The third and final Library folder is there.
All three Library folders contain different information. You can check for yourself if you don’t believe us.
How to show more stuff in Finder
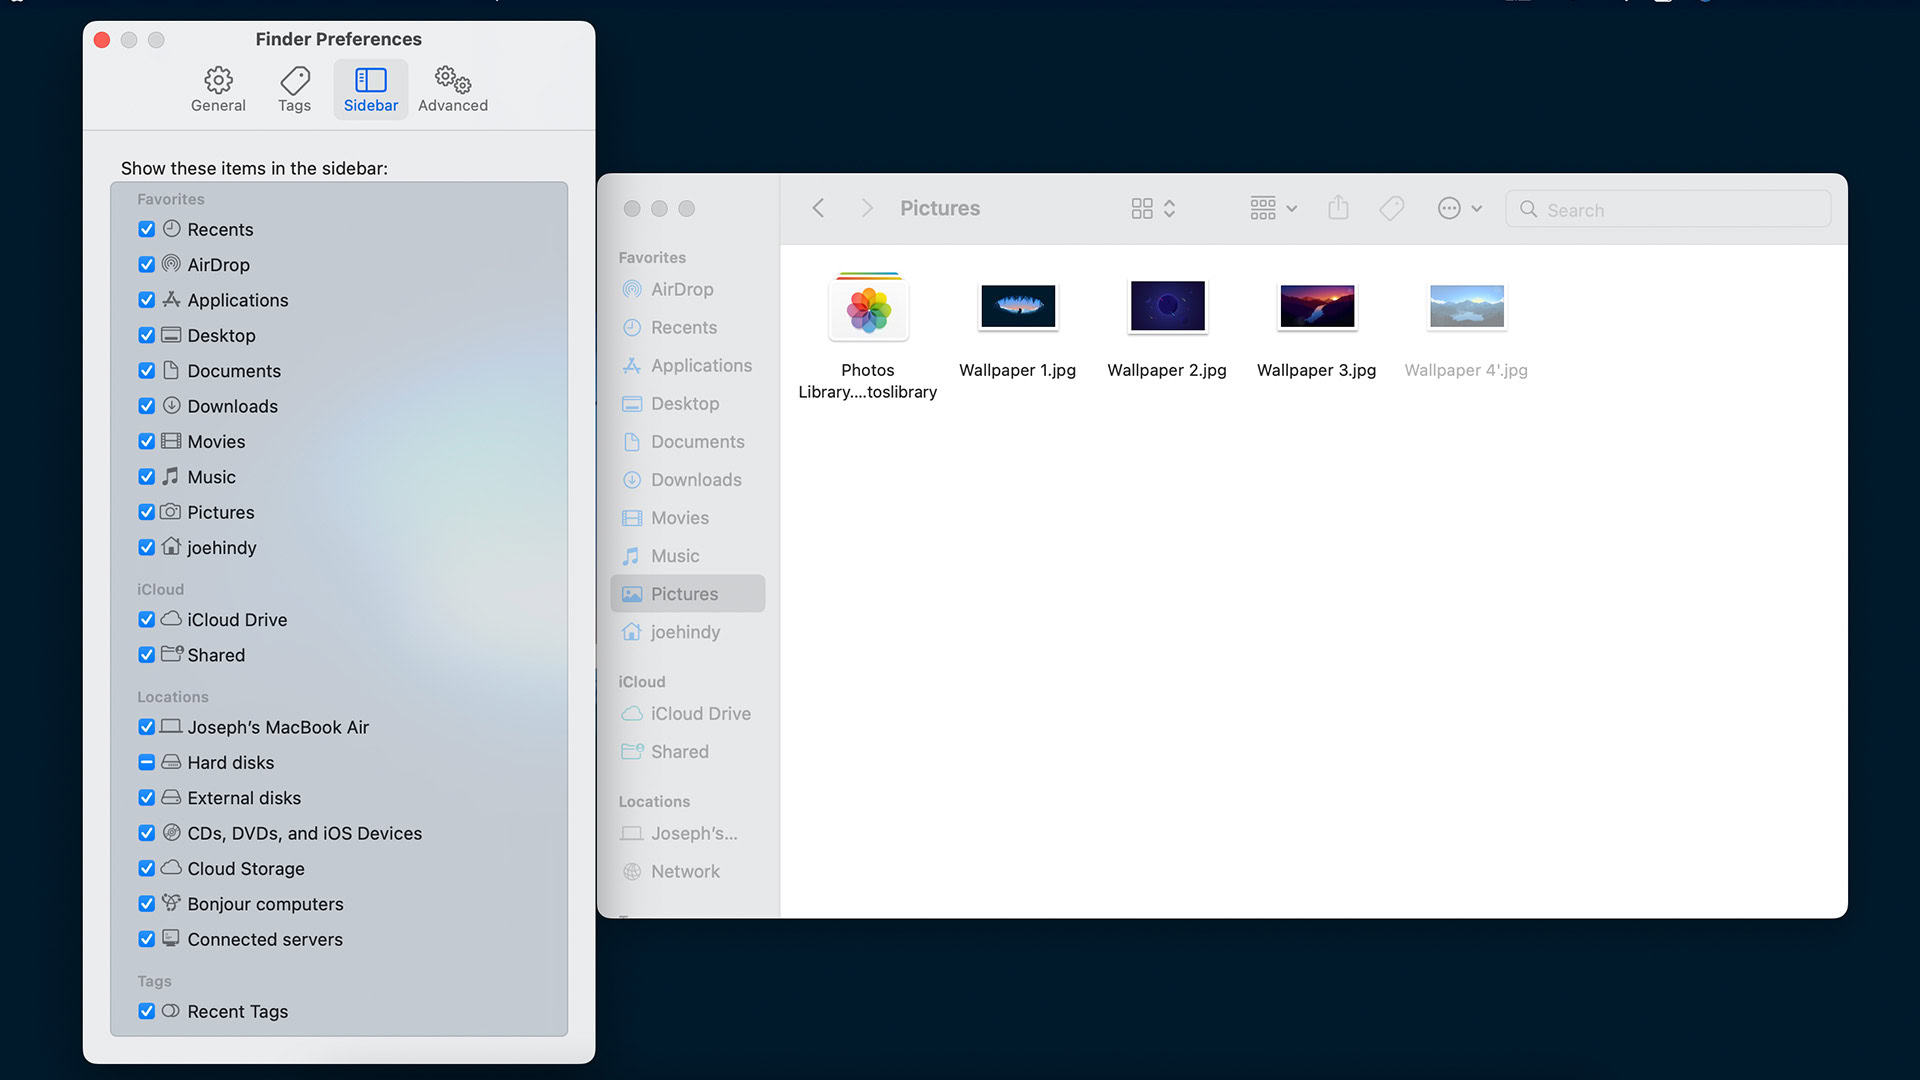
- Open Finder. At the top menu bar, tap Finder again and then select Preferences.
- At the top of the Finder Preferences window, tap the Sidebar option.
- A list appears with a bunch of file folders, data locations, iCloud stuff, and more.
- Tick the checkboxes for the things you want to see. Alternatively, you can also untick the boxes to hide things you don’t want to see.
- Once done, exit out of the window, and you’ll see all those folders on Finder’s sidebar from now on.
- None of the stuff you can show with this method is technically hidden, but some Macs come out of the box with some of it turned off, so you can’t see everything.
Up next: How to check for and remove malware from a Mac
FAQs
In general, we don’t recommend deleting hidden files unless you’re sure they aren’t tied to a critical system process. Apple rarely hides files that it doesn’t need for something. However, if you want to, use the above methods to show hidden files and delete them like any other file.
It should, yes. I put some files on a USB drive, hid them, and then unhid them with the above processes. There may be some instances where it doesn’t work, but you can always reformat the USB drive to wipe it out entirely.
Make them visible with the above steps and double click them like you would any other file. Being hidden doesn’t change how files work, simply whether or not you can see them.
Yes. You can permanently unhide a file or folder. Open a terminal, type sudo chflags nohidden, drag and drop the file into Terminal to add its file path, and hit enter. You’ll need to enter your password, but it’ll unhide the file or folder forever.