Affiliate links on Android Authority may earn us a commission. Learn more.
How to change the MAC address on almost any device
Your MAC (Media Access Control) address is vital information. It’s a hardware identifier that helps networks locate your computer (or other device) for various purposes — think of it like the number on your house or apartment. Note however that while you can change a MAC address, the process isn’t very intuitive, and normally the only thing that can see your MAC address is your home Wi-Fi router — so altering it isn’t really necessary unless you frequently connect to public networks. In any event, we’ll show you how to change your MAC address on most modern devices so your connection can stay private.
QUICK ANSWER
To change the MAC address on a device, you can sometimes find the option in network settings, but you may have to resort to command-line instructions or third-party tools. If you can't alter the address in network settings, you should at least be able to view it. Changing is usually unnecessary, however, especially on modern smartphones.
JUMP TO KEY SECTIONS
How to change the MAC address on Windows
Windows offers a few native methods of changing a MAC address. Some third-party apps can handle the task as well, and we recommend checking out Technitium. While its UI is a bit weird, you’ll get used to it pretty quickly, and the app is completely free.
How to change MAC address on Windows 11
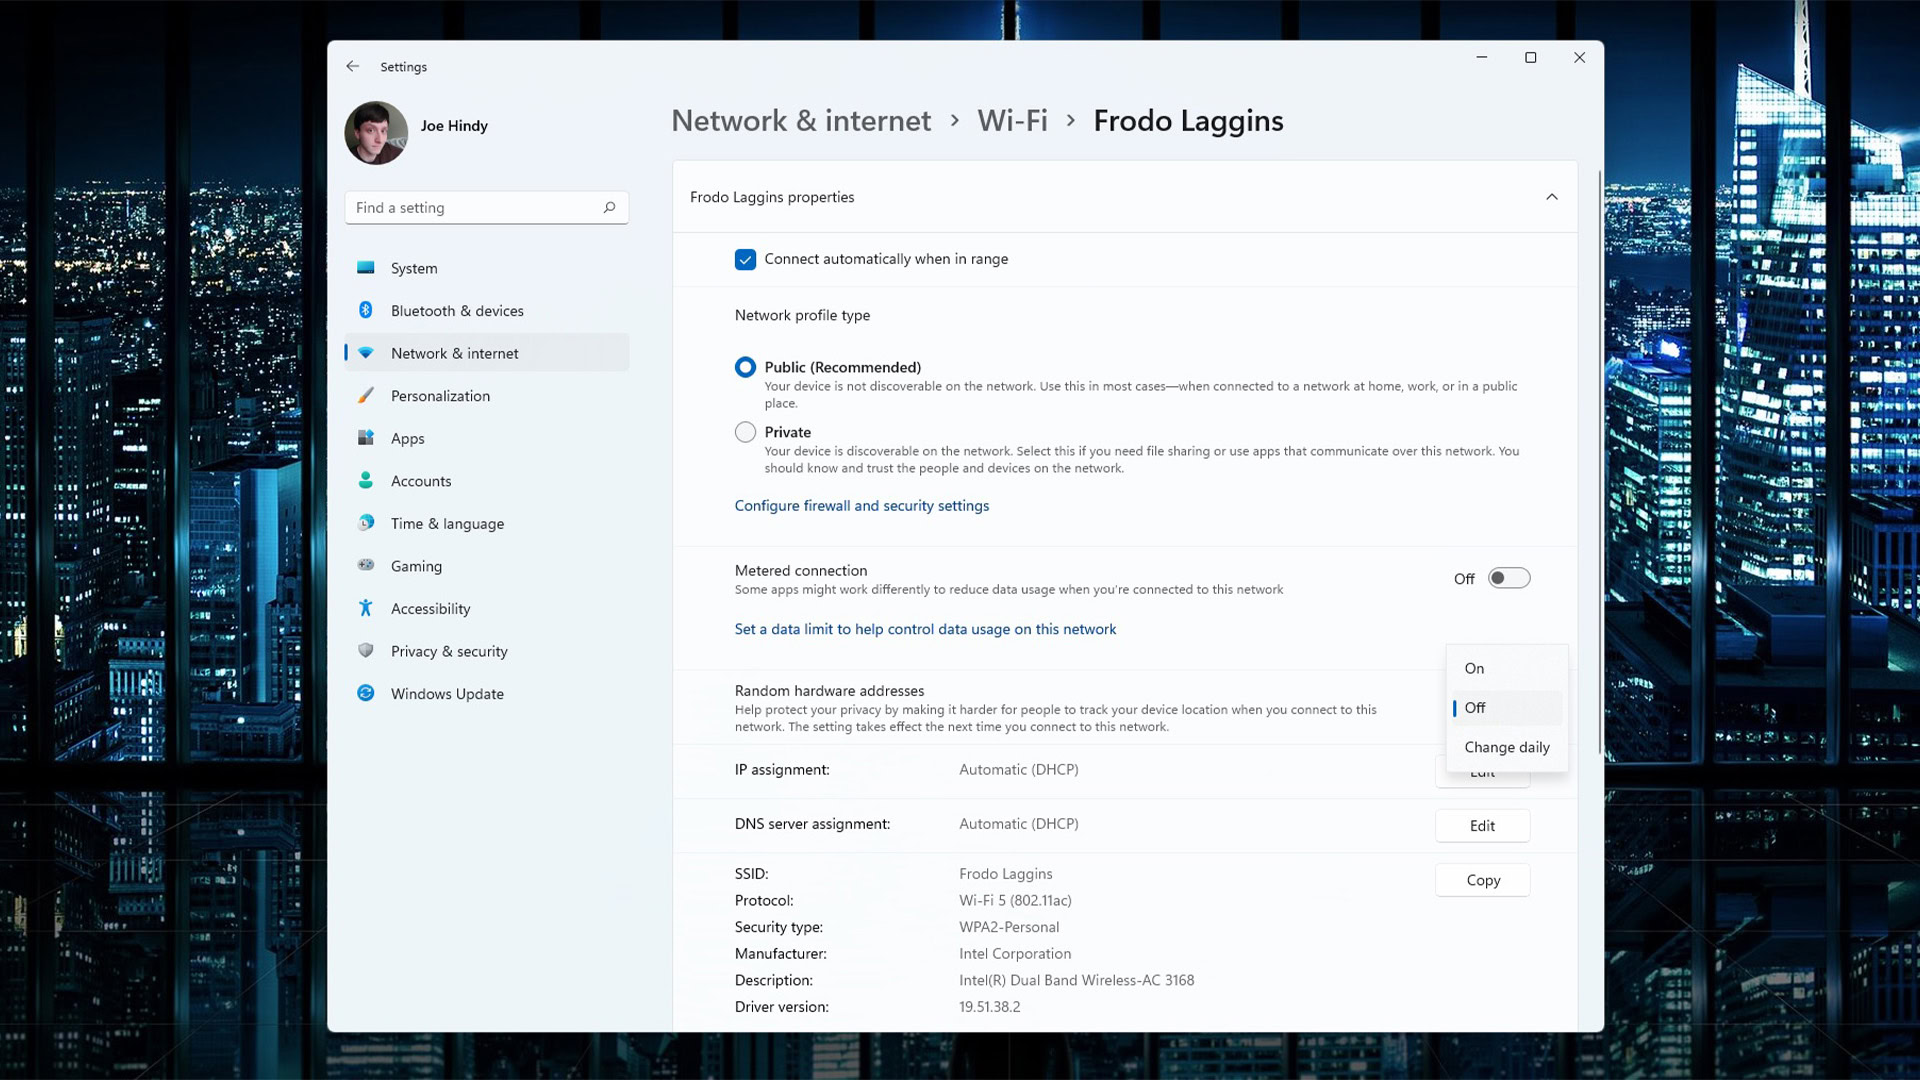
- Hit the Windows key on your keyboard and type Settings into search. Open the Settings app when it pops up.
- Head to the Network and Internet section.
- Click Ethernet if you’re hardwired into your router, or Wi-Fi if you’re connected wirelessly.
- Select your Wi-Fi SSID or Ethernet adapter, as appropriate.
- Look for the Random hardware addresses selection. It’s off by default, but you can set it to On or Change Daily.
- Setting it to On will randomize your MAC address to any device that can see it.
- Setting it to Change Daily will randomize your MAC address every 24 hours.
That’s the process for Windows 11. You can’t change a MAC address manually with this method, but it still obfuscates the address for whatever network you’re on.
How to change MAC address on older versions of Windows
- Hit the Windows key and type Control Panel into search. Open the Control Panel app once it appears.
- Use the search bar in the top right corner to search for Network Connections. Click the View network connections link.
- On the next screen, find the network adapter you’re currently using. If it has a red X under the icon, that’s not the one you’re using. Double-click on your active network adapter.
- Click the Properties button toward the bottom of the window. On the next screen, find and click the Configure button. Finally, on the next screen, click the Advanced tab.
- Under Property, click on the Network Address item.
- Enter your new MAC address. Windows will add punctuation for you, so if you want it to be A1:B2:C3:D4:E5:F6, you’ll type it as A1B2C3D4E5F6. Remember, MAC addresses have to be 12 characters long. Hit OK when you’re done.
- Reboot your computer.
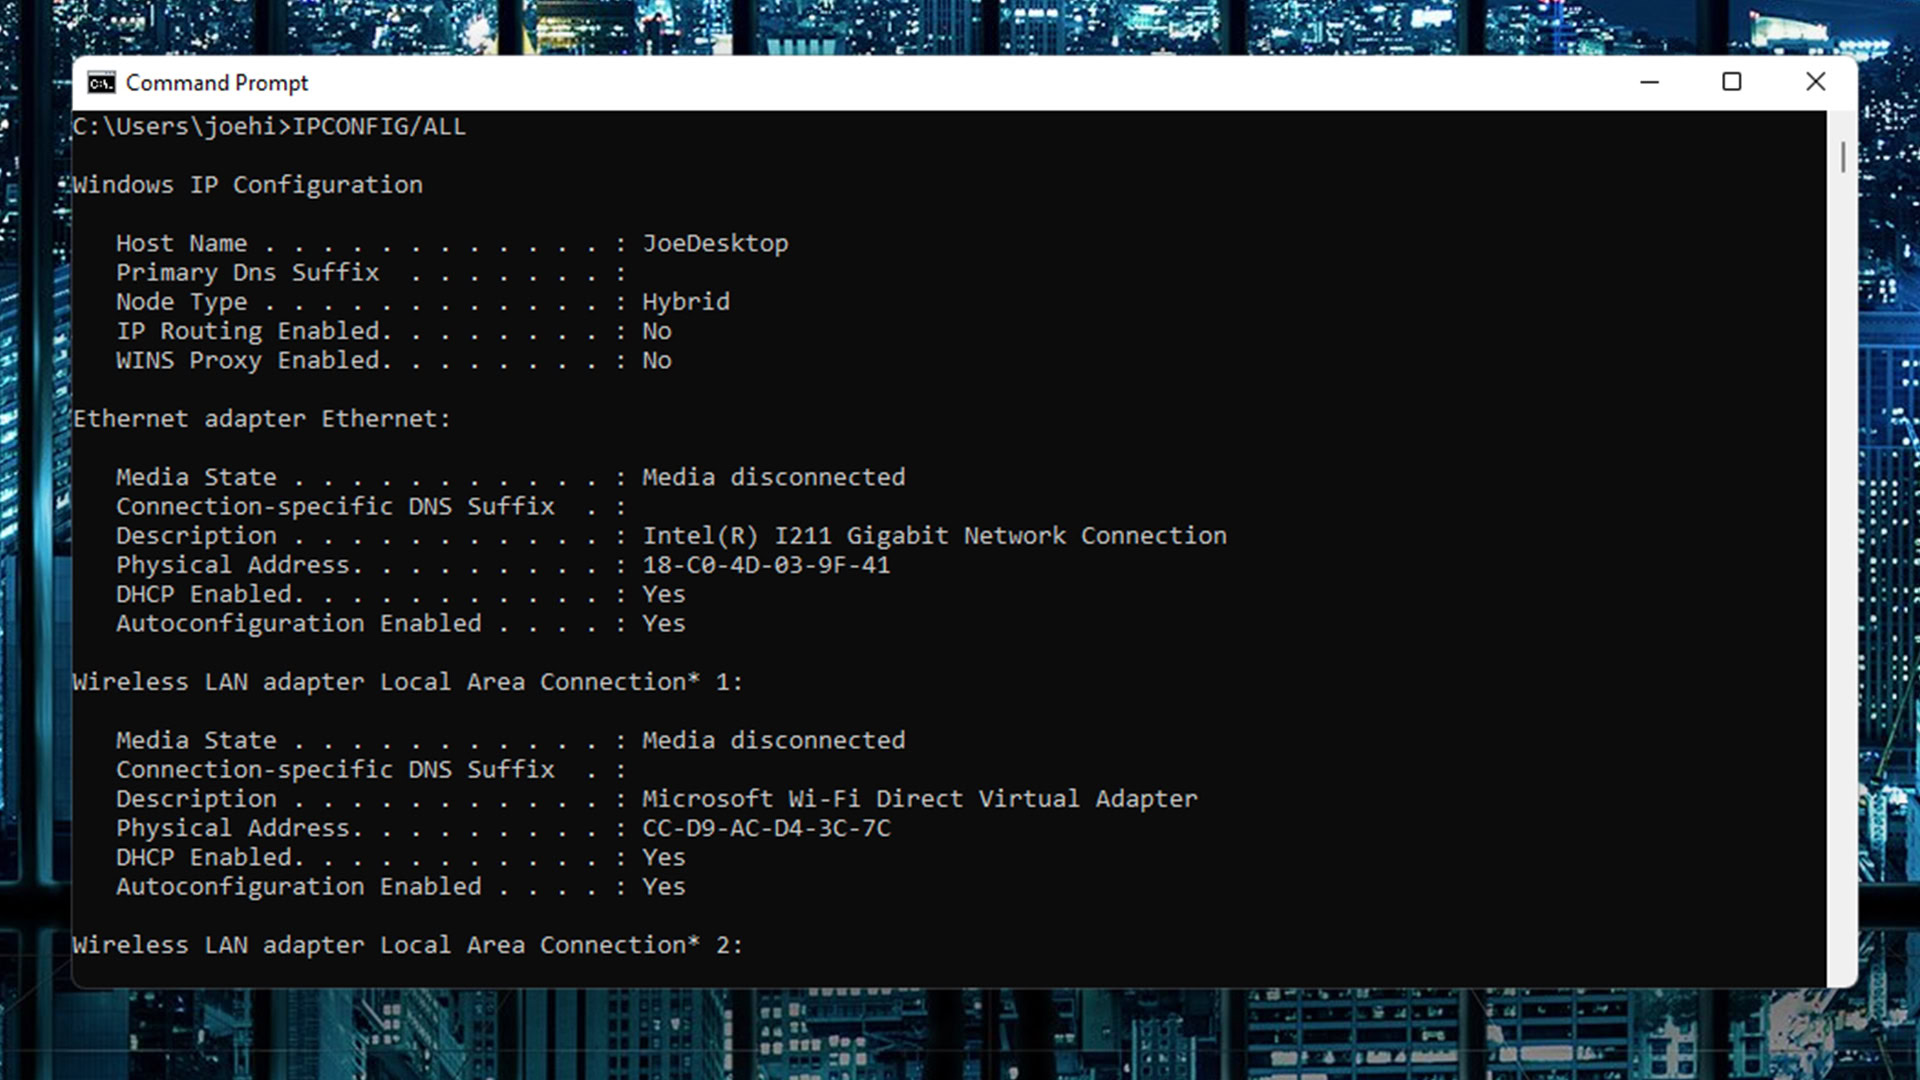
- Check and make sure it worked okay. Hit the Windows key and search for CMD. Open Command Prompt when it shows up in search.
- At the input, type IPCONFIG/ALL and hit Enter. Look for your network adapter and then find the Physical Address. It should be the same as the one defined in previous steps.
How to change MAC address in Windows with the registry editor
- Hit the Windows key, search for CMD, and open Command Prompt.
- Type IPCONFIG/ALL and hit Enter.
- Write down the MAC address of the adapter you want to change. You’ll need this information later. We recommend writing it down in a Notepad file, or just leaving the Command Prompt window open for the rest of this tutorial.
- Next, hit the Windows key again, search for Regedit, and open the Registry Editor app when it pops up. It’ll ask for admin permission. Grant it to continue.
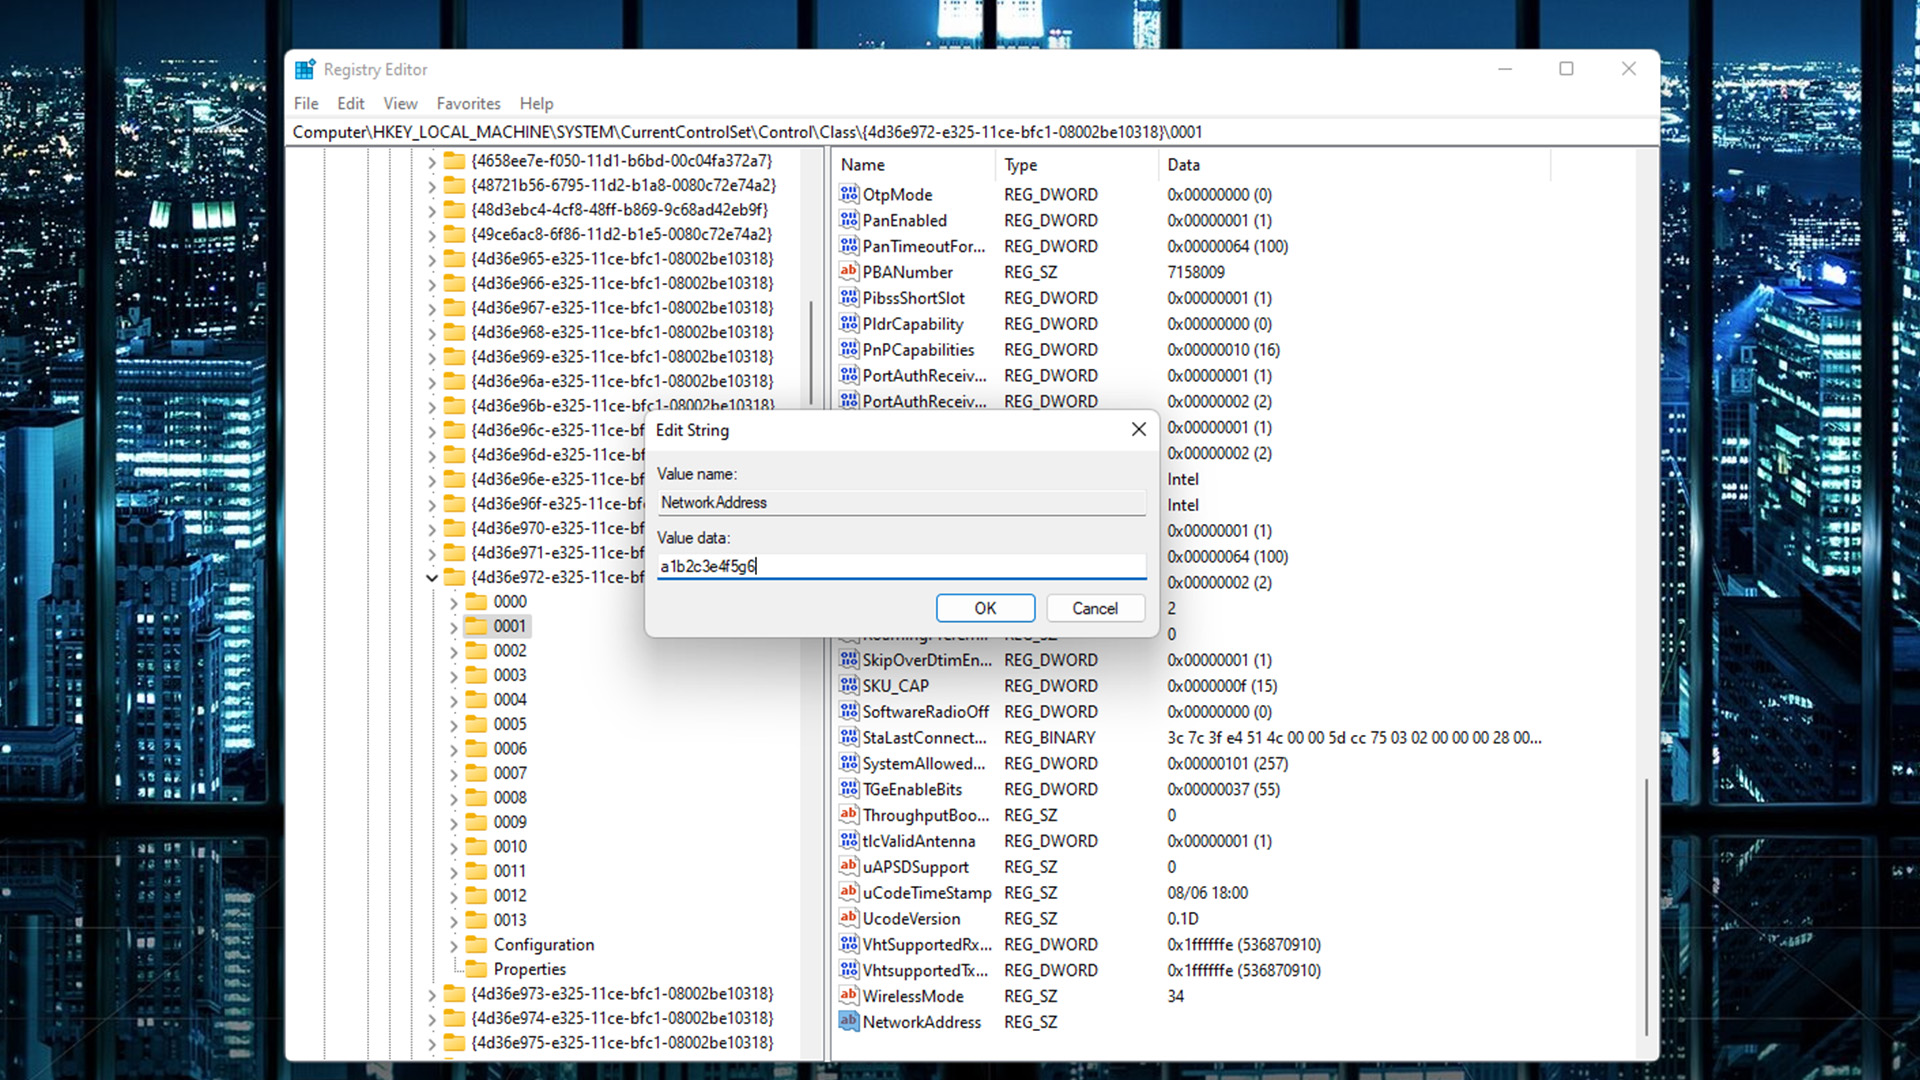
- Open HKEY_LOCAL_MACHINE, then SYSTEM, CurrentControlSet, Control, Class. Once done you’ll have a massive list of seemingly random values.
- You’re going to want to find {4d36e972-e325-11ce-bfc1-08002be10318}. It’s there, just take your time.
- Once found, you should see a group of numbered folders starting at 0000. Each individual folder is one of your network interfaces. Click on each one and check out the DriverDesc to find the network adapter you want to change.
- Right-click on the numbered folder and select New, then String Value. Your new string value will show up in the window. Rename to NetworkAddress.
- Double-click the new string value (or right-click and click Modify). In the empty box, input your new MAC address. Again, Windows will add the punctuation for you, so if you want it to be A1:B2:C3:D4:E5:F6, you’ll type it as A1B2C3D4E5F6. Remember that MAC addresses have to be 12 characters long. Hit OK when you’re done.
- Reboot your computer. Once rebooted, return to the Command Prompt and run another IPCONFIG/ALL. Your chosen network adapter should have a new MAC address.
- Note — You can return to the registry and delete the NetworkAddress string you created to revert changes. The system will warn you about deleting registry entries. Since you made this one however, you can delete it without causing unexpected issues. Just make sure it’s the one you made.
How to change the MAC address on Android
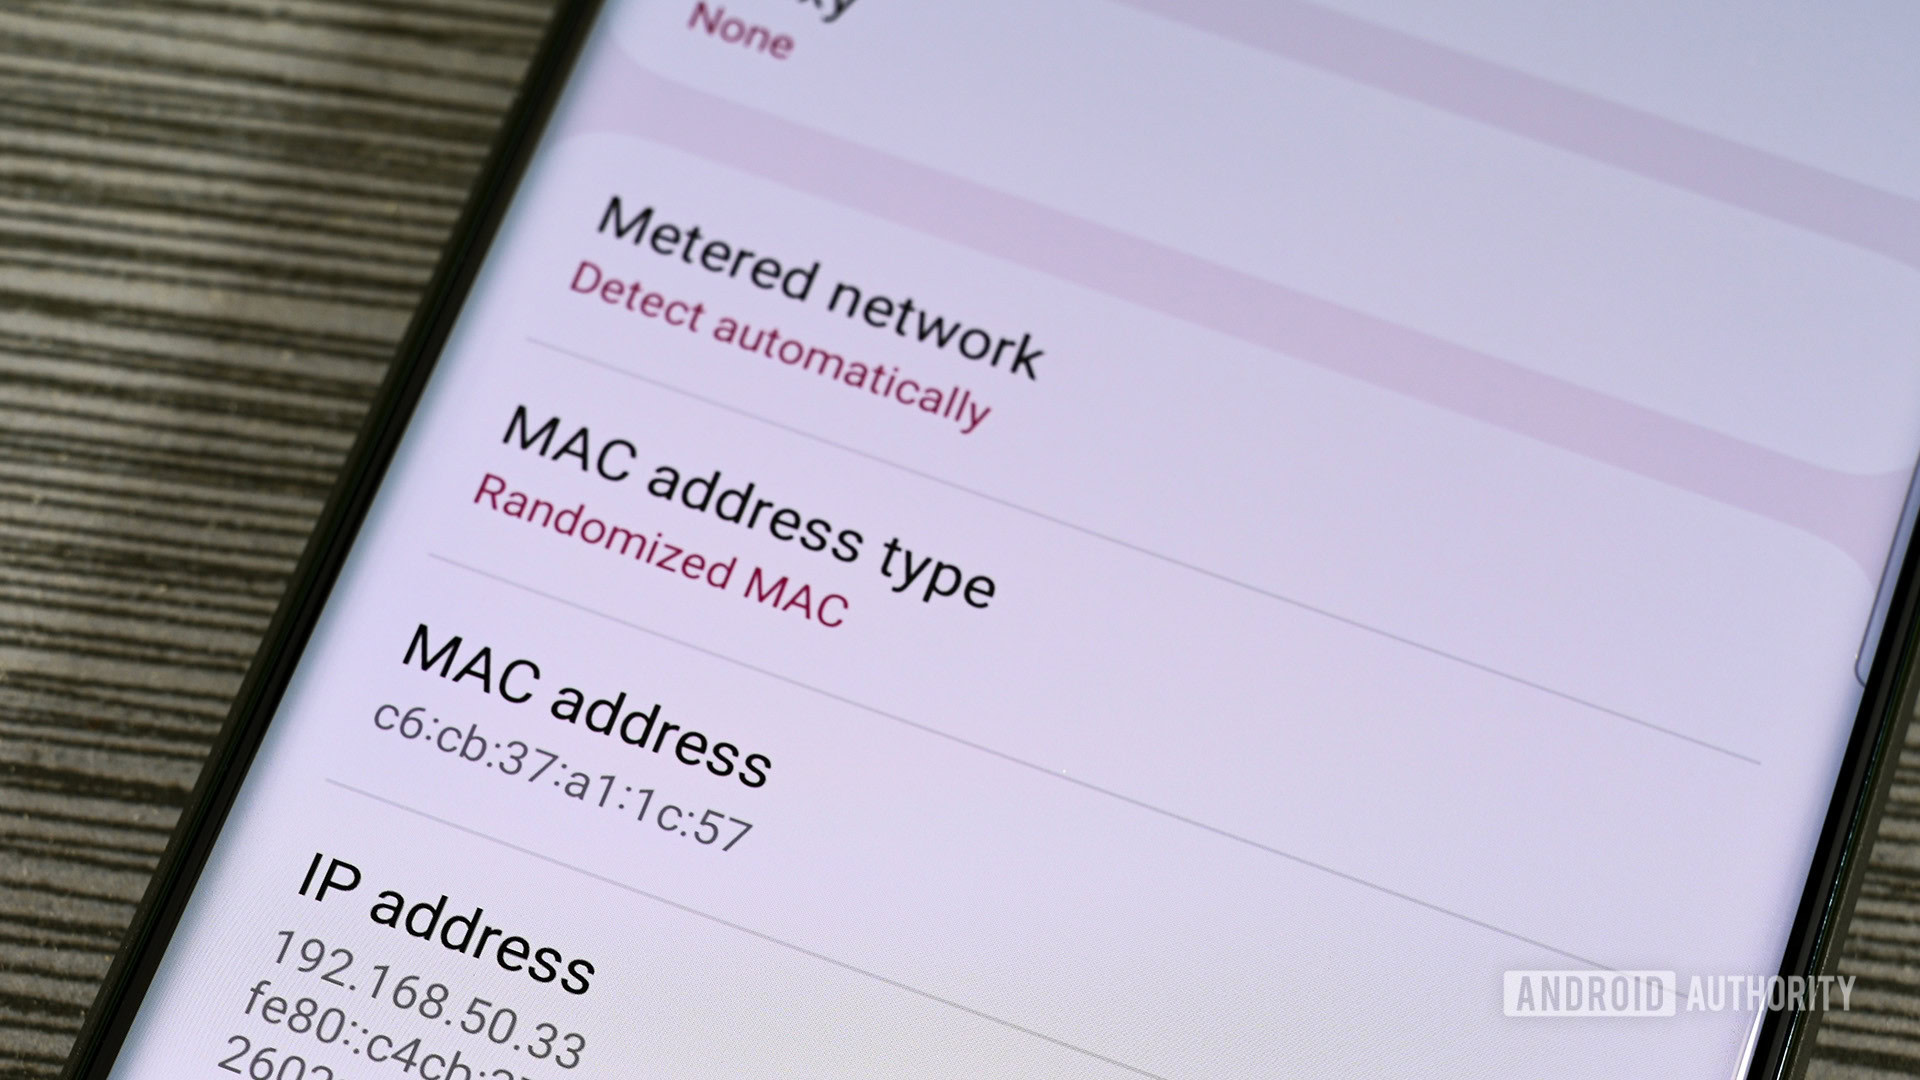
Android is a bit more finicky than other platforms because Google won’t let you mess around much if you don’t have root access. Luckily, modern Android devices randomize MAC addresses on their own, something that began with Android 10. Since that tends to complete the mission of making your device harder to identify on public networks, you probably shouldn’t bother modifying settings.
If you’re still running Android 9.x or earlier for whatever reason, your MAC address isn’t randomized. The good news is that you can fix that. The bad news is that you’ll need root to do it, and we’re not responsible for any damages you encounter in the process.
- The first step is to root your phone. Each phone has a different method, so run a Google search for your phone model and follow instructions carefully.
- Install a version of BusyBox. We recommend BusyBox for Android (Google Play) or straight-up BusyBox (Google Play).
- After that, you’ll need Change My MAC (Google Play). Once it’s installed, open that app and give it superuser permissions.
- From there, follow in-app instructions. You’ll be able to assign your own custom MAC address or randomize it.
- To revert, all you have to do is turn your Wi-Fi off and back on again. It’ll return to its default MAC address or a different random one if you’re on Android 10 or higher.
We wish there were an easier method for people on older versions of Android. If we spot one that actually works in our tests, we’ll update our article and put it here.
How to change the MAC address on macOS
There are a few different ways to change your MAC address on macOS that vary in difficulty.
Change macOS MAC address with Terminal
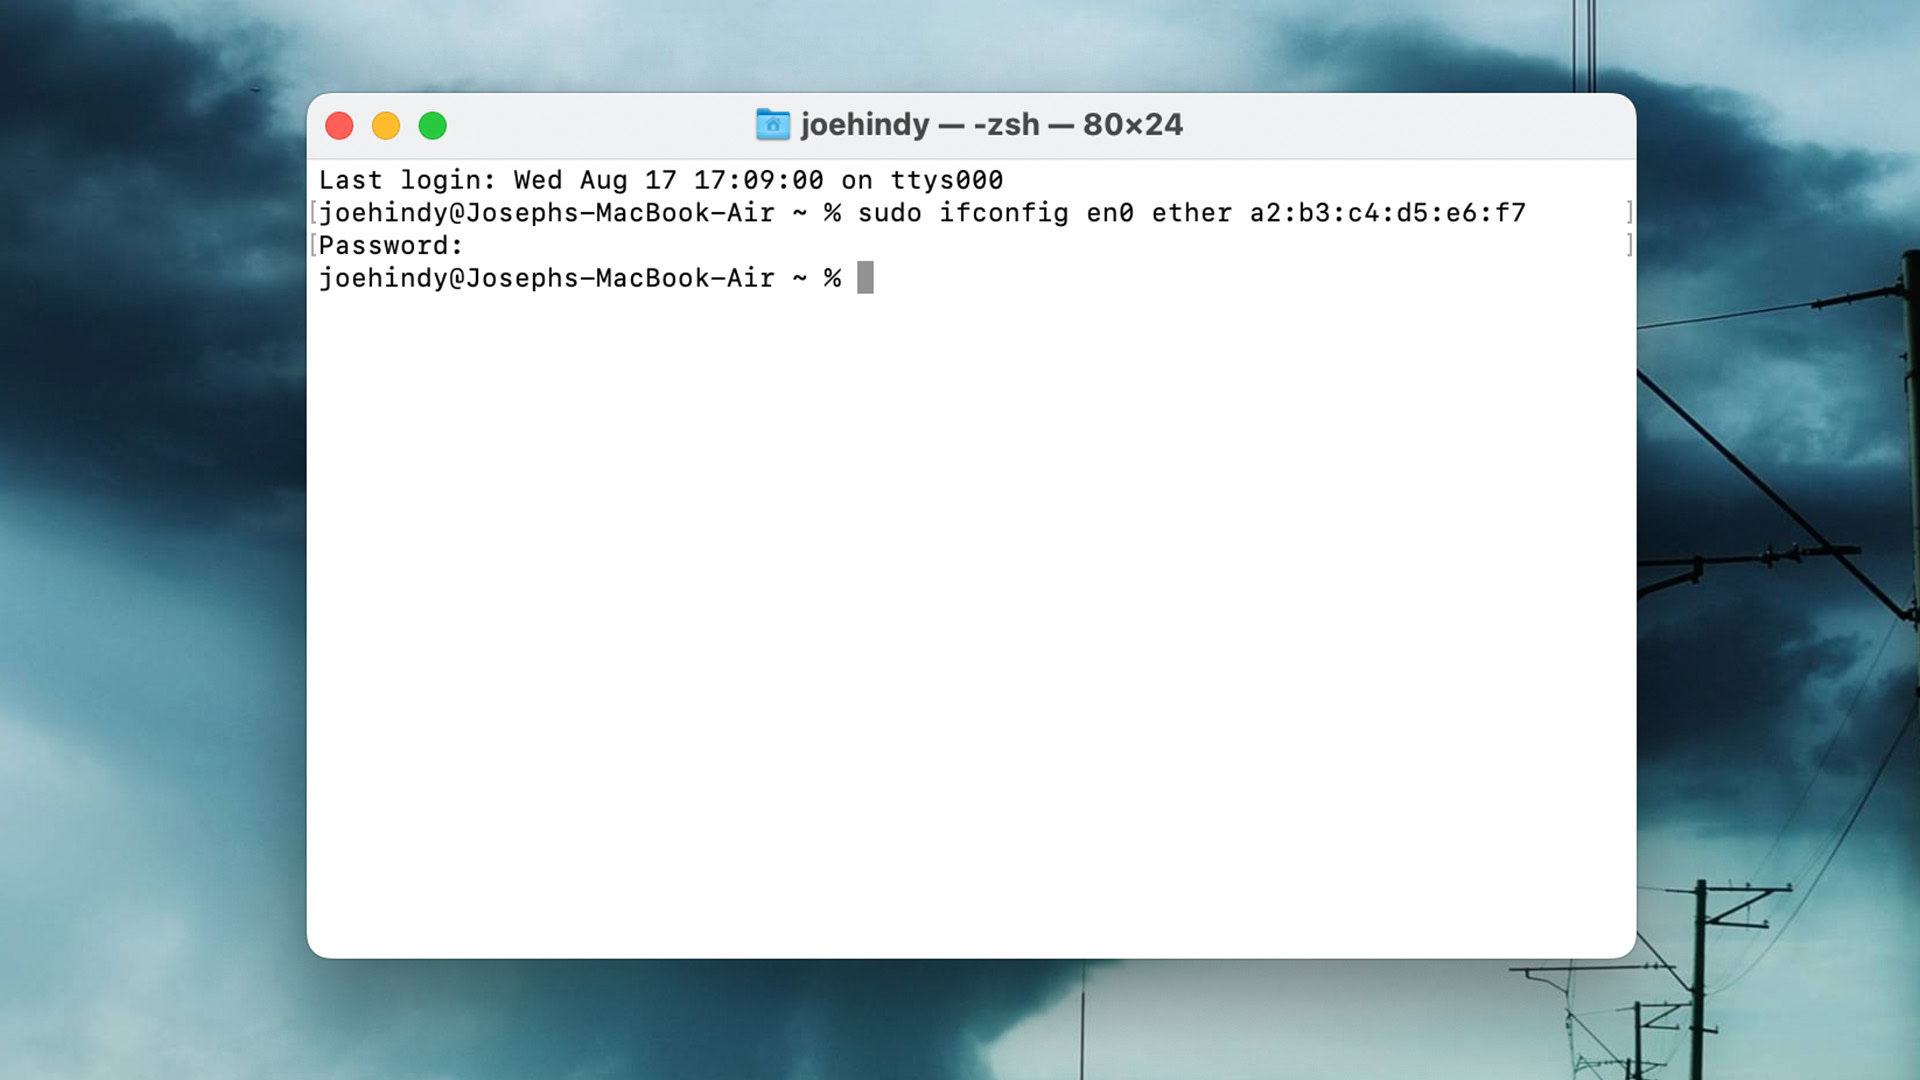
- First, click the Apple logo in the top left corner, then System Settings. Find and click on Network. Select Wi-Fi or Ethernet as appropriate.
- If you selected Wi-Fi, pick an adapter and click the Advanced button. If you selected Ethernet, pick your adapter and click Hardware.
- Look for your current MAC address. You can either leave this window open for the rest of the tutorial or write down the MAC address somewhere.
- Next, click the Apple logo in the top left and, while holding down Options (Alt), click System Information. When the window opens, click Network in the left margin.
- On the next page, you’ll find your Wi-Fi adapter. Look under the BSD Device Name to find your network adapter’s name.
- Next, disconnect your Mac from your network, but don’t turn off the adapter itself. For example, if you’re on Wi-Fi, disconnect from your Wi-Fi router, but don’t turn your Wi-Fi off entirely.
- Open Launchpad and search for Terminal. Open it when you find it.
- Next, type sudo ifconfig [network adapter name] ether xx:xx:xx:xx:xx:xx and hit enter. In this command, replace [network adapter name] with the adapter name we found in the steps above and replace xx:xx:xx:xx:xx:xx with the MAC address you want. Check the screenshot above to see what I used.
- Pro tip — some sources say you may need to run this command a couple of times to get it to stick. If you hit up on the arrow keys, it’ll repopulate the command, and you can just hit Enter again. Do this five or six times. It won’t hurt anything.
- Repeat the first three steps to check and see if your MAC address has changed.
Change macOS MAC address with Homebrew
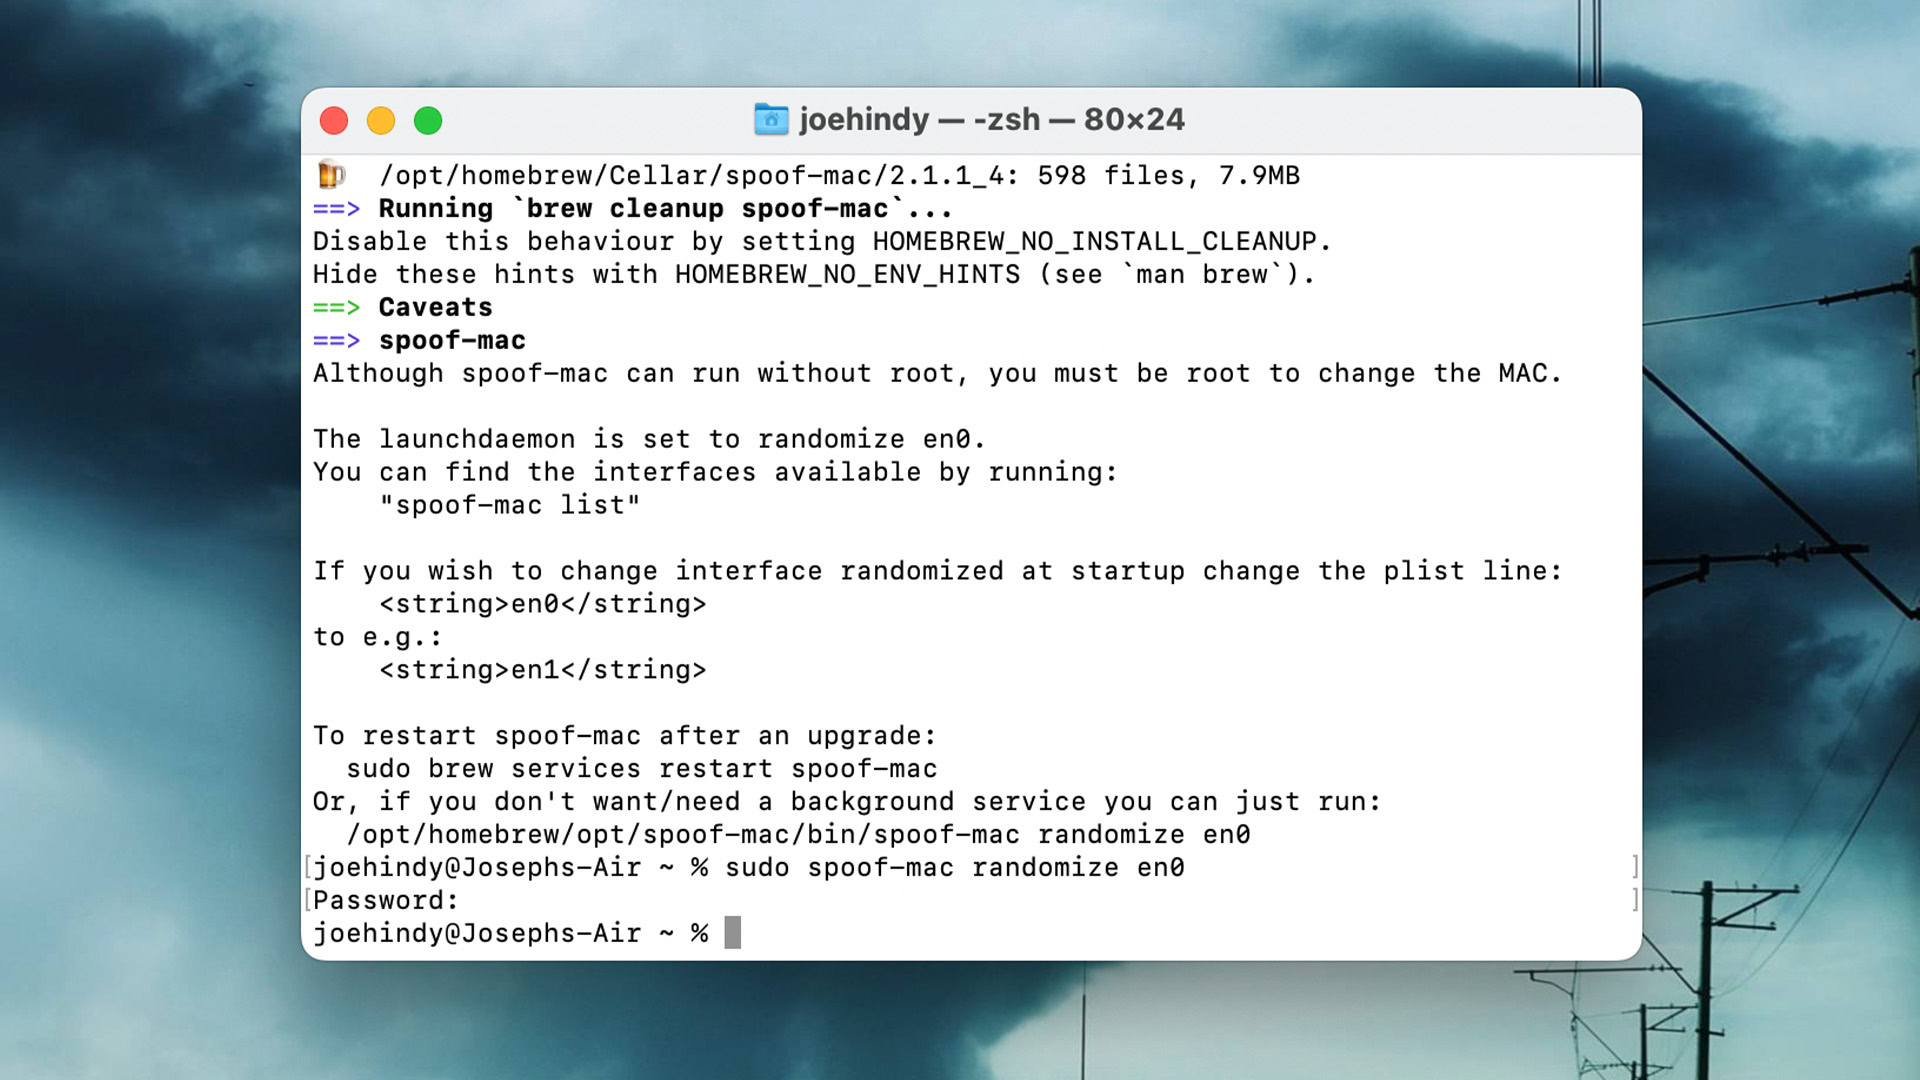
Homebrew is a package manager for macOS, and it includes a lot of really neat tools. One of those tools can spoof your MAC address with just one line in the Terminal, and we think it’s a much easier method than the one posted above.
Before you do this one, make sure you have Homebrew installed. Head to the official website for installation instructions and check here if you have any problems getting brew to be recognized as a real command in Terminal. Don’t worry, it’s really easy.
- Open Launchpad and type Terminal into search. Open Terminal once you find it.
- Type brew install spoof-mac and hit enter. This will install a tool that will spoof your MAC address.
- After the install is complete, type sudo spoof-mac randomize [network adapter name] and hit enter. Replace [network adapter name] with your actual adapter. Check the tutorial above for steps to find your network adapter name(s).
- That’s it, your Mac now has a randomized MAC address that will keep people on public networks guessing. You may need to turn your Wi-Fi off and back on in order to see the change.
- While still in Terminal, type ifconfig and hit enter. Find and check your network adapter to make sure the MAC address is, in fact, different.
Not only is this the easiest solution, but you’ll also have Homebrew. Homebrew has a lot of power user tools that can make life easier.
Third-party apps that change your Mac’s MAC address
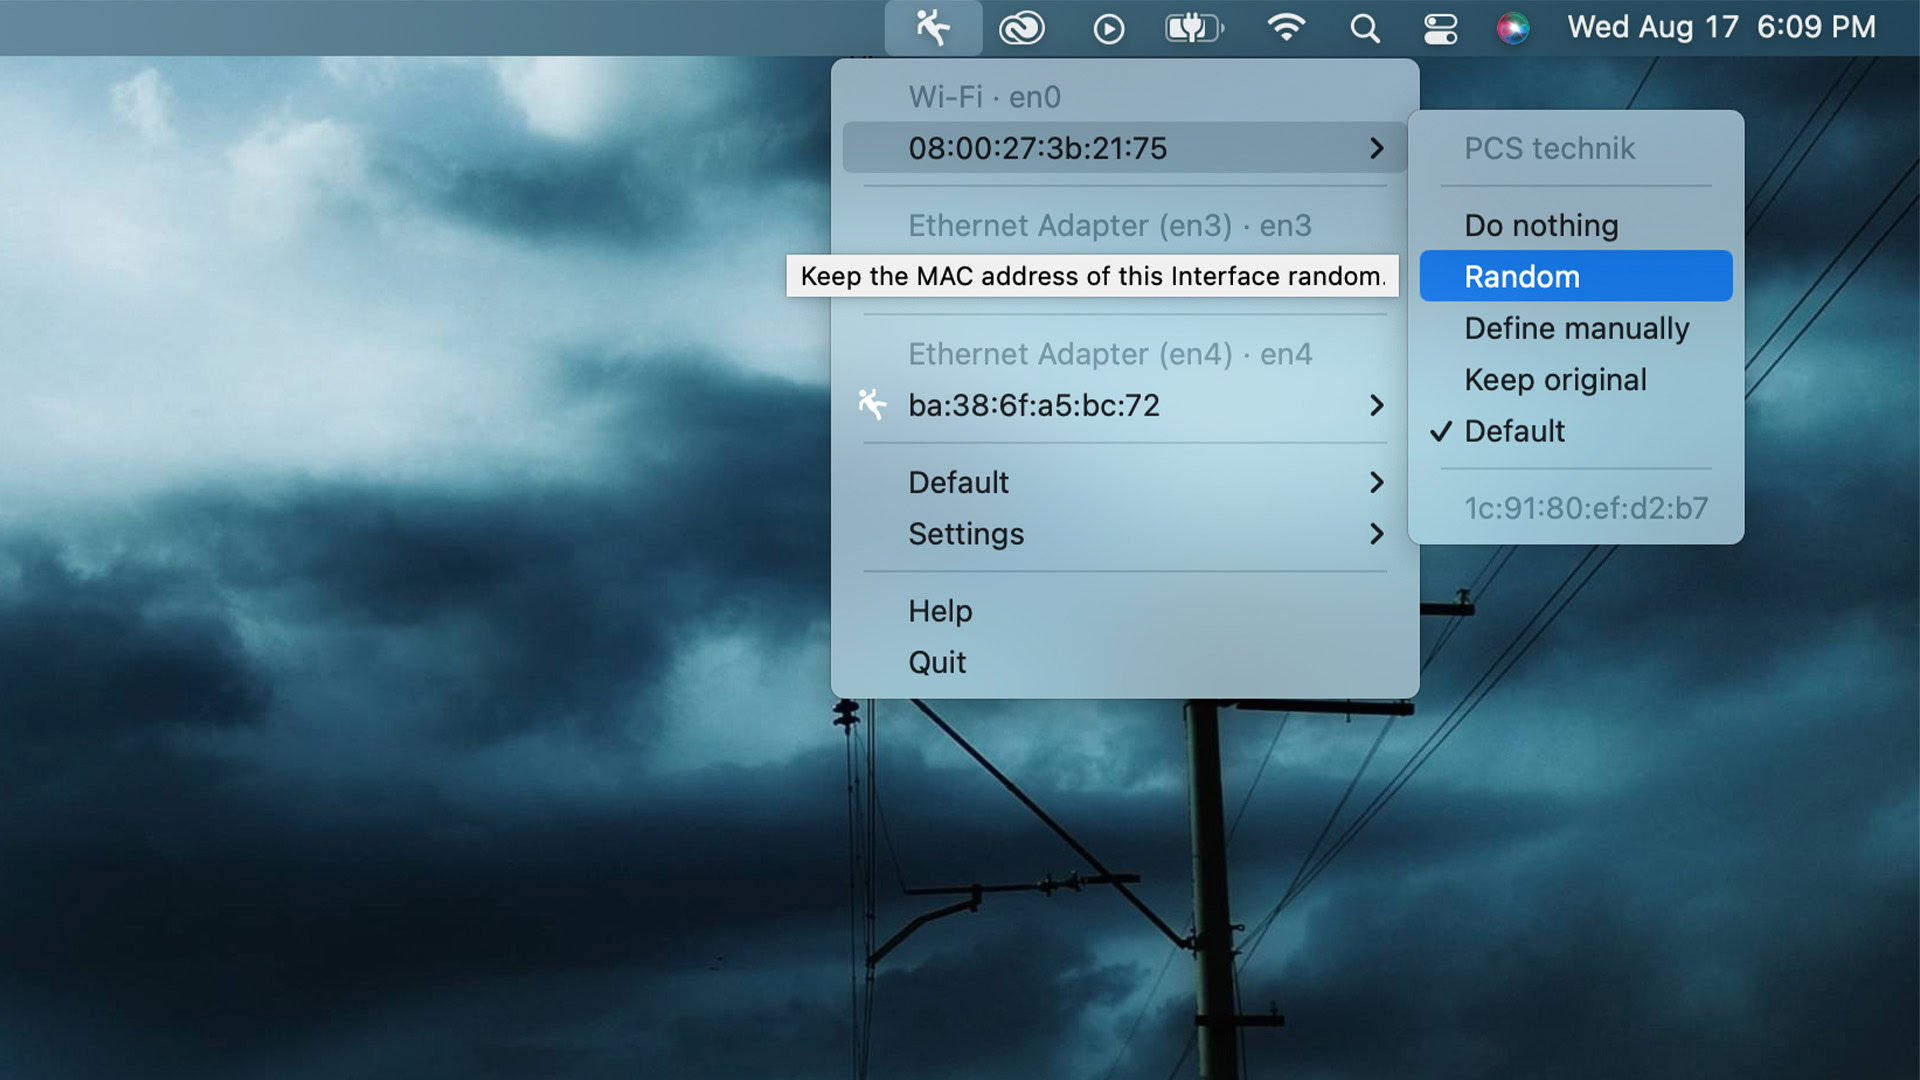
Like Windows, macOS has some third-party apps that make this process pretty easy. Below is a list of apps (and their price tags) that can get the job done.
- WiFiSpoof ($24.99) — WiFiSpoof is a solid app that works as intended. It’s a bit pricy at $24.99, but it’s also one of the few that you can get right out of the Mac App Store.
- LinkLiar (Free) — LinkLiar is a much simpler tool that still works really well, and supports modern macOS releases. You can install it manually or through Homebrew. It’s free and open-source.
There are others, but we tested both of the above apps and found that they got the job done.
How to change the MAC address on iOS
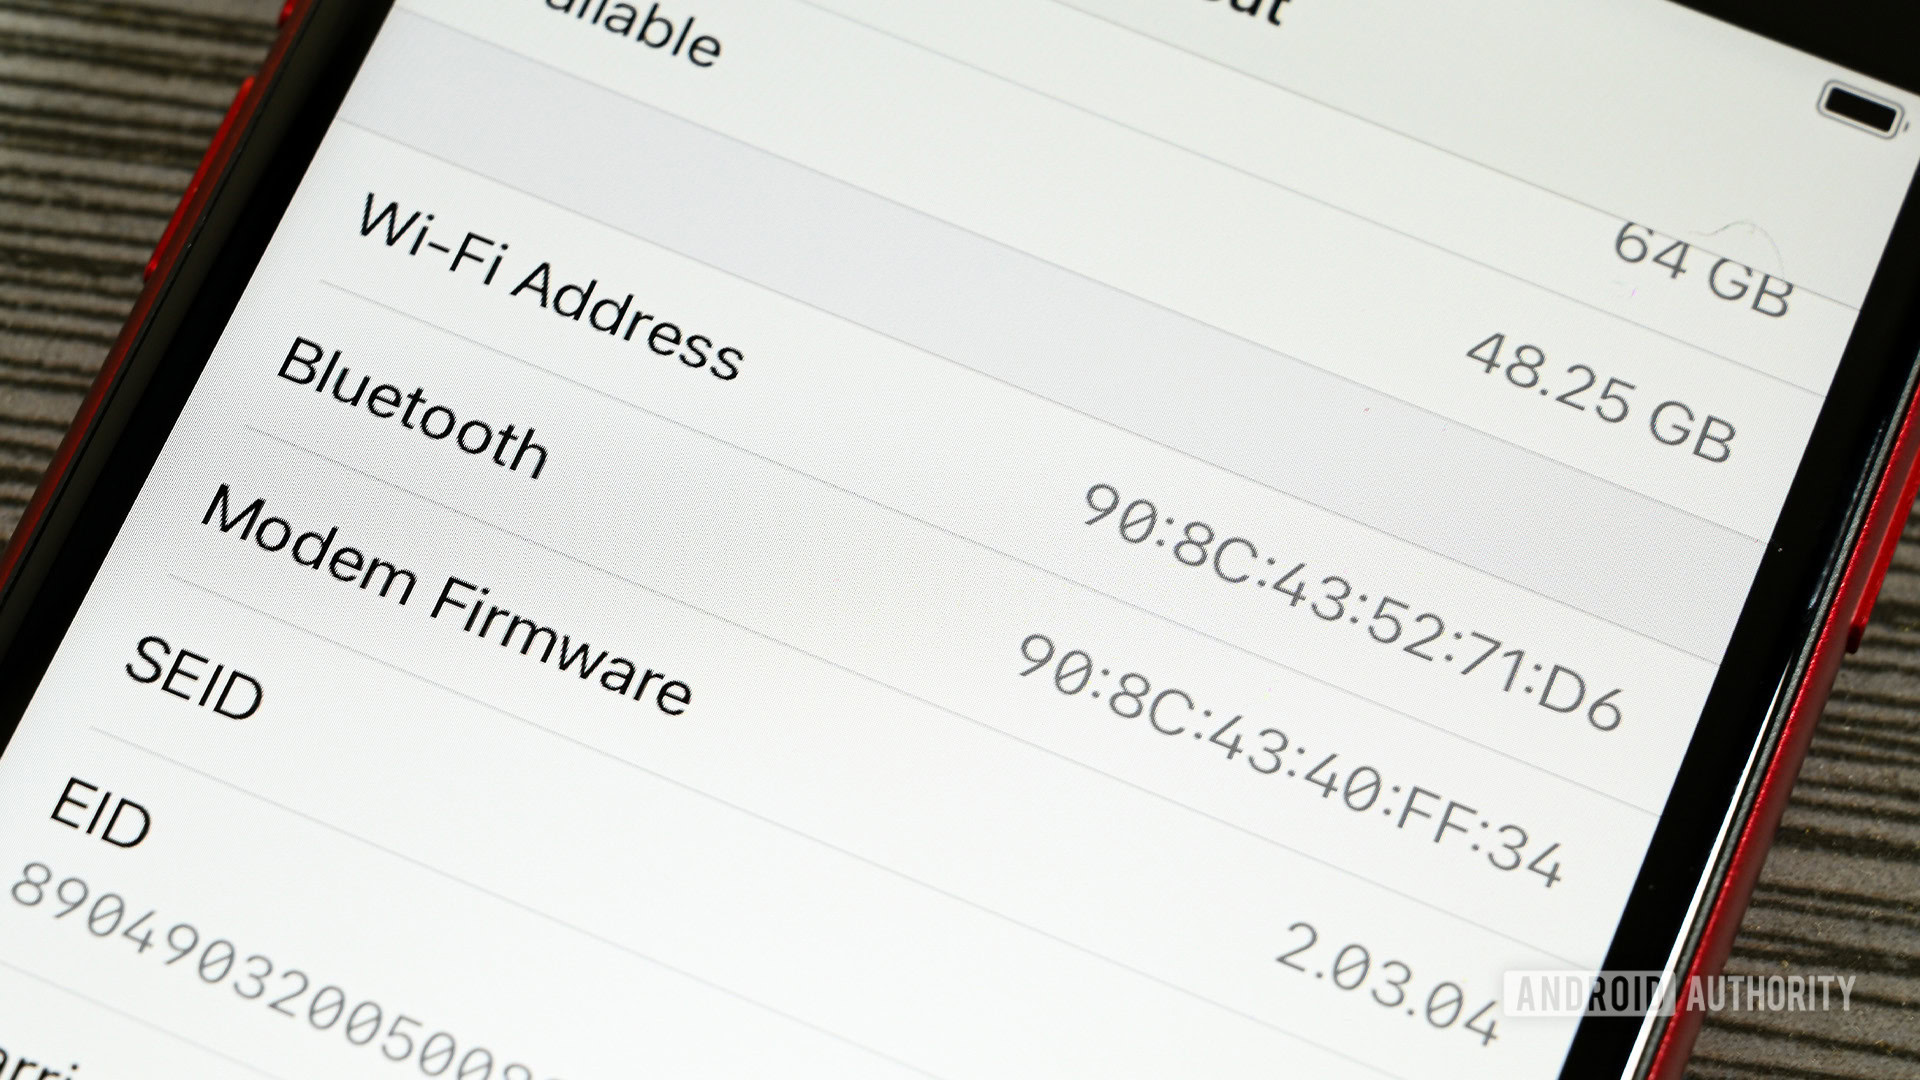
iOS is a lot like Android in that aren’t any native methods to select your MAC address. In fact, the software spoofs for you automatically so long as you’re running iOS 14 or later. You can toggle this on and off, so we’ll show you how.
- On your iPhone, open Settings, then tap Wi-Fi.
- Hit the small blue “i” icon next to the network you’re connected to.
- On the next page, find the Private Wi-Fi Address toggle. When Private Wi-Fi Address is on, your MAC address is randomized.
- When you toggle Private Wi-Fi Address off, you’ll get a warning telling you that you’ll rejoin a network with a non-private MAC address. Hit the Rejoin button to continue.
- When you turn Private Wi-Fi Address on, you’ll get a different window telling you that you’ll rejoin the network with a private address. Hit Rejoin to continue.
- Note — You can do this on a per-network basis, for instance keeping the feature off on your home network but enabled for a coffee shop’s Wi-Fi. We recommend leaving it on for every network, because it certainly doesn’t hurt anything.
That’s about all you can do. There are some other options if you jailbreak, but we don’t recommend jailbreaking your iPhone just for this purpose. The Private Wi-Fi Address option does exactly what it needs to, which is to hide your real MAC address from public (and private) networks.
How to change the MAC address on Chrome OS
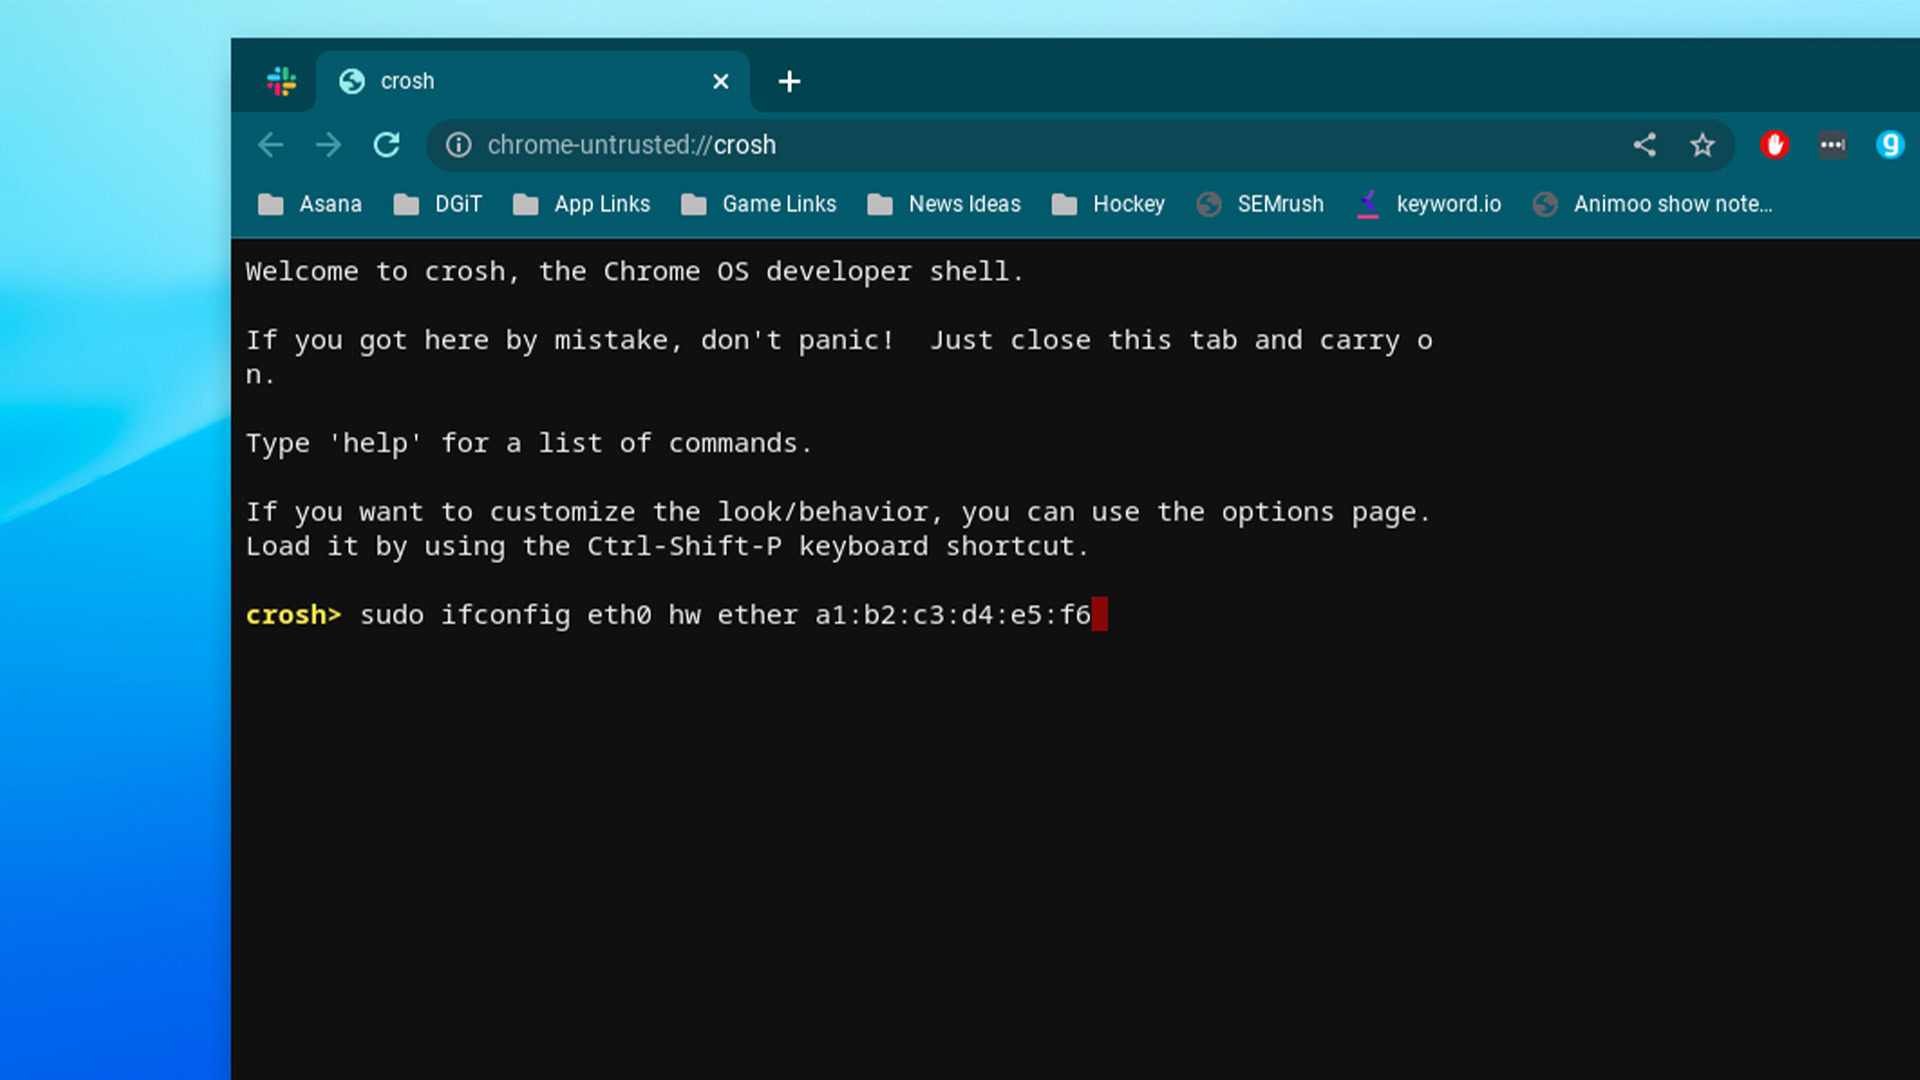
Yes, it is possible to change you MAC address on Chrome OS. It’s actually not too dissimilar from macOS and even includes some of the same commands. The only caveat is that your Chromebook needs to be in developer mode. Other than that, it’s actually pretty easy.
- Enable developer mode on your Chromebook. Warning — Entering developer mode will essentially factory reset your Chromebook. Unfortunately, this is necessary.
- Once booted, press Ctrl +Alt +T to enter Crosh, a portmanteau between Chrome and Shell. It’s basically a terminal like the one in macOS or the Windows Command Prompt.
- In all of the below commands, replace eth0 with wlan0 if you use a wireless connection. Basically, eth0 is Ethernet, and wlan0 is WLAN (wireless LAN).
- Type sudo ifconfig eth0 down and hit Enter. This will disconnect you from the Internet.
- Type sudo ifconfig eth0 hw ether xx:xx:xx:xx:xx:xx and hit Enter. Replace the x values with the MAC address of your choice, but make sure to leave the colons in.
- Finally, type sudo ifconfig eth0 up to reconnect to the Internet.
- You should be using a different MAC address now. To revert, simply reboot your Chromebook.
- Note — you have to have admin access in order to perform this task. People using a Chromebook managed by another person won’t be able to perform the above steps.
FAQ
A MAC address, or Media Access Control address, is a unique identifier that helps other devices find your device on a network.
A MAC address is a 16-digit identifier code where every two digits is separated by a colon. So, it’ll look like this: a1:b2:c3:d4:e5:f6.
Yes. In fact, that’s why so many people want to change, or spoof, their MAC address. It makes a device harder to target on public networks. You should still take advantage of features like firewalls, sandboxing, and real-time detection when available.