Affiliate links on Android Authority may earn us a commission. Learn more.
How to add borders in Google Docs
Borders, or lines that wrap around the outer edges of something like a Google Doc, can help focus attention on the content within. They can be decorative additions to a title page for an assignment or essential to breaking up text. Let’s quickly go over how to add a border in Google Docs.
Read more: How to flip an image in Google Docs
QUICK ANSWER
To add a border in Google Docs on your computer, click Format → Paragraph styles → Borders and shading. Alternatively, you can click Insert → Table. Click on the single square in the top left to insert a 1×1 table into your Google Doc, then use that as your page border.
JUMP TO KEY SECTIONS
How to add page borders in Google Docs
Borders and shading
Aside from drawing a border and formatting it as Behind text, there are two primary ways to add a page border in Google Docs. The first way is to use the dedicated Borders and shading function.
To access this, click Format–>Paragraph styles–>Borders and shading.
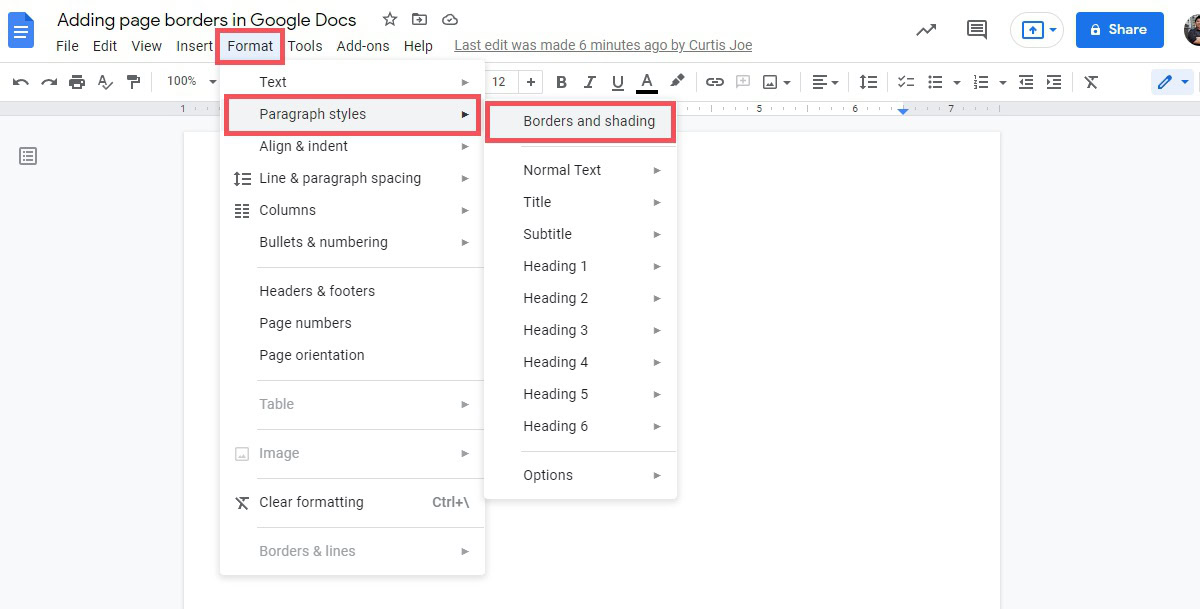
Customize your border in the Borders and shading menu. You have six parameters to play with: Position, Border width, Border dash, Border color, Background color, and Paragraph padding.
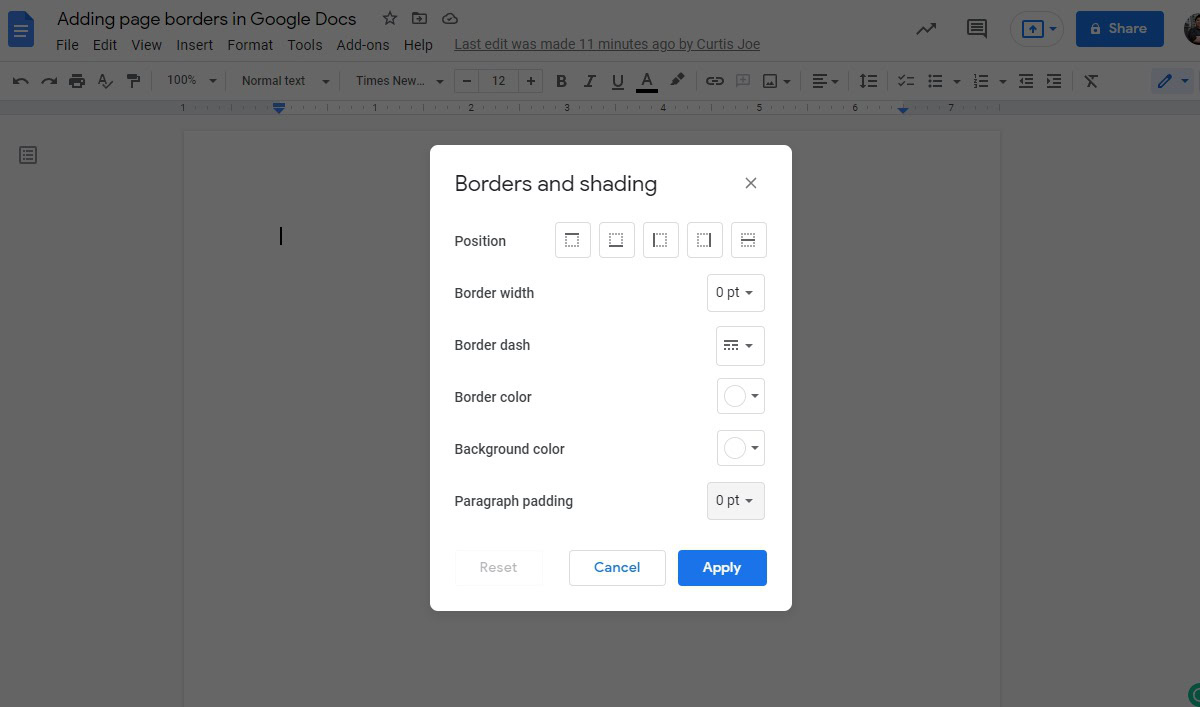
In terms of Position, you have five options to choose from:
- Top border will add a border above your content.
- Bottom border will add a border below your content.
- Left border will add a border on the left side of your content.
- Right border will add a border on the right side of your content.
- Between border will add a border between your content.
If you want a simple page border, click Top border, Bottom border, Left border, and Right border.
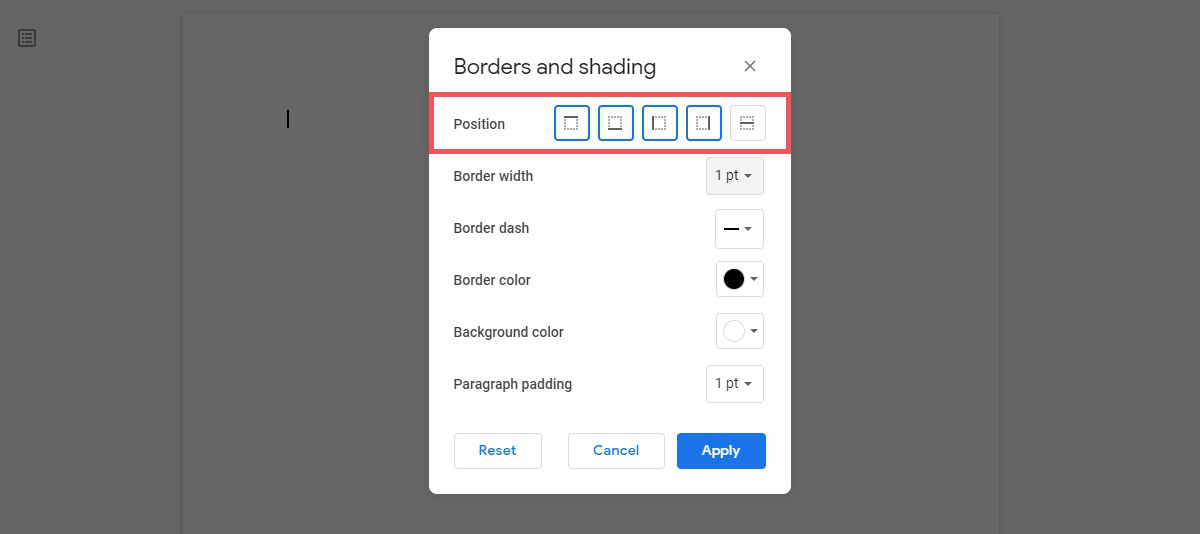
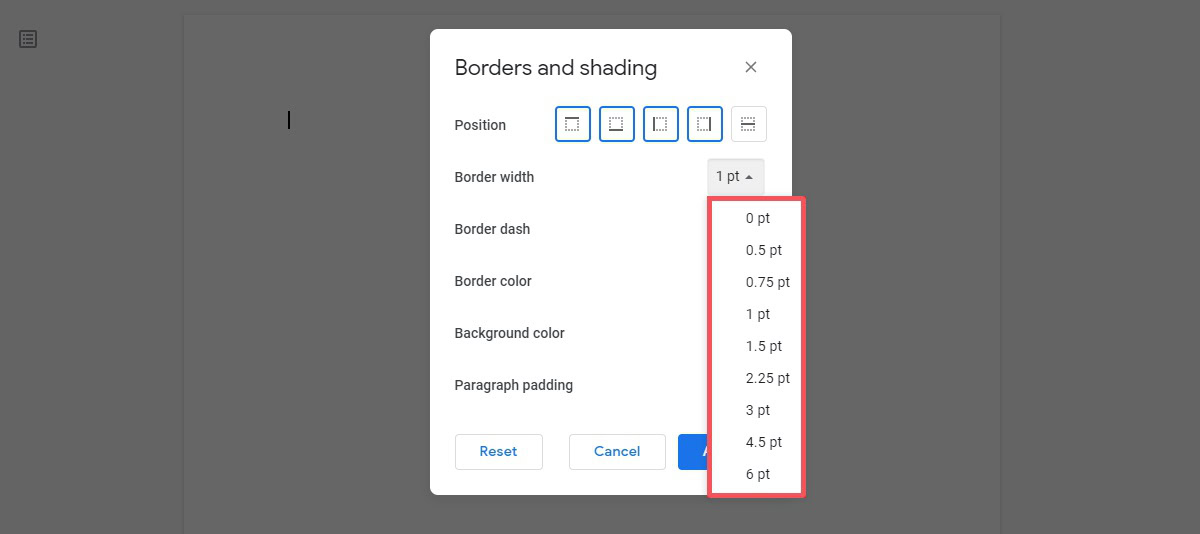
The following setting, Border width, alters how thick the line is for your border. The maximum setting here is 6pt.
You can customize the look of your border in the Border dash options. The lines available aren’t the most ornate, but there may be more in the future.
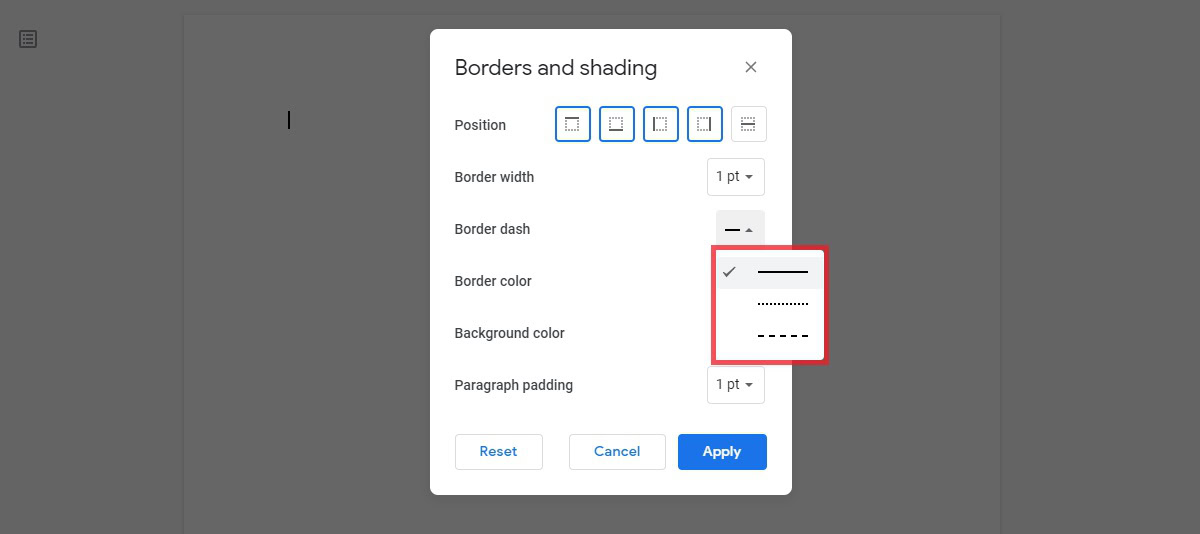
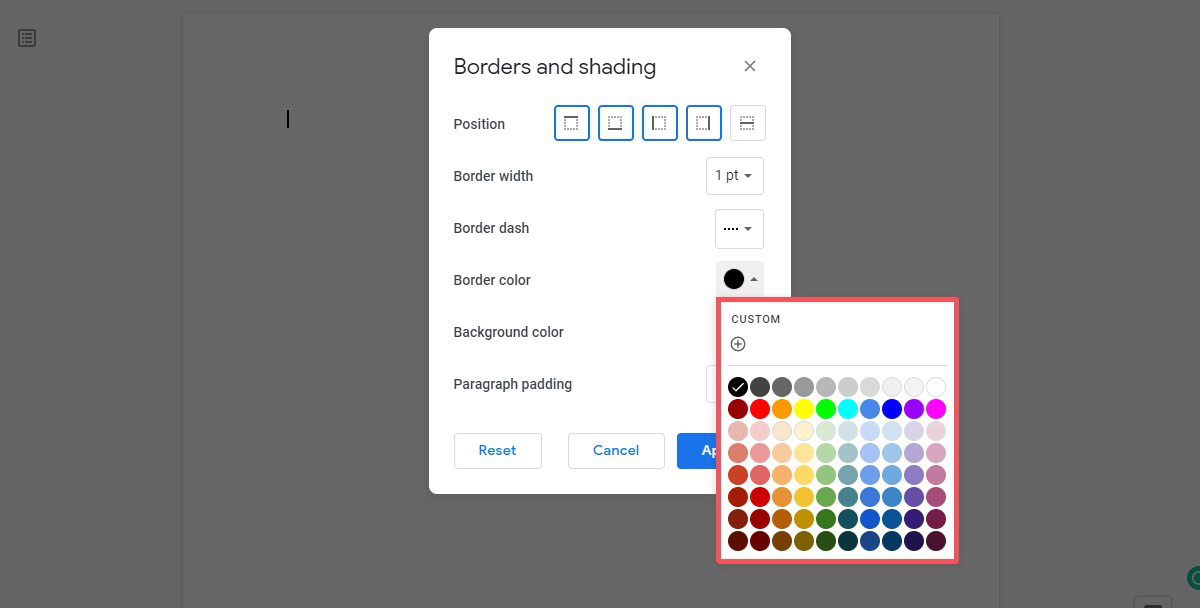
The Border color setting will change the line’s color for your border. You can select from one of the preset colors or click CUSTOM at the top to choose a custom color.
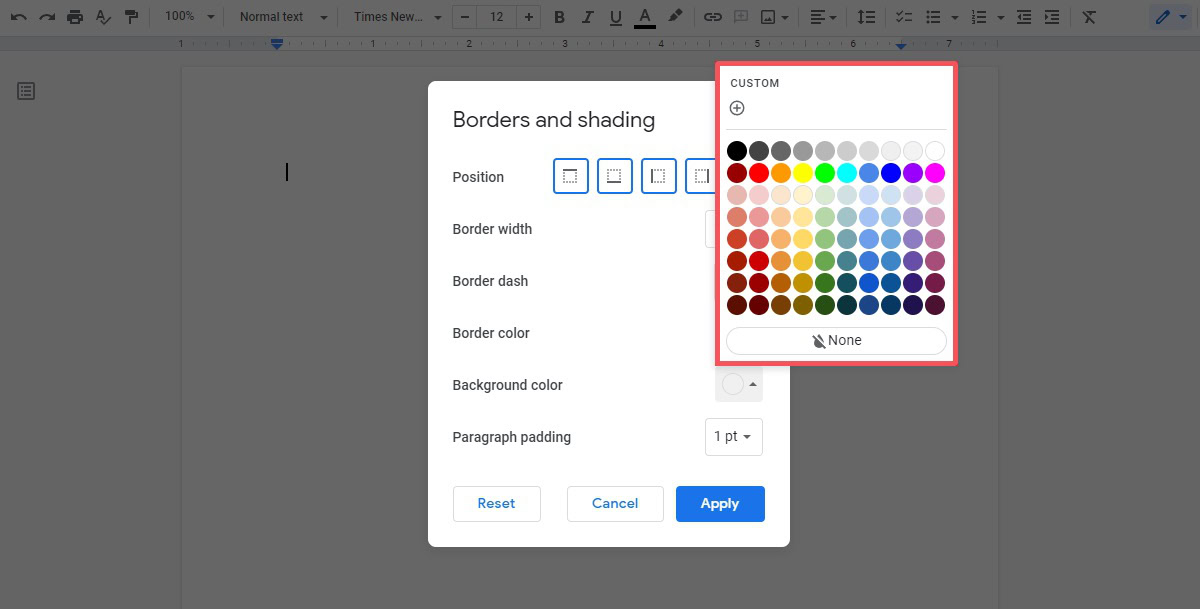
In addition to the color of the border itself, you can change the color of the background within the border using the Background color setting.
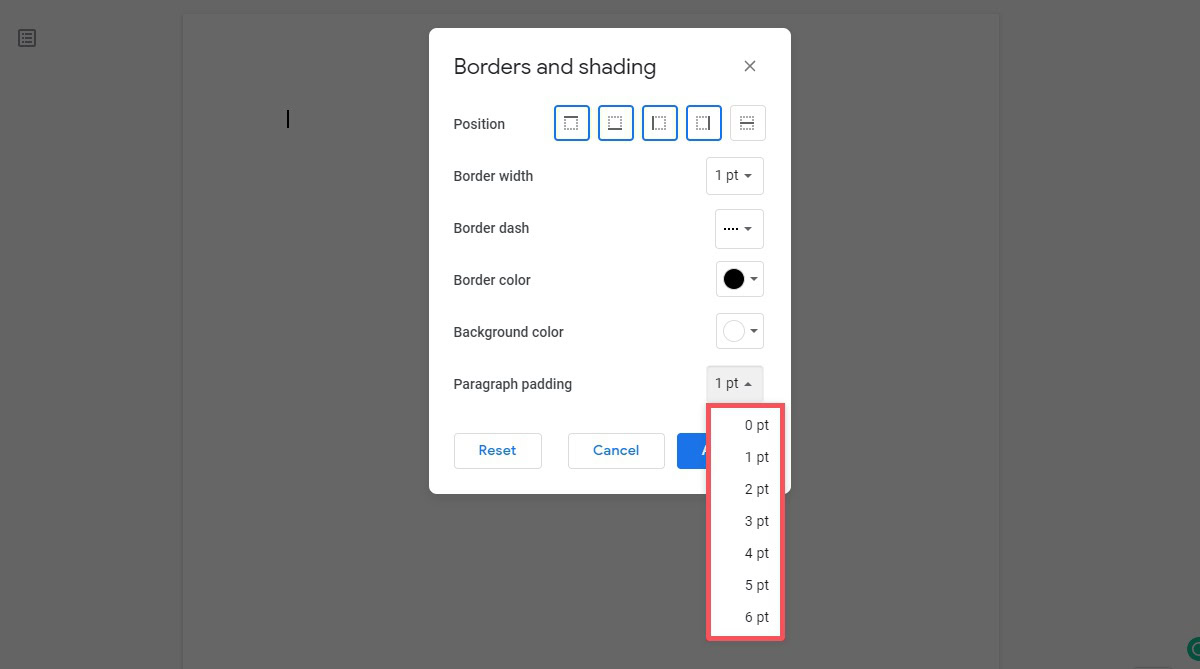
Lastly, you can change the Paragraph padding. This is the gap between your text and the inner edge of the border.
When finished, click the blue Apply button.
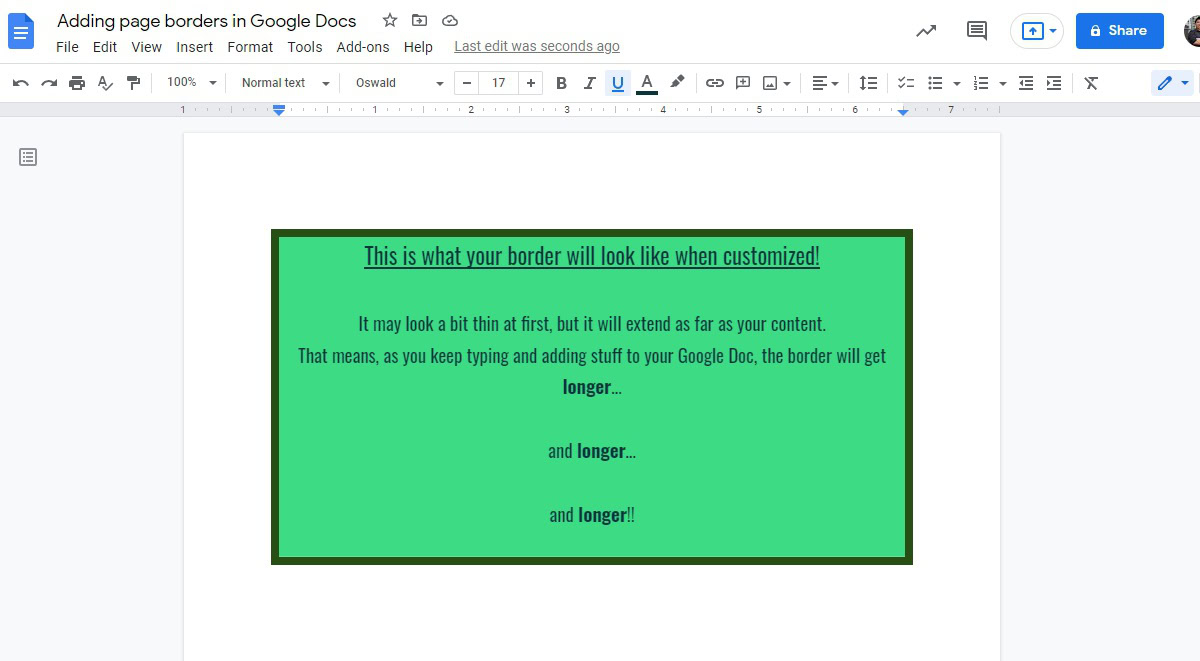
1×1 table
The second way you can add a page border in Google Docs is to use a 1×1 table and extend it down the page.
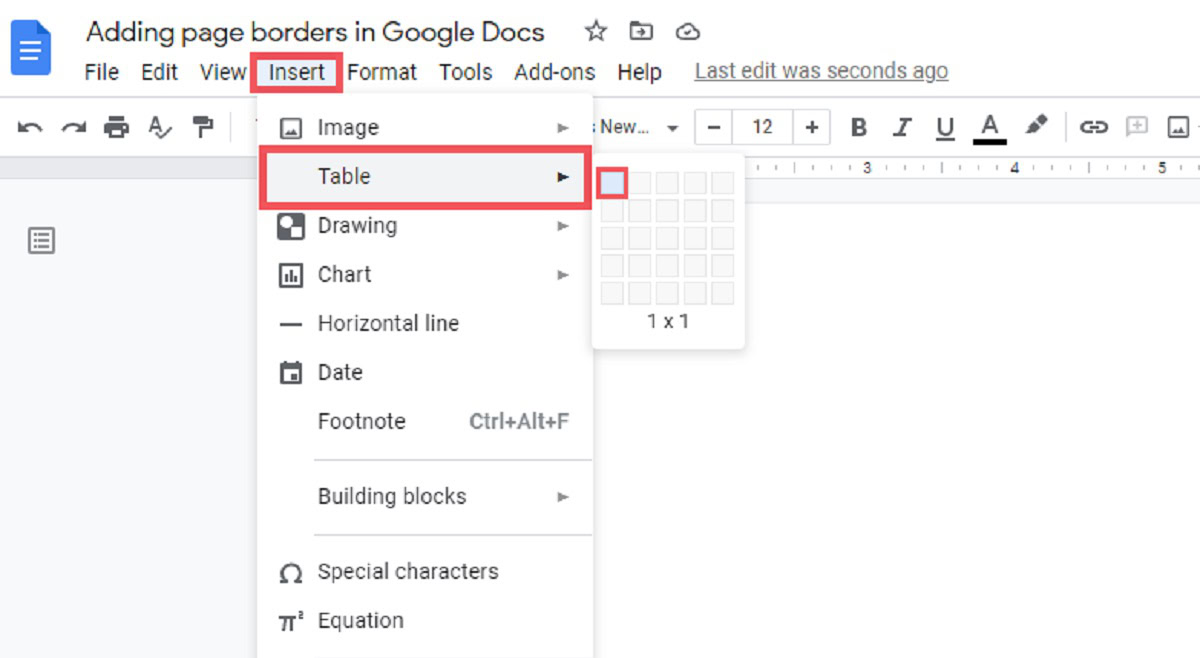
Click Insert in the top toolbar, then hover your mouse over Table. Click on the single square in the top left to insert a 1×1 table into your Google Doc.
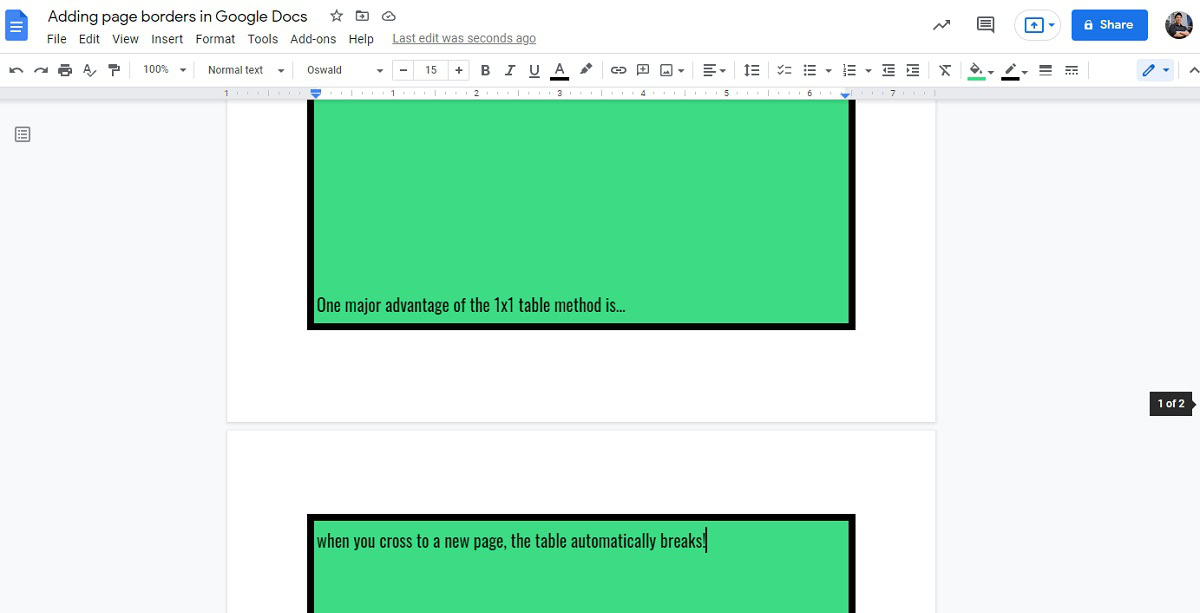
Format the look of your table border using the four buttons in the top right: Background color, Border color, Border width, and Border dash.

If you need the border closer to the edges of your page, you can change the margins. Otherwise, start typing and adding content within the table; it will extend down as you keep adding more to your Google Doc.
How to add borders around images in Google Docs
If you are looking to add a border around an image on your Google Doc, then you’re in luck. It’s very easy and doesn’t require you to go into Borders and shading or make a table around it.
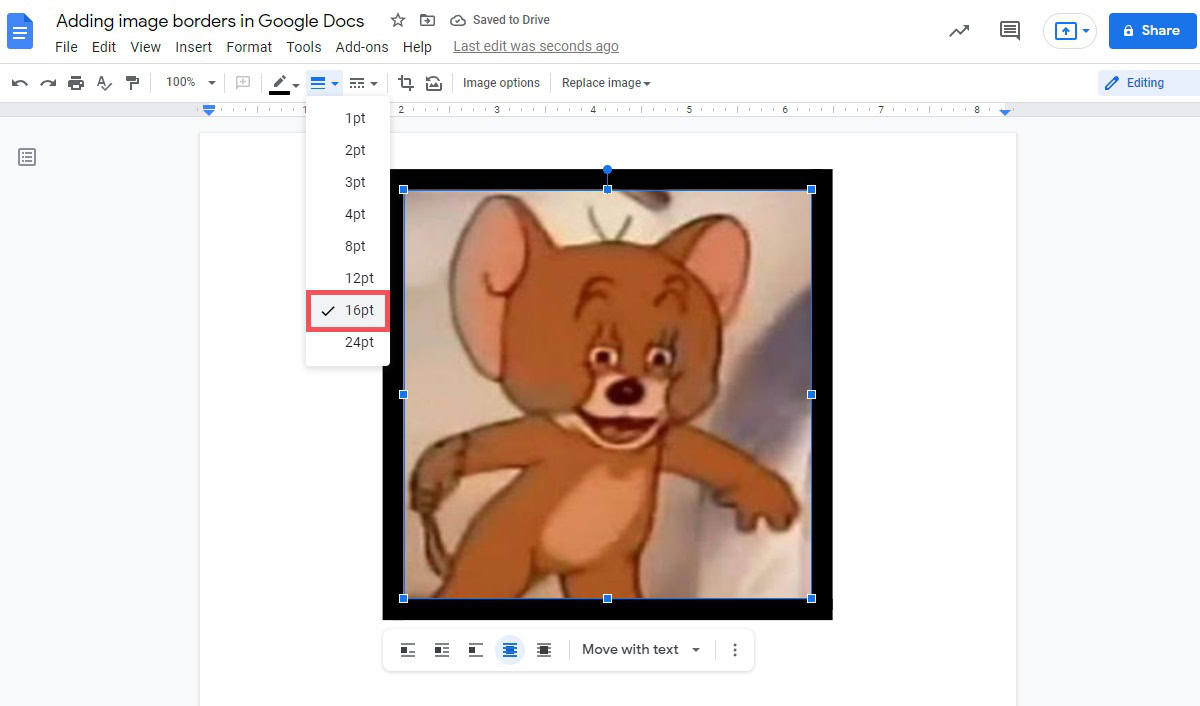
To do so, click on your image within Google Docs to select it. After that, click the Border weight button in the toolbar above.
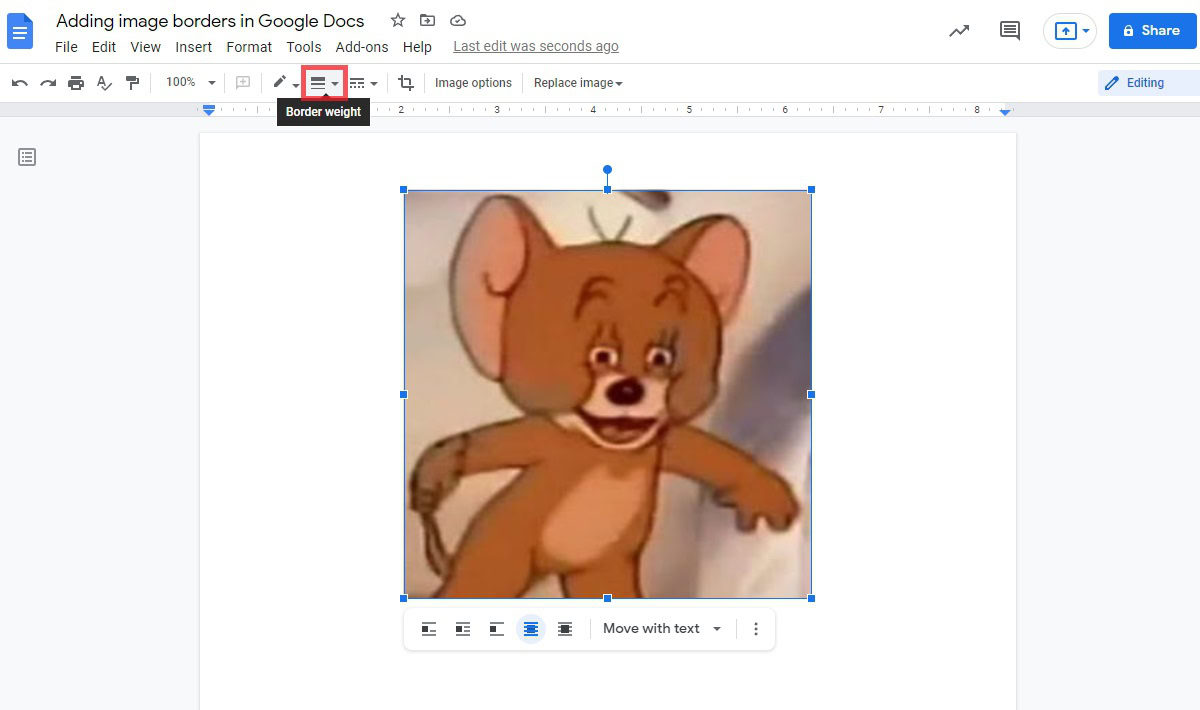
Select the line weight you want for the image border. For example, here, we chose a thicker 16pt line.
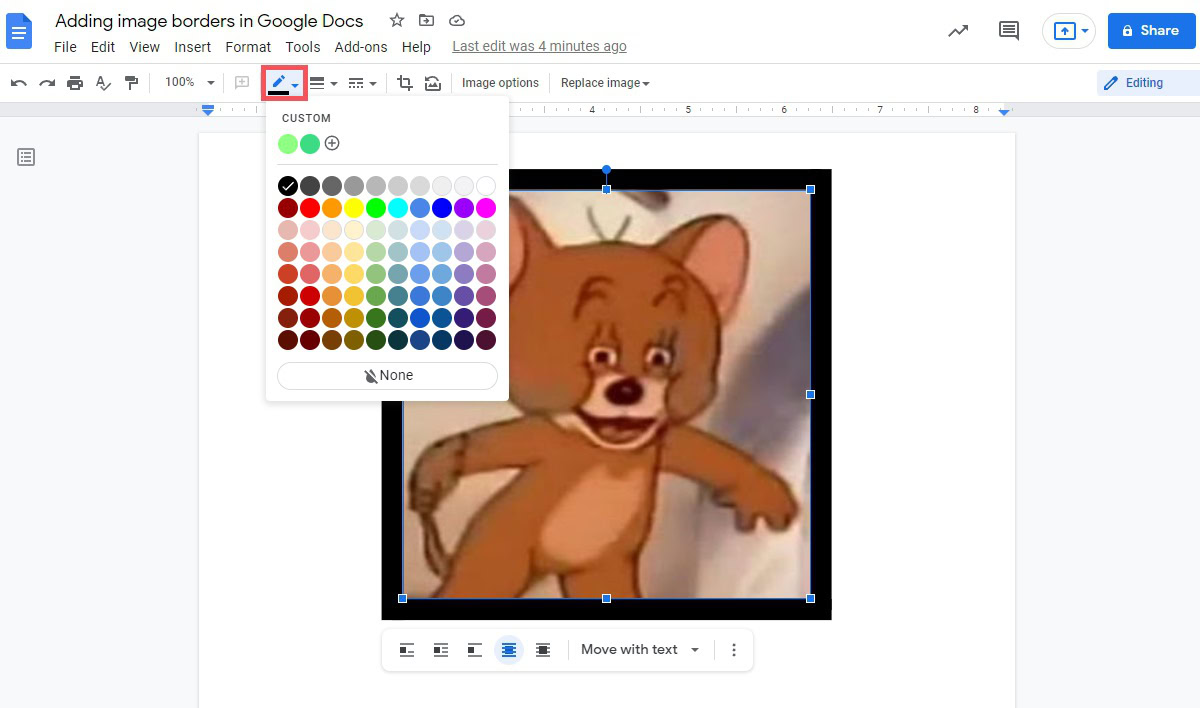
The border color will automatically be set to black. If you want to change this, you can click the Border color button above and choose a new color.
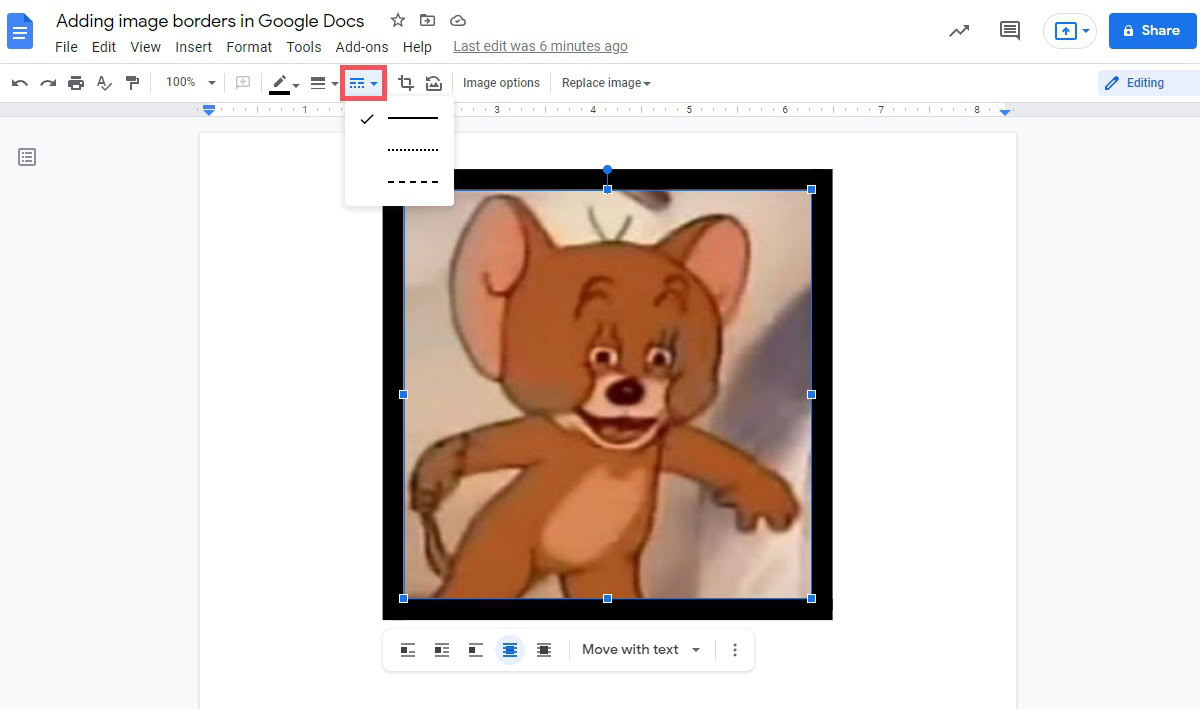
If you want to change the style of the border, you can click the Border dash button. You have three different kinds of lines to choose from.
Adding a horizontal line in Google Docs
If you don’t want to add a border all around your text, you may just want to add a horizontal border between lines. Google Docs makes it very easy for you to add a line in and break text. This allows you to section off certain parts of your document, move onto other topics, and more.
To do this, start by clicking on the page where you want to add a horizontal line.

Click Insert. From the subsequent dropdown menu, click Horizontal line.
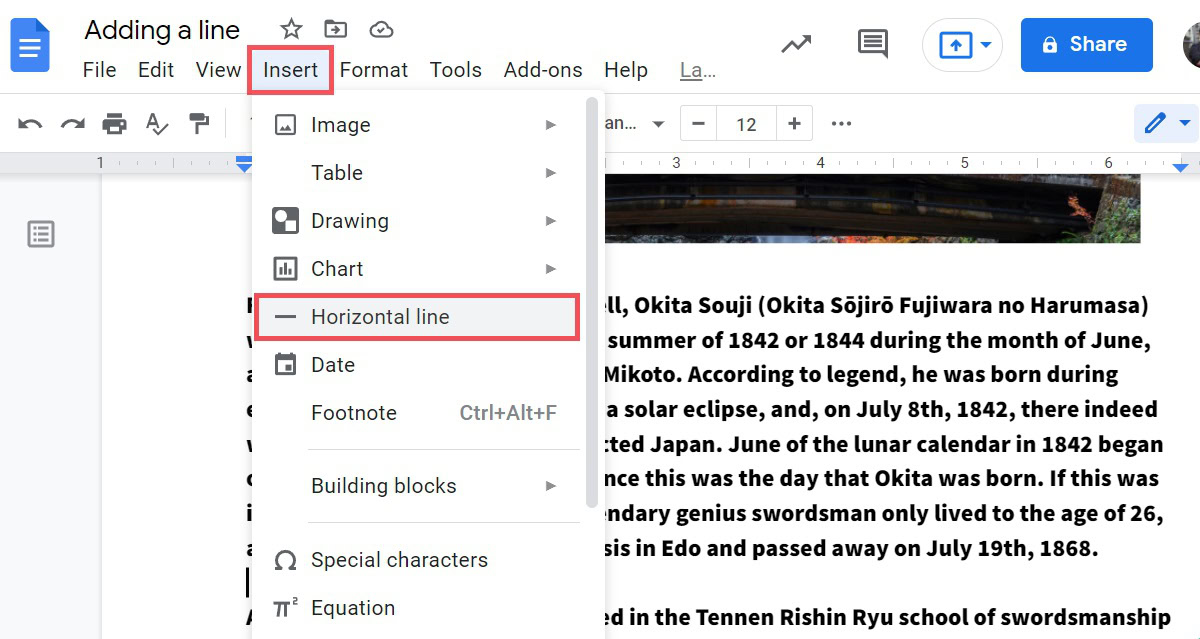
There will be a horizontal line or “border” between the surrounding text when finished.

FAQs
How do you add a decorative border on Google Docs?
As mentioned in the article, there are only three types of lines that you can use for border outlines in Google Docs. A straight, unbroken line, a dotted line, and dashes.
If you wish to use a more ornate border, you will have to add it manually using the Drawing function. After that, you can format it as Behind text.