Affiliate links on Android Authority may earn us a commission. Learn more.
How to create a desktop shortcut in Windows
Published onMay 4, 2023
If you are really into time-saving productivity tips on Windows 11, then at the very least, you should put shortcuts to all of your most used apps and files in one easy, convenient place on your desktop. Then you don’t have to tediously scour your computer when you’re looking for something. Here is how to create a desktop shortcut on Windows, which can be moved anywhere you want on the computer, including the taskbar.
QUICK ANSWER
If you want to create a desktop shortcut in Windows, you have three options. You can right-click on the desktop and create a new shortcut link using the box provided. Secondly, you can drag the icons for the app/folder/file from the start menu onto the desktop. Third, you can right-click on the item in Windows Explorer and use the shortcut option in the right-click menu.
JUMP TO KEY SECTIONS
Desktop ‘Create Shortcut’ box
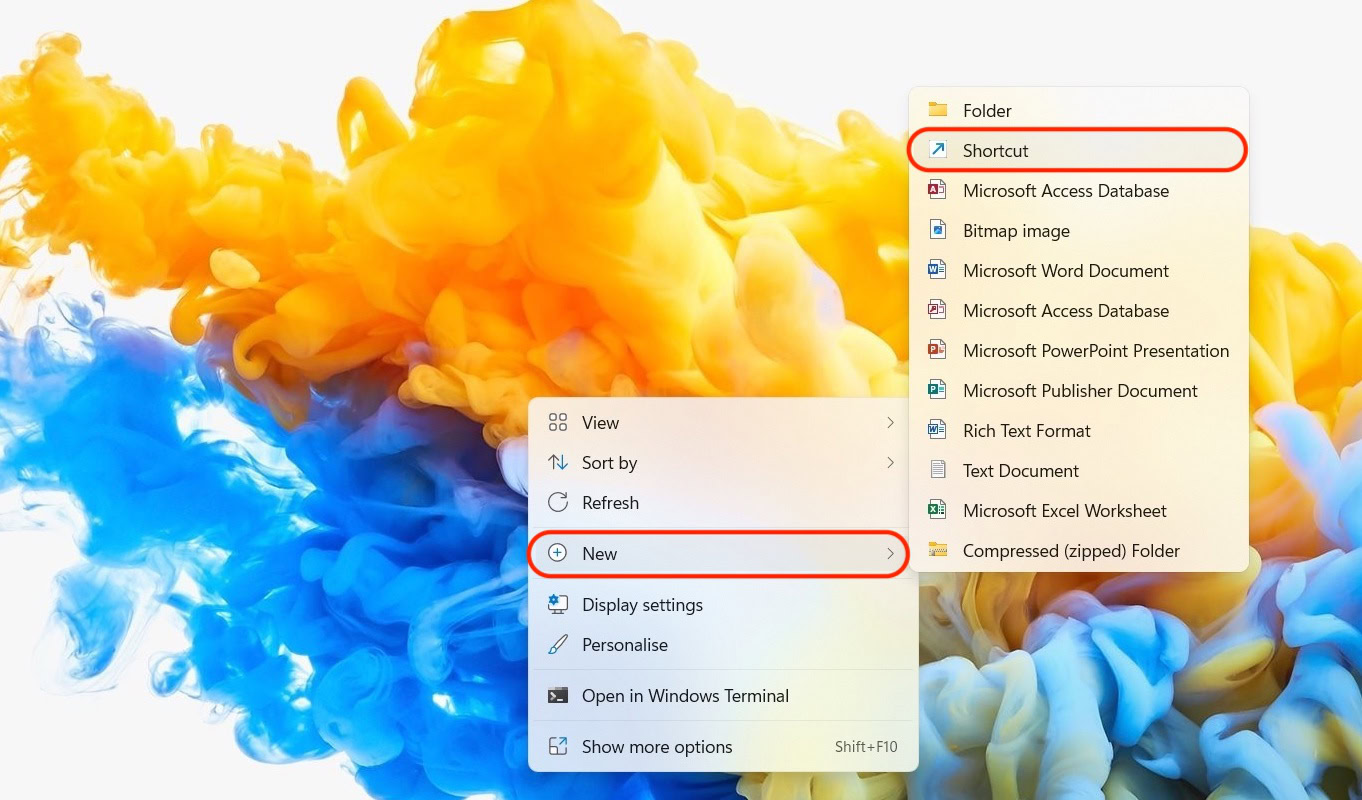
Here is the first way to create a desktop shortcut in Windows. Right-click on the desktop and select New > Shortcut.
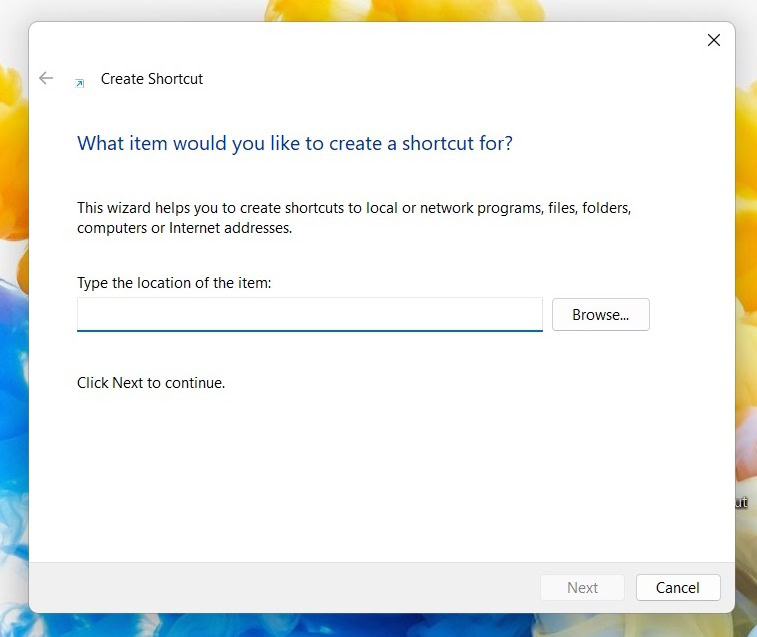
A box will now appear called Create Shortcut. Click the Browse button to go to the app, file, or folder that you want to make a shortcut for.
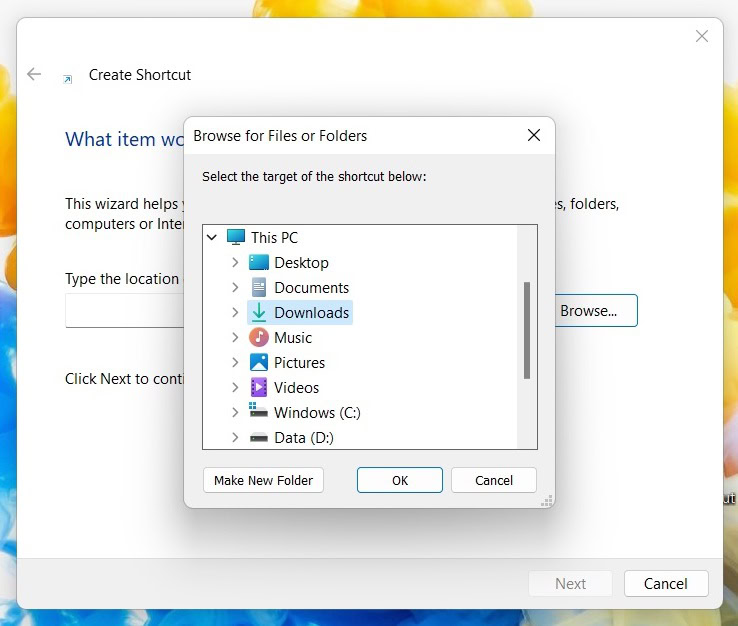
Navigate to the correct folder and find what you want to make a shortcut for. When you’ve found it, click it and then click OK.
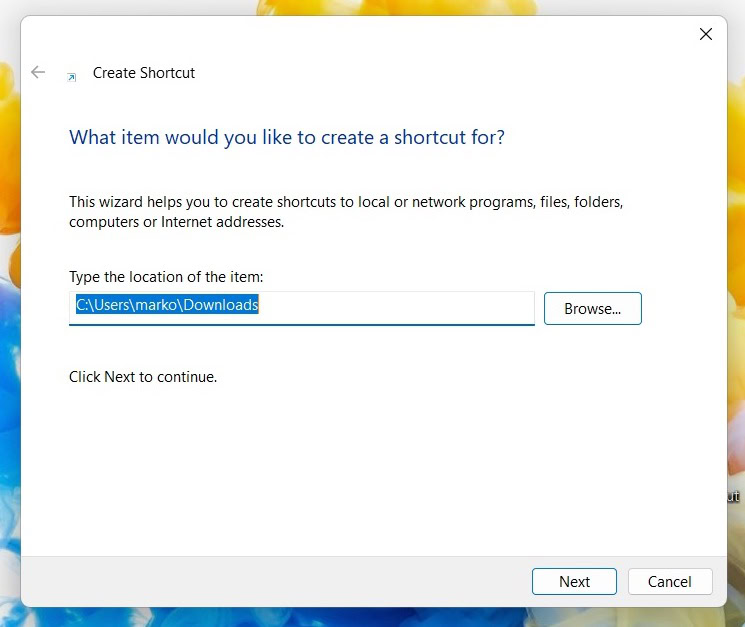
You will now see the file path to the app, file, or folder in the item location section. Click Next to continue.
Your shortcut needs a name. Usually, you would call it by its usual name on your computer. But if you feel the need to rename it, this is where you would do it. Click Finish to end the process.
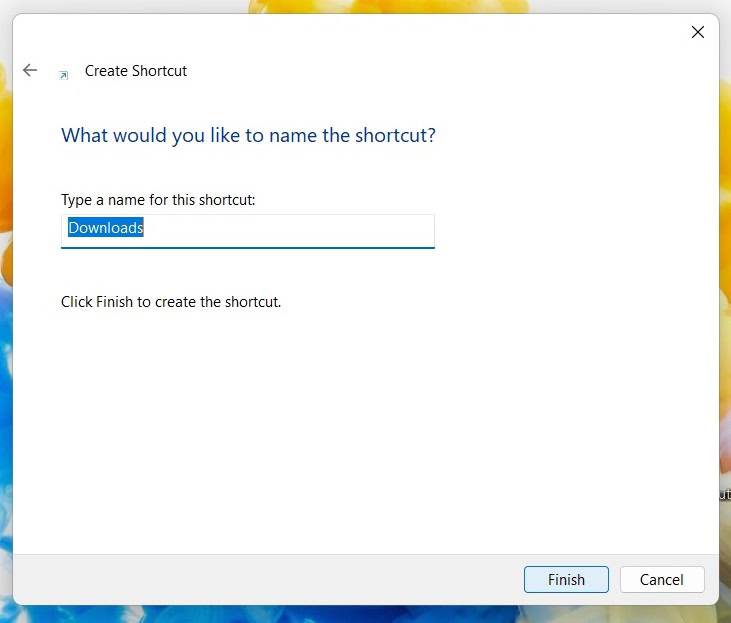
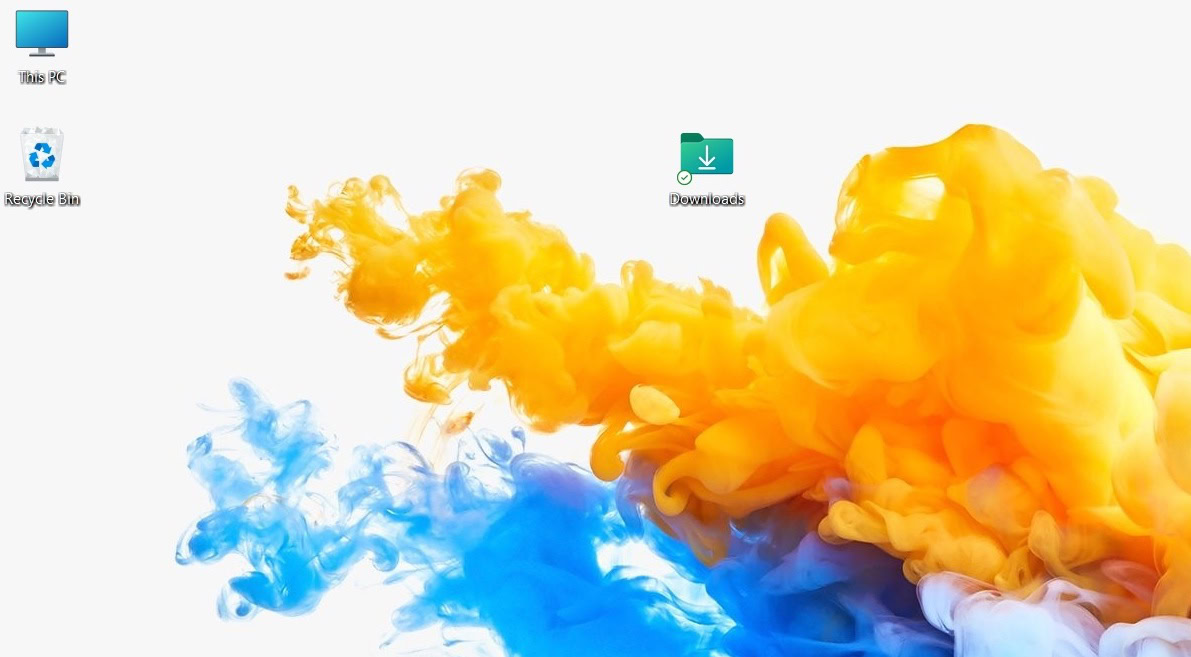
You will now see the shortcut sitting on the desktop. In my case, I made a shortcut to the Downloads folder. This icon can now be dragged around with your cursor to wherever you want to put it, including your taskbar.
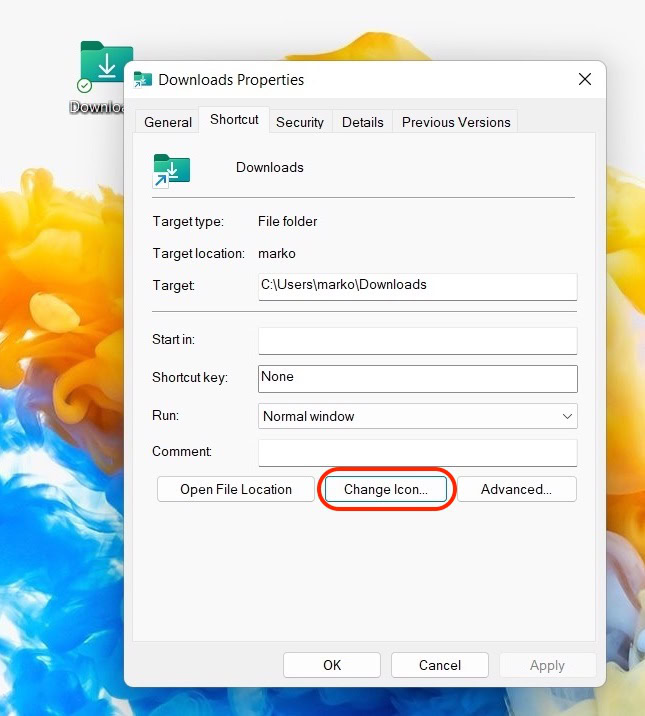
If the icon and color don’t appeal to you, you can alter its appearance. Right-click on the shortcut and go to Properties > Shortcut. At the bottom, you’ll see Change Icon.
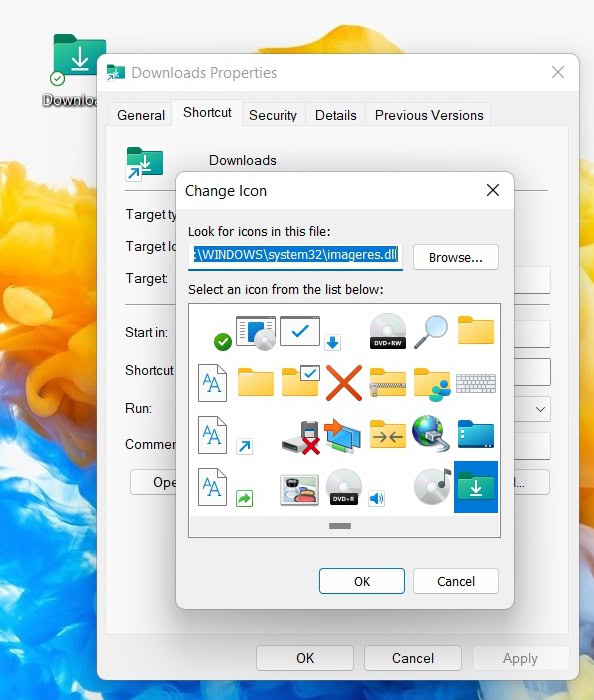
You can now choose from one of Microsoft’s selections of icons, or you can click Browse to use your own icons.
Dragging icons from the Start menu
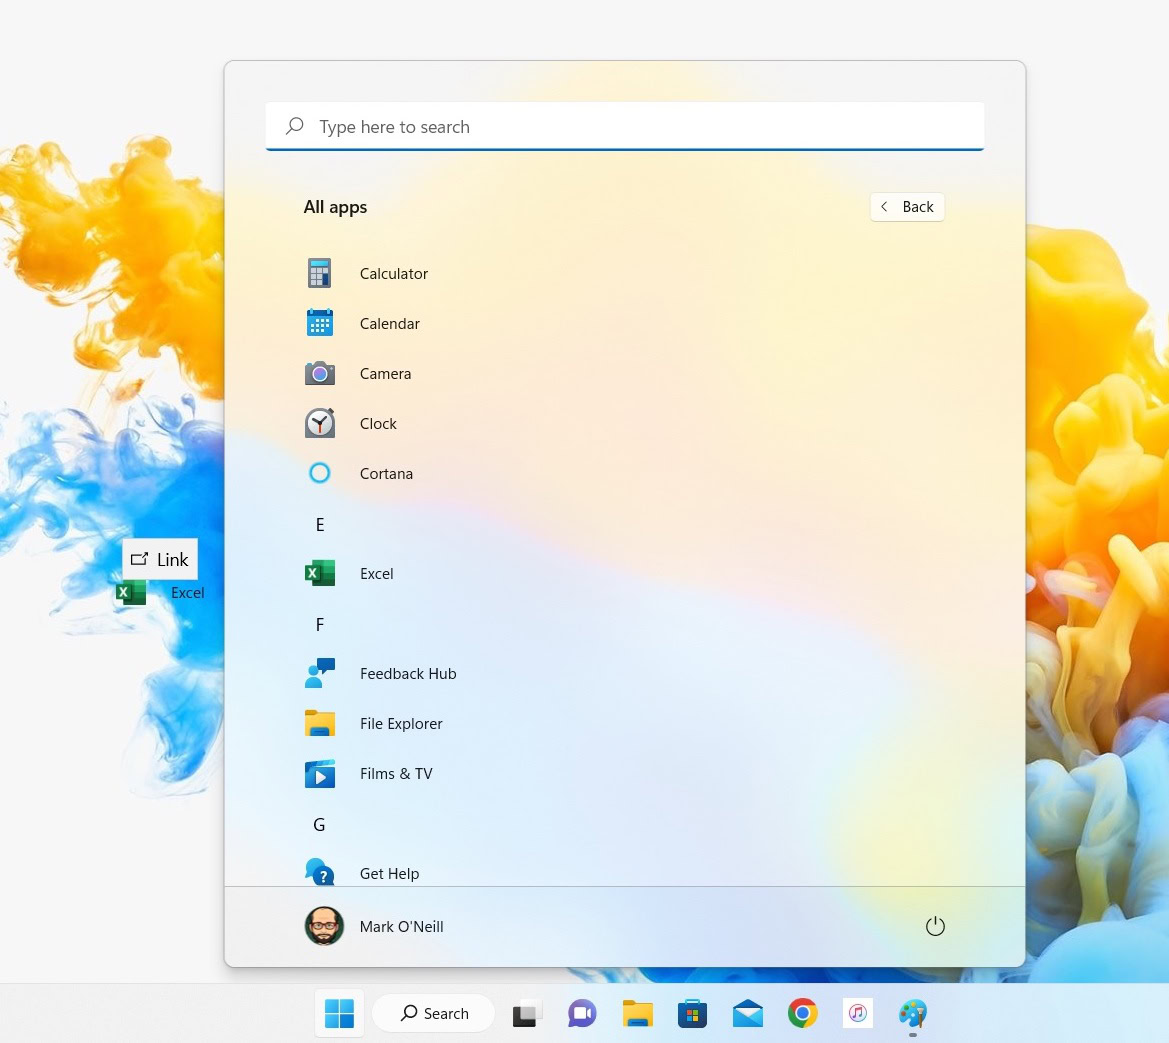
Another easy way to create a desktop shortcut on Windows is to open the Start menu. This can be done by tapping the key with the Windows logo on it. Go to All apps, find what you want to make a shortcut for, then drag it with your cursor onto the desktop.
This only makes a copy of the shortcut, so the original stays in the Start menu.
‘Send to’ right-click menu option
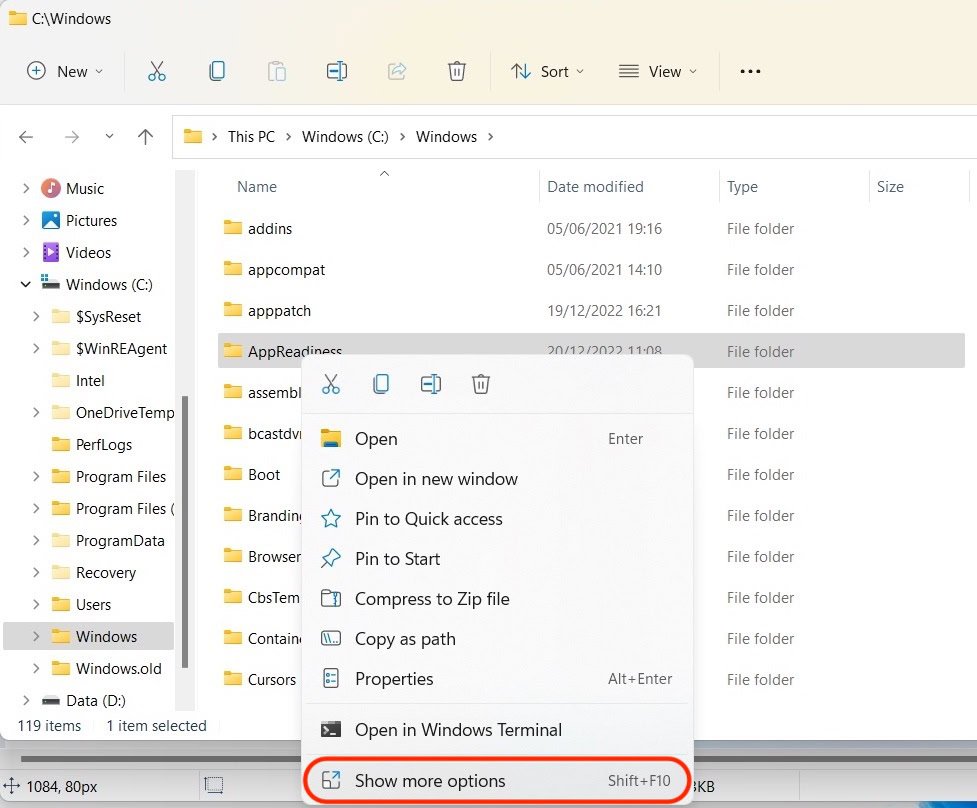
The final way is to go to the app, folder, or file in Windows Explorer. Right-click it and select Show more options.
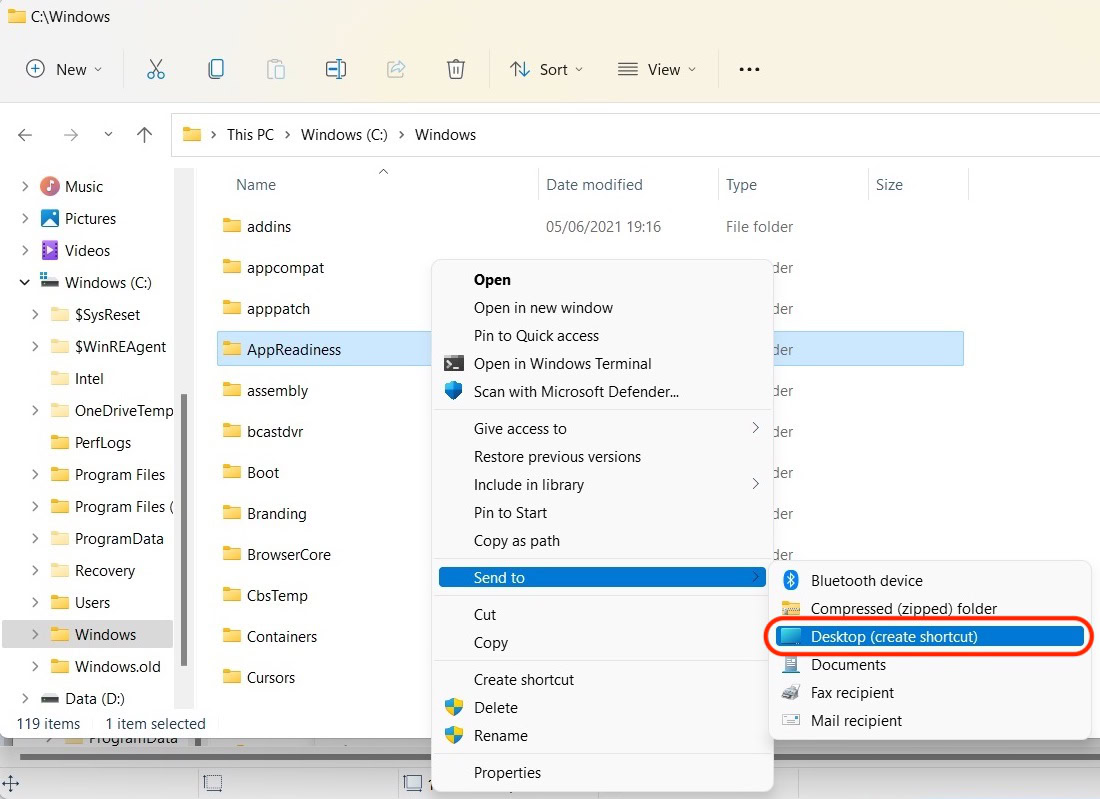
Go to Send to > Desktop (create shortcut). This will now create a shortcut and place it on the desktop.
There are a couple of other ways to create a desktop shortcut in Windows, but this involves mucking around with the Registry or the Command Prompt. By comparison, these three methods are much easier and faster, and we always like to bring you the easiest and fastest ways to do things.
FAQs
Right-click on your Desktop and click New > Shortcut. In the box that appears, type in %windir%\explorer.exe ms-settings:windowsupdate-action and click Next. Name your shortcut and click Finish.
Yes, just drag them from the desktop onto the taskbar and release them. They will now be pinned to the taskbar.