Affiliate links on Android Authority may earn us a commission. Learn more.
How to use a Nintendo Switch Pro Controller on PC
One of the glorious advantages of PC gaming is the seemingly endless library of titles optimized through Steam. Your library of available titles expands even further once you consider other platforms like Origin and the Epic Games Store. If you’re switching over to PC gaming for the first time but are used to using a controller, worry not. Many choose to game with a controller rather than using their mouse and keyboard; in fact, it can often be an advantage. For example, some shooting games like Halo Infinite, Overwatch, and Call of Duty: Warzone have built-in “aim assist” to help you track enemies when using a controller. Let’s go over how to connect your Nintendo Switch Pro Controller to a PC.
QUICK ANSWER
To connect a Switch Pro Controller to your PC, connect your controller to your PC using the USB-C cable. For a wireless connection, press and hold the Sync button atop the controller until the indicator light underneath the controller starts blinking from left to right. This will enable it to connect via Bluetooth.
JUMP TO KEY SECTIONS
How to connect your Nintendo Switch Pro Controller to a PC
Wired connection
The Nintendo Switch Pro Controller works natively on modern Windows devices, being identified on the platform as the “Pro Controller.” All you need, in this case, is a USB-C to USB-A cable—like the one that comes in the box with your Nintendo Switch Pro Controller. Alternatively, you can try using a third-party USB-C to USB-C cable if your computer has a USB-C port to get the same results.
We suggest using the original cable that came with your Nintendo Switch Pro Controller.
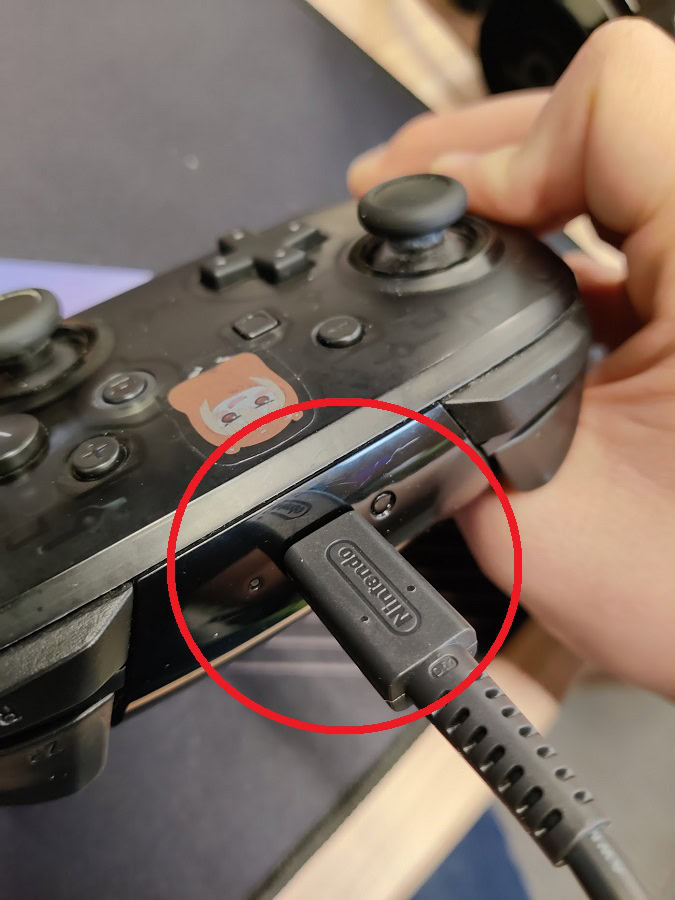
Plug the USB-C end of the cable into the port on top of your Nintendo Switch Pro Controller.
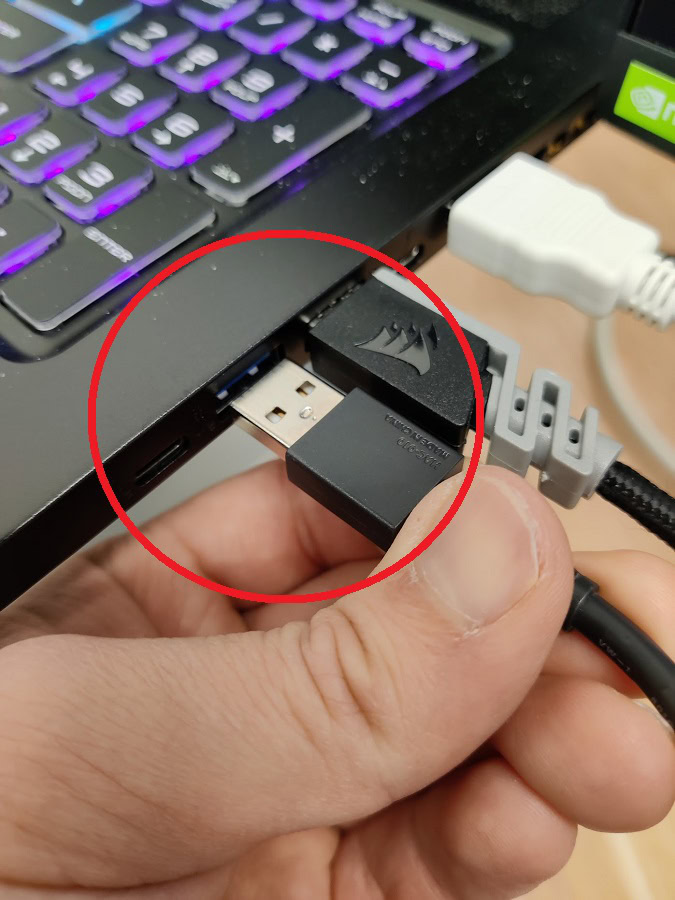
Plug the USB-A end into a port on your computer.
Connecting wirelessly
Your computer must have Bluetooth functionality to connect your Switch Pro Controller wirelessly. If you’re using a desktop PC, there must be a Bluetooth chip on your motherboard or a Bluetooth-enabling PCIe card plugged into your motherboard. If you’re on a laptop, it must have Bluetooth built-in.
There are also Bluetooth USB adapters, but we haven’t tested enough of these with the Nintendo Switch Pro Controller to diagnose additional latency issues.
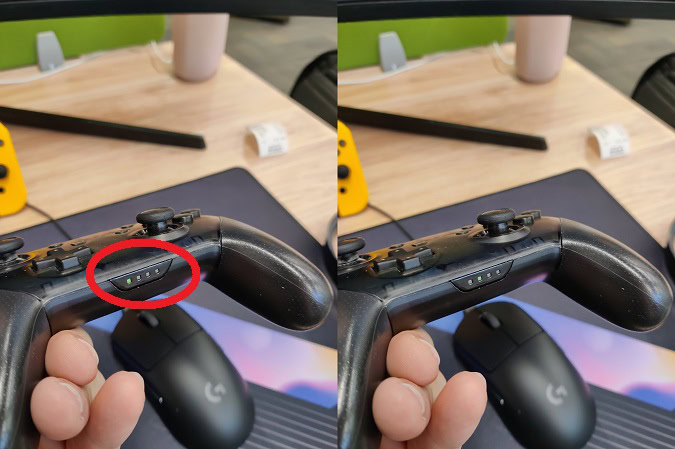
Make sure your Nintendo Switch Pro Controller is charged and has battery life so it can operate wirelessly. Press and hold down the small Sync button atop the controller next to the USB-C port.
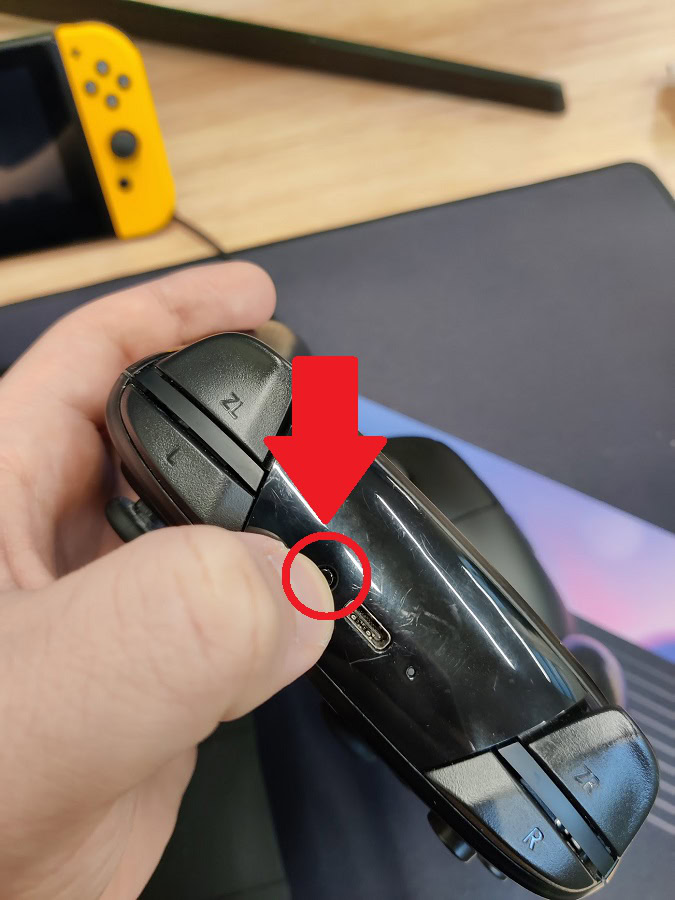
After about five seconds, the green indicator light underneath the controller should begin blinking back and forth. The light will repeatedly go from left to right, then right to left. This means your controller is in “pairing mode.”
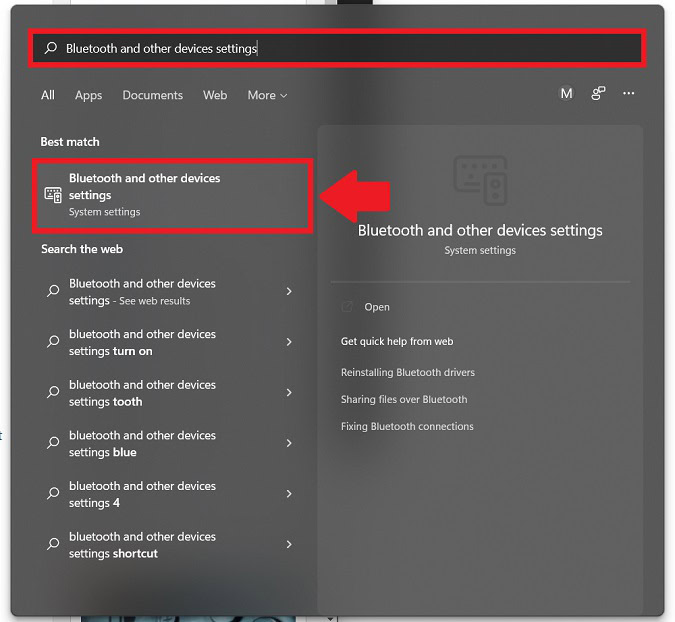
On your computer, search for Bluetooth and other devices settings in the Start menu. The option to open that page from System settings should appear, so click it.
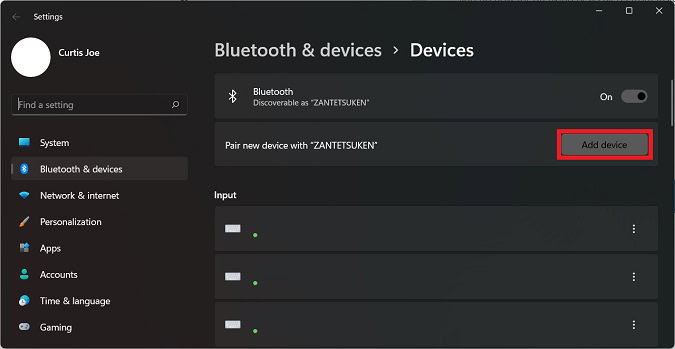
Underneath the Bluetooth toggle, you should see the Pair new device with “[your computer name]” option. Click the Add device button next to it.
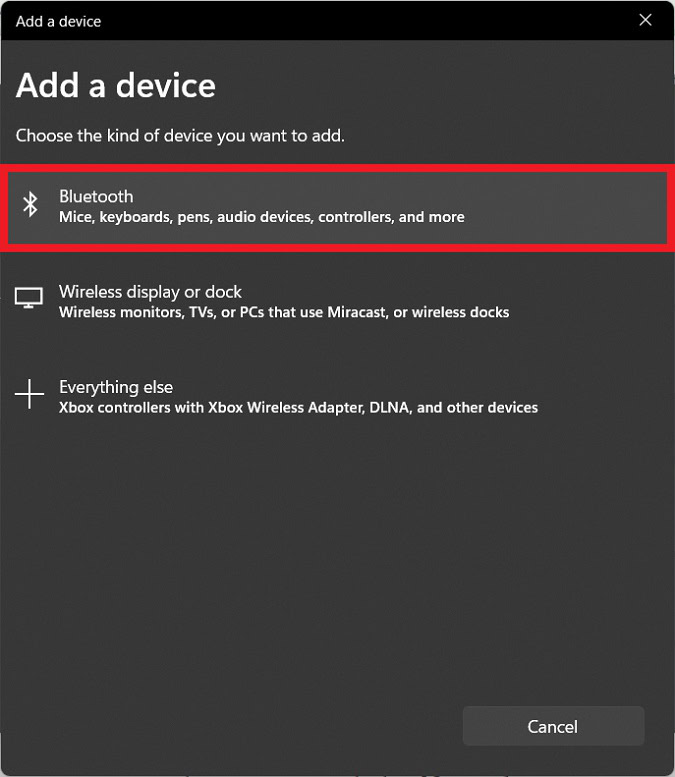
In the Add a device menu, select Bluetooth.
With the Nintendo Switch Pro Controller in pairing mode, it will appear in the list of devices available to pair. It should appear as Pro Controller. Click on it from the list.
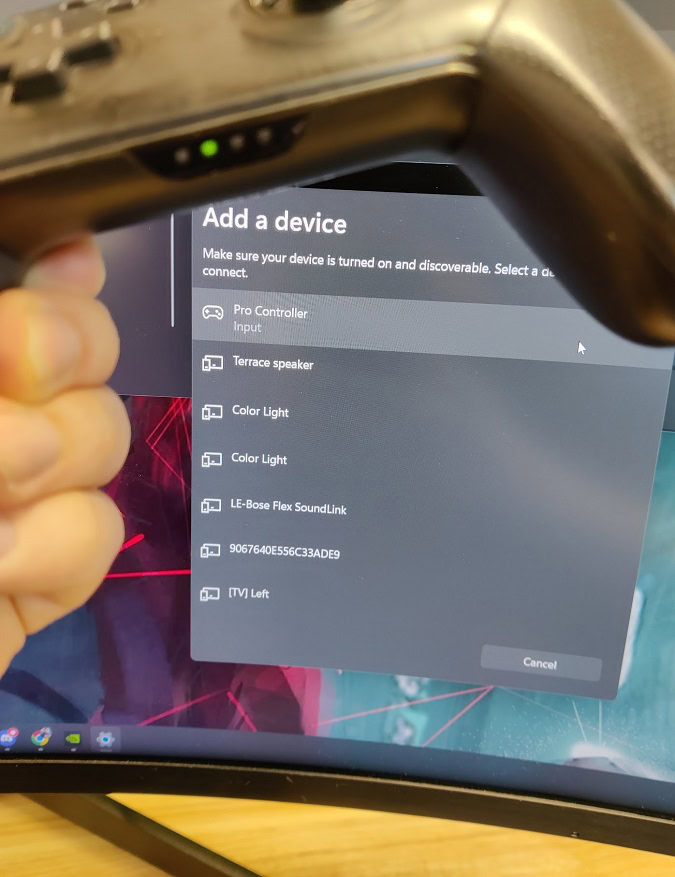
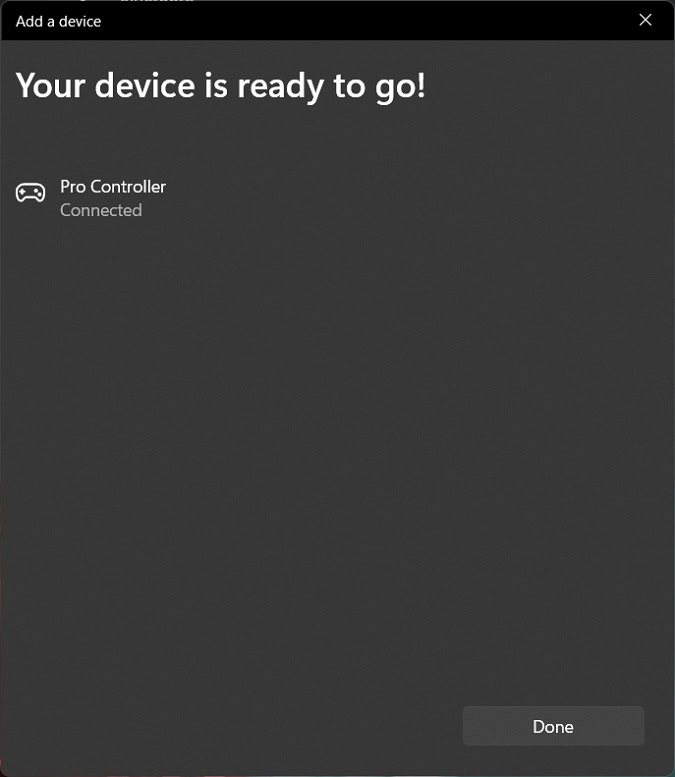
Your Nintendo Switch Pro Controller is now connected to your computer wirelessly via Bluetooth.
How to use your Switch Pro Controller on Steam
Just by plugging it in, your Switch Pro Controller should work with most Steam games. However, if it still isn’t working, you can do a few things.
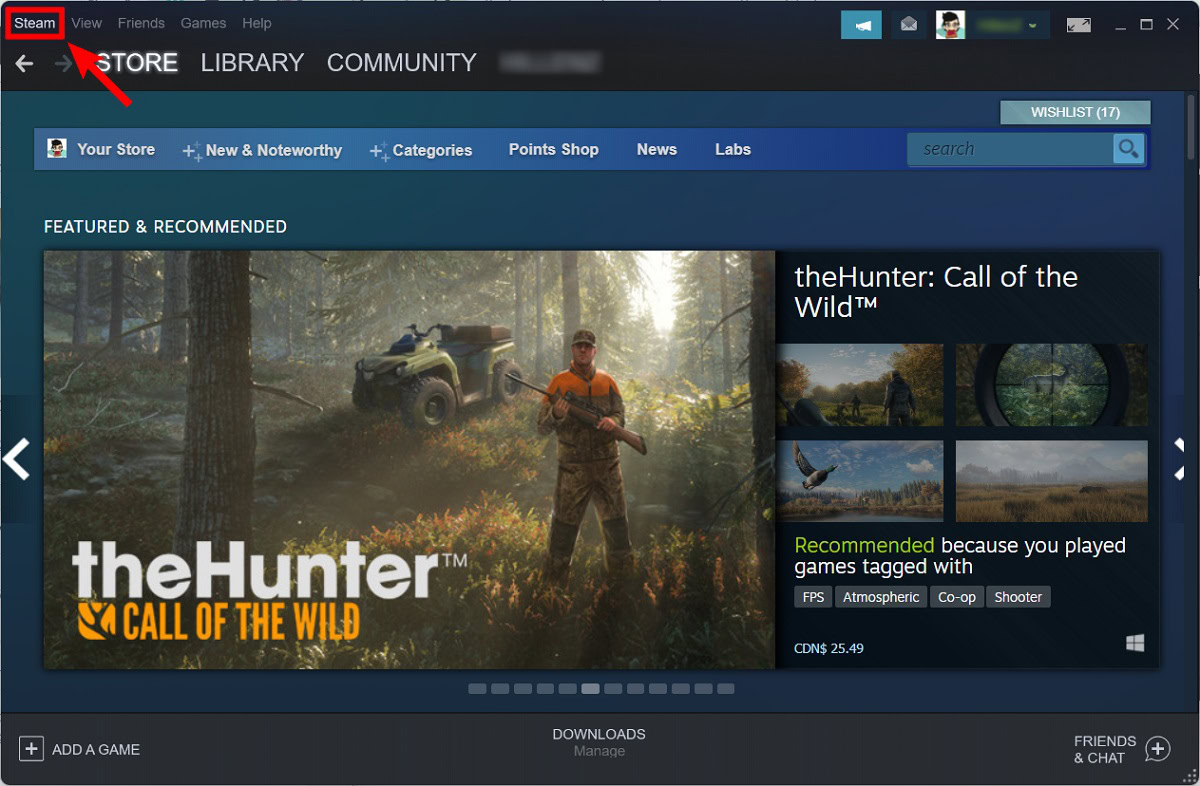
Open Steam on your desktop computer and click the Steam button in the top left.
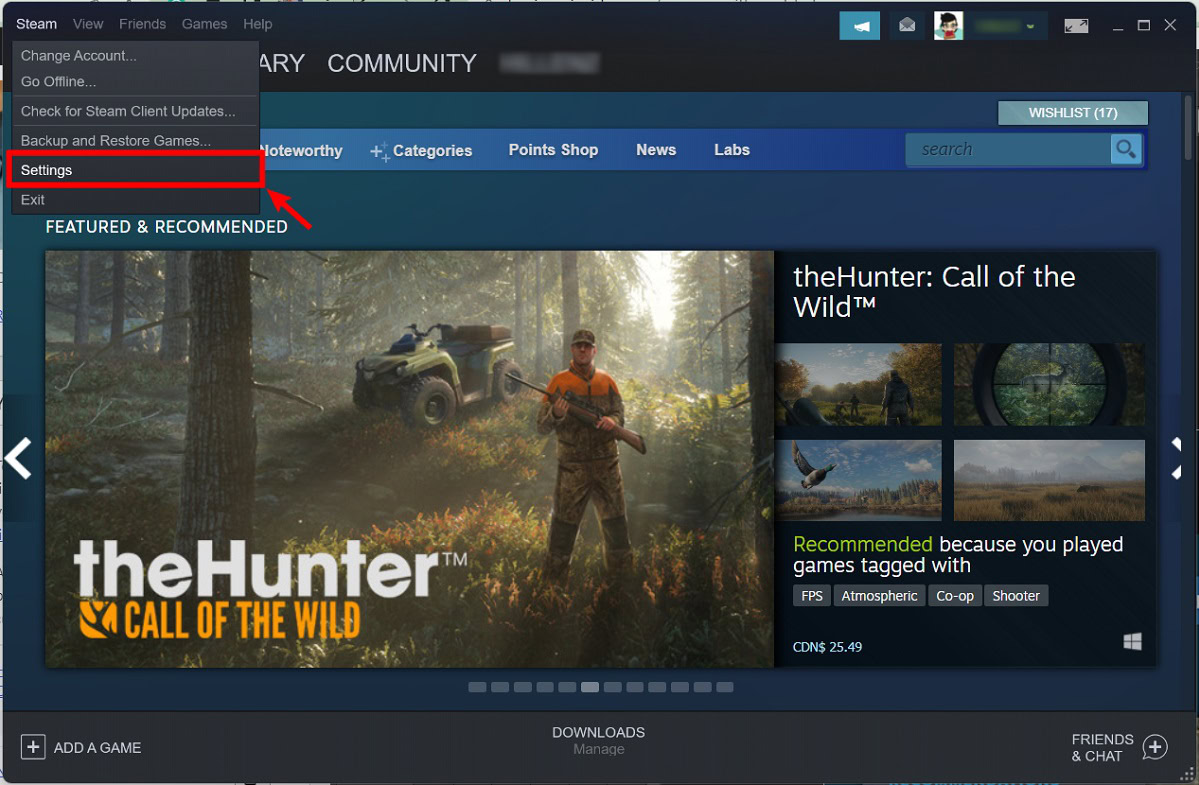
Click Settings from the dropdown menu.
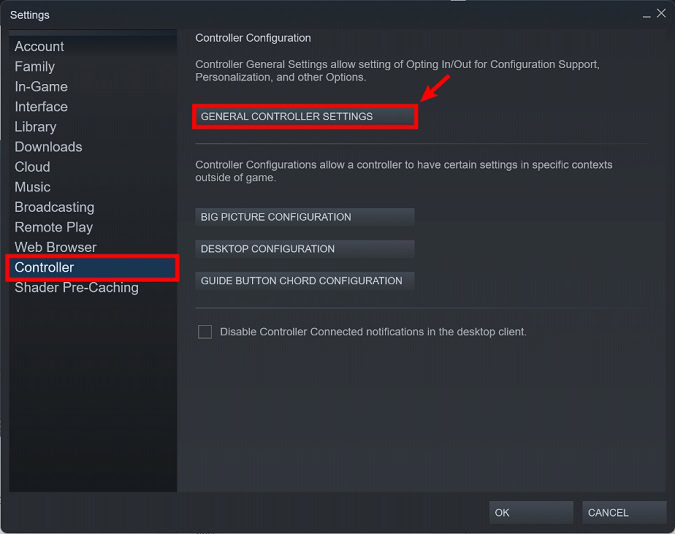
From the options on the left side, click the Controller tab. After that, click GENERAL CONTROLLER SETTINGS.
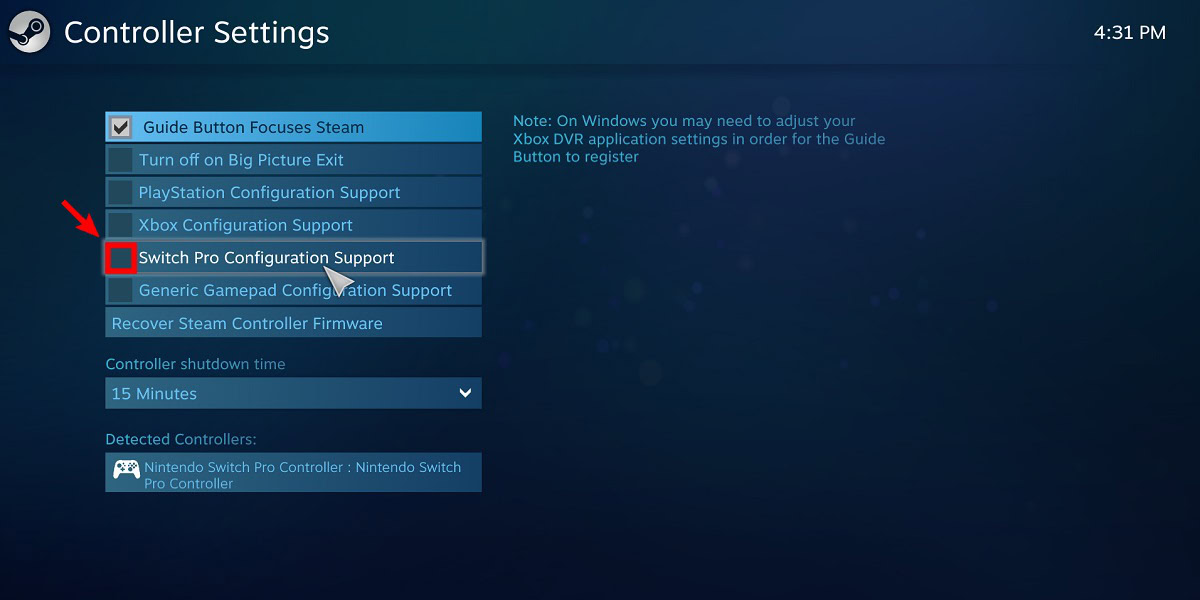
Click the checkbox next to Switch Pro Configuration Support.
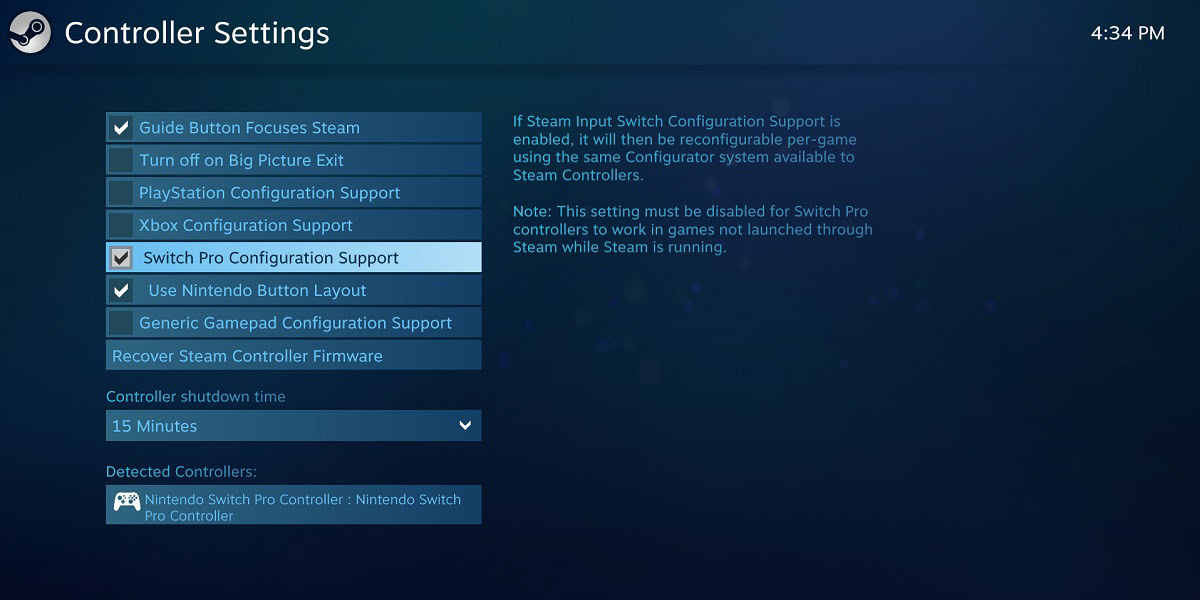
Underneath it, Use Nintendo Button Layout should also automatically be checked. This will allow you to use the Nintendo Switch Pro Controller as intended. Without this option active, the Switch Pro Controller may act similarly to the Xbox Series X controller, which has a different layout.
If you intend to use Steam in Big Picture Mode, you can also go into each game and configure custom in-game control mappings for your controller.
How to use your Switch Pro Controller with non-Steam games
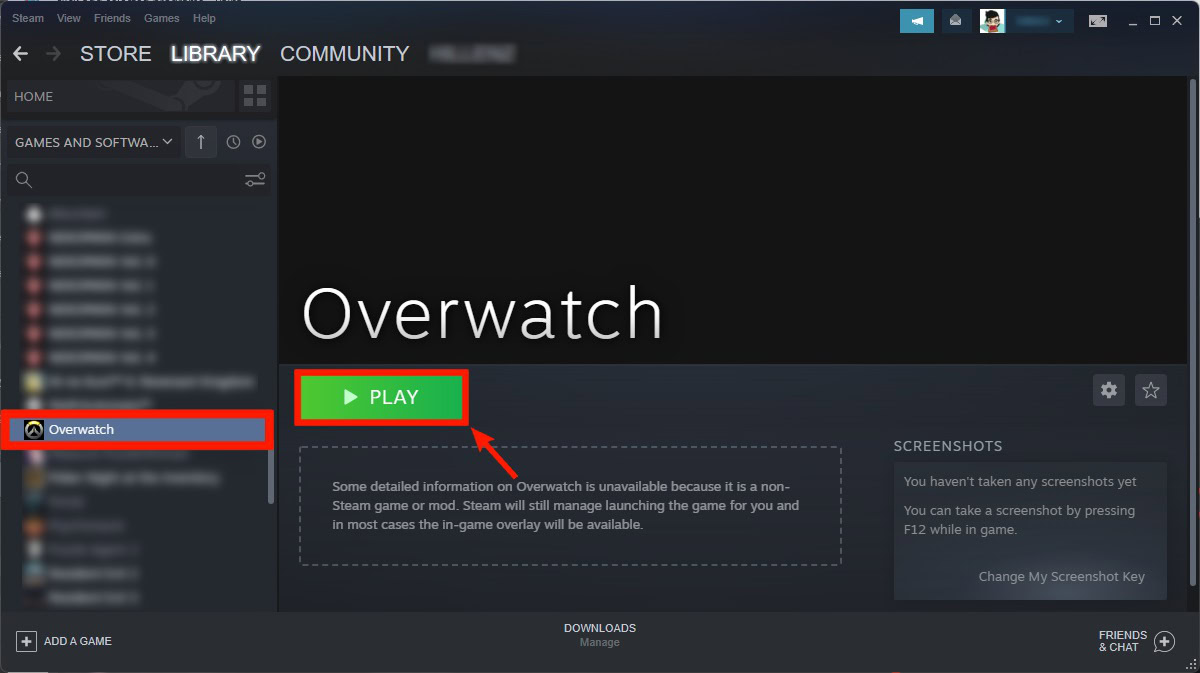
You can use your Switch Pro Controller as you configured it through Steam in non-Steam games. You must add that non-Steam game to your Steam library, then run it from there with your controller plugged in.
How to add a non-Steam game to your Steam library
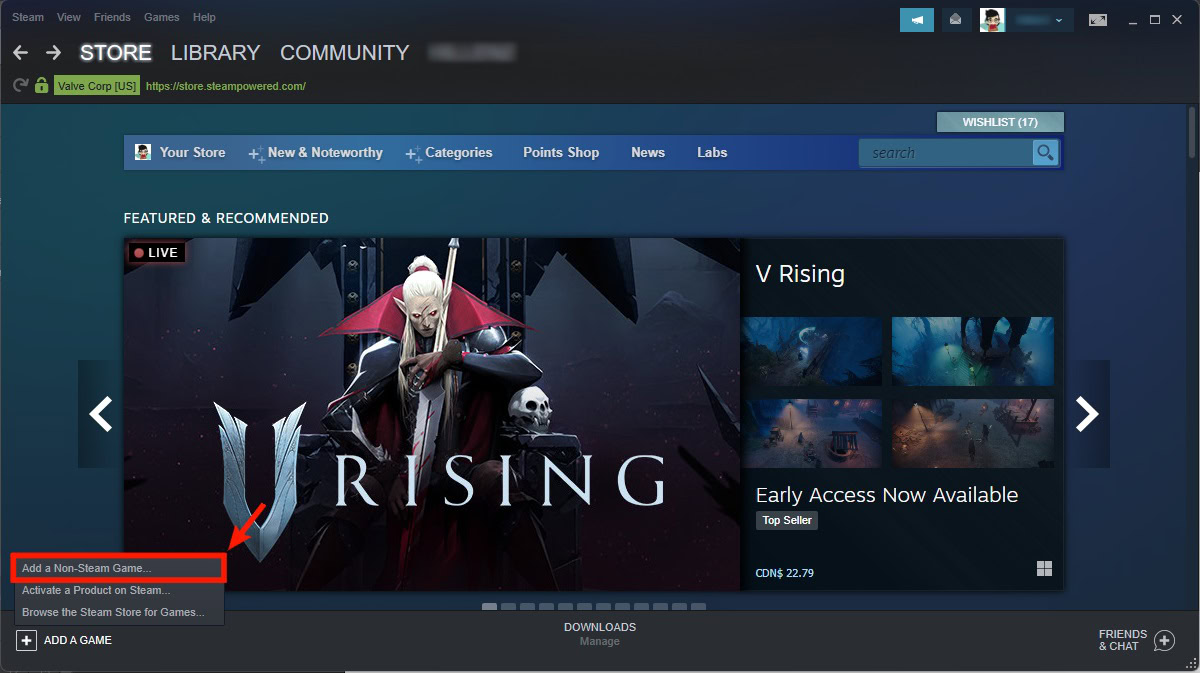
Open Steam on your desktop computer. From the options along the bottom of the interface, click the plus-shaped ADD A GAME button.
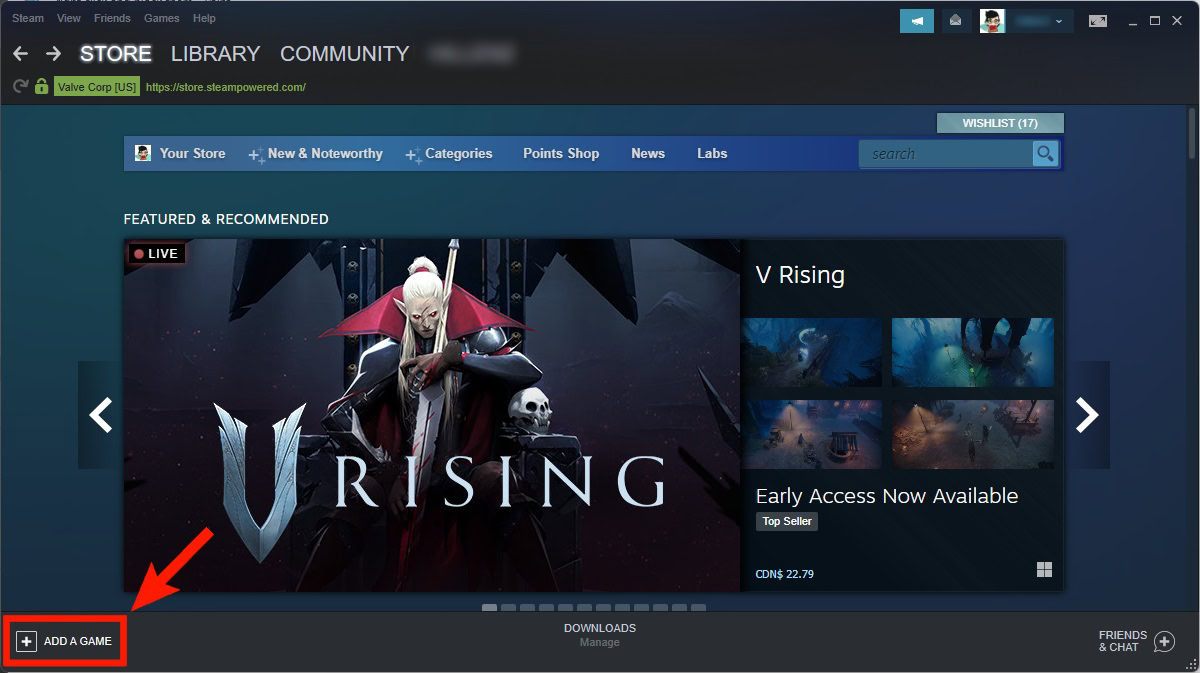
From the following options, click Add a Non-Steam Game….
In the Add a Game pop-out, locate the program you wish to add to your Steam library. Click the checkbox next to it, then click the ADD SELECTED PROGRAMS button in the bottom right.
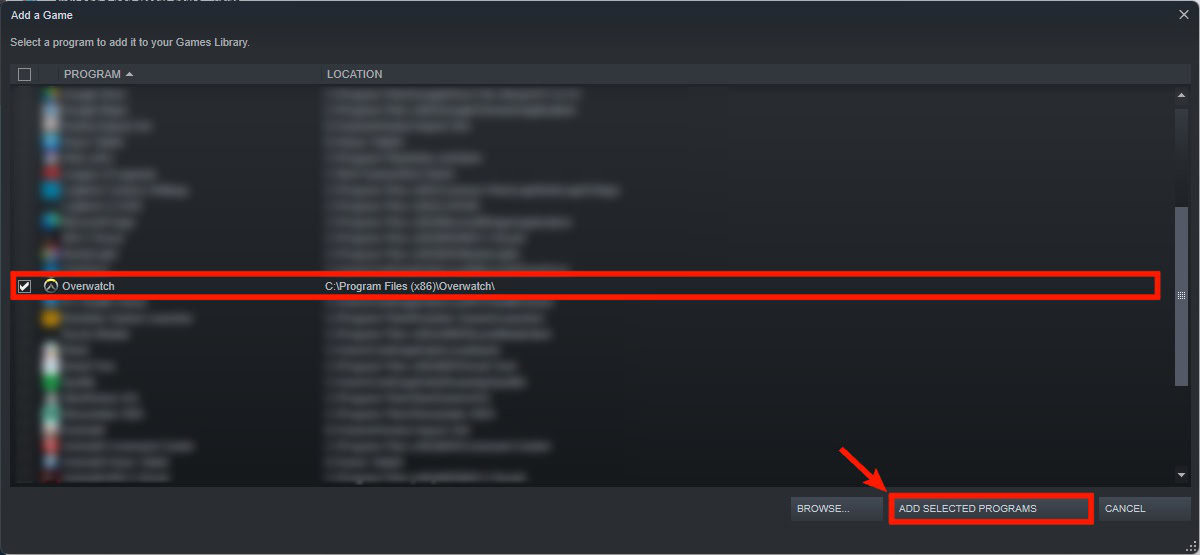
Your non-Steam game will now appear in your Steam library.
