Affiliate links on Android Authority may earn us a commission. Learn more.
Android customization - capture time lapse images using Tasker, coding 101: the For loop
We’ve been on a photography kick here on our Android customization series, we’ve been using Android devices as cameras, as remotes for other cameras and more. We’d like to do a photography project once again today, but our purpose is to learn how to use the For loop tool in Tasker, coding 101.
One of the most memorable lessons my college programming instructor gave was an intro to the IF statement and For loops. It involved gaming, robotics and a hot chocolate on a cold winter day. Since I’ve already talked about IF statements in this series, I will have to deny you games and robotics, but you are welcome to enjoy a hot chocolate as you read forward, learning about the For loop in Tasker.
Before we begin

Tasker For loop
In the coding world, the For loop is a coding method in which a section of code is performed over and over again, in a loop, until a predefined criteria is met. This may sound odd, until you see it at work. Examples of For loops can be found all over the place in every day life. Think of all of the repetitive actions you make that have a pre-set count to them.

Before I leave the house, I reach down, pull on a shoe, then sit back up, then I reach down, pull on a shoe and sit back up, again. There is but one variable in the action, left side or right side, but the action remains the same and I know exactly how many times I need to do it. If I were coding putting on my shoes, I would most certainly use a For loop to do it. (Special note: that is not my shoe, I’m not that cool!)
Although the For loop is designed to rapidly punch through code, we will use it on a somewhat battery draining project today, a photo time lapse.
Before we start this, let me remind you that Tasker has a method within the Profiles that allows you to trigger a Task over and over again based on time, which would be a little gentler on your battery, but we’re learning here, so let’s use the For loop.
Begin a new Tasker Task, name it appropriately, I’ll call mine “ForLoopse“.
Tap the “+” to add your first action.
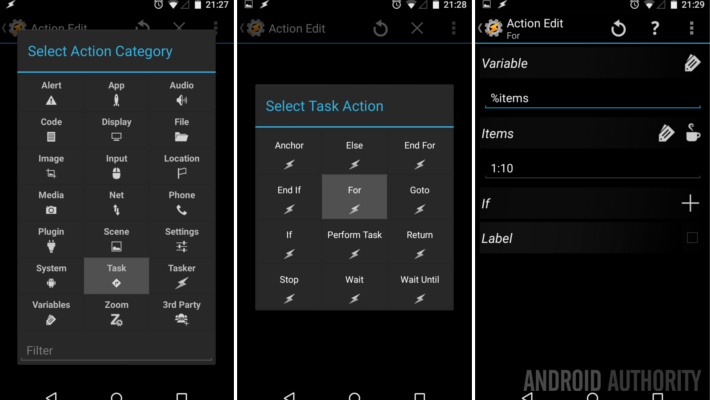
Choose Task.
Choose For.
We must now decide how we want to handle this project, specifically, how many photos do you want to take in your time lapse. I shall start with 10, just for learning purposes – in the real world, you may end up taking hundreds, even thousands of images to get a quality time lapse of any length. Don’t worry about that too much though, I will show you a better option next week.
So, under Variable, enter a new local variable name, for ease I’ll call mine “%items“.
Now, in the Items section, fill in the parameters for which your For loop should run. I have entered “1:10” meaning that my loop will run ten times, each time it will add 1 to the value of %items, beginning at 1 and running through to 10. I’ll explain more later.
Hit the system Back button to save and exit the For configuration.
Now we take the picture. Tap the “+” button to add another action.
I’ll make this quick, since we’ve seen it a few times already: Media -> Take Photo. Set all the settings just the way you like them, except Filename, I’ll cover that next. Also, keep in mind that you will be taking ten, or hundreds of images here, and that if you plan to compile them into an animated GIF, you probably won’t need them at full resolution. Consider your desired output size and set the Resolution appropriate for that. I’m staying fairly large at 1280×720, which I will crop down for the final animation.
Now, under Filename, I want to use the %item variable to keep track of the photos. This also shows how the variable works. So, my Filename is as follows: “TimeLapse_photo%items“. Remember that the For loop will change the value of %items each time it runs, so this will properly number my photos for me for organizing later.
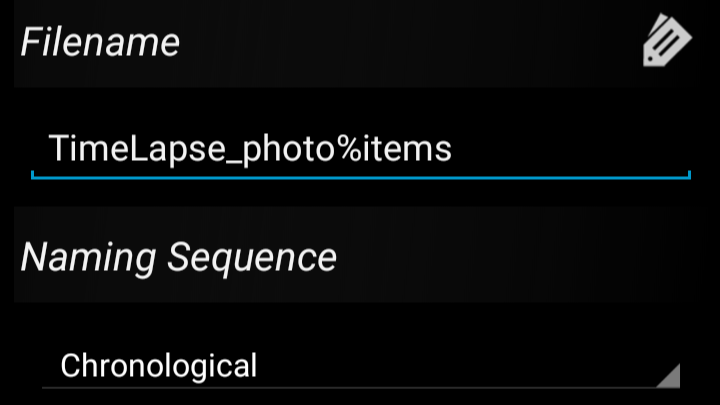
Tap the system Back button to save and exit.
If we do nothing more than just finish off the loop at this time, it would run as fast as it can through the ten iterations, instead, we want to introduce a delay.
Tap the “+” button to add another action.
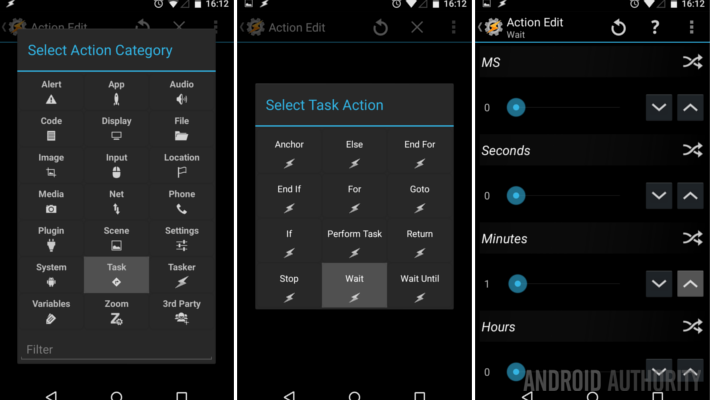
Choose Task.
Choose Wait.
Enter an appropriate time between image captures. I will be watching the clouds, so a one minute interval should be more than enough. Keep in mind that your device will require 2-3 seconds to actually take each photo through Tasker, so I recommend going no less than 5 seconds here.
Also, the length of time your device will now be busy can be determined by simply multiplying your number of times looping by the time in between each loop. Mine is ten loops, at one minute each, for a total of ten minutes of device usage. Obviously I am not using my main device for this project.
Tap the system Back button to save and exit.
Finally, we must assign a termination for the For loop.
Tap the “+” button to add your next action.
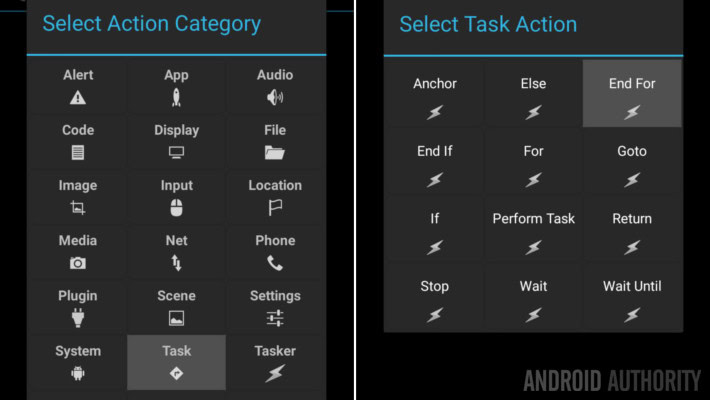
Choose Tasks.
Choose End For.
All finished, you can hit the system Back button to save and exit all the way out of Tasker.
There you have it, your device is ready to start taking a succession of photos that you can compile into an animated GIF, or whatever you have in mind for it.

What’s next
Let’s remind ourselves some of the intricacies of animated images. First, you will need a good amount of images to make a smooth animation. That movie you watched the other day likely ran at about 24 or 29 frames per second. Of course, when recording, it would have had to capture at least 24 images each second to make this work.
We are capturing one image every 5+ seconds, thus, real time action is not entirely possible with today’s project. Don’t fret, I will show you a better option next week, oh, and I thought you just came here to learn the For loop anyway. Back to the animation, you can see that I put mine together at five frames per second, giving you a decent 2 second look out my front deck. You are seeing Mt. Hood there, if you were interested.

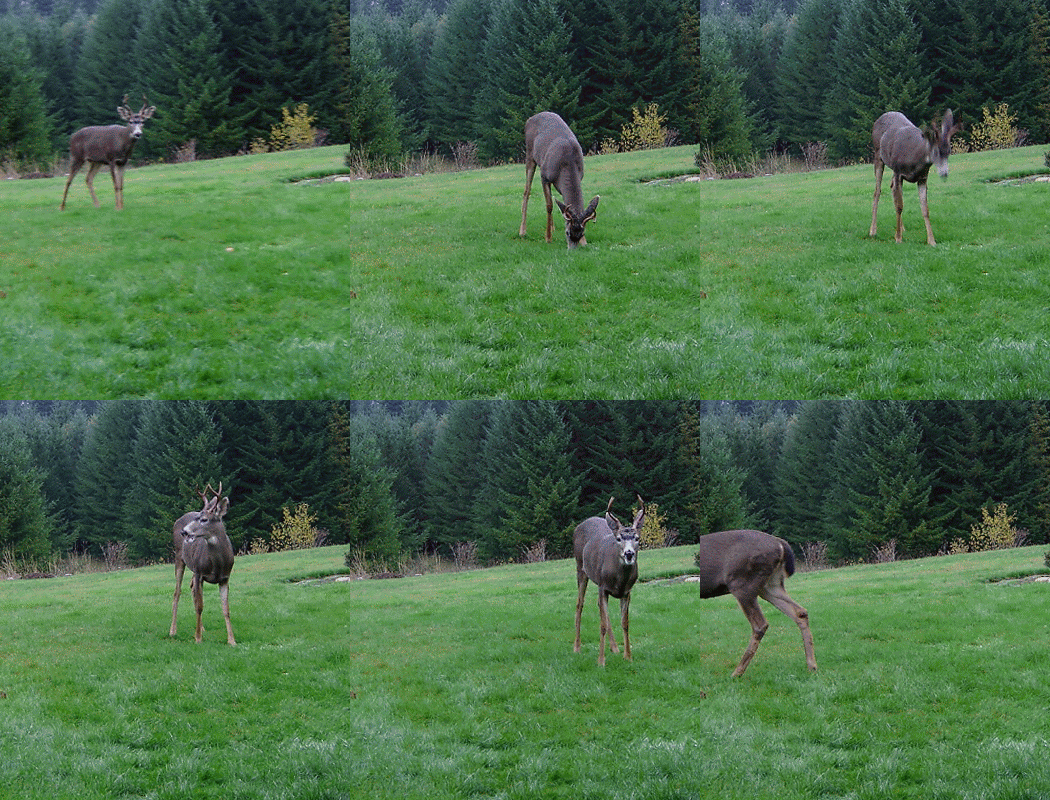
Finally, I did not at all cover how to trigger your time lapse capturing For loop today. Can I leave it to you to create a Tasker Task widget on your homescreen, or create a Profile using Pushbullet to trigger the capture remotely? Or, maybe you want a Profile that triggers at a certain time of the day? I think you can handle this.
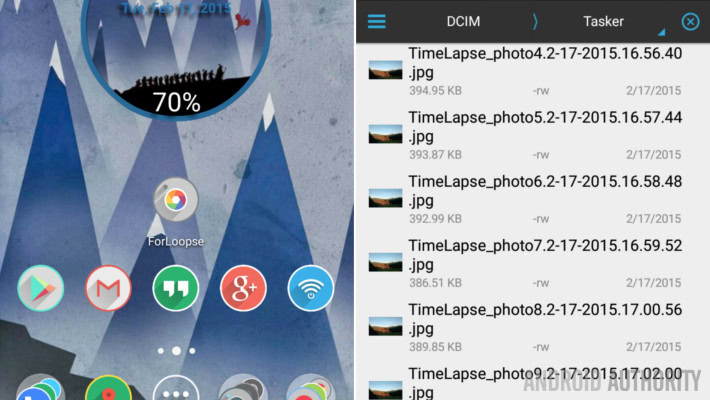
Next week
Coding 101 was fun in today’s Android customization post. I hope you get that a time lapse is not a great use for the For loop tool, instead, I suspect you’ll likely use it for variable manipulation within a larger project. If you are still interested in creating a time lapse, and really want to step it up, I invite you to join me next week as I show off one of the best time lapse tools I have ever experienced on an Android device. No hints, sorry.
What is the best use of Tasker’s For loop that you can think of?