Affiliate links on Android Authority may earn us a commission. Learn more.
How to use HDR on your Android device
March 18, 2013
Of the many ordinary and extraordinary things that I can do on my Android device, mobile photography is one of my well-loved activities. Taking panoramic images is a walk in the park on my Android phone. I can even create 360-degree photos of my surroundings with the Photo Sphere mode of the Android 4.2 Camera. Yet, there’s a very nifty camera mode that’s not much talked about — High Dynamic Range mode, better known as HDR.


Used appropriately, HDR Mode can produce really awesome photos. On the Web I have seen stunning HDR images that were taken using a DSLR camera and merged through an HDR photo editing tool. Can the HDR feature on Android devices provide the same or comparable quality? What is HDR anyway? And, how does it work? How can you effectively use HDR?
In this guide, you’ll learn how to use HDR on your Android device. You may also watch the video tutorial towards the end of this post.
What is HDR?
HDR stands for High Dynamic Range. It usually refers to the method of capturing images having “greater dynamic range between the lightest and darkest areas of an image than current standard digital imaging methods or photographic methods” (Wikipedia).
HDR images are frequently described as saturated, high in contrast, and rich in colors. Looking at an HDR image might make you think that it’s a complicated and time-consuming image to create. But, the truth is that creating HDR images is quite simple.
The process involves capturing multiple shots of the same subject but in varying exposures (underexposed, normally exposed, and overexposed). The multiple images are then combined into one photo, resulting in a greatly detailed image. Some photographers use HDR software to merge and edit the images, oftentimes resulting in surreal images.

HDR Mode on Android also follows the same principles but is simpler compared to how it is usually achieved on a DSLR camera. HDR on Android handsets usually correct exposure imbalances and enhance details on both the subject’s background and foreground.
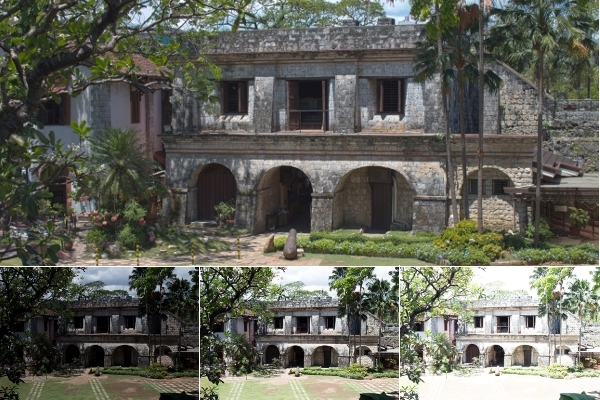
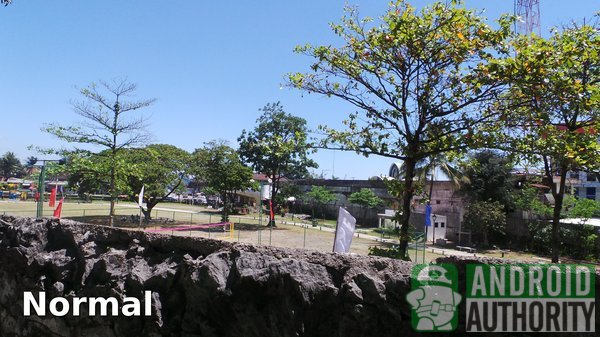
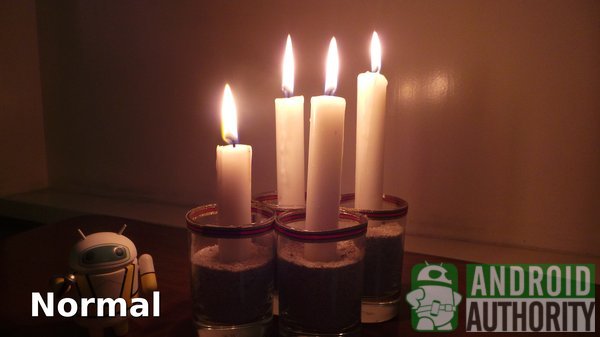
To better understand how HDR works, let me show you some sample images taken by the Galaxy Camera. The photo below was taken without HDR:
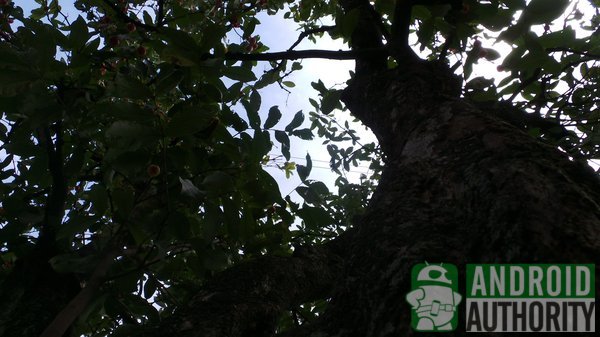
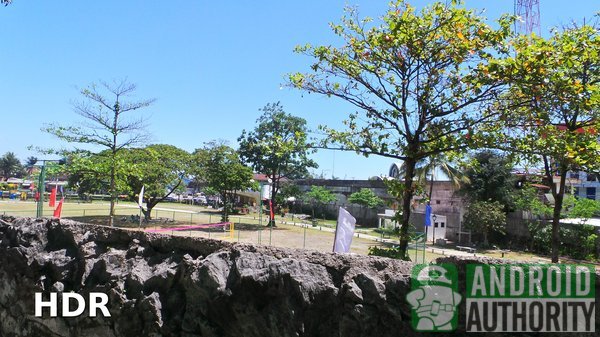
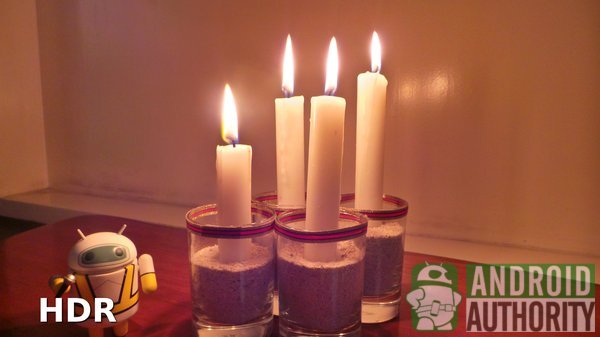
And, this one’s a photo with HDR enabled. Do you see some difference?
The tree in the first picture is underexposed because of the bright background (i.e., the bright sky). HDR tries to correct this imbalance by equalizing the exposure on both background and foreground so details are enhanced in both areas. This is basically how HDR works.
Do you have HDR?
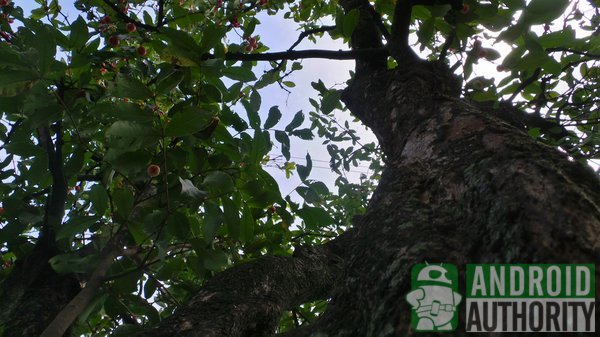
Not all Android devices support HDR Mode. The best way to check for HDR capability is by looking for the HDR option in your device’s Camera app.
The HDR option on some high-end Samsung devices can be found under the Shooting Mode menu.
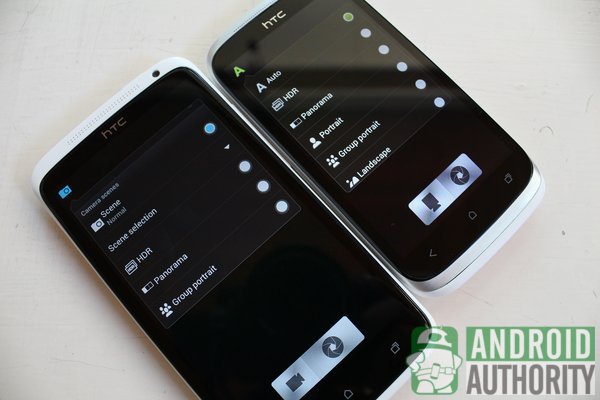
Some custom Camera apps (e.g., on the HTCOne X and Desire X) place the HDR option under the Camera Scenes section.
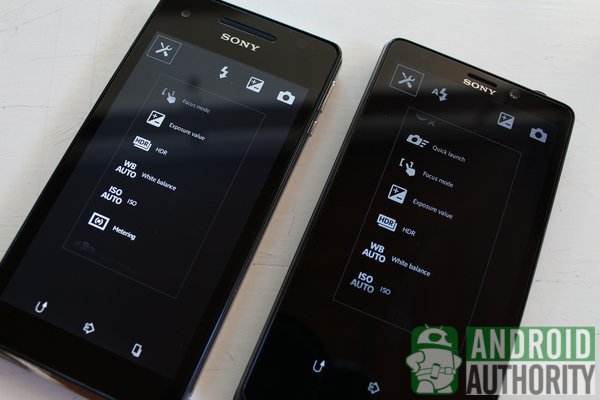
If you can’t find HDR under Shooting Mode or Camera Scenes, try looking for it under the camera’s Settings menu. Some Sony devices (e.g., the Xperia T and Xperia V), for example, place HDR under the camera’s Settings menu.
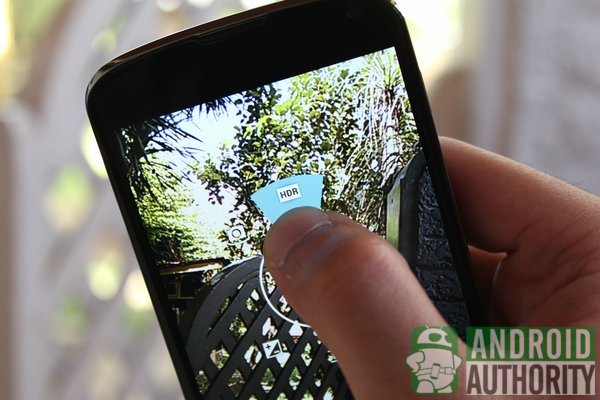
On the Nexus 4, which runs Android 4.2 Jelly Bean, you can easily turn HDR Mode on by long-tapping the viewfinder and tapping the HDR icon. Interestingly, the Android 4.2 Camera on the other Nexuses (i.e., Galaxy Nexus and Nexus 10) doesn’t have HDR Mode.

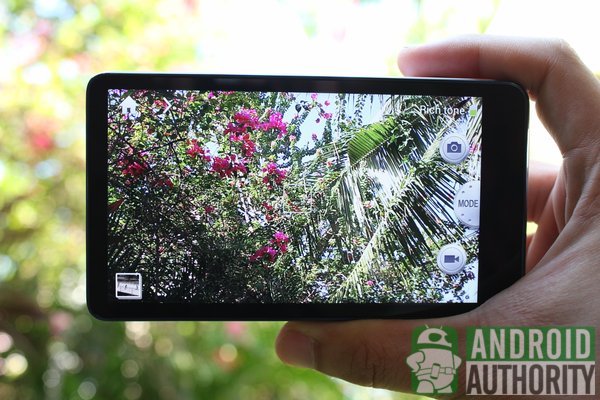
On other Android devices, HDR may be found under certain labels such as Backlight HDR or Backlight Correction HDR. On the Galaxy Camera, HDR is not labeled as such; instead, Samsung calls it Rich Tone and it can be found under the Smart Modes menu.
Using HDR on your Android device
Using HDR on your Android device is easy. All you need to do is enable HDR Mode and snap photos as you normally would: launch camera app, point and focus at subject, and hit camera shutter.
Also, you might want to use a tripod if it’s available, or at least hold the camera with stable hands; HDR doesn’t take too kindly to movement when capturing photos. Also, the camera shutter speed may vary depending on the amount of light.
If you use a Samsung Android device, you will notice that the camera will produce two pictures. One is the HDR image and the other is the one with normal exposure. Check the file name to distinguish the two images. HDR images have “HDR” in their file names.
When to use HDR
HDR is a handy feature on your Android camera. But, when is the proper time to use HDR? Here are some situations where HDR may be advantageous:
- Landscape shots. Activating HDR for capturing landscape photos is usually beneficial, especially when the sky is too bright and the subject has a dark foreground. In such circumstances, HDR ought to help in capturing rich details from both background and foreground.
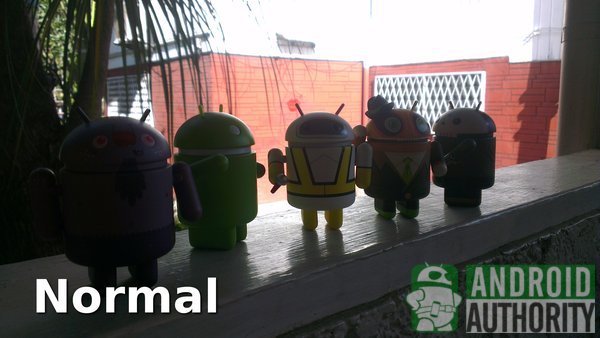
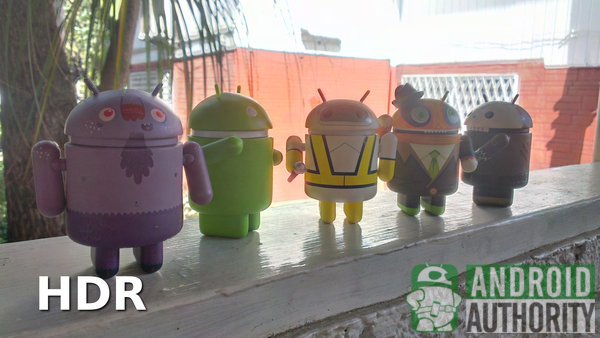
- Portrait shots under sunlight or with bright background. Taking portrait shots with a bright background leaves the subject underexposed. To fix this problem, enable HDR so the background and foreground are evenly exposed.
- Capturing dim scenes. You can also use HDR when you want to capture dim scenes such as a picture of a candle flame or the lights on the street.
- Remedying low-light scenes. — HDR can help brighten up images taken in low-light conditions.


When not to use HDR
HDR may be advantageous in several situations, but there are times when you don’t want to use HDR. Here are some of those instances:
- Photographing moving subjects. HDR takes three or more photos in a row and combines them into one composite picture. So, make sure that the subject doesn’t move, or minimize movement while taking a photo.
- Capturing realistic colors. Since HDR attempts to enhance a photo’s details, it may alter the photo’s original color in the process. Turn off HDR if you want to capture the realistic color of the blue sky or a beautiful red rose.
- When flash is needed. Some Android devices disable flash when HDR is enabled. Some Android devices, though, allow simultaneous use of both flash and HDR.
Using an HDR camera app

If your Android device doesn’t have HDR, don’t fret. You can still enjoy HDR photography with the help of Android apps. There are several HDR-capable camera apps on the Google Play Store.
A personal favorite of mine is HDR Camera+, a paid app that allows you to take HDR photos and instantly edit your photos after capturing them.
Or, if you just want the HDR feature without the ability to edit your photos, there’s the plain ol’ HDR Camera app, which is free.
Here’s a quick guide to capturing your first HDR image using HDR Camera+:
- Install the HDR Camera+ from the Google Play Store and launch it after installation.
- Tap the cog-wheel Settings icon, tap Advanced, and mark the Edit After Taking option.
- The HDR camera app interface looks like the Android camera’s interface. It has a viewfinder taking up most of the device’s screen. Below the viewfinder is a bar holding the Settings button, Shutter button, and a thumbnail preview of the last taken photo. Below the bar is the zoom slider.
- Point your camera towards the subject and tap the Shutter button to take a picture. Make sure to keep your hands still.
- After taking a picture, the photo editor page will appear. If you want, select one of the preset filters or manually adjust your photo’s exposure, color vividness, contrast, and micro contrast.
- Tap the floppy disk icon to save your work.
- Tap the thumbnail to view your image. From the image view page, you can also share your HDR photo to various apps and services.
Video Guide
Know more about how to use HDR on your Android device by watching our video tutorial on YouTube:
Conclusion
HDR is one of the many features on an Android camera that make mobile photography interesting and fun. It certainly makes photos look better because of the wider range of light and dark intensities. And, although not all Android devices have HDR out of the box, you can always try installing an HDR camera app.
Do you use HDR on your Android device? How often do you use it? Do you find it useful? What tips and tricks can you share to us regarding HDR use on Android? Let us know in the comments.
(with contributions from Elmer Montejo)
Thank you for being part of our community. Read our Comment Policy before posting.