Affiliate links on Android Authority may earn us a commission. Learn more.
How to completely uninstall BlueStacks from Windows or Mac
BlueStacks is one of the more popular Android emulators available on Windows and MacOS. If you no longer require it, you may want to uninstall it from your machine to free up some space. But how do you do this, and what should you do to overcome any errors while uninstalling it? We guide you through everything you need to know about uninstalling BlueStacks below.
QUICK ANSWER
To uninstall BlueStacks on Windows, open the Start Menu, search for BlueStacks, right-click on the entry, and select Uninstall. On Mac, select the Go option on the Finder toolbar, choose Applications, right-click on BlueStacks, and select Move to Bin.
JUMP TO KEY SECTIONS
How to uninstall BlueStacks on Windows

If you know how to uninstall a program on Windows, you’ll know how to uninstall BlueStacks. No special steps are required here, and that’s great news for beginners and more experienced PC users.
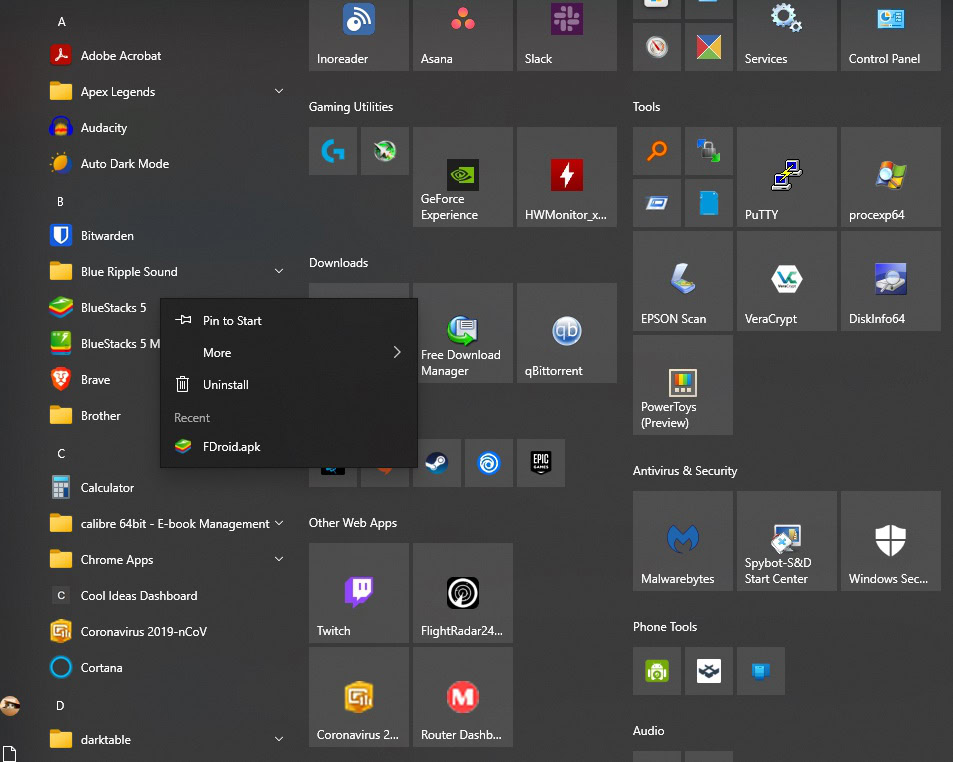
- If you’re running Windows 10 or 11, hit the Start button.
- Search for BlueStacks.
- Right-click the app, then select Uninstall.
The uninstall process will begin and should complete within a few minutes.
If you’re running an older version of Windows, the process is a little more involved. Open Control Panel, and navigate to Programs > Uninstall a program. Find BlueStacks, then right-click on the entry. Select Uninstall.
BlueStacks official Windows uninstaller
BlueStacks offers a dedicated uninstaller tool to scrub your PC of the program and its files for those who don’t want to jump through all these hoops. This is an excellent way to remove an older version of BlueStacks in preparation for the latest or if an error is affecting the app. Find a download link on this page.
How to uninstall BlueStacks on a Mac
Uninstalling BlueStacks on a Mac is just as simple as removing any other program.
- From the Finder menu bar, select Go > Applications.
- Scroll down until you find the BlueStacks icon.
- Right-click the icon, then select Move to Bin.
How to fix the 2318 error when uninstalling BlueStacks
The 2318 error is a more common and annoying issue when uninstalling BlueStacks on a Windows PC. The error doesn’t have a definitive fix, but there are several things you can try to solve or get around it.
Restart the Windows Installer service
We found that this is the easiest and quickest possible fix. Restarting the service is a good idea to rule out Windows Installer as the culprit.
- Open the Start Menu, then type cmd to bring up Command Prompt.
- In the app details page, select Run as administrator.
- In the Command Prompt window, type net stop msiserver, then hit the enter key. This will stop the Windows Installer service. Next, type net start msiserver and hit the enter key. This will restart the service.
- After you’ve completed these steps, try uninstalling BlueStacks as you would any other program on Windows.
Remove BlueStacks registry keys
Bad registry keys may also cause the 2318 error. Some users have found that removing all the registry keys related to BlueStacks and initiating the uninstall process works.
- Open the Start Menu, then type regedit to bring up the Registry Editor. Open the program.
- If a User Account Control box appears, click Yes.
- With the Registry Editor windows in the foreground, hold CTRL-F to activate a search.
- Type bluestacks in the search field, then select Find Next.
- Wait for the Registry Editor to search for BlueStacks-related keys. You’ll want to delete each one that is found.
- Before deleting any registry keys, creating a backup of your registry is a good idea. Select Files > Export… in the Registry Editor toolbar to do this. In the Export Registry File window, give the backup a name (e.g. Pre-BlueStacks Uninstall – Date), and ensure that the All option is selected in the Export Range box.
- To delete a registry key, right-click on a key, then select Delete.
Use BlueStacks’ Windows installer
As mentioned above, BlueStacks has a dedicated uninstaller for those struggling to uninstall the editor from their machines. This might circumvent the 2318 error on Windows machines and is well worth trying if both potential solutions fail for you.
