Affiliate links on Android Authority may earn us a commission. Learn more.
How to create a 3D shooter for Android with Unity – Part two

In part one, we saw how to create a basic 3D environment in Unity and then add first person controls and a camera, along with the ability to shoot. Hopefully, you will have found the process was surprisingly simple, though we’re far from done just yet!
I mean, whoever heard of a first person shooter where you can’t aim up and down? It’s nonsense!
The solution to this one is easy though (sorry to leave you hanging!). All you need to do is click on your FPSController in the hierarchy. This will then show the children, which right now are your FirstPersonCharacter and your Gun. All we’re going to do is move the gun from the FPSController to the FirstPersonCharacter. The latter is what controls the camera and so by making the gun its child, it will now follow wherever the camera points, which is the de facto ‘head’ of our character.
Hit play and you’ll find you can now look left and right and up and down. And if you hit fire, the bullet will fly upward or downward in accordance with the angle of the gun – remember it is being spawned at the precise center of the gun and with its precise orientation.
Adding targets
Now we can aim properly, what we need next is something to shoot at! So let’s create ourselves some targets. To do that, just create another GameObject using whatever shape you deem appropriate. A flat circle probably makes the most sense but how do we make one of those?
A simple solution would be for us to use a cylinder and then change the dimensions. So go to GameObject > 3D Object > Cylinder and then drop it into your Scene.

After changing the scale to make it appear flat, add a second flat cylinder just in front of it and half the size right in the center. I created two more materials – one red, one white – and used those to color the outer and inner circles respectively. The result is something resembling a target and with no 3D modelling necessary. You’ll notice that this should already have a capsule collider attached and you’re also going to need to tick ‘Is Trigger’ in the inspector for the outer ring.
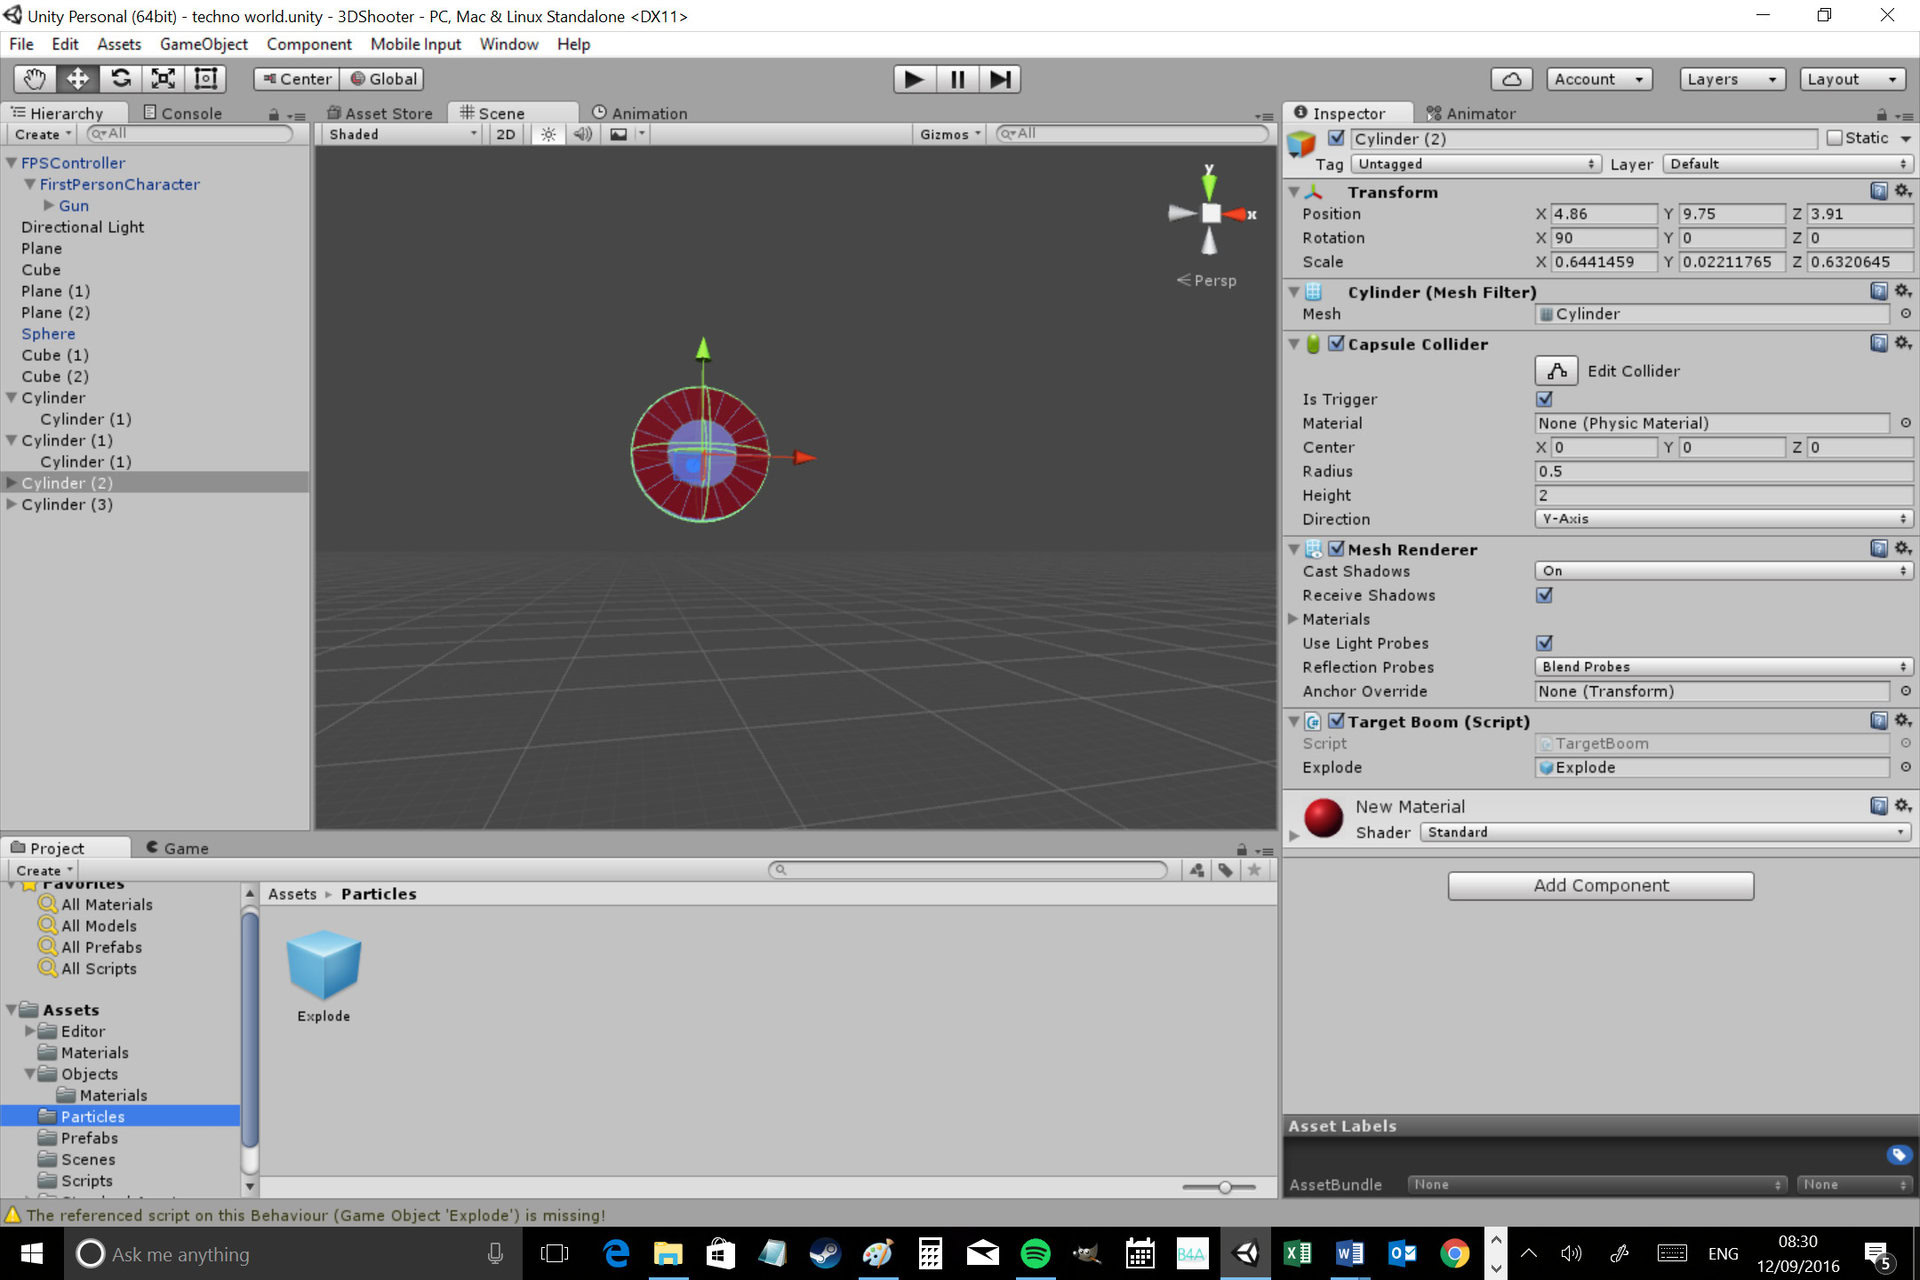
The reason we’re doing that is because we don’t need the target to respond to collissions but we do want to know when something comes into contact with it so that we can detect when it’s being shot and get it to react accordingly. So create a script and call it ‘TargetBoom’ (make sure you created the script in your Scripts folder and your materials in the Materials folder…). Enter the following code:
public class TargetBoom : MonoBehaviour {
    public GameObject explode;
    // Use this for initialization
    void Start () {

    }

    // Update is called once per frame
    void Update () {

    }

    void OnTriggerEnter(Collider other)
    {
        Instantiate(explode, gameObject.transform.position, gameObject.transform.rotation);
        Destroy(gameObject);
        Destroy(other);
    }
}
The ‘onTriggerEnter’ event is what tells us when something interacted with the trigger, so anything here will occur only once an object touches our target. In our case, we’re destroying both the target and the bullet but not before instantiating an explosion (the same way we instantiated the bullet). The explosion is a particle effect and if you’re not sure what that is or how to make one, then you can find out more in my creating a 2D platform game in Unity post (see the section called ‘Adding gore’).
Now attach this script to the target you’ve created, create your particle effect and drop it into the relevant slot in your inspector – you should know how to do all this by now. If you check that post, you should also find how to add an exploding sound effect on the collision to complete the effect should you so desire.
It should all look like this when you’re done (sans optional sound effect):

Now just copy and paste your targets around the screen a little to make as many as you want and enjoy some target practice!
I’ve added a little script to make the objects move left and right, which I also borrowed from the 2D platformer article. Add this script to the targets and remember to fill out the variables in the inspector if you want to make them move left and right.
public class ObjectMove : MonoBehaviour
{
    public float amounttomovex;
    public float speed;
    private float currentposx;
    private float currentposy;
    private int facing;

    void Start()
    {
        currentposx = gameObject.transform.position.x;
        facing = 0;
    }

    void Update()
    {
        if (facing == 1 && gameObject.transform.position.x < currentposx - amounttomovex)
        {
            facing = 0;
        }

        if (facing == 0 && gameObject.transform.position.x > currentposx)
        {
            facing = 1;
        }

        if (facing == 0)
        {
            transform.Translate(Vector2.right * speed * Time.deltaTime);
        }
        else if (facing == 1)
        {
            transform.Translate(-Vector2.right * speed * Time.deltaTime);
        }
    }
}
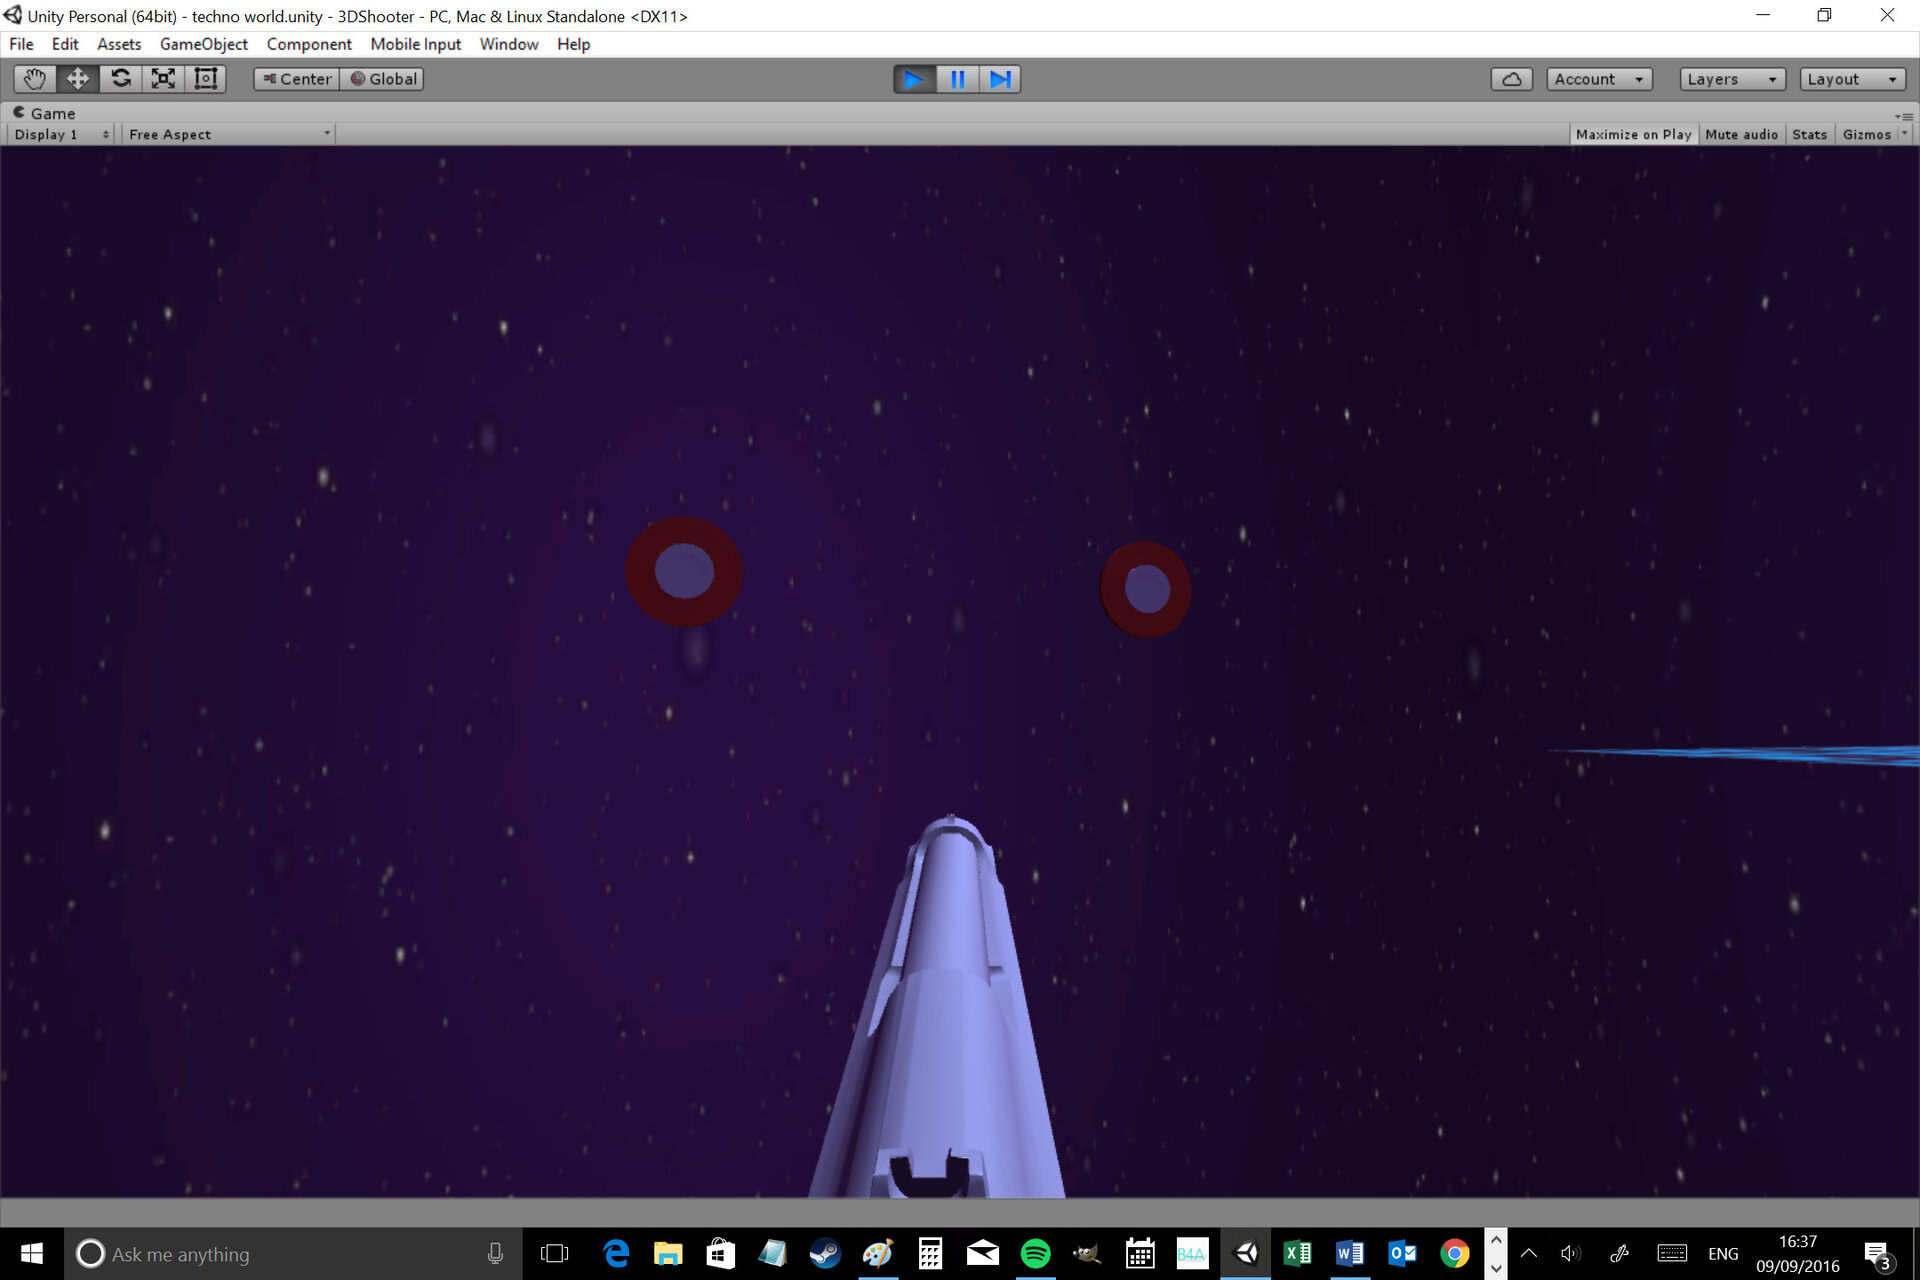
Of course, it wouldn’t be a huge leap to make these targets into enemies by making them swarm on the player and kill us on collision! For now, try shooting the targets and see what happens…
Adding mobile input
Now it’s time to add mobile input so that we can actually control this thing without a mouse and keyboard. Thankfully, this is pretty easy again thanks to some more ready-made scripts in the assets we already imported.
With any luck, you should have a script in your assets called ‘MobileSingleStick Controll’. You can find this by just searching for ‘MobileSingle…’ in your project window. Now just drag and drop this anywhere into your hierarchy and it will automatically create a button for you and an arrow pad. Hit ‘Play’ and you can test this on your PC by using your touchscreen (if you have one) or pressing the ‘Esc’ key and then using the mouse to try dragging the joystick button around. You’ll find that this joystick allows you to walk around the screen, while the button handles jump.
Pretty simple! Except right now you can’t look around, so we need to fix that. Simply copy the first joystick and then paste it into the same parent object. Now just change the horizontal and vertical axis names to ‘Mouse X’ and ‘Mouse Y’ respectively. This means the control will act like a mouse rather than a cursor.
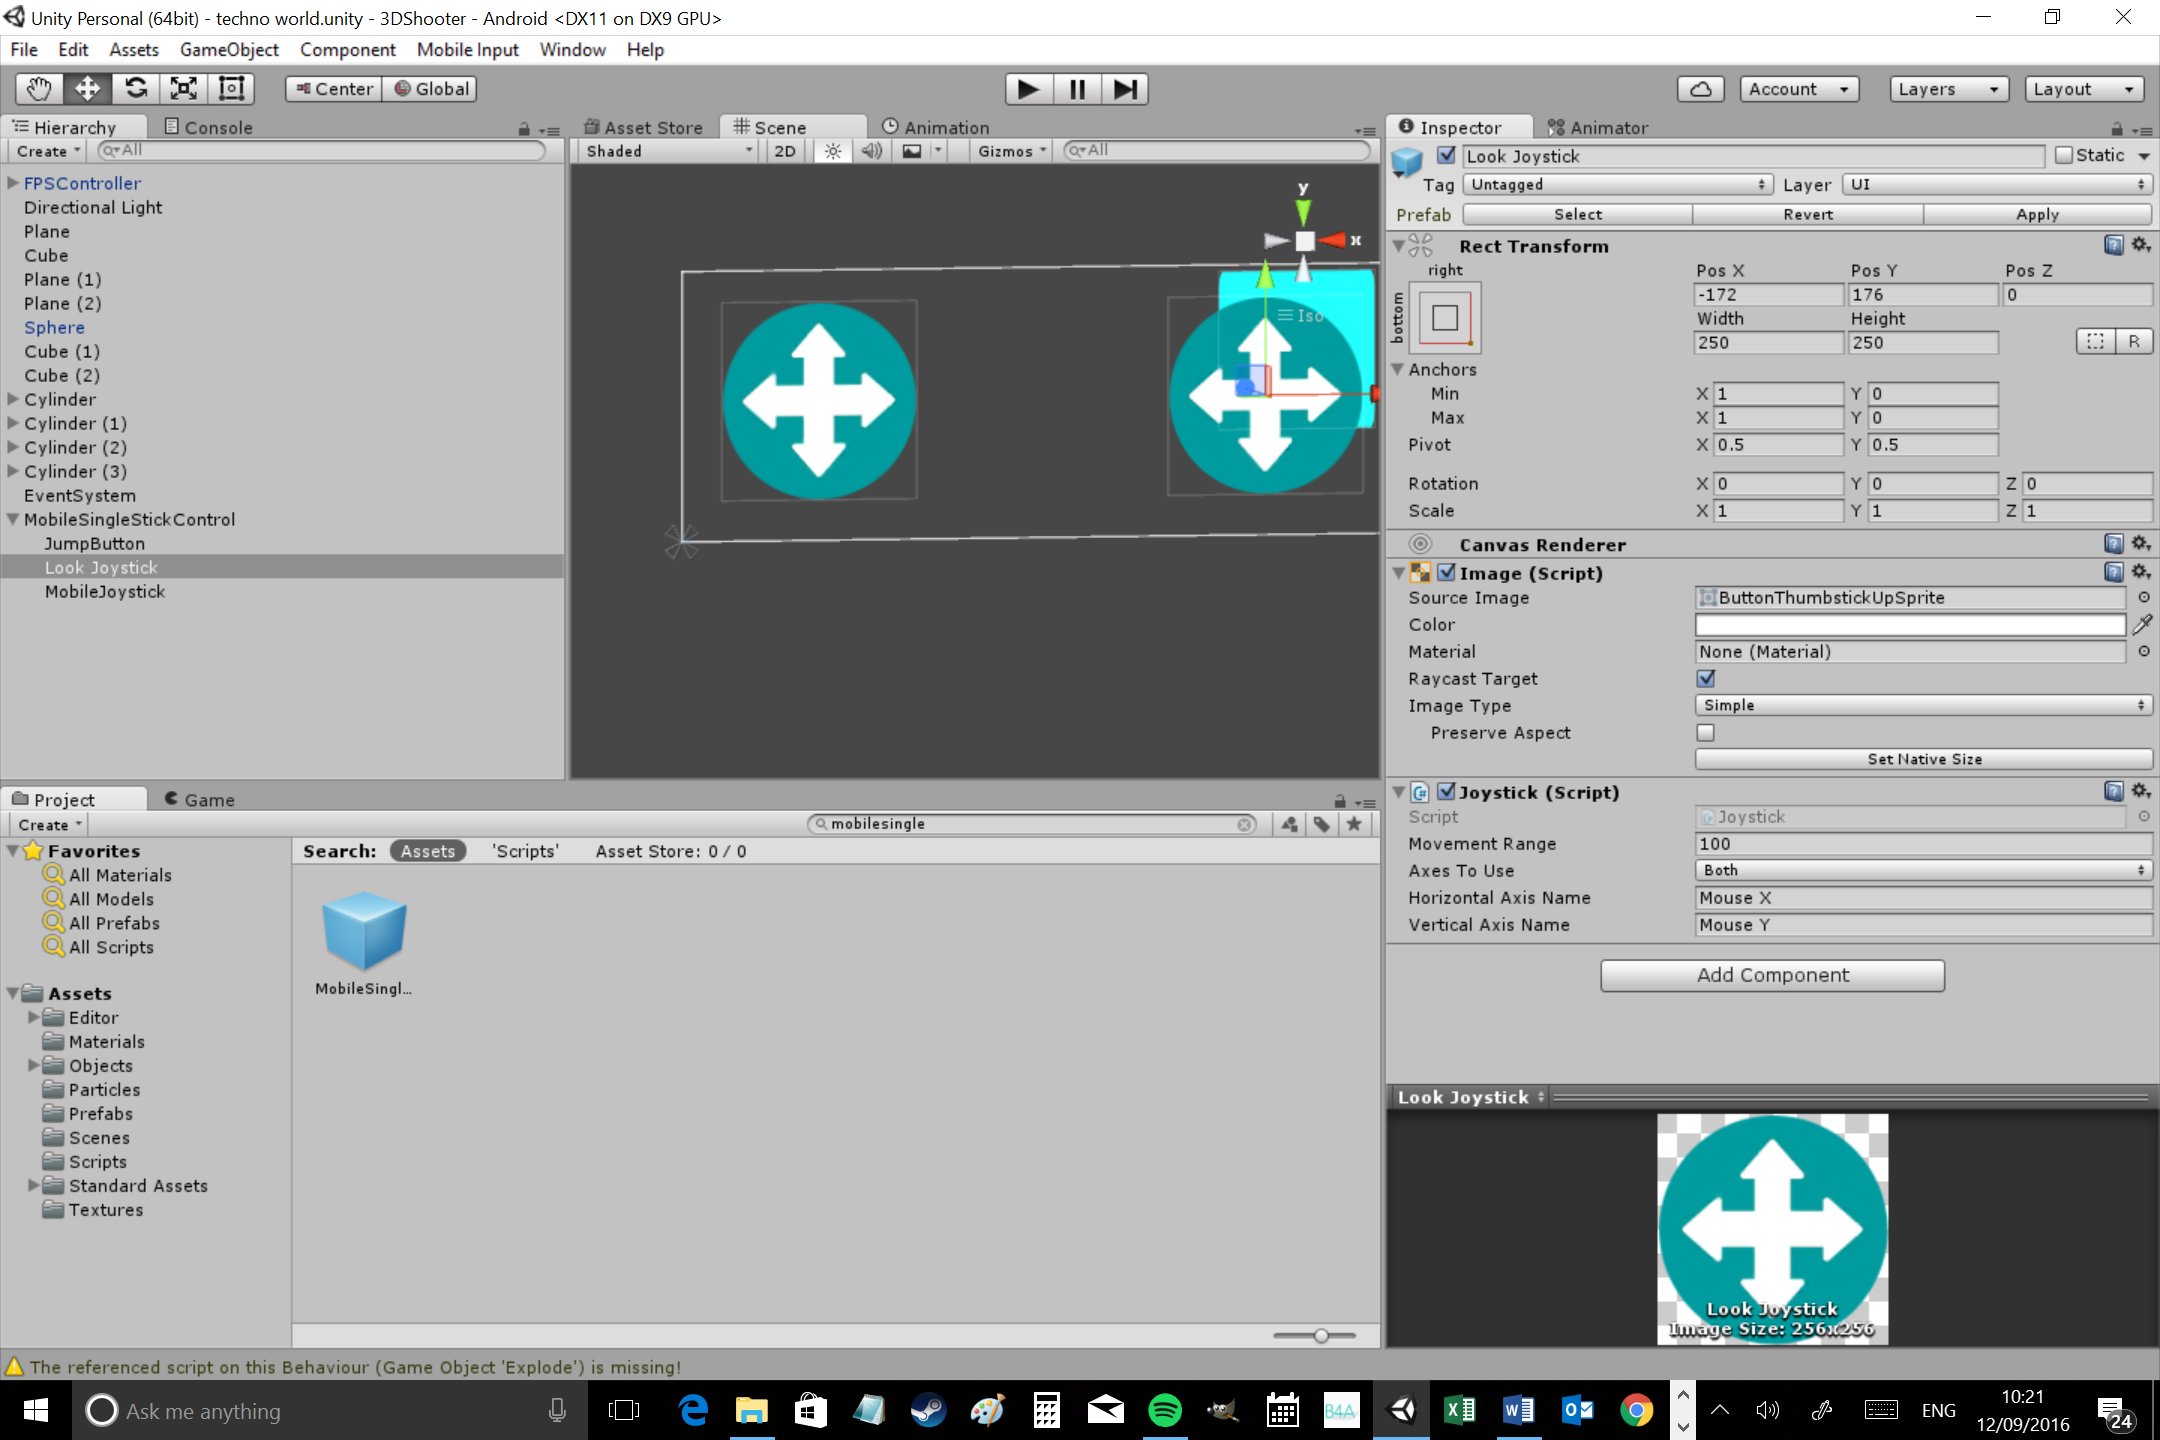
You’ll want to increase the size a little too and adjust the position. Remember to use the ‘anchor’ option in the inspector to anchor your controls relative to the bottom corners of the screen. I also made my jump button turquoise (yeah, it’s pretty ugly) and put it in the top right. This is easier to tap when you’re running and it looks a little nicer than being a long white button. You can add a texture of your choice later. What you’ll be left with is this:
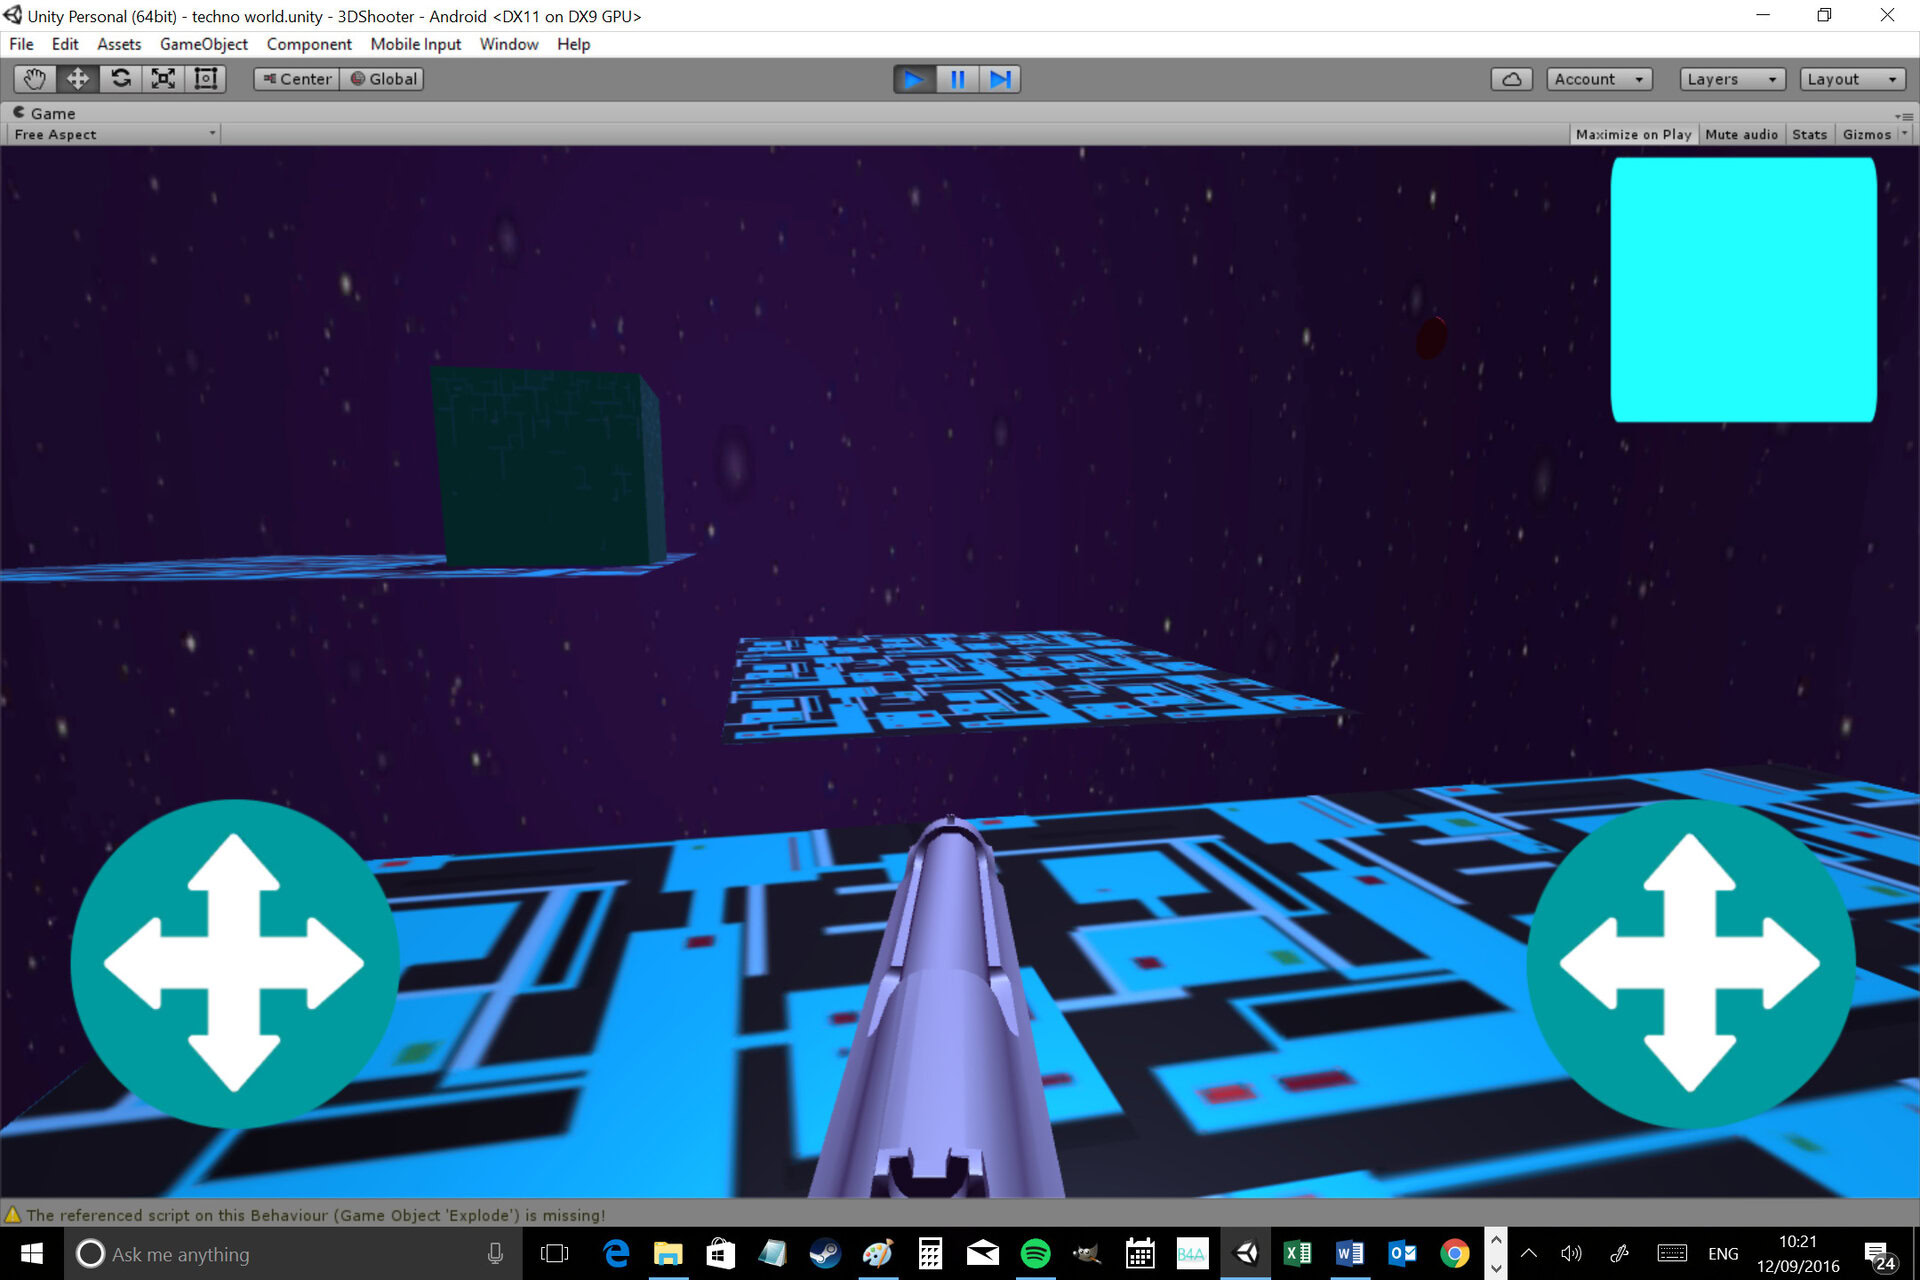
You’ll also find that tapping or clicking anywhere on the screen makes the character fire. This is because the first screen touch is interpreted as a left click. This isn’t a terribly elegant solution to our controls but it will do for now. So let’s give it a go…
Playing on mobile
All that’s left for us to do is actually test this game we’ve made on our mobile device!
To do that, head over to File > Build Settings and then make sure that you drag your scene into the window that says ‘Scenes in Build’. This is important, as only the scenes included here will actually make it into your final product. Where it says ‘Platform’ you of course want to select ‘Android’ and where it says ‘Texture Compression’ choose ‘ECT’. This will ensure maximum compatibility across Android devices but it does mean you can’t use transparencies in your textures.
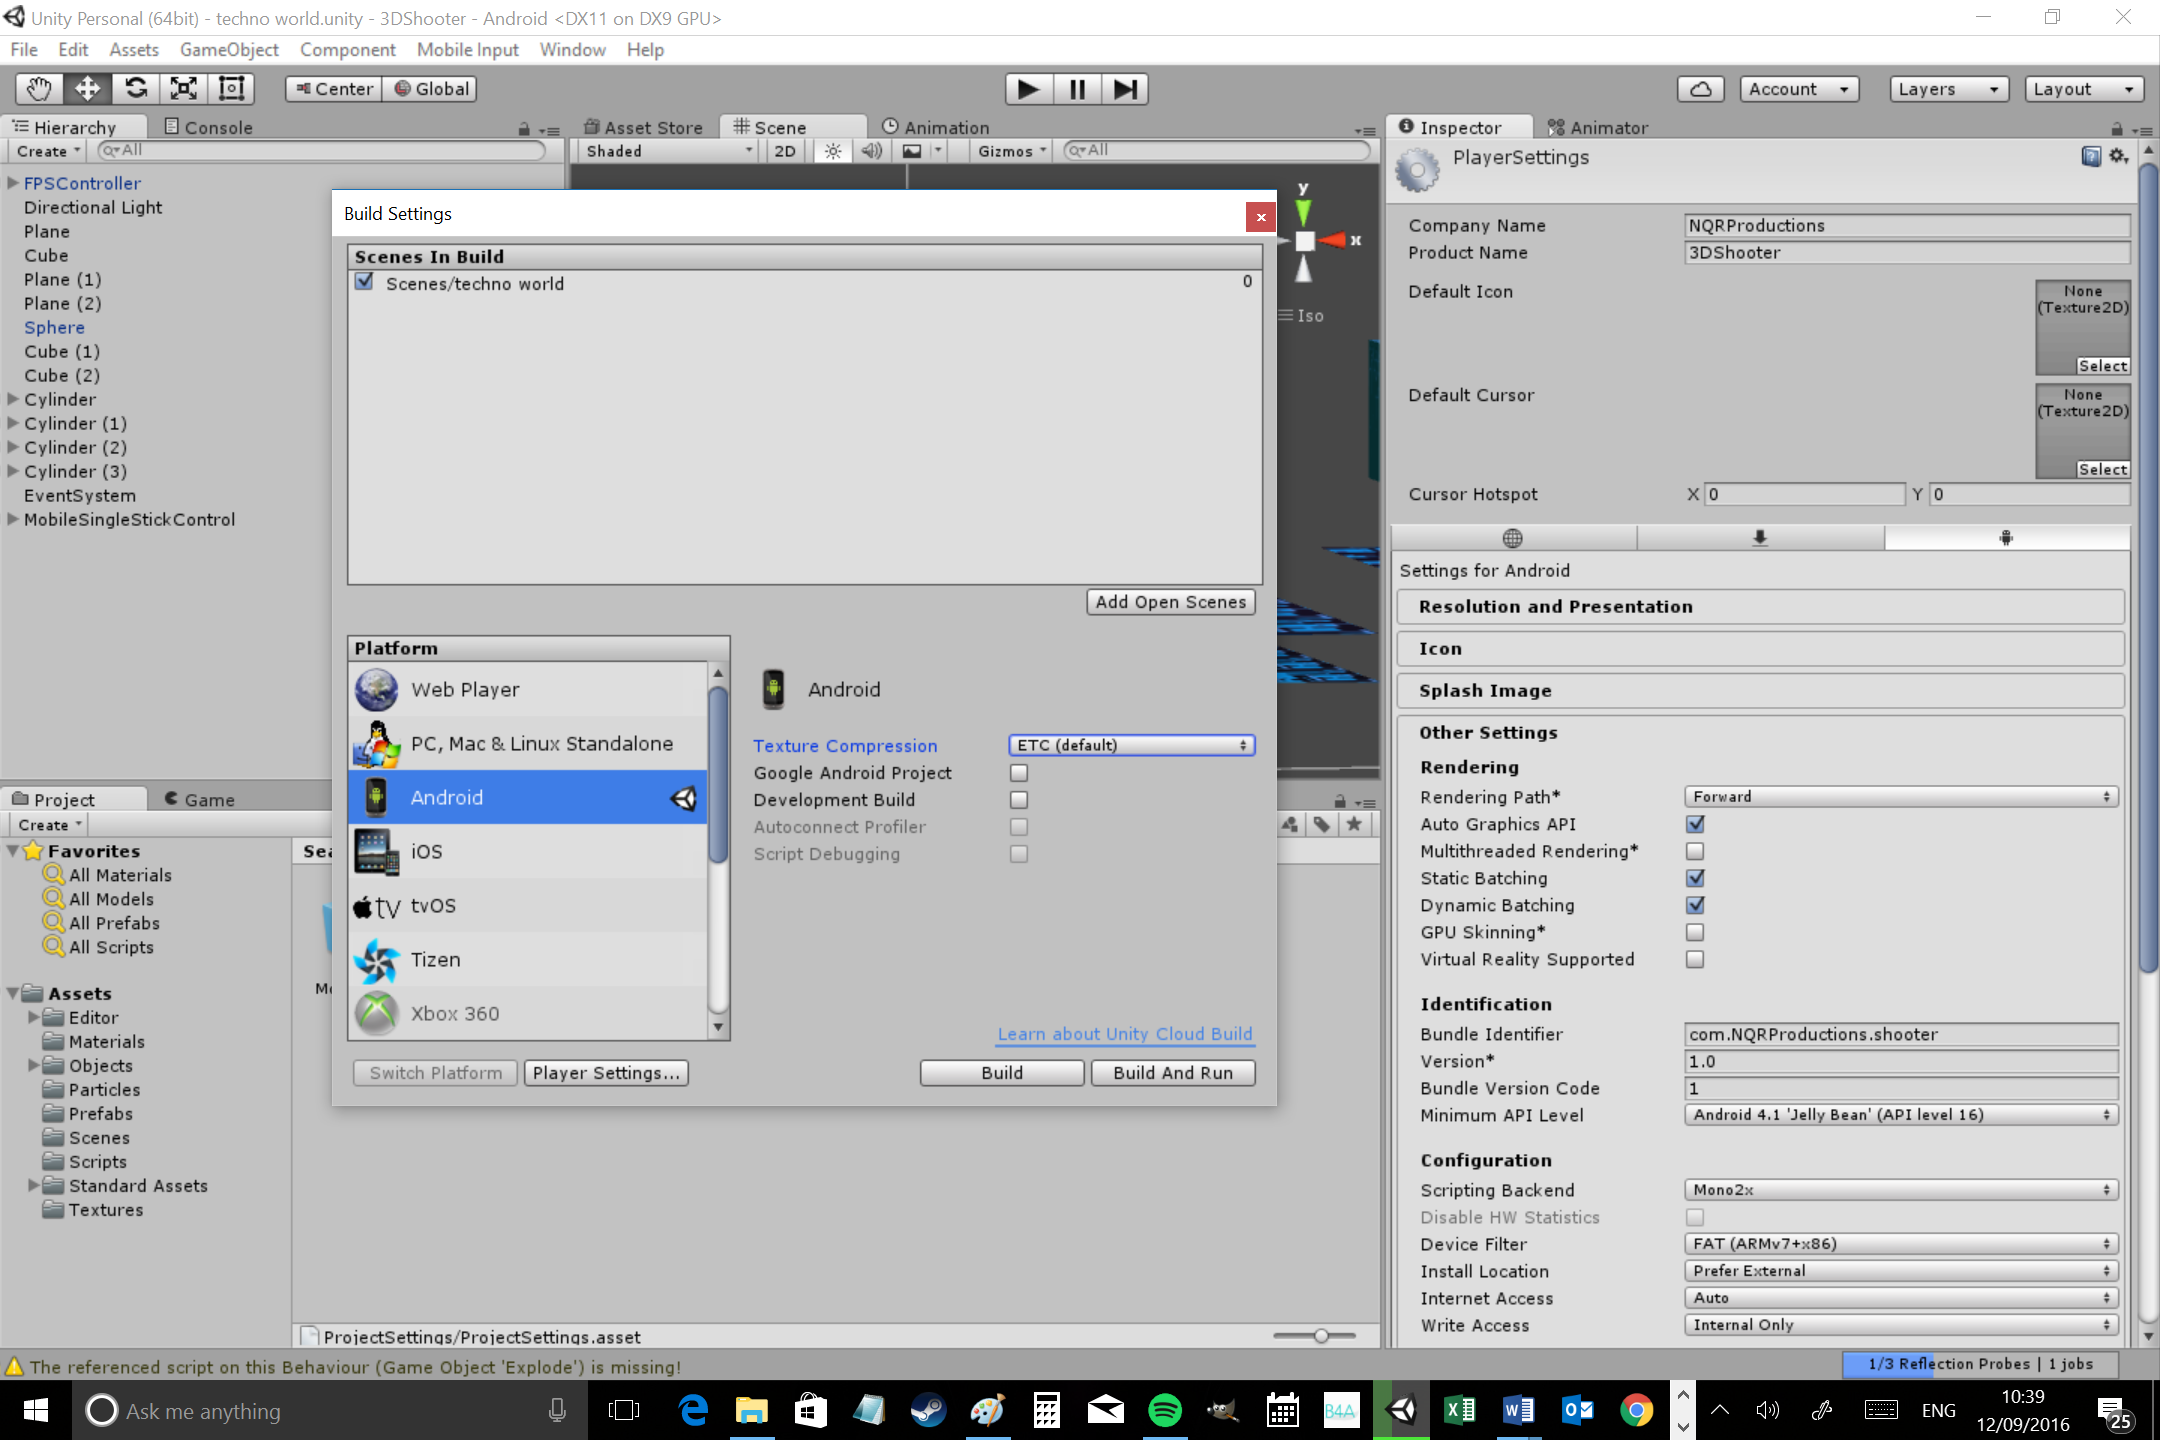
Hit the option in the bottom left that says ‘Player Settings’ and you’ll be able to make some more changes in the inspector. You’ll need to create your private key sign under ‘Publishing Settings’ (use the debug for now) and you’ll need to create a package name. Under ‘Resolution and Presentation’ you can remove support for portrait orientation (because that’s just weird for a 3D shooter). You can also choose your Minimum API Level.
Now just hit ‘Build and Run’ with your Android device connected and it should create and install your app! If it asks where your Android SDK is, then just point it at the right folder.
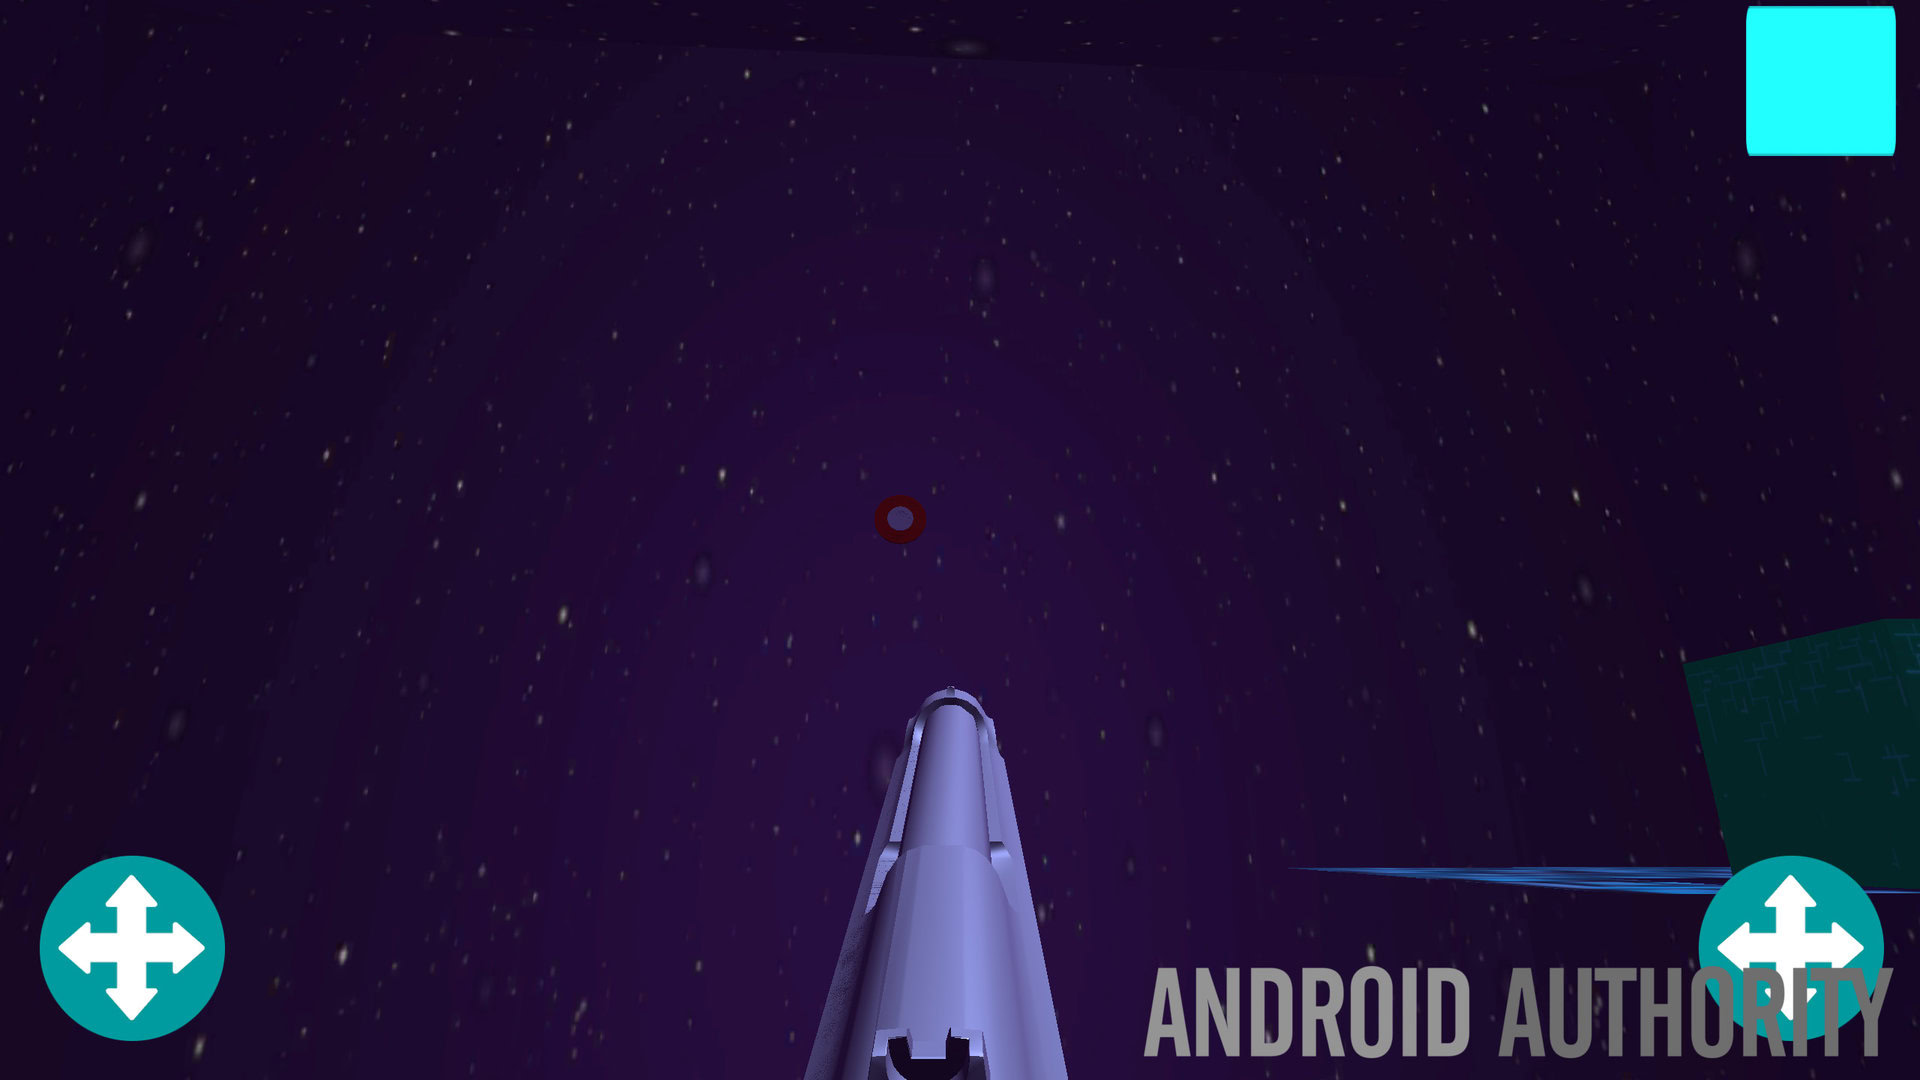
Once it’s installed, have a little play and see what you think. You might find that you want to adjust the sensitivity or positioning of your joysticks to get the feel just right. But either way, you now have a first person shooter up and running on your phone with responsive touch controls! This is very much the ‘bear bones’ of a game but by adding some enemies and challenges and fixing up the UI… it’s not too much of a stretch of the imagination to see it becoming something more.
Level 2!
I did mention something about creating another type of environment however, so just quickly before we wrap up, let’s take a look at how you might go about building a second level and letting the player travel there.
To start with then, I’ve created a flat door-like structure with a faint portal texture and placed it somewhere in the level. This will be our level’s end point. I’m making it a trigger and adding a new script called ‘Gateway’ to send us to the next level. That script looks like so:
public class Gateway : MonoBehaviour {

    // Use this for initialization
    void Start () {

    }

    // Update is called once per frame
    void Update () {

    }
        void OnTriggerEnter(Collider other)
    {
        if (other.tag == "Player")
        {
            Application.LoadLevel("level2");
        }
    }
}
This script will be attached to the doorway and now, when the player comes into contact with it, Unity will load the scene called ‘level2’. So save the script and attach it to your doorway, then make sure that the FPSController is tagged with ‘Player’ (you’ll find this option if you select it and look in the inspector).
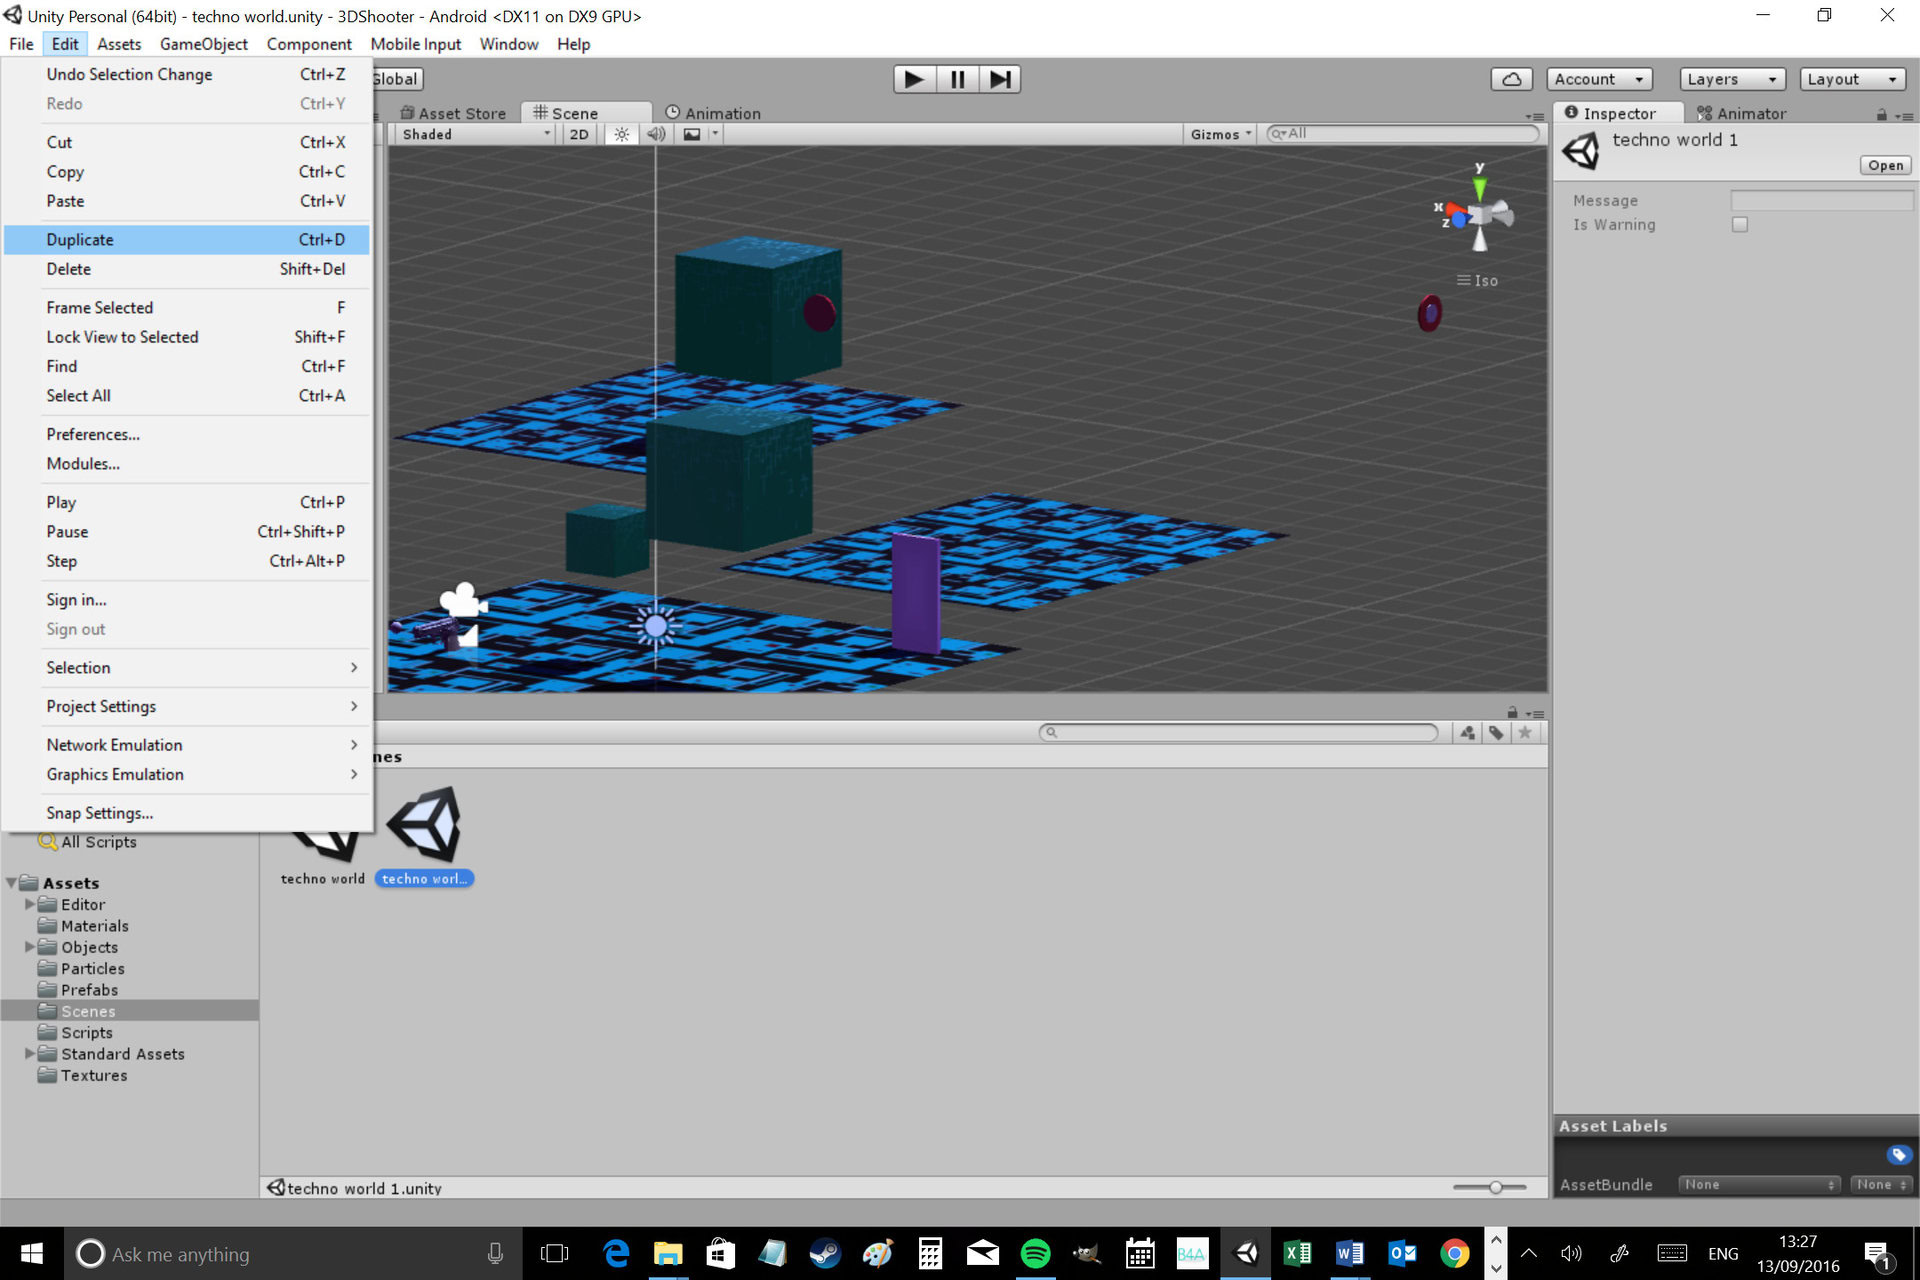
We also need to make our ‘level2’ and the easiest way to do that is to select the scene we’ve already created in the ‘Scenes’ folder and then go to Edit > Duplicate to make an exact copy. Rename the new scene ‘level2’ and add it to the build settings as you did earlier. Once all this is done, delete all the level elements (your cubes, targets etc.) from the scene and get ready to build the new level from scratch.
This time, you’re going to insert a ‘Terrain’ instead of a plane from the 3D Objects menu though. What’s fun about this, is that it allows you to insert mountains, hills, potholes and more – and even to plant trees around!
Before we can have any real fun with this though, you’ll want to import another package just like you did before with the character assets. This time you want to pick ‘Environment’ (Assets > Import Package > Environment) and that will give you things like textures and 3D models that you’ll be free to use. These include trees, grass and lots more generic environmental stuff for you to play with.
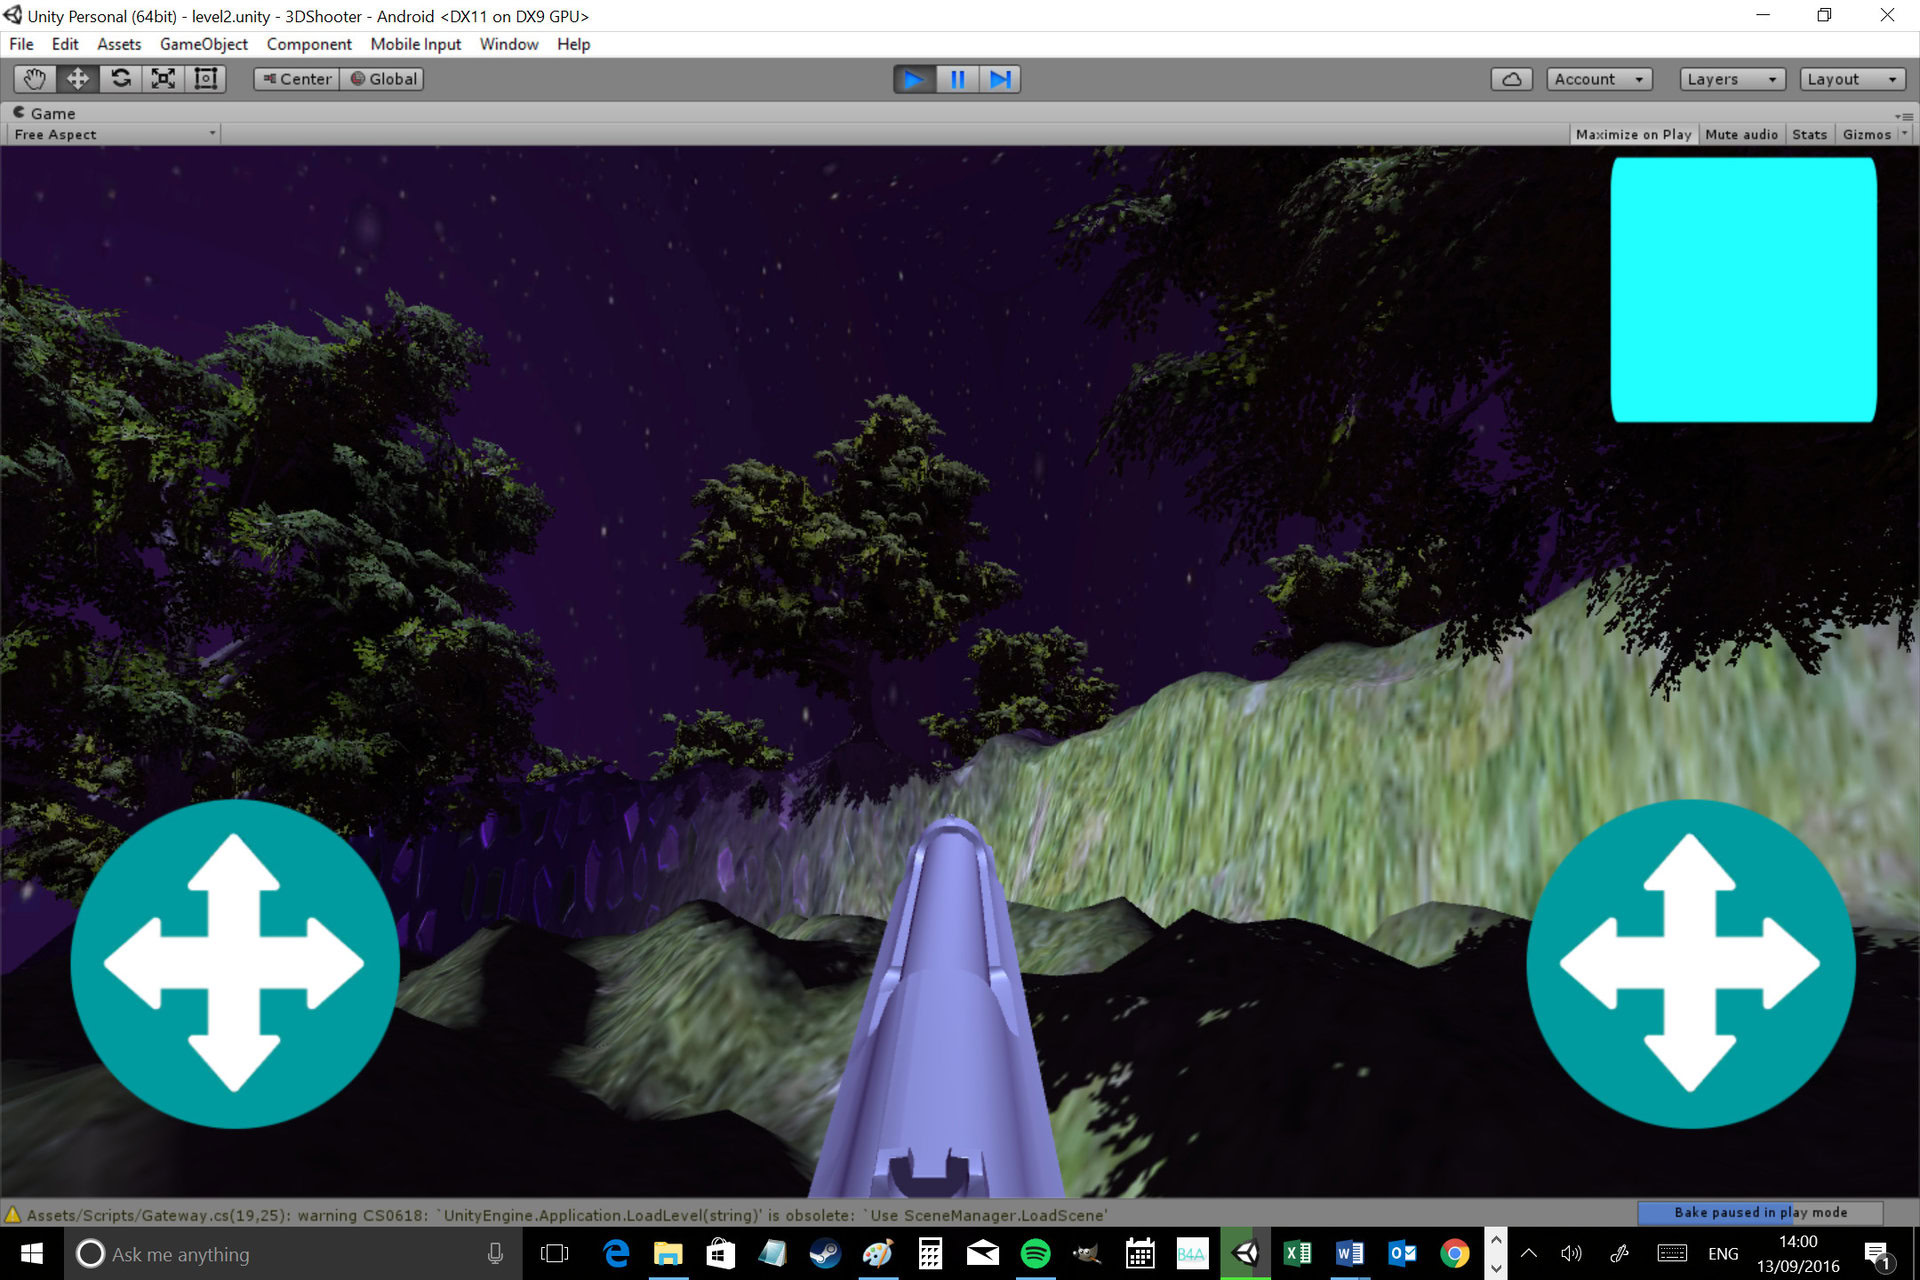
Now select the terrain in the scene and you’ll be able to do all sorts of fun things in the inspector. You can ‘paint on’ various different textures or mountain formations, invidually place trees (or any other type of 3D model) and more. I’ve created something alien using a combination of the provided assets and my own sprite as a texture…
Conclusion
And with that, I shall leave you to have a play. As you can see, the possibilities really are endless and Unity makes it all very simple to make your ideas a reality, with minimum hassle and coding. My advice as always though, would be to start with something relatively simple that you can finish. That way, you’re much more likely to actually complete your project and get to enjoy the excitement of having something you built available for download on the Google Play Store. Be sure to share your creations in the comments!