Affiliate links on Android Authority may earn us a commission. Learn more.
How to check your BIOS version on a Windows PC
The BIOS version on a Windows PC normally isn’t that important, but it can be — updating your BIOS may sometimes prevent critical glitches, or even deliver improved performance, particularly for some gaming PCs. Here’s how to check your BIOS version in both Windows 11 and 10.
QUICK ANSWER
To check your BIOS version in Windows 11 or 10:
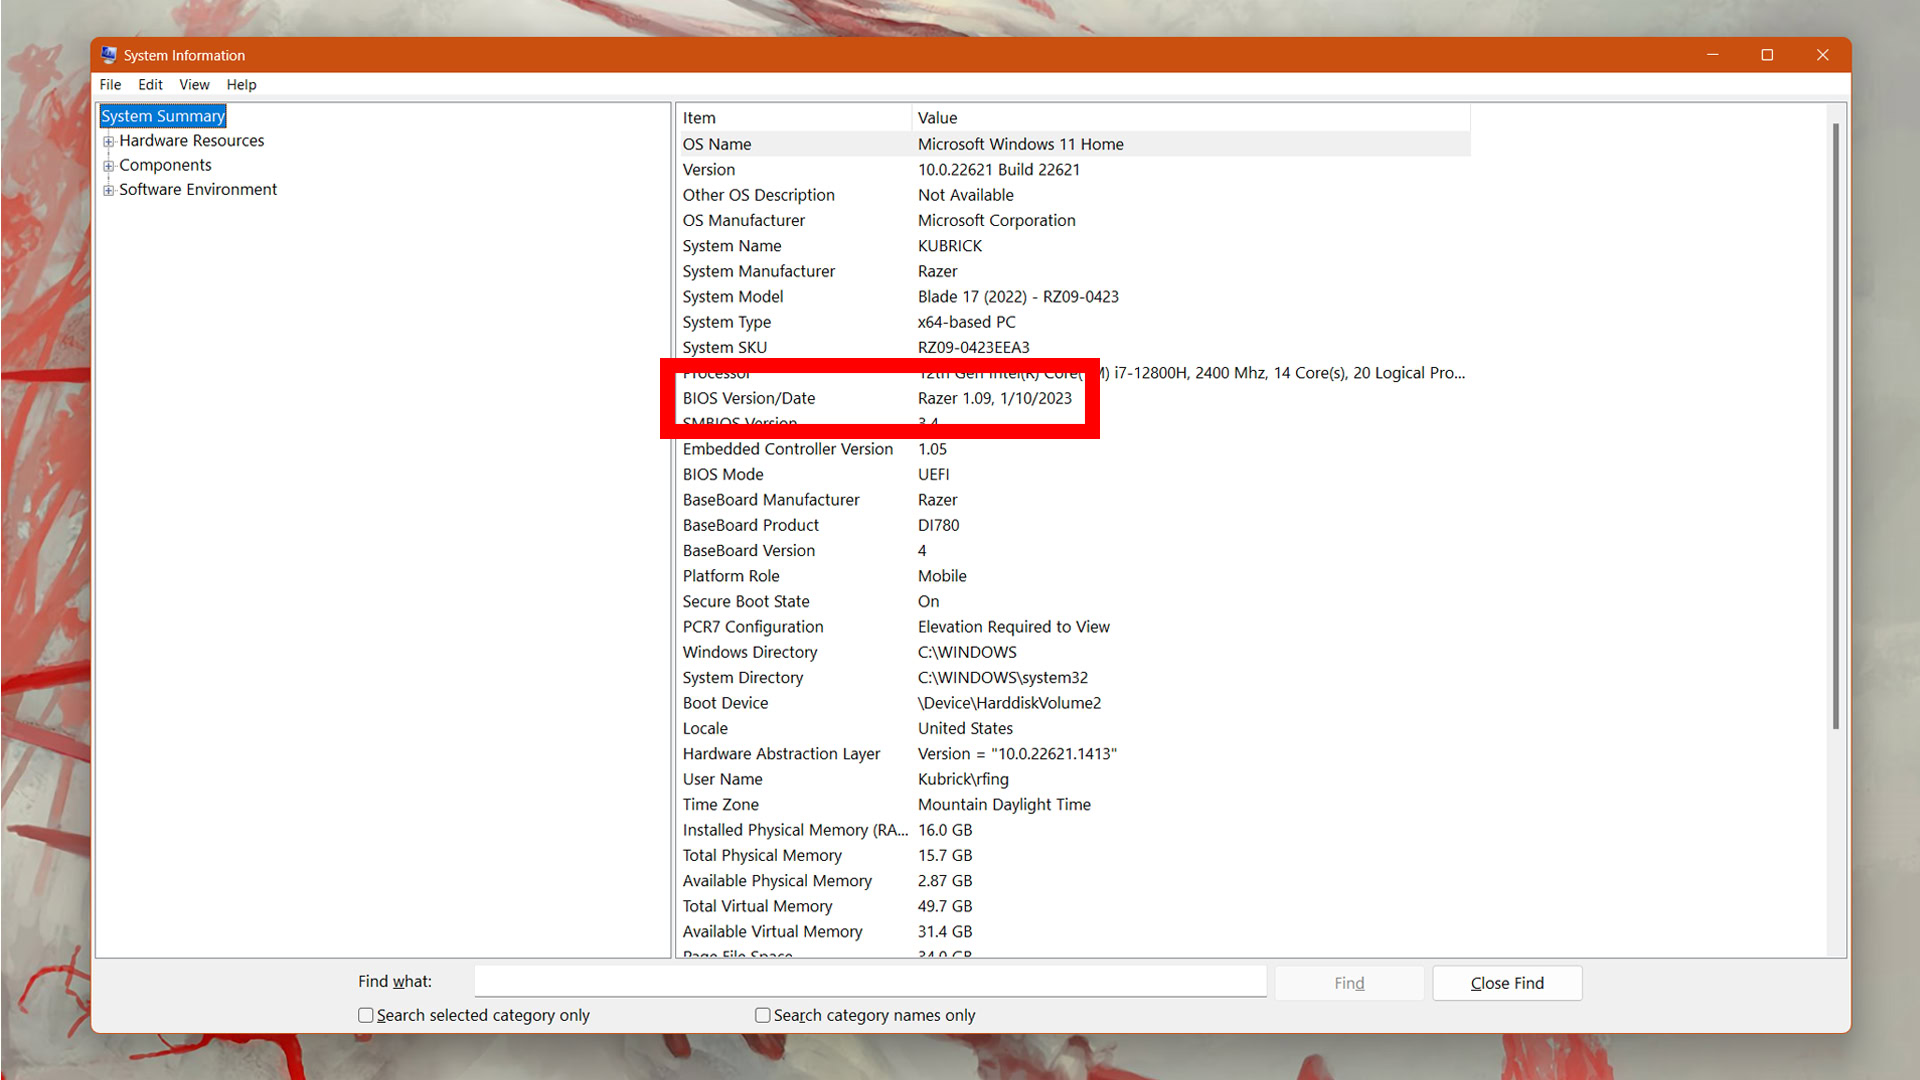
- Press Windows + R, then type msinfo32 into the Run pop-up and hit Enter.
- Look for the BIOS Version/Date field.
How to check your BIOS version in Windows 11 and 10
The easiest method by far is the System Information panel, but there are alternatives.
Using the System Information panel

- In Windows 11, the quickest way to access the panel is by typing System Information into the taskbar’s search field and hitting Enter to choose the top result.
- In Windows 10, it may be easier to hit Windows + R, then type msinfo32 into the Run pop-up and hit Enter. This shortcut also works in Windows 11.
- Look for the BIOS Version/Date field. If the date is more than six months old, it’s probably worth checking if there’s a newer BIOS available via your computer or (in the case of custom PCs) motherboard maker’s website.
Using Command Prompt

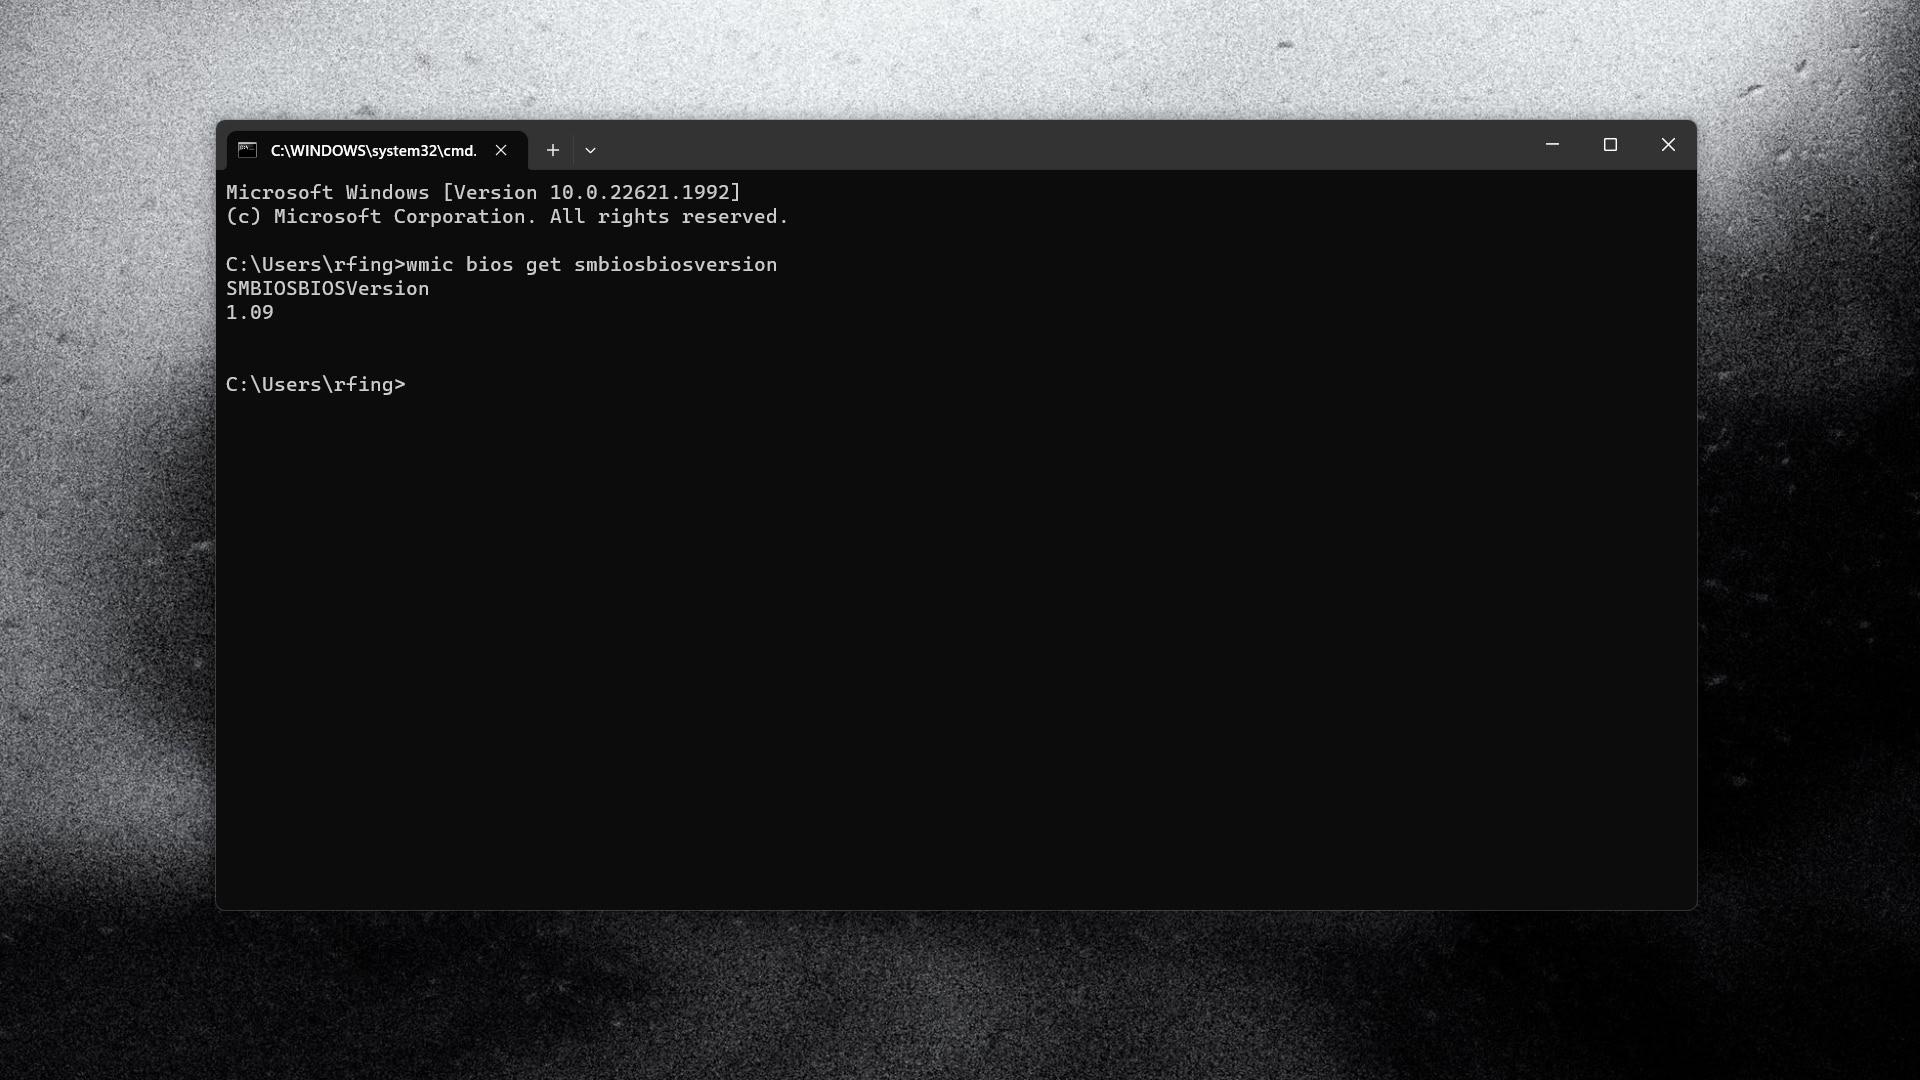
- Open Command Prompt by searching for it in the Windows 11 taskbar, or hitting Windows + R, typing cmd, and hitting Enter.
- Type wmic bios get smbiosbiosversion and then hit Enter.
- You’ll get a simple identifier for your BIOS version. For that reason, you might prefer System Information regardless.
Using manufacturer-supplied apps
If you have a pre-built PC, it’s possible that included software utilities will let you check BIOS info and/or download the manufacturer’s latest firmware update. In fact we recommend this if it’s an option, since you’re guaranteed to get an update specifically applicable to your machine. Never install a BIOS made for a different computer or motherboard.