Affiliate links on Android Authority may earn us a commission. Learn more.
How to change DNS settings on every device
The Domain Name System (DNS) is one of the most important, yet lesser-known aspects of browsing the internet. In a nutshell, it’s responsible for converting a domain name (like google.com) to an IP address (like 142.250.217.78). Without DNS, your computer — and others along the way — would have no way of knowing where to send and retrieve data.
By default, your home network likely relies on a DNS server provided by your internet provider. However, these servers aren’t always the fastest and, in some cases, may even allow your ISP to maliciously track your online behavior. To that end, if internet speed and privacy matter a lot, you should perhaps consider changing your DNS server.
Related: How to block ads across your entire Wi-Fi network with a Raspberry Pi
QUICK ANSWER
The best way to change your DNS server is at the router level, which will affect every single device connected to it. You’ll typically find this field under the LAN or DHCP sub-menu of your router’s admin page.
If your router is locked down or otherwise inaccessible, you’ll have to modify DNS settings on each individual device instead.
JUMP TO KEY SECTIONS
How to change DNS settings at the router level
While you can manually configure each device in your household to use a specific DNS server, the easier method is to simply change it at the router level. Doing it this way will make it so that everything connected to the router will automatically reference your preferred DNS server. Having said that, not all routers allow you to change this setting, especially if you’re still using the one supplied by your ISP. Regardless, it’s worth a try.
To change your router’s DNS server, you’ll first need to access its administrative page. This is typically done through the web browser or a mobile app. If it’s the former, navigate to 192.168.1.1 or 192.168.0.1 and enter admin in the username and password fields. If this doesn’t work for you, a Google search should yield the right combination for your router model.
Assuming you’ve made it through the login process, here are the remaining steps you’ll have to complete:
- Enter the Network, Internet, or LAN menu. The exact label may differ depending on your router’s manufacturer.
- Look for DNS Address field. You may find it tucked away under an Advanced sub-menu, if available.
- Enable the Use the following DNS address setting. You should now be able to enter a primary and secondary DNS address of your choice.
- Finally, click Save or Apply and reboot the router so that the changes can take effect.
How to change DNS settings in Windows 11
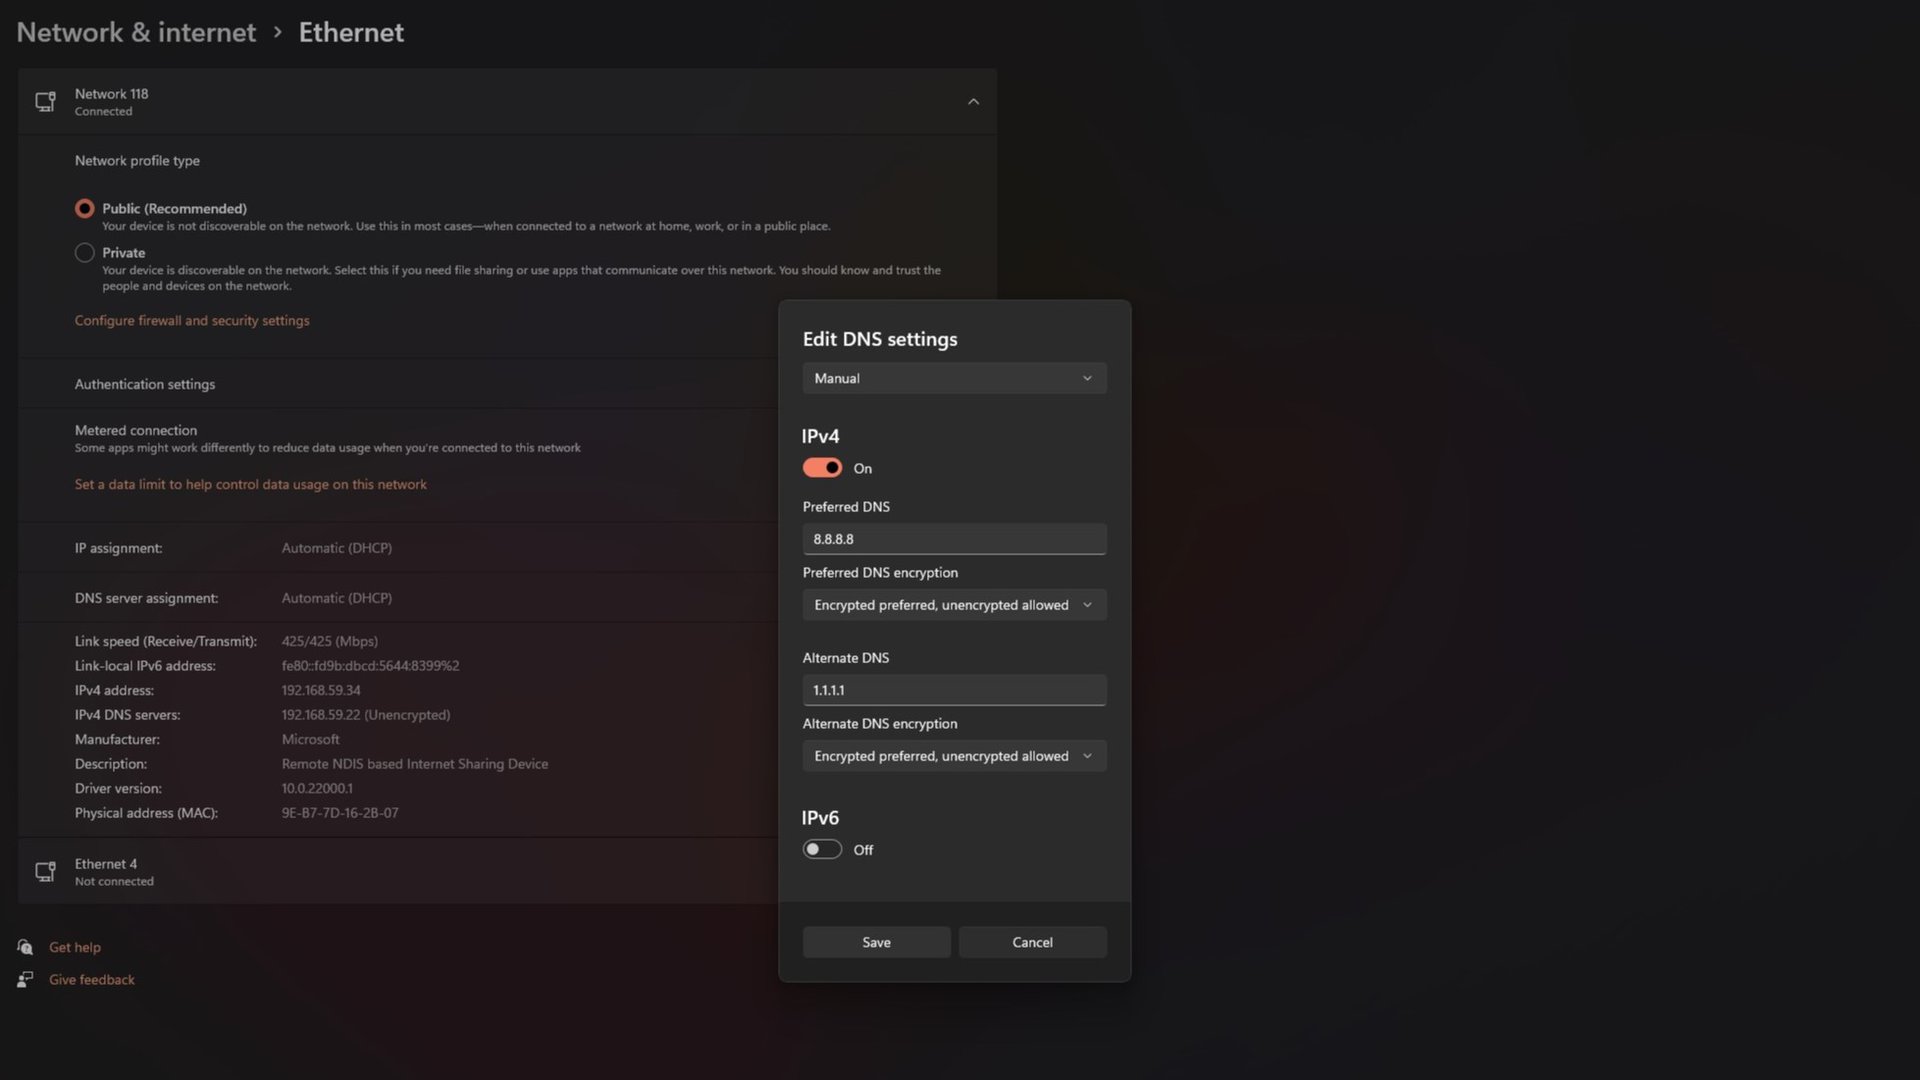
If you don’t have control over your router, you can still change DNS settings on a per-device basis. Let’s start with how to do that on Windows.
- Open the Settings app via the Start menu or use the Start+I keyboard shortcut.
- Click on Network and Internet to the left of your screen, then enter the Ethernet or Wi-Fi sub-menu (depending on your connection type).
- On the next screen, you should see a DNS server assignment field with an Edit button alongside. If you selected Wi-Fi in the previous step, you may find this field under Hardware properties.
- Change the Automatic (DHCP) DNS setting to Manual and enable the IPv4 toggle.
- Finally, enter your preferred and alternate DNS addresses
- Click Save to confirm the changes.
How to change DNS settings on a Mac
To change your Mac’s DNS settings, click on the Apple menu to the top-left of your screen and open System Preferences. Then, follow these steps:
- From the list of categories, select Network.
- Pick the network type you’d like to change DNS settings for, either Wi-Fi or Ethernet/LAN.
- Click Advanced and switch to the DNS tab.
- Click on the + icon to add a DNS server. Simply input the desired IP address, like 8.8.8.8.
How to change DNS settings on Android
Changing your DNS server on Android has become pretty straightforward since the release of Android 9 Pie. Simply follow the steps below:
- Open Settings, then enter the Network & Internet sub-menu.
- Tap Private DNS, this option may be hidden under an Advanced sub-menu on some devices.
- Change the default Automatic selection to “Private DNS provider hostname” and enter your custom DNS address.
A caveat here is that Android’s implementation of Private DNS does not allow you to use an IP address. In other words, you’ll need to provide a domain (also known as hostname) like 1dot1dot1dot1.cloudflare-dns.com instead of 1.1.1.1. Not all DNS providers offer a hostname, however.
How to change DNS settings on an iPhone or iPad
To change your preferred DNS server on an iOS device like the iPhone or iPad, follow these steps:
- Locate and open the Settings app
- Enter the Wi-Fi submenu and select your network from the list.
- Under the DNS section, tap “Configure DNS”, and change the selection from Automatic to Manual.
- Delete any pre-populated DNS servers and tap the + icon to add your own.
- Tap Save and repeat the process for any other Wi-Fi network you may use.
Keep in mind that iOS doesn’t allow you to use a specified DNS server on cellular connections. You’ll have to use a third-party app like Cloudflare Warp that circumvents this restriction via an always-on VPN connection.
Read more: What is a VPN? Do you need one?
How to change DNS settings on a Chromebook
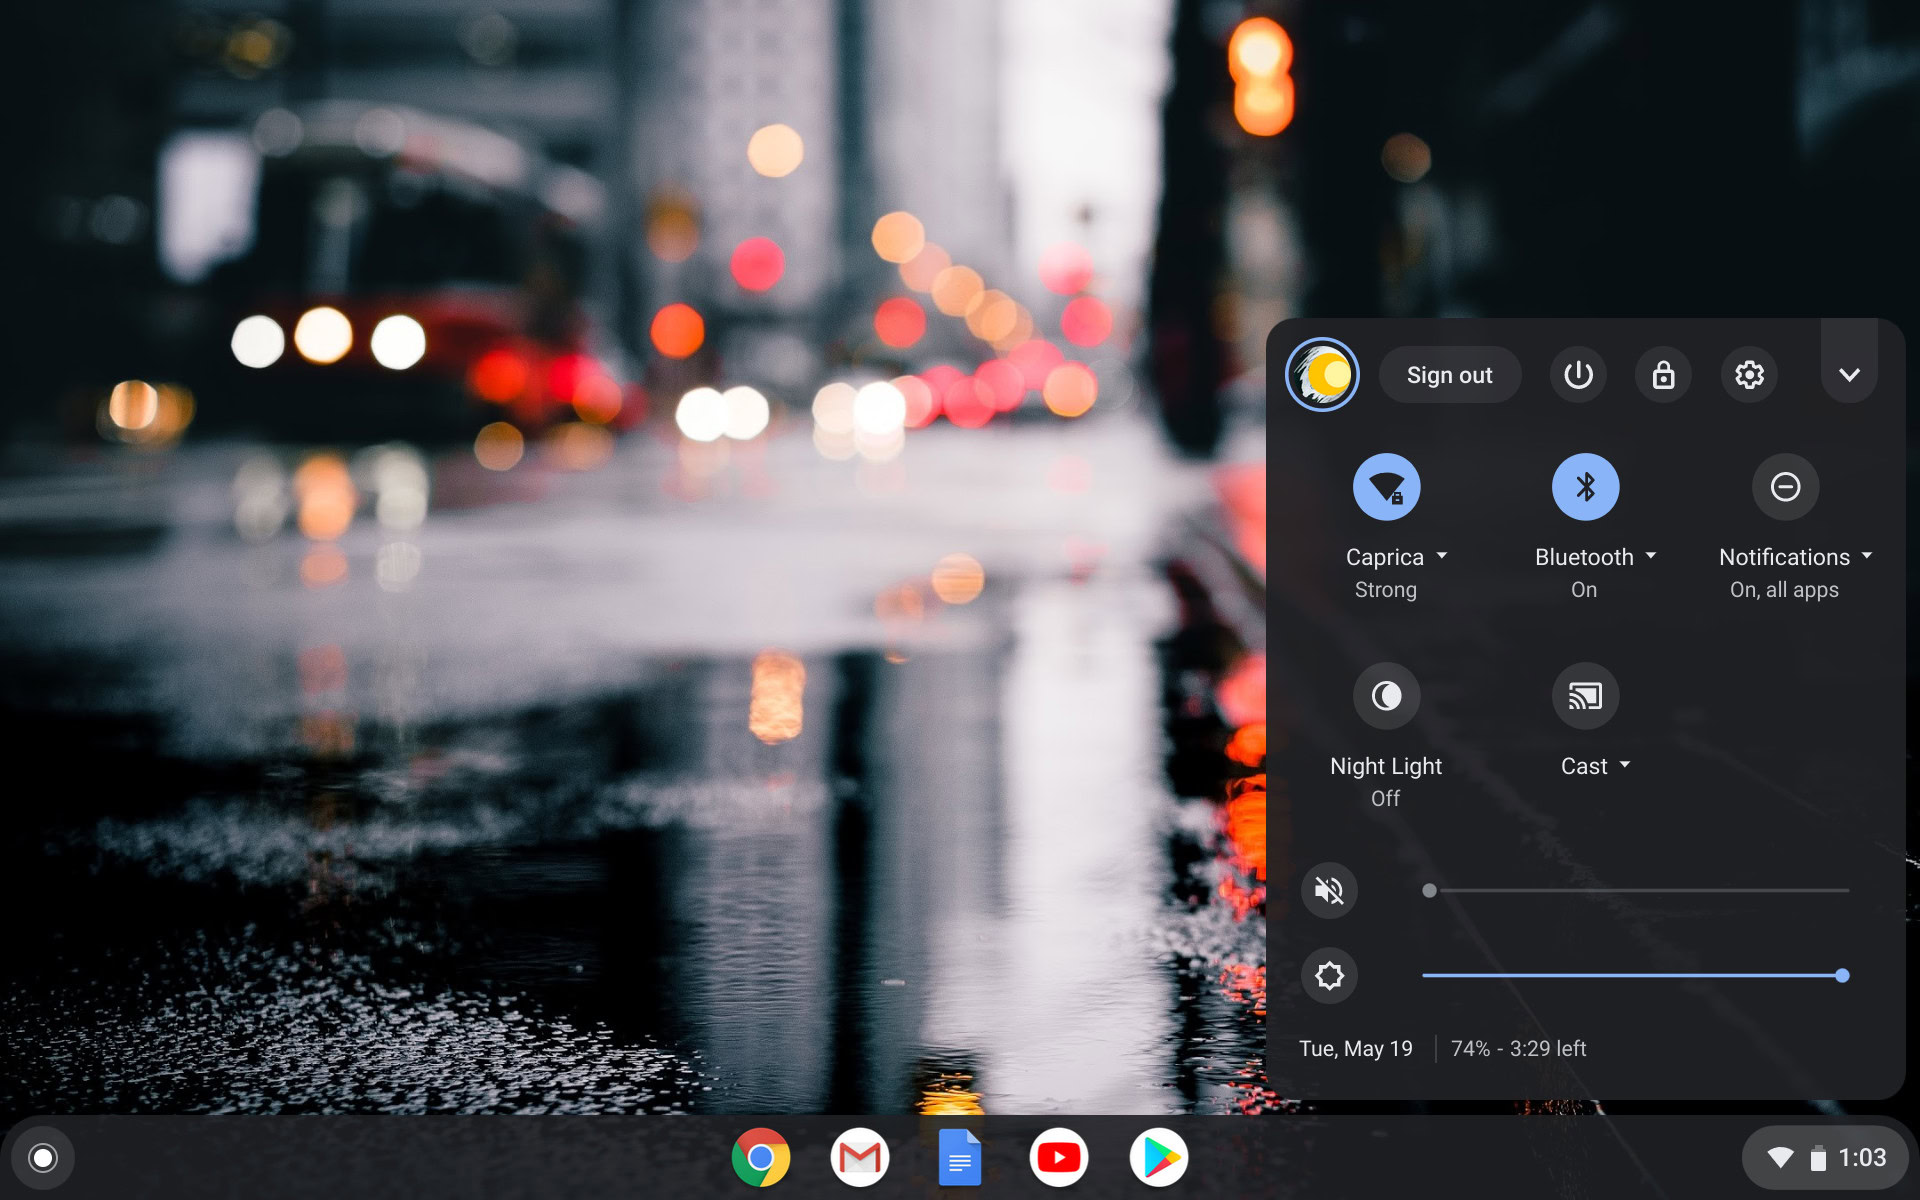
Like Android, ChromeOS allows you to change your DNS server pretty easily. Simply follow these steps:
- Open the Settings app, either from the quick settings or search menu.
- Select the connection for which you would like to change the DNS servers for, either Wi-Fi, mobile network, or Ethernet.
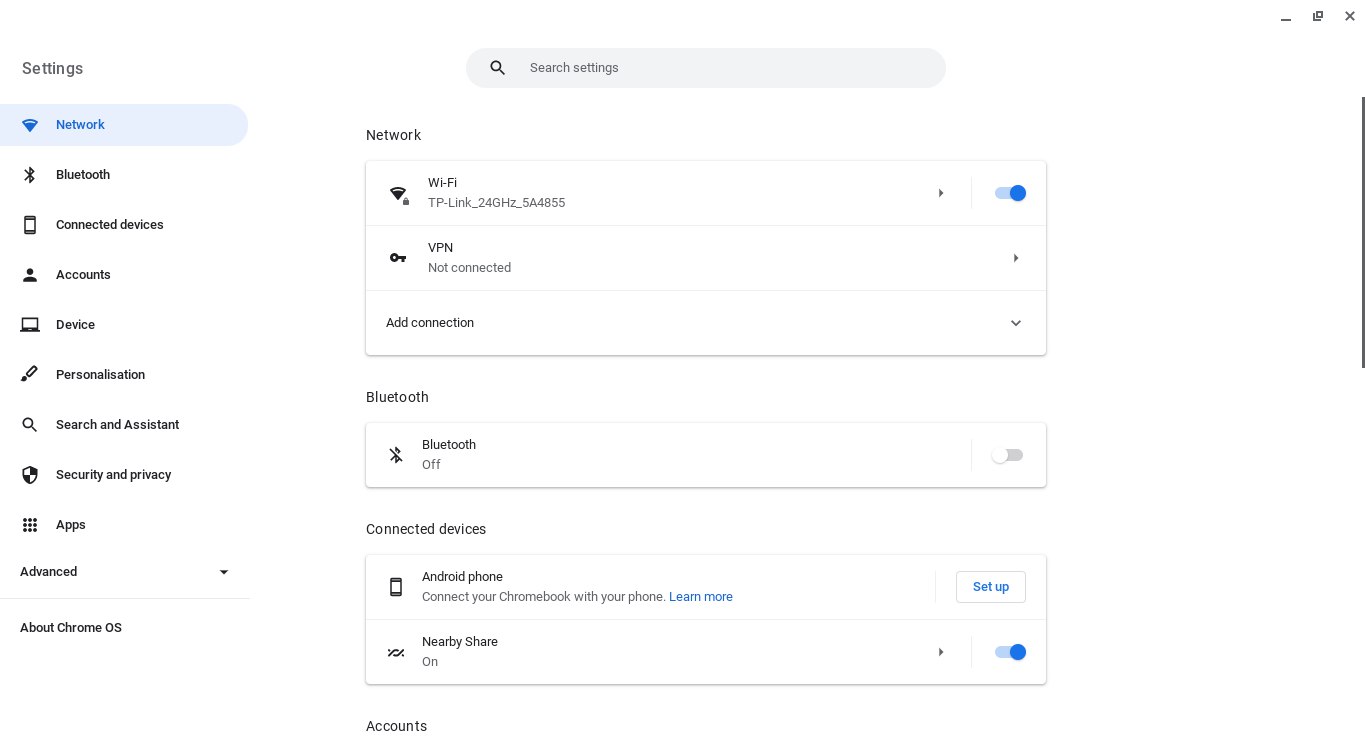
- Select your current network and navigate to the Network > Advanced sub-menu.
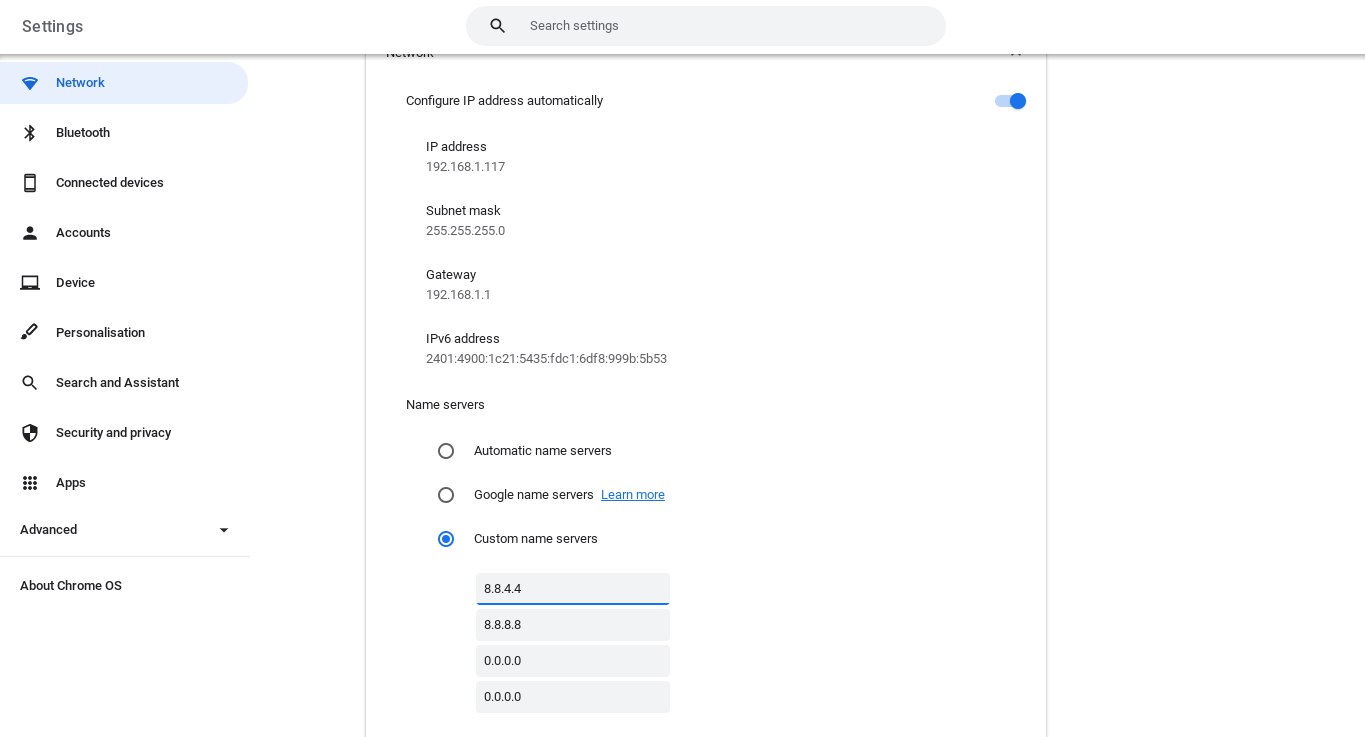
- Scroll down to the Name servers section and change the Automatic selection to Custom name servers. You should now be able to input your preferred DNS provider’s IP address.
See also: How to set up a VPN on Android, Windows, and other platforms