Affiliate links on Android Authority may earn us a commission. Learn more.
GameMaker: Studio tutorial for beginners
Published onOctober 7, 2015
What is GameMaker?
GameMaker is a tool for users to make their own games, created in 1999, the tool has had great success in letting people make amazing content. But until 2012 when GameMaker: Studio came out, users could only develop for Windows and OS X. With the release of GameMaker: Studio, YoYo Games added a bunch of modules that allow development from desktop operating systems to Android, iOS and Tizen. GameMaker and GameMaker: Studio both have a drag and drop interfaces that make game development fairly easy. If a developer wants to get more technical then GameMaker has its own language known as GML that allows for infinite possibilities.
Setting up GameMaker: Studio for Android
GameMaker: Studio will not work with Android right out of the box. The first thing to do is to download the Java 7 JDK. After that, install the Android SDK. Note that you need to just install the SDK, not Android Studio, as it is not needed here. After installing the Android SDK open the SDK Manager and install the SDK-Platform Tools and the Android versions 2.1 (API 7), 2.2 (API 8), 3.2 (API 13), 4.0.3 (API 15) as well as the latest version of Android. Make sure to click the “obsolete” checkbox to be able to install 2.1 and 3.2.
GML is not difficult to learn and is much easier than Java or C++. This is because GML is not an Object Oriented Programming language and therefore doesn’t include things like classes or methods.
Next is the Android NDK, which can be found here for 64 bit computers and here for 32 bit computers. Once all of that is installed and ready to go open GameMaker: Studio and enter your login information, this will activate the product. Then go to File>Preferences>Web Server and enter your computer’s local IP address. This is only needed if you do not want to connect your phone to your computer every time to test applications. Instead you can connect the phone wirelessly through Wi-Fi. Next go back into preferences and click on the “Android” tab. Add the paths of the SDK and NDK in their respective locations and then click “Check Android …” to check each one and to make sure that GameMaker can find them.
Once completed then click the “keystore” tab and fill out the basic information on the page. You can name the keystore to whatever you want, but when making a password, make sure it is one you will remember, you will need this password to update apps on the Play Store, if this password is forgotten, a new keystore will have to be generated and Google will not let apps be updated if the updated version has a new keystore. Once all of the information is completed, click “Generate” to generate a Key Hash. That’s it for set up!
Unity 3D Game Developer Course
Master Construct 2 & Start Bringing Your Game Ideas to Life without Writing a Line of Code!
$39 $300 [87% off]
The basics

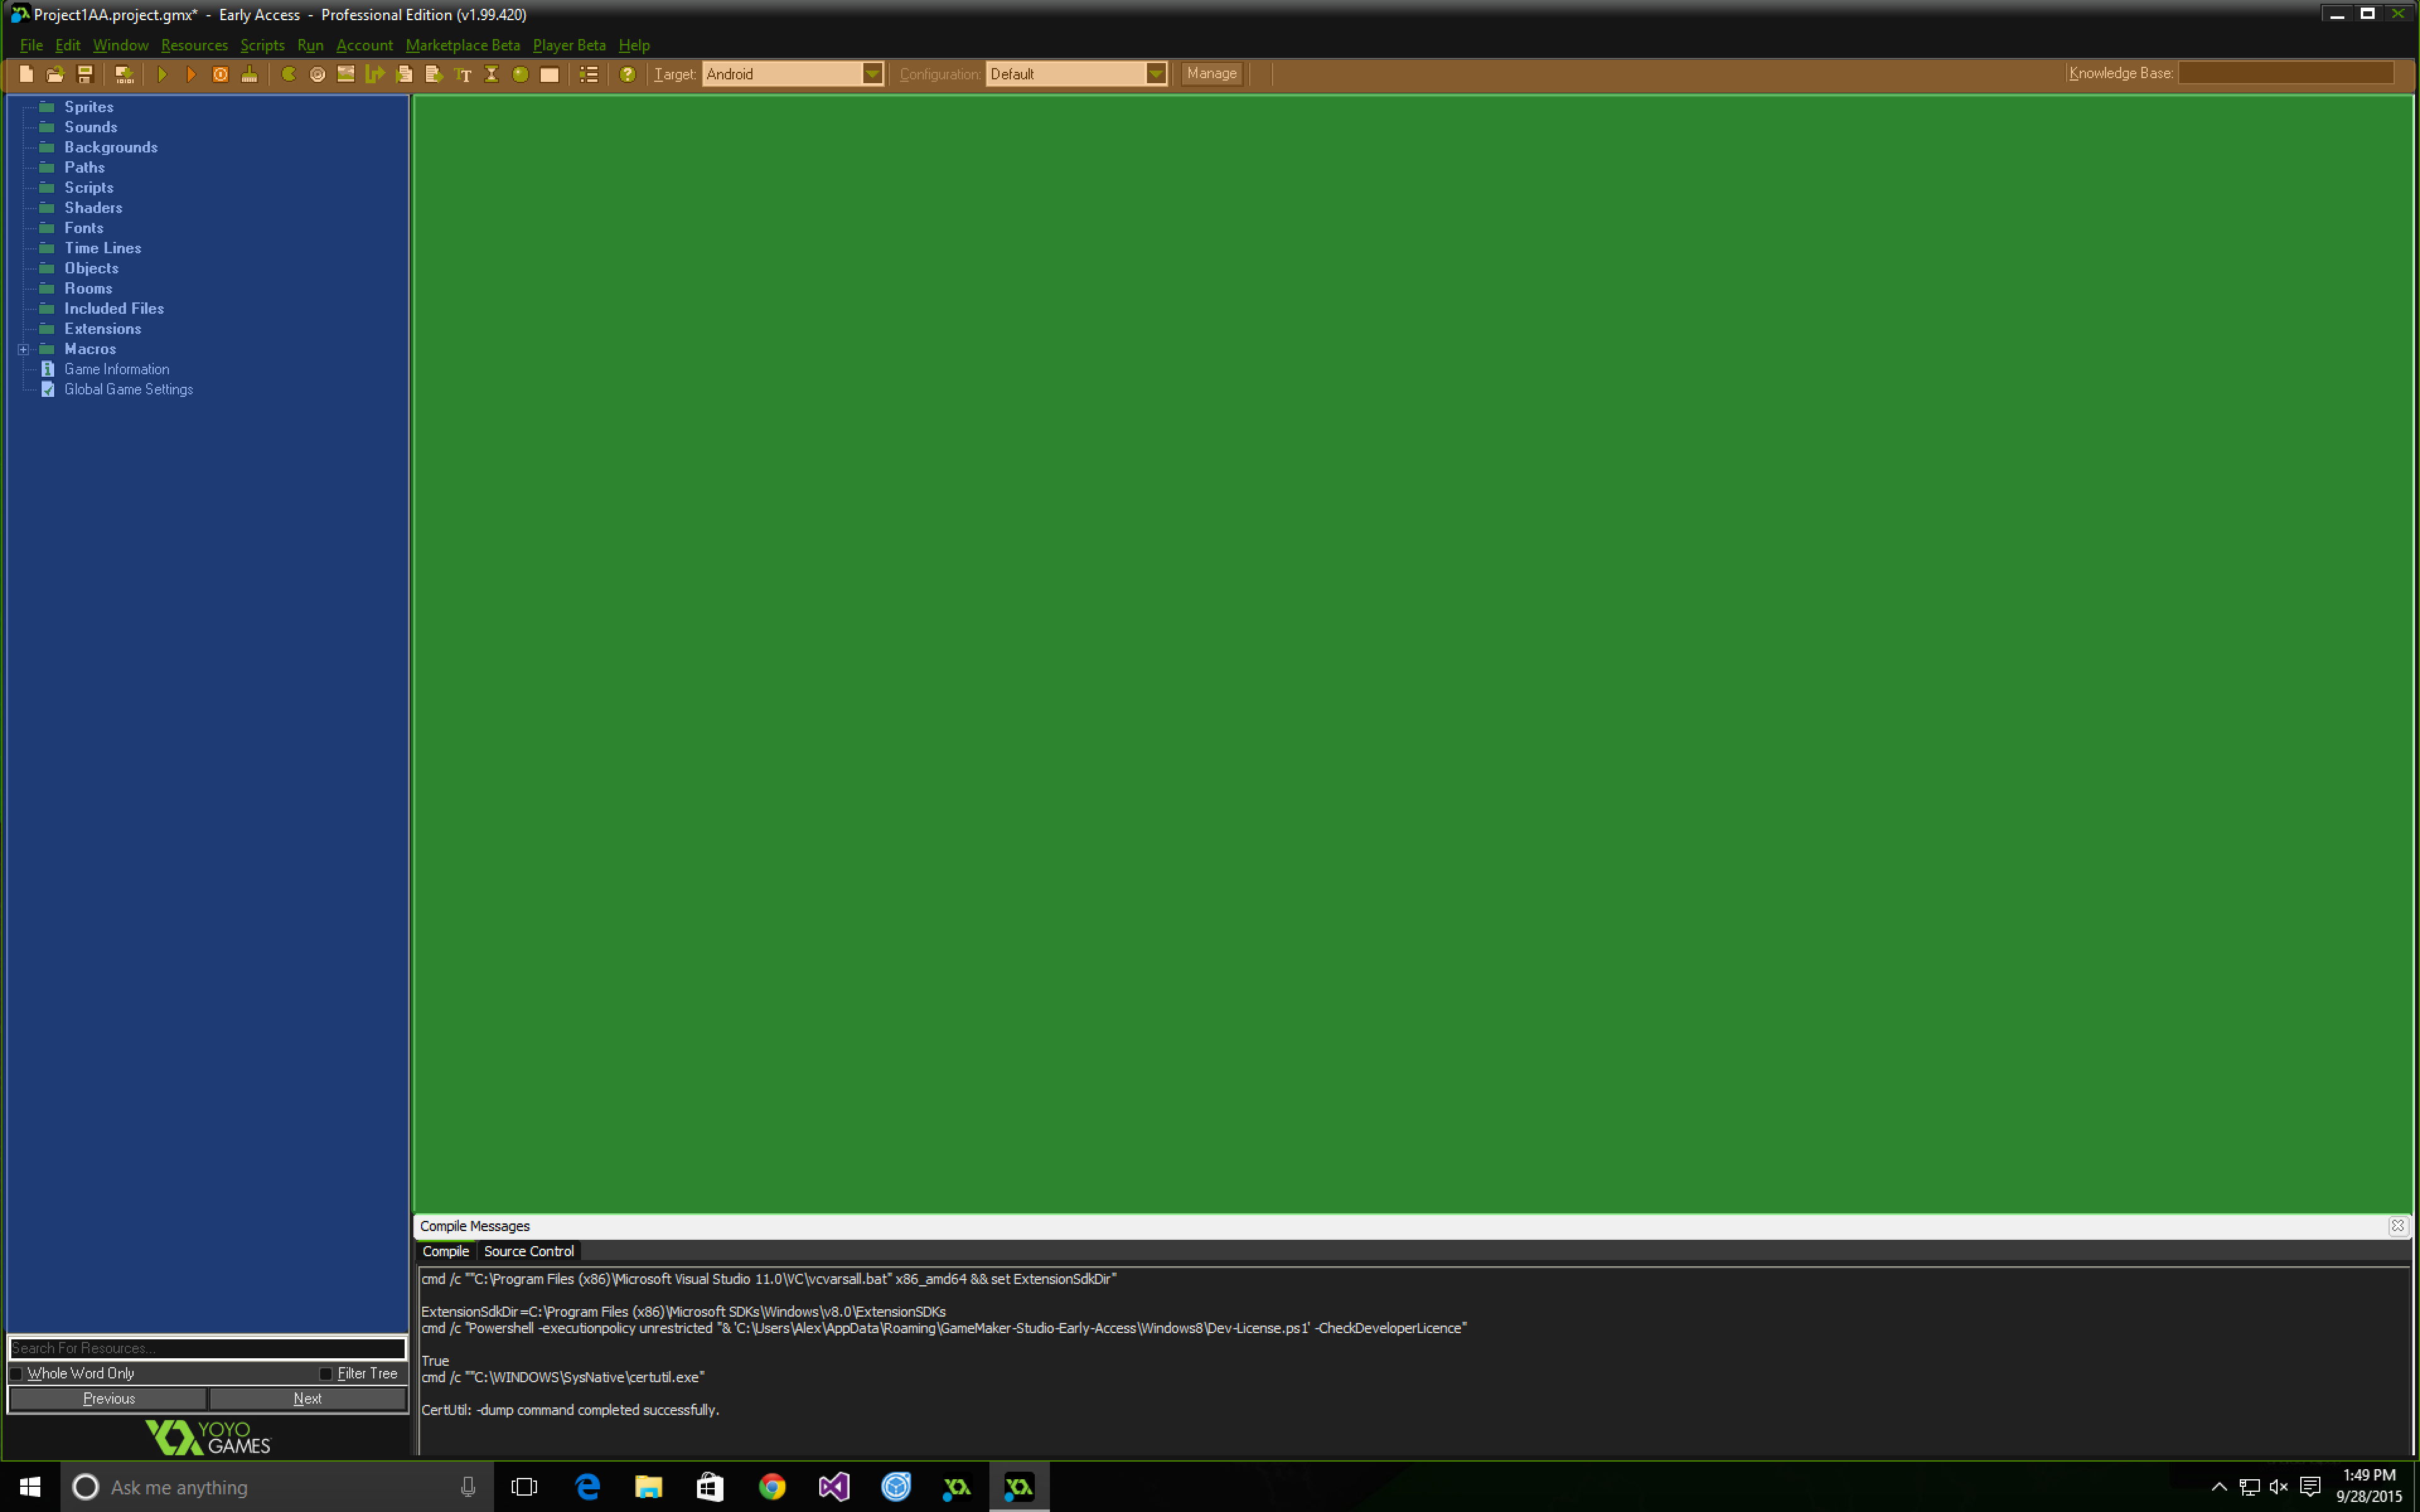
The image above breaks the main window into 3 parts differentiated by the colors blue, green and orange. The orange selected area is the task bar, this is where most of the run commands are. The most important items on the task bar are the green play button, which will run the program on the specified platform, and the target drop down, which will let the developer specify which platform they want the app to run on. In this article we will be focusing on Android as the target platform. The next color is blue, this is the sidebar; this is where the magic happens. Each folder handles different parts of the game. The folders include:
- Sprites
This folder handles all of the images for the game except for backgrounds, which will go in the backgrounds folder. Creating a sprite, or anything for a specific folder, all that is required is to right click on the folder and click “Create …”, this will create a new instance of whatever folder is selected. Once a new sprite is created, the sprite properties box pops up. From here you have the ability to load a sprite externally or there is also the option to create one in GameMaker. Creating a sprite using GameMaker is extremely limited and is no substitute to an actual graphics program like Photoshop. GameMaker has the ability to do animations as well. To do this, just create multiple images in the same sprite instance, this can be done by clicking the blank piece of paper with a green plus in the image view screen. You can add as many frames as you want, or even make an animation in a third party program like Flash and import it into GameMaker.
Side note: always center the origin by clicking “center”, this will ensure that spawning and collisions work properly.
- Sounds
Sounds are an important part of any game, and this is where you add them. GameMaker supports any file type and that file can be uncompressed or compressed depending on the developer’s needs. Sound files must be imported and can not be created in GameMaker by itself, however there is a simple sound editor.
- Backgrounds
This is where background images will go, ideally they need to be the same as the room’s width and height. Doing this will ensure that everything scales properly.
Creating a background is basically the same as creating a sprite, with the ability to load and edit the background. You can access the backgrounds and apply them in the room settings under “background”. The background will always be behind everything in the room.
- Paths
The basic idea behind paths is that at some point in the game, the developer may want an object to follow a certain path in a room. Creating a new path opens the path editor that allows the creation of said path, once created then in the creation event an action or code can be called for an object to follow a given path. To create a path just click in the gridded area where you want the first point to be, then the second point and so on. Getting a rough outline of the path then going in and modifying the coordinates to the precise locations after is the recommended method, this way you don’t have to search around for the X and Y values. On the left side of the pane “add” will add a new point at the bottom of the stack and “insert” will add a point at the location selected in the stack, and of course “delete” will delete the selected point in the stack. There are also options to flip the path on either axis, rotate the path, and scale the path. To make an object follow a path go into the object properties pane and in the “move” tab there will be four options. “Set Path”, “End Path”, “Path Position” and “Path Speed.” The first option sets a path for an instance. The next option will end the current path that an instance is following. Path speed will set the speed of the path, negative numbers will make the instance move backwards while zero will stop the instance on this path. Path position sets the location of the object on the path from 0 – 1. For example, if you set the position to “.5”, the object will be moved to the middle of the path.
- Scripts
This is where things can get pretty complicated. Scripts enable the use of custom code to do certain things. For example, if the game has an options menu, all of the options’ values once selected in the menu would be stored in a file externally from the game. To do this a script could be made that would make the file and fill it with the correct values. That is what this script code does:
//Load the default options file...

if file_exists('Options.ini')

{

ini_open('Options.ini')

fullscreen=ini_read_real('Settings','Fullscreen',1)

music=ini_read_real('Settings','Music',1)

volume=ini_read_real('Settings','Volume',1)

ini_close()

}

else

{

//If the file was deleted...

ini_open('Options.ini')

ini_write_real('Settings','Fullscreen','1')

ini_write_real('Settings','Music','1')

ini_write_real('Settings','Volume','1')

fullscreen=ini_read_real('Settings','Fullscreen',1)

music=ini_read_real('Settings','Music',1)

volume=ini_read_real('Settings','Volume',1)

ini_close()

show_message('The options configuration file was not found. A new one was created.')

}

window_set_fullscreen(fullscreen)
- Shaders

//

// Simple passthrough vertex shader

//

attribute vec3 in_Position; // (x,y,z)

attribute vec4 in_Colour; // (r,g,b,a)

attribute vec2 in_TextureCoord; // (u,v)

//attribute vec3 in_Normal; // (x,y,z) unused in this shader.
varying vec2 v_vTexcoord;
varying vec4 v_vColour;
void main()
{
vec4 object_space_pos = vec4( in_Position.x, in_Position.y, in_Position.z, 1.0);
gl_Position = gm_Matrices[MATRIX_WORLD_VIEW_PROJECTION] * object_space_pos;
v_vColour = in_Colour;
v_vTexcoord = in_TextureCoord;
}
- Fonts
This is where you can define fonts, this includes the font itself as well as the size and what characters are needed. If the app doesn’t use all the characters, you can select a range to free up space. Color and alignment do not need to be defined here, they will be defined in whatever object calls them. For example, this code defines what font and color to use as well as the vertical alignment:
draw_set_color(c_white)//sets color to white

draw_set_valign(fa_top)//aligns vertically

draw_set_font(fHUDSmall)//sets font to fHUDsmall
- Time Lines
When developing a game, sometimes you may want something to happen at a certain time, this is where time lines come in. After creating a time line a properties box pops up. To add a an event click “Add”, then type in how many steps after the game starts to execute the action. A step is basically a frame, so if the room speed is 60 frame a second, there are 60 steps per second. If you want to have something happen five seconds after the game starts, just multiply 5 by 60. All of the events and actions from creating an object are present and act the same. An object needs to initialize timelines, they do not start when the game starts.
- Objects

- Rooms
This where the actual game UI is made. Each screen, including levels and menus will be in a room. Creating a room is the same as everything else in the sidebar, just right click and click new. Once a room is created you can place objects in the locations needed. This could include building the platforms for a platformer as well as objects that draw the GUI or the main character. The room settings pane has six tabs: backgrounds, physics, objects, views, settings and tiles. The most used ones are background, objects, views and settings. The backgrounds tab is where you can set the background for that specific room. The object tab is where objects can be selected and placed in the room. Views can be tricky, the basic understanding of how this works is if the target device has a screen resolution of 1080×1920 in portrait but the room size is 1080×3000 the game will just show the specified dimensions relative to the y value set in the views tab. This enables a scrolling effect that can follow an object or just stay stationary. This can be useful for games that have enemies coming from above or for platformers. The object following part of the views tab allows the game to follow a given object, this is not a replacement from a standard view setup because it dynamically changes the camera to follow the object and can be kind of wonky without coding something better/custom.
- Included Files
GameMaker is not limited to files that are created in the program itself. Using this option the developer is able to add any other files needed to make the game work properly. These files may include bundled items with *.exe and HTML files. This shouldn’t be needed for Android.
- Extensions
These .GMEZ files can add a lot of functionality to GameMaker: Studio including adding GameMaker Language functionality. The most important thing that pertains to Android is the ability to add ads to the application. YoYo Games offers a few tutorials on how to add ads here.
- Macros
A macro is something that holds a constant value globally in GameMaker. Some built-in examples include “vk_…” variables for the keyboard and “c_…” variables for colors. The developer is able to define constant global variables as macros in this section. To create a new macro right click on the folder like you would on any other folder in the side bar then once the box pops up click “add” to add a new macro, then just type in a name and a value.
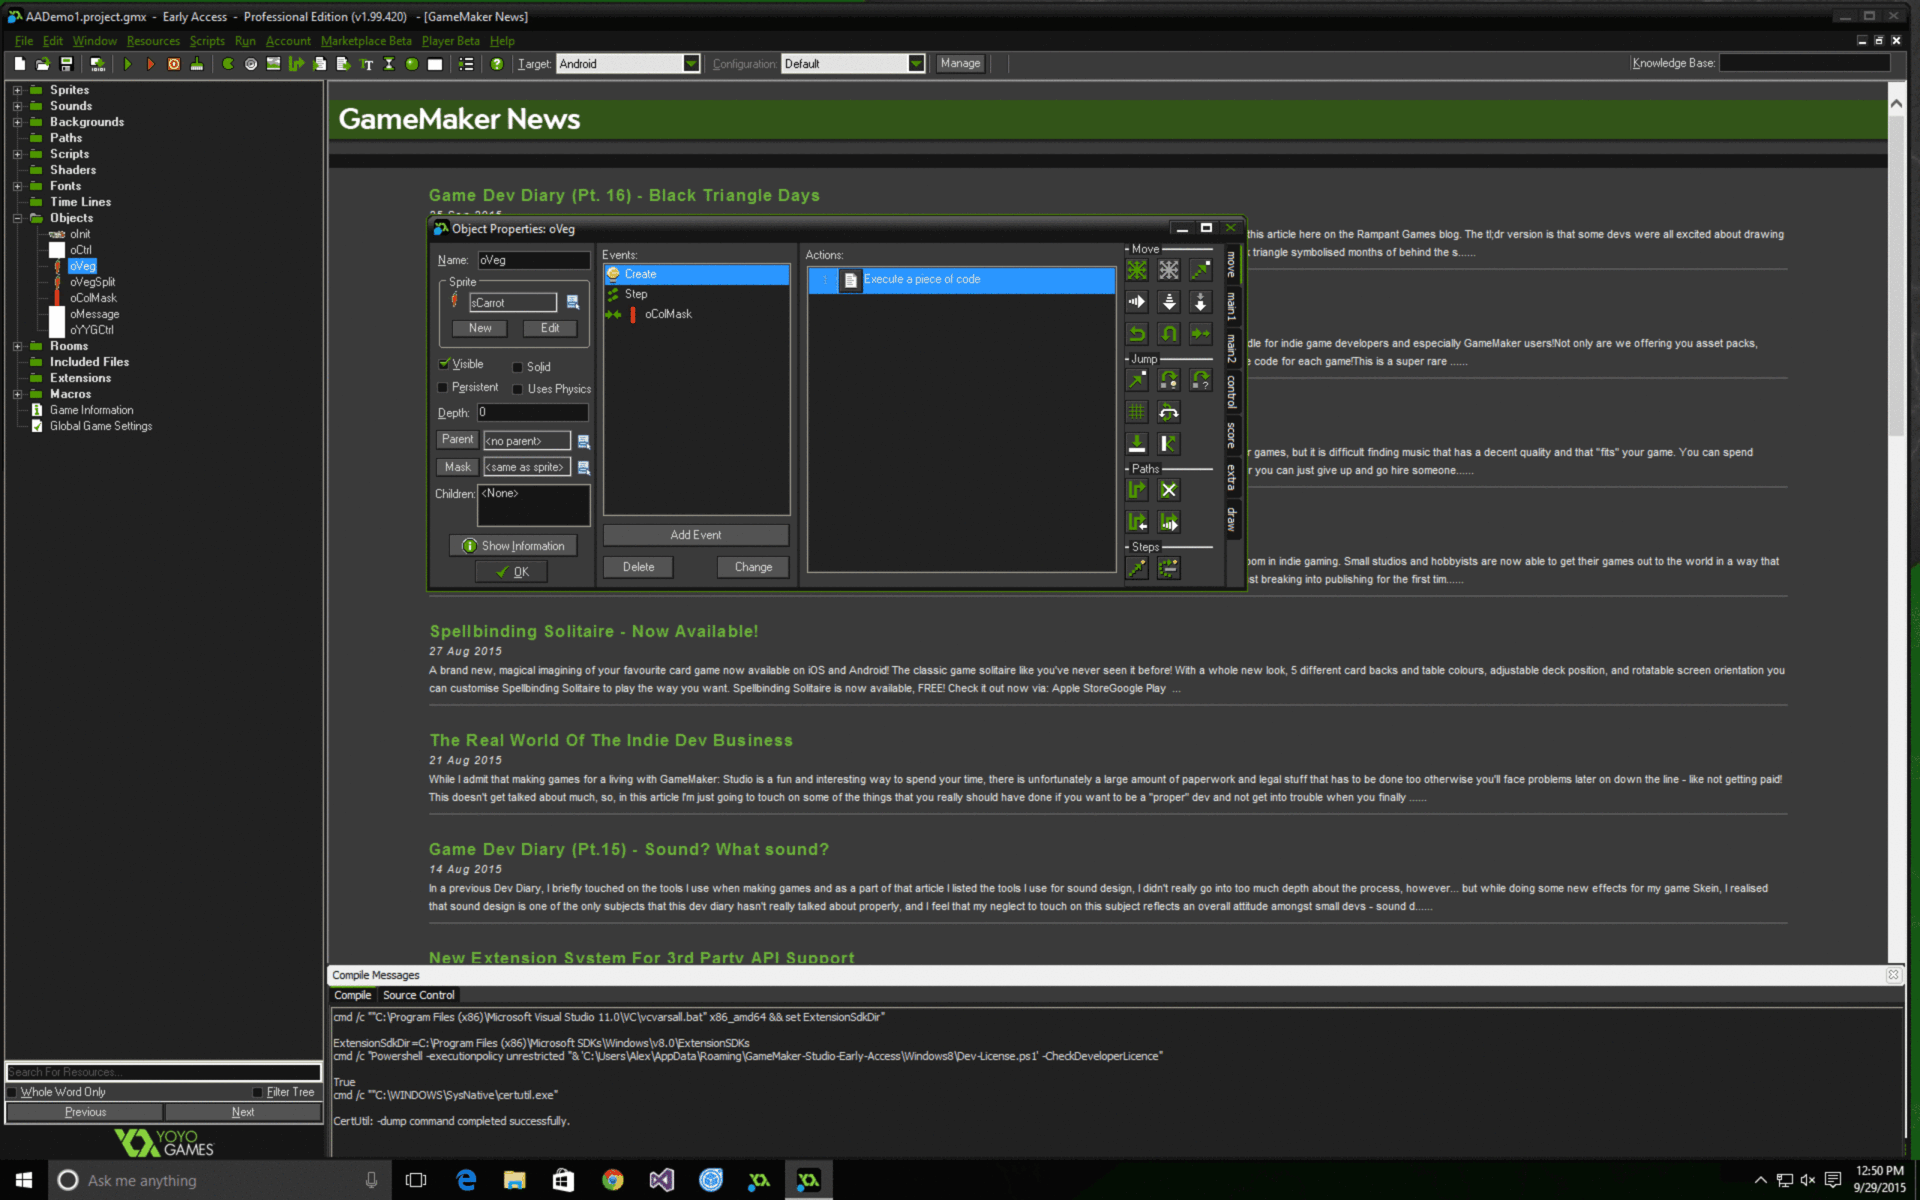
The green area in GameMaker: Studio is just open space dedicated to showing the latest YoYo Games news when the app first opens to other things like rooms or object properties. It all depends on what you are working on at that specific moment.
A brief intro to GameMaker Language
GameMaker: Studio offers it’s own programming language for more control than the basic drag and drop actions. To add code into the game, do as you normally would to add an action, but instead of adding one, go to the “control” tab on right and go down to code and drag in the white piece of paper. This brings up the code editor. GML is not difficult to learn and is much easier than Java or C++. This is because GML is not an Object Oriented Programming language and therefore doesn’t include things like classes or methods. This leads to simpler code. Also, there is no need to declare data types in GML. For example if I wanted to declare a few int types and Strings in Java, I would have to explicitly define the data type, where as in GML this is not the case.
Java:
 int x = 0;

int y = 42;

String s = "Android Authority";

String str = "Alex";
GML:
 x = 0;

y = 42;

s = "Android Authority";

str = "Alex";
Another side note is that the semicolon “;” is not required after each statement like it would be in Java or C++. Even so, it is good practice to use the semicolon after each statement, not doing so may lead to errors later on that can be avoided. Assuming basic knowledge of Java and the like, GML will not be difficult. Pretty much all the the basic logic from those languages apply here, including “=”, “==”, “+”, “-” and so on. The program structure is also basically identical with “{” starting blocks and “}” closing them. The sample game will go into a lot more detail when it comes to GML. For basic games that do not require anything special, there is no need to use or even think about GML, as most of the functionality is available with the drag and drop interface.
Creating a basic game
To help you get started with game development, I have uploaded a complete game to GitHub. It is a basic game based off Fruit Ninja complete with sounds and animations. This game was originally made by YoYo Games, but it has been modified to include comments on why everything is set up the way it is. The font used is “Gang of three” which is a free font. This isn’t necessary to download unless you want to modify the in game text. This game has been tested to work on both Windows and Android. Almost every line of code in each action is explained in each code file.
Exporting the GameMaker file to an apk file
Creating an .apk file is very simple, just go to File> Create Application. This will make an .apk that you can upload to the Play Store. However, there are a few steps that need to be taken before the app should be made. First, go into “Global Game Settings” in the sidebar then click on “Android”. From here there are four tabs that need to be completed, this includes the name, version and package name of the application in the General tab. In the Graphics tab the app icons, texture size and screen color depth can be chosen. The social and permissions tabs handle leaderboards and permissions respectively. Once all of this is filled out, the application can be exported as an apk and uploaded to the Google Play Store.
Wrap-up
Developing for Android is hard, especially when it comes to beautiful games. Thankfully engines like GameMaker: Studio exist that make game development a lot easier. With its drag and drop interface, creating games for Android has never been easier. With the addition of GML, the possibilities are endless and there should be no limit to what is possible. If you have any questions on the game feel free to comment below.
