Affiliate links on Android Authority may earn us a commission. Learn more.
An easy first project for Android development noobs: Math Game
You can read about Android development until you’re blue in the face, but eventually you actually have to build something if you want to get a true grasp on how it all works.
In fact, I think this is a scenario where the very best way to learn is by doing. Until you actually dive into Android Studio and start trying to build a working app, you won’t have any context for the information you are absorbing. You won’t see what it is for, or how it all works together.
the very best way to learn is by doing
This post will guide you through a very simple first Android Studio project. This will show you all the pieces of the puzzle as they work together, and let you to actually test some of the theory you’ve picked up so far. I’ll be operating under the assumption that you have done a little background reading on Java and Android, but I’ll still go over everything as much as possible to guide you through the process. The project should be ideal for someone new to Android development.
We will be building a math game. But that isn’t really what’s important; you can just as easily reverse engineer this to be anything else!
Finding your way around
If you haven’t got a copy of Android Studio, go ahead and follow this post for instructions on how to get it.
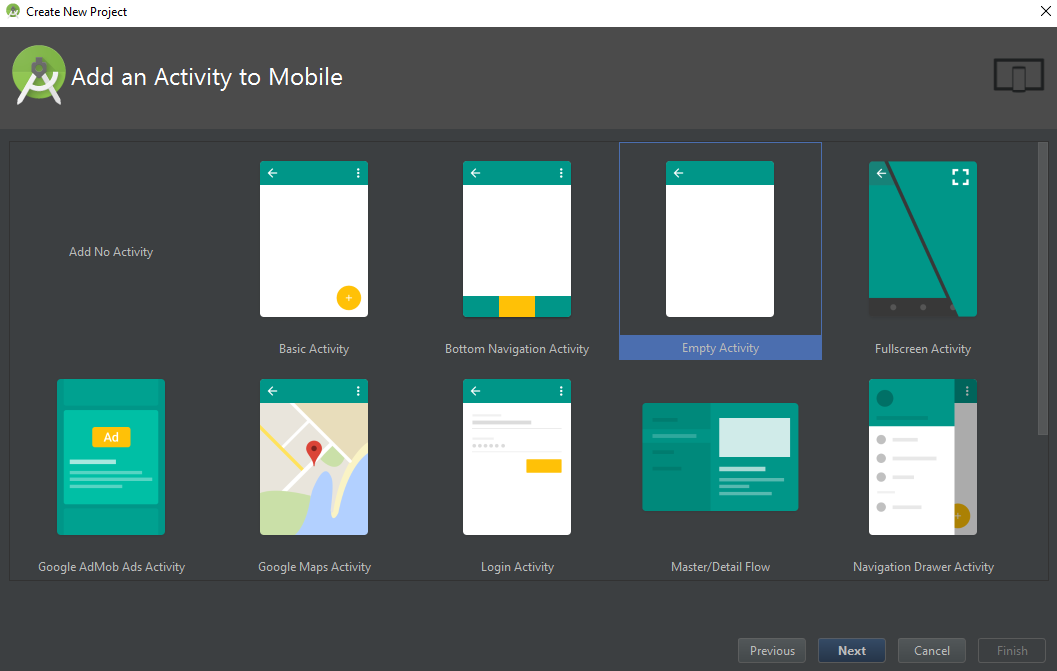
Once installed, start a new project. Call it whatever you like, but make sure to choose “Empty Activity.” This means that the app “template” will be empty and devoid of buttons and menus which can otherwise get complicated for a newbie. Leave all other options as default.
Once that has loaded up, you’ll be presented with your first project. Android Studio has lots of windows, which can be pretty daunting when you’re starting out. Don’t worry about them. Instead, simply focus on the most important two: the window with the code on the right and the one with the directory on the left.
The window on the right is where you input and edit your code. The window on the left is where you choose which file it is you want to edit. You can also open multiple files at once and then flick between them using tabs along the top of the main window. Right now, you should have two files open: activity_main.xml and MainActivity.java. The latter will likely be selected and you’ll be able to see the basic code it contains.
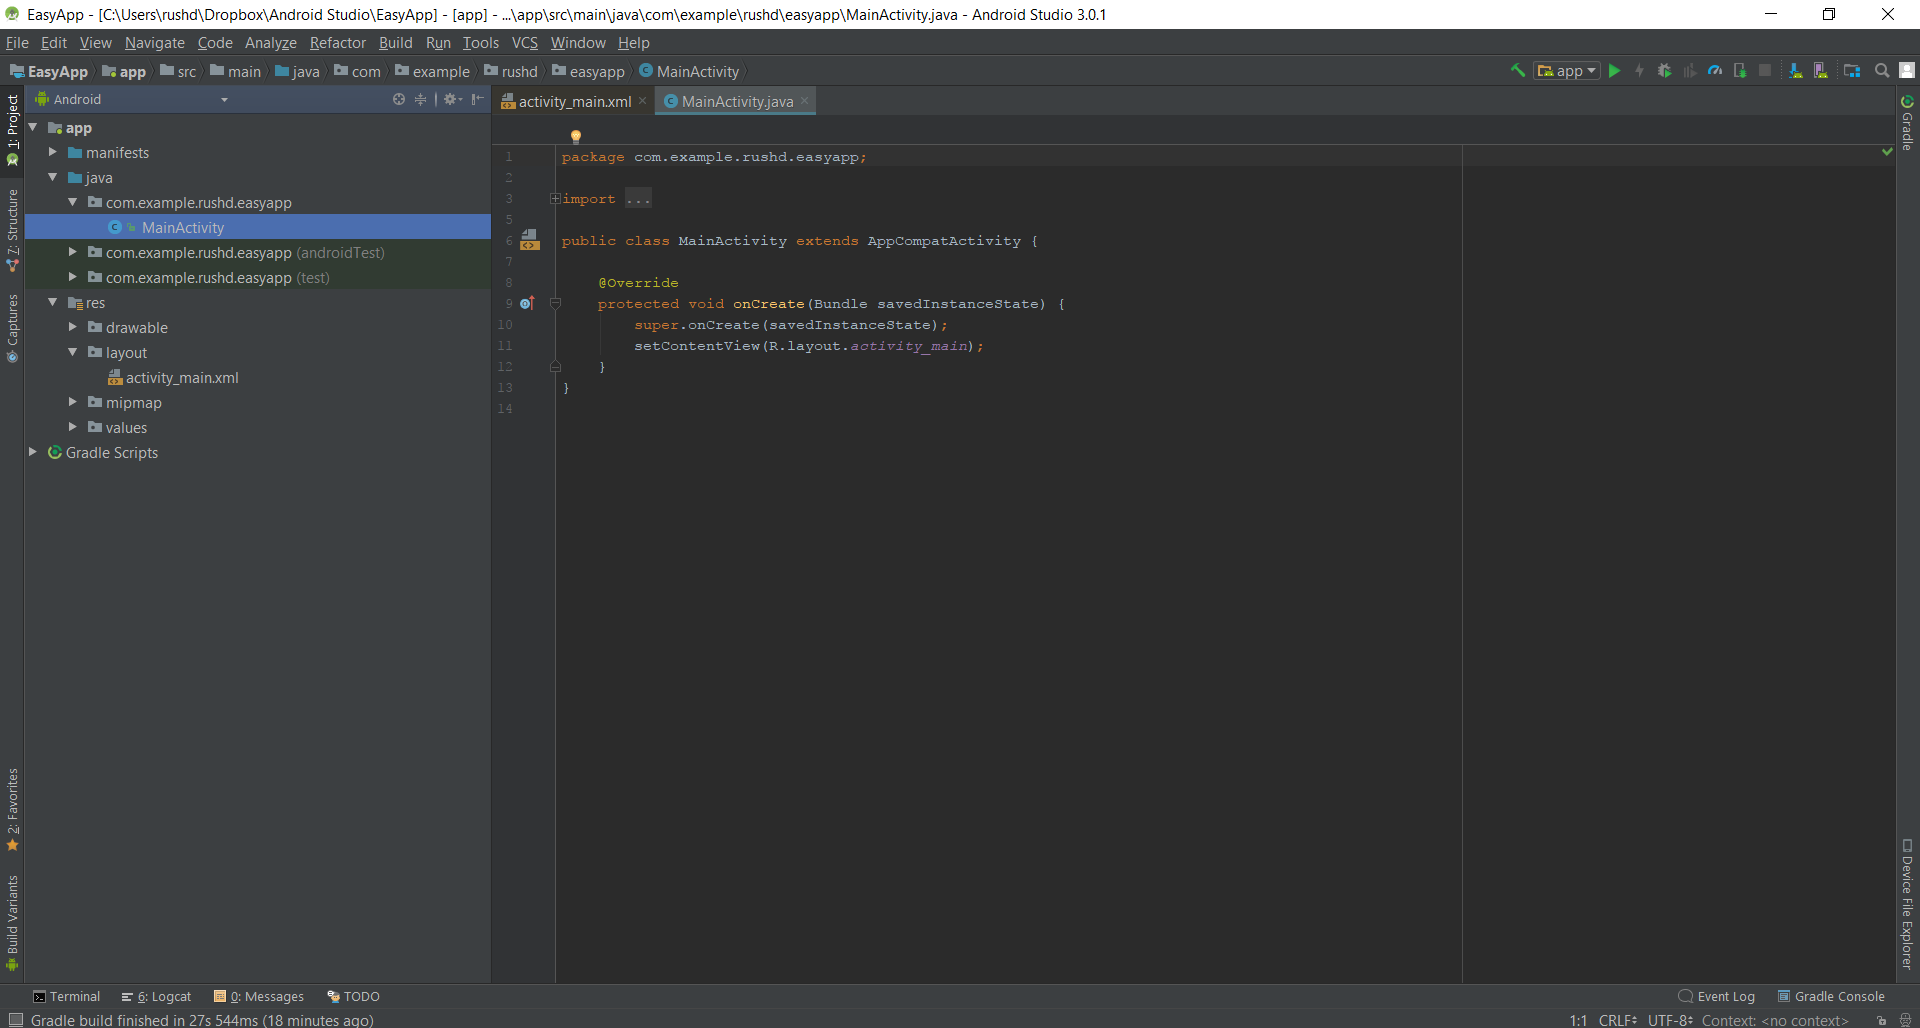
This code is what we call “boilerplate code” — the default code Android Studio fills out on your behalf. This is useful code required for the majority of projects, but you can ignore it for now.
These two files are open because they are the most important files in any new project. An activity is any stand alone screen in an application — in some cases it will contain the entire app. This consists of two files: one to define what it looks like, called an XML file, and one to define how it behaves, called a java file.
The XML file tells Android where to place the buttons, the images, and any other important files. Meanwhile, the Java file defines how these buttons and images behave, like what happens when you click on a button.
You’ll find MainActivity.java in: app > java > [package name of your app] > MainActivity.
Because the XML file defines a layout, which is graphical in nature, it is a “resource” file. This then goes in: app > res > layout > activity_main.xml. File names can’t have spaces and resource files can’t use upper case, which is why the two words are joined via an underscore.
Creating your views

Click on the tab at the top that says ‘activity_main.xml’ in order to switch to that file. Make sure you have the Design tab selected at the bottom of the screen rather than the Text tab (which shows the XML code).
This design view will allow you to drag and drop elements onto the screen to set them out however you like. Most Android apps use “views,” which are all the elements you are probably familiar with from using apps on your own device, like buttons, images, and text boxes. With the design view, we can set these up really nicely and easily; just find the element you want on the left (under Palette) and then drag and drop it onto the picture of your app.
This design view will allow you to drag and drop elements onto the screen to set them out however you like.
You already have one “textView” in the middle of the screen which says “HelloWorld.” We’re going to turn that into our title. But we also want two more textViews underneath, to show the two numbers we want to present the user, as well as an “editText” which will be used for them to input their answer. Use the item in palette called “Number” and this will confine the input to numbers online.
Lastly, add a button so they can submit their response and a final textView to say if they got it right.
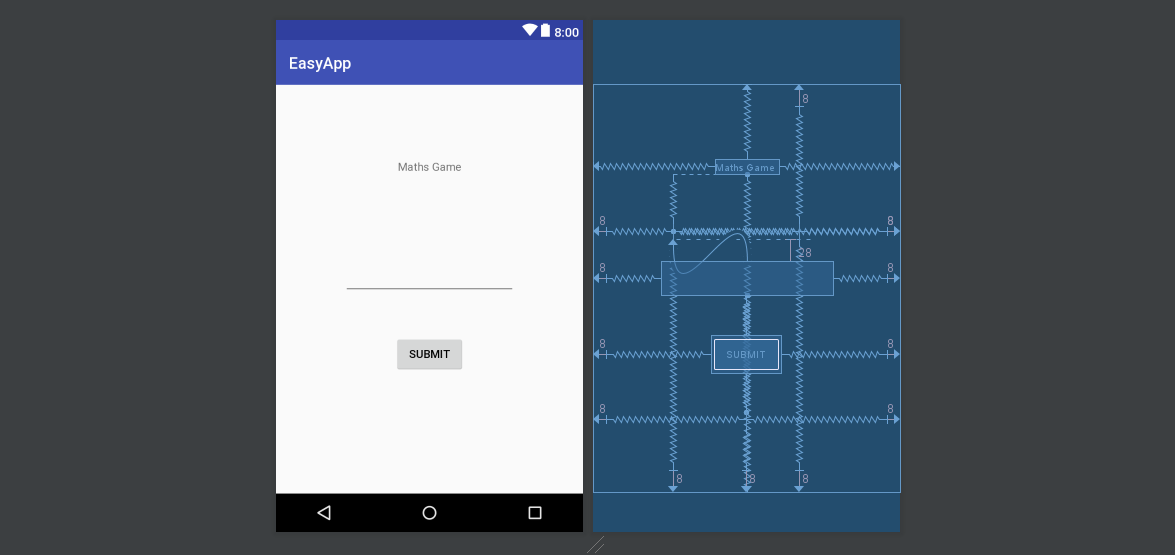
You will likely that these elements can be a little stubborn and sometimes refuse to go where you want them. That’s because we’re using a type of layout called “Constrain Layout,” which means all views are positioned relative to one another and the edges of the device. To move your views around, you need to grab onto the edge of one, drag it to a fixed point, and do the same for the other three sides. Once you’ve done that, you can then adjust its position between those fixed points.
You should end up with something that looks a bit like this, but it’s up to you how you’d like to position your elements!
Naming and customizing views
Select any of the views and a window on the right called “attributes” should tell you a bit about them.
Here you can change properties like the name of the view or the text it displays. If you choose “Hello World!” you can change this to show the name of your app by editing the option that says “text.” Let’s change that to “Maths Game!.” The s is optional, I’m British.
Likewise, change the text on the Button so it says “Submit” and make the others blank.
Now choose the first blank textView and change the option at the top of the Attributes that says “ID” to “Number1.” This “ID” won’t be seen by the user, but rather it’s used to identify our views from within the Java code. If we want to write code to alter the behavior of a view, we need to tell Android which view we’re going to be changing! Call the next one “Number,” call the editText “Attempt,” call the button “Submit” and call the text at the bottom of the screen “Answer.”
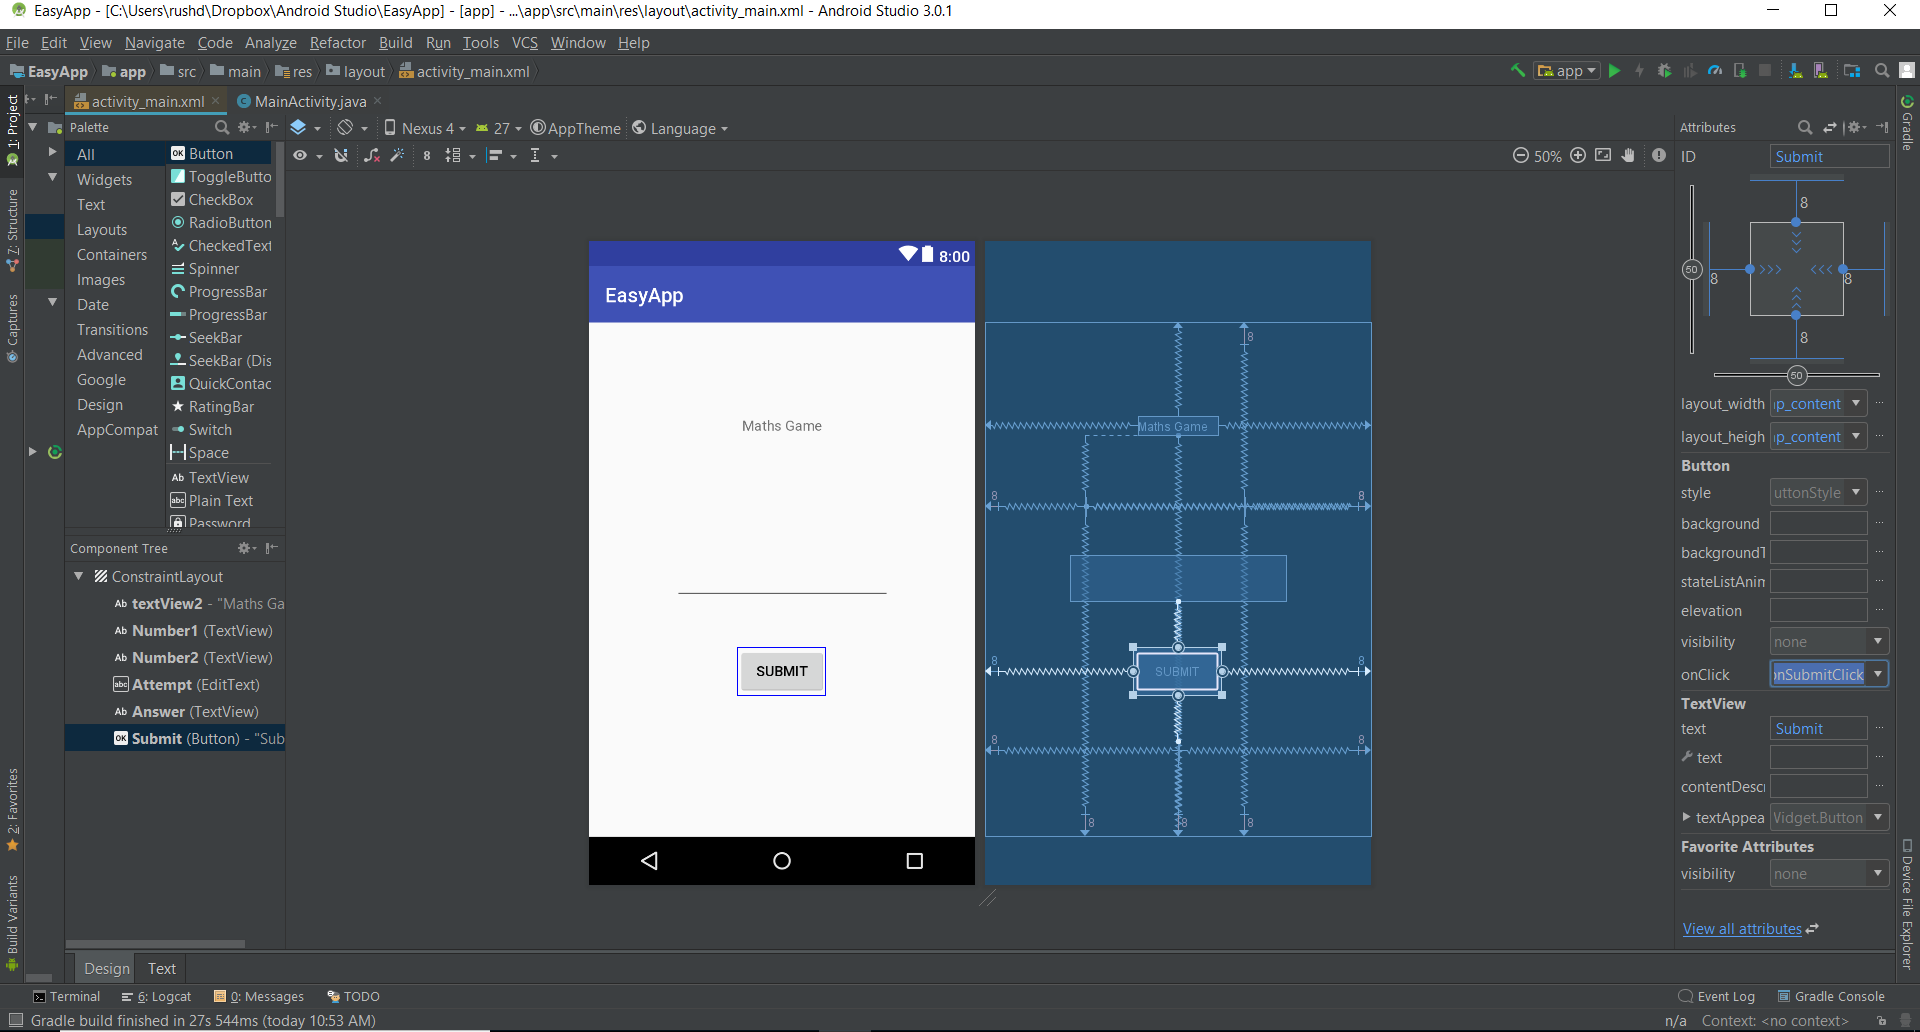
Finally, click on the button again and where it says “onClick,” write “onSubmitClick.” An “onClick” is a piece of code executed whenever a view gets clicked. This is another way for us to conveniently refer to our views.
Starting java
Your app is now very pretty but it doesn’t really do much as yet. To remedy that, head back to the “MainActivity.java” file by choosing the tab along the top.
With this page open, you can now start adding code telling those buttons and textViews how to behave.
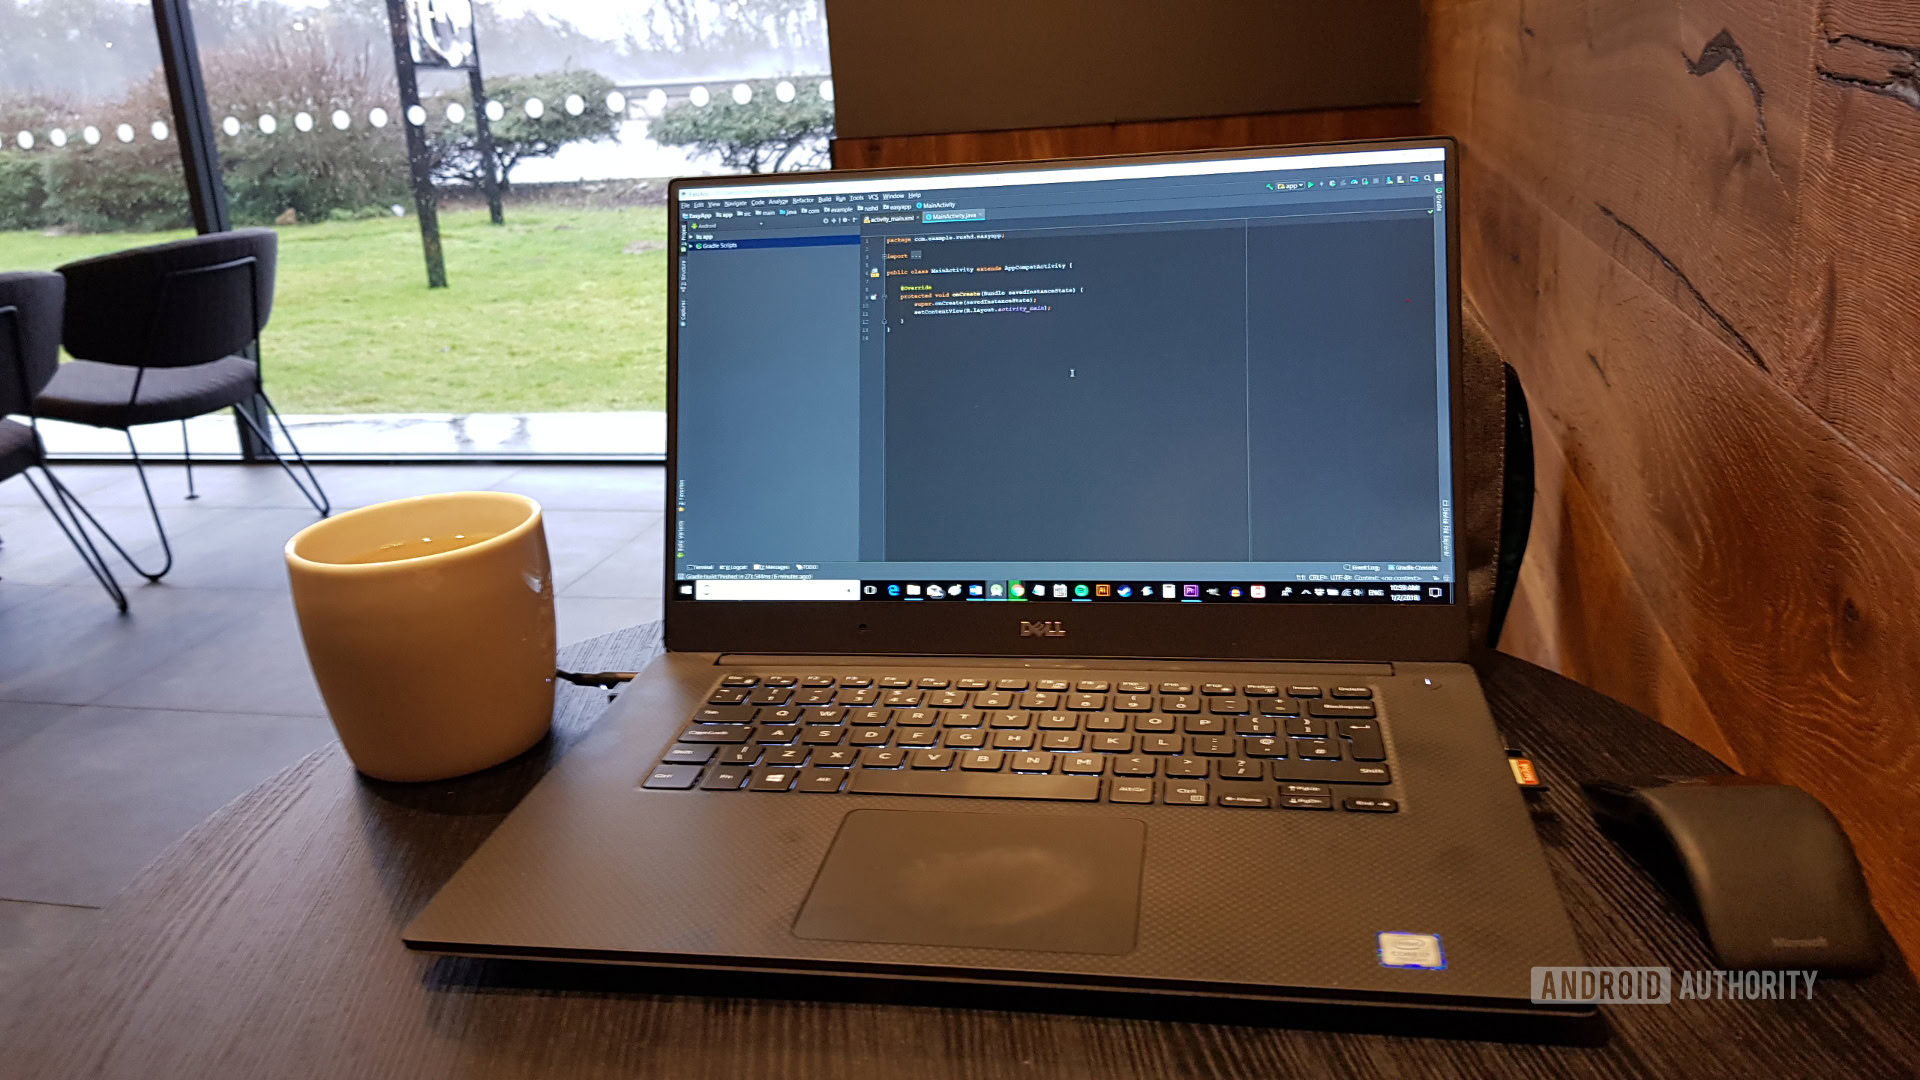
The first thing to do is change the two numbers so they show random text. To do that, we need to locate them via our code.
Remember we said that “boilerplate” code was code Android Studio had filled in for you. That includes the “onCreate” method, which is a section of code that runs as soon as an activity is created. Methods are simply convenient bundles of code, which are contained within curly brackets.
We can see in here this line:
setContentView(R.layout.activity_main);This is what tells Java that activity_main.xml is where the layout is defined. It also means we can now reference our views from that file by using the ID.
So, if we want to change the text of our Number1 view, then we could do the following:
Int value1 = 12;
TextView Number1 = findViewById(R.id.Number1);
Number1.setText(“” + value1);
If you see a red underline, you’ll need to “import a class.” This is basically telling Android Studio you want to use extra features, so just click on the offending text and then click “Alt+Enter” as instructed to quickly access that feature!
What happened here is we have created a variable. This is a “label” that represents a value, in this case the label is value1 and it represents the whole number (integer) 12. It is an integer called value1 and it is equal to 12.
We’re then locating the TextView by saying that we want to create a virtual TextView, which is going to represent the TextView with the ID “Number1” from our layout file. Then we are setting the text of that TextView to be whatever value1 represents. This is a TextView, called Number1 and the source is R.id.Number1.
Then we can access a ‘feature’ of our TextView to say “setText.”
The reason we say “” + value1 is that TextViews expect strings of characters, not numbers. By using those empty quotation marks, we are saying ‘no text, plus the number’.
We can do the same thing for Number2 in the same way.
Adding interaction
You might be wondering what that onSubmitClick was all about. This tells Android Studio we’re going to add some lines of code to listen for clicks on that button and we will group those together as a method called “onSubmitClick.”
Anything in onCreate happens when the app starts up and anything in onSubmitClick happens when the submit button is clicked (because we defined the method in the design view)! Note though that we need to find our views again in order to access them here.
Anything in onCreate happens when the app starts up and anything in onSubmitClick happens when the submit button is clicked
What happens when someone clicks on this button?
First, we want to check what number they have entered into the EditText. Then, if that number is equal to value1 + value2, we will tell them they got it correct by updating the Answer TextView. If they got it incorrect, then we will update the view to reflect this while showing what it should have been.
This means locating our views, converting integers (numbers) into strings (words) and back again, and also using an “If” statement in order to check if the value provided is correct. The whole thing looks like this:
public void onSubmitClick (View view){
    TextView Answer = findViewById(R.id.Answer);
    EditText Attempt = findViewById(R.id.Attempt);
    int userAnswer = Integer.parseInt(Attempt.getText().toString());
    if(userAnswer == value1+value2) {
        Answer.setText("Correct!");

    } else {
        Answer.setText("Wrong, the correct answer was: " + (value1+value2));
    }

}
This won’t run just yet though, because we can’t access value1 or value2 – they’re in a different method. To fix this problem, pop them outside the onCreateMethod and now they’ll be available to reference anywhere in your code. We unfortunately can’t do the same thing for our buttons and text views because we don’t tell Android where to find the views until the onCreate executes.
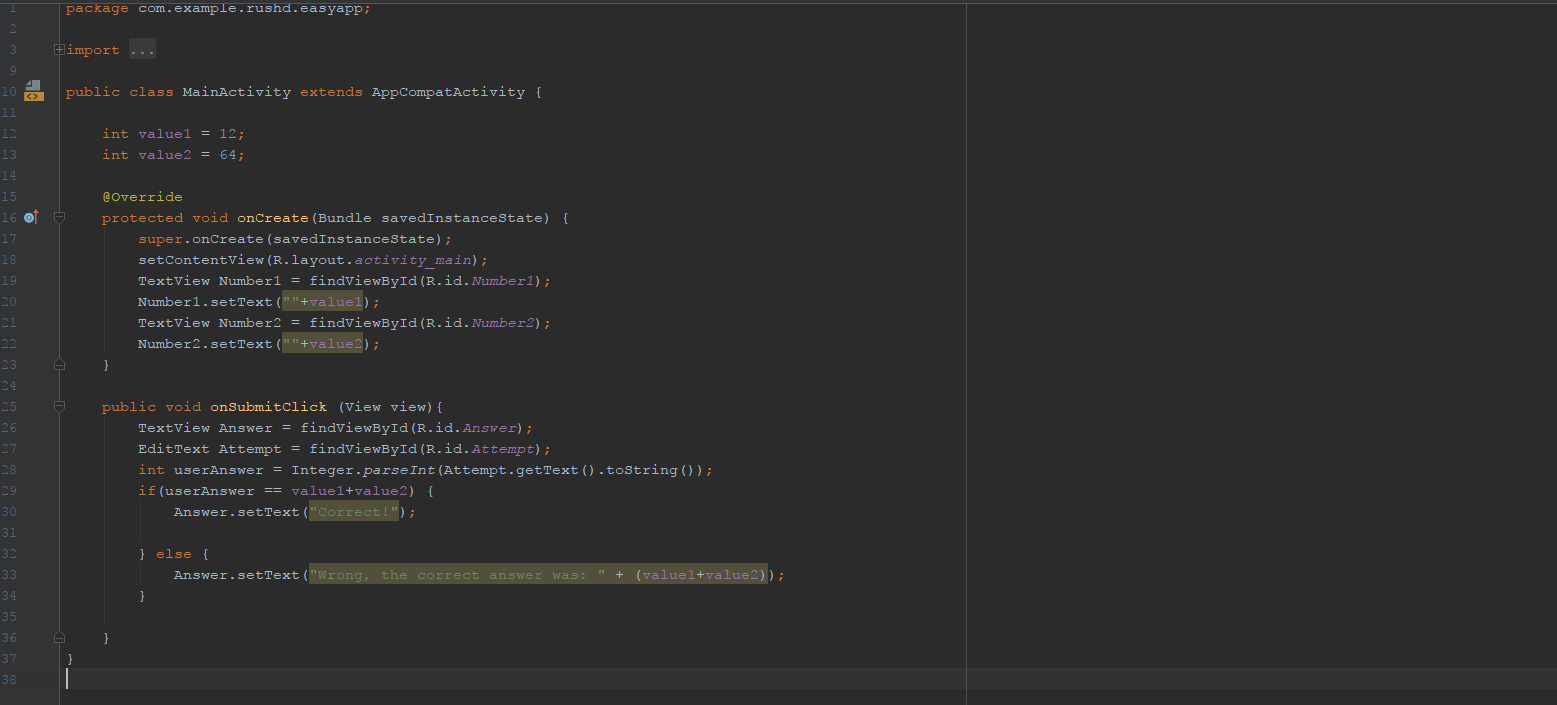
We’re getting the TextView and the EditText as we have done before. Then we’re creating an integer called userAnswer which uses “getText” to retrieve the text from Attempt and parseInt in order to turn those characters into a number.
An if statement works just like in Excel. As long as the logic inside the brackets is true, then the code in the curly brackets will be executed. So as long as userAnswer is the same as value1 + value2 (we used two equals signs here because Java), then we set the Answer to ‘”Correct!”
Otherwise, the brackets that follow the word “else” will play out.
Don’t worry about all this if it seems complicated — you can either reverse engineer this code or just find the relevant commands and what they all do with a little Googling. Reading through it may help you understand the logic though.
The entire code should now look like this:
public class MainActivity extends AppCompatActivity {

    int value1 = 12;
    int value2 = 64;

    @Override
    protected void onCreate(Bundle savedInstanceState) {
        super.onCreate(savedInstanceState);
        setContentView(R.layout.activity_main);
        TextView Number1 = findViewById(R.id.Number1);
        Number1.setText(""+value1);
        TextView Number2 = findViewById(R.id.Number2);
        Number2.setText(""+value2);

    }
    public void onSubmitClick (View view){
        TextView Answer = findViewById(R.id.Answer);
        EditText Attempt = findViewById(R.id.Attempt);
        int userAnswer = Integer.parseInt(Attempt.getText().toString());
        if(userAnswer == value1+value2) {
            Answer.setText("Correct!");

        } else {
            Answer.setText("Wrong, the correct answer was: " + (value1+value2));
        }

    }
}
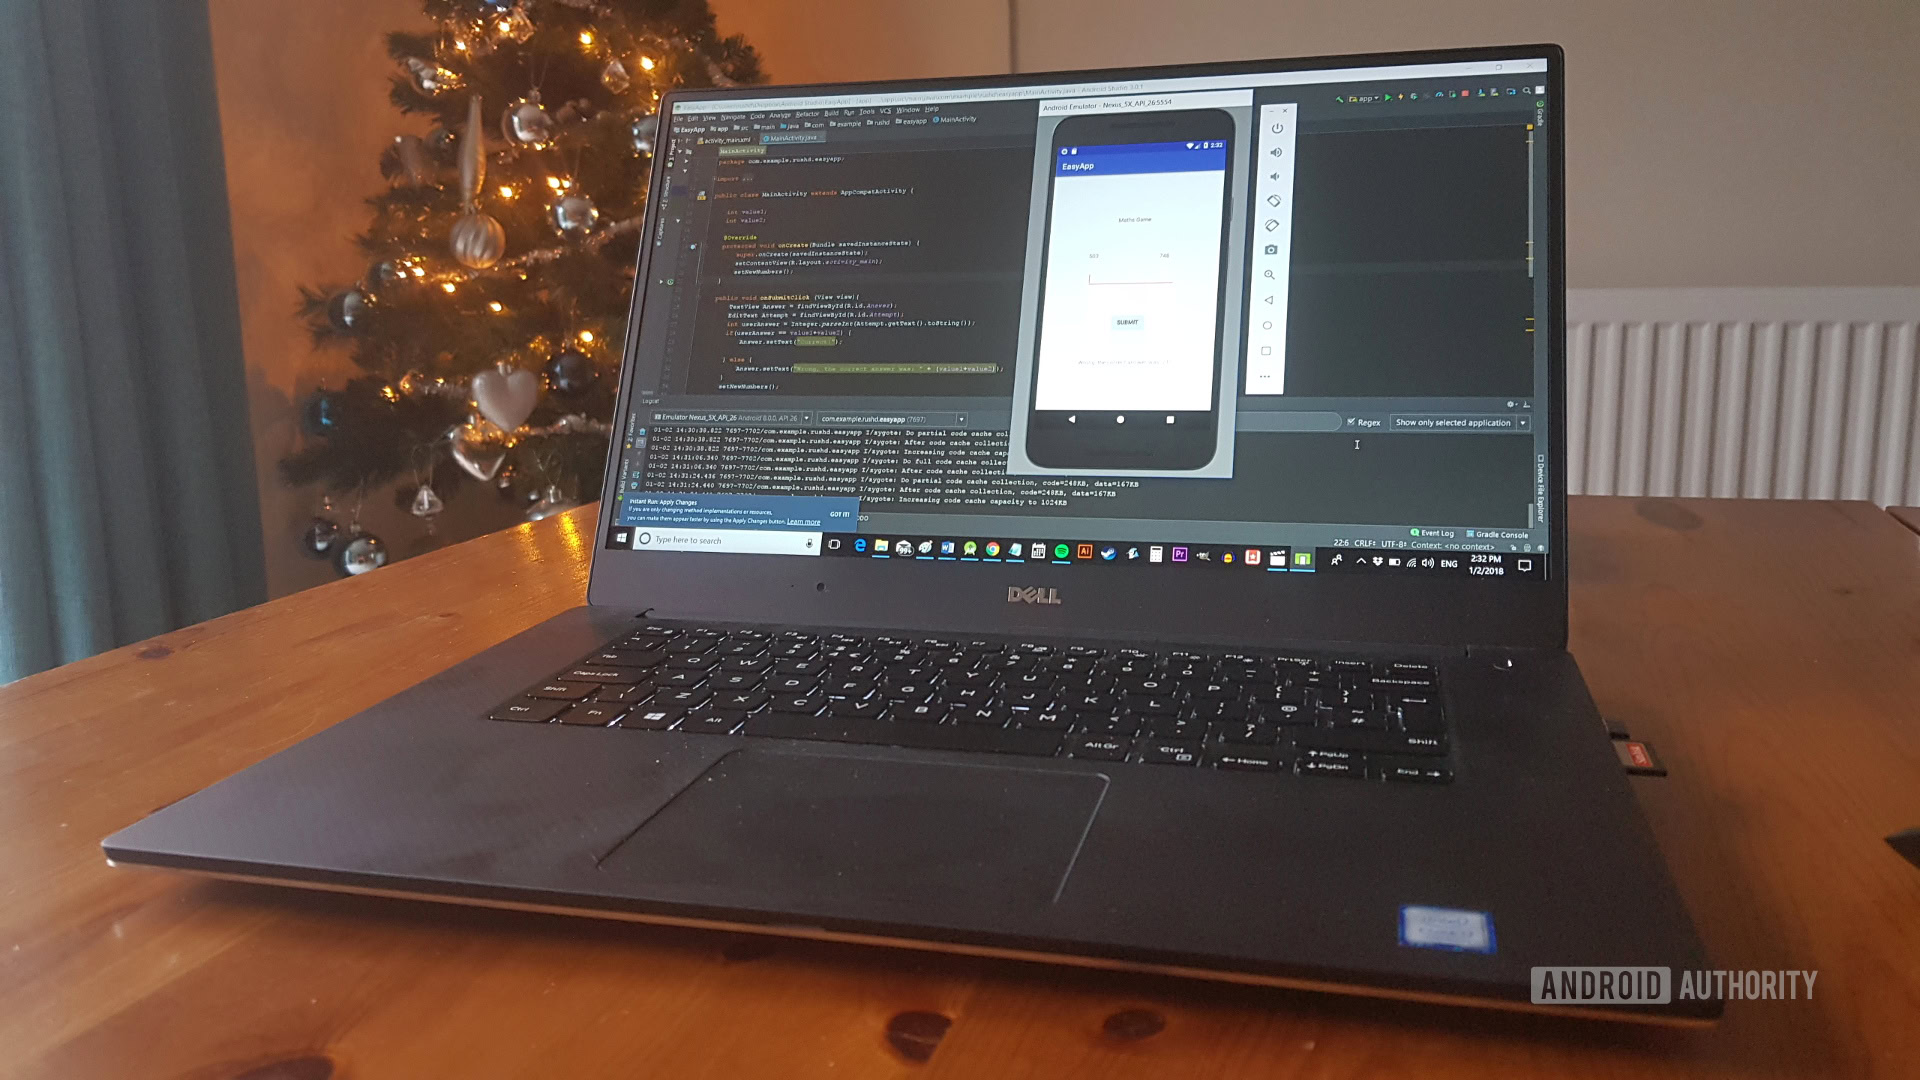
Try and run it by plugging your Android device into your computer. Make sure that you have USB debugging turned on before hitting play. You can also test it on an emulator if you have set one up.
Final touches
If you did everything right, then you should now have a very basic math game. When I say basic, I’m not kidding— there’s only one question!
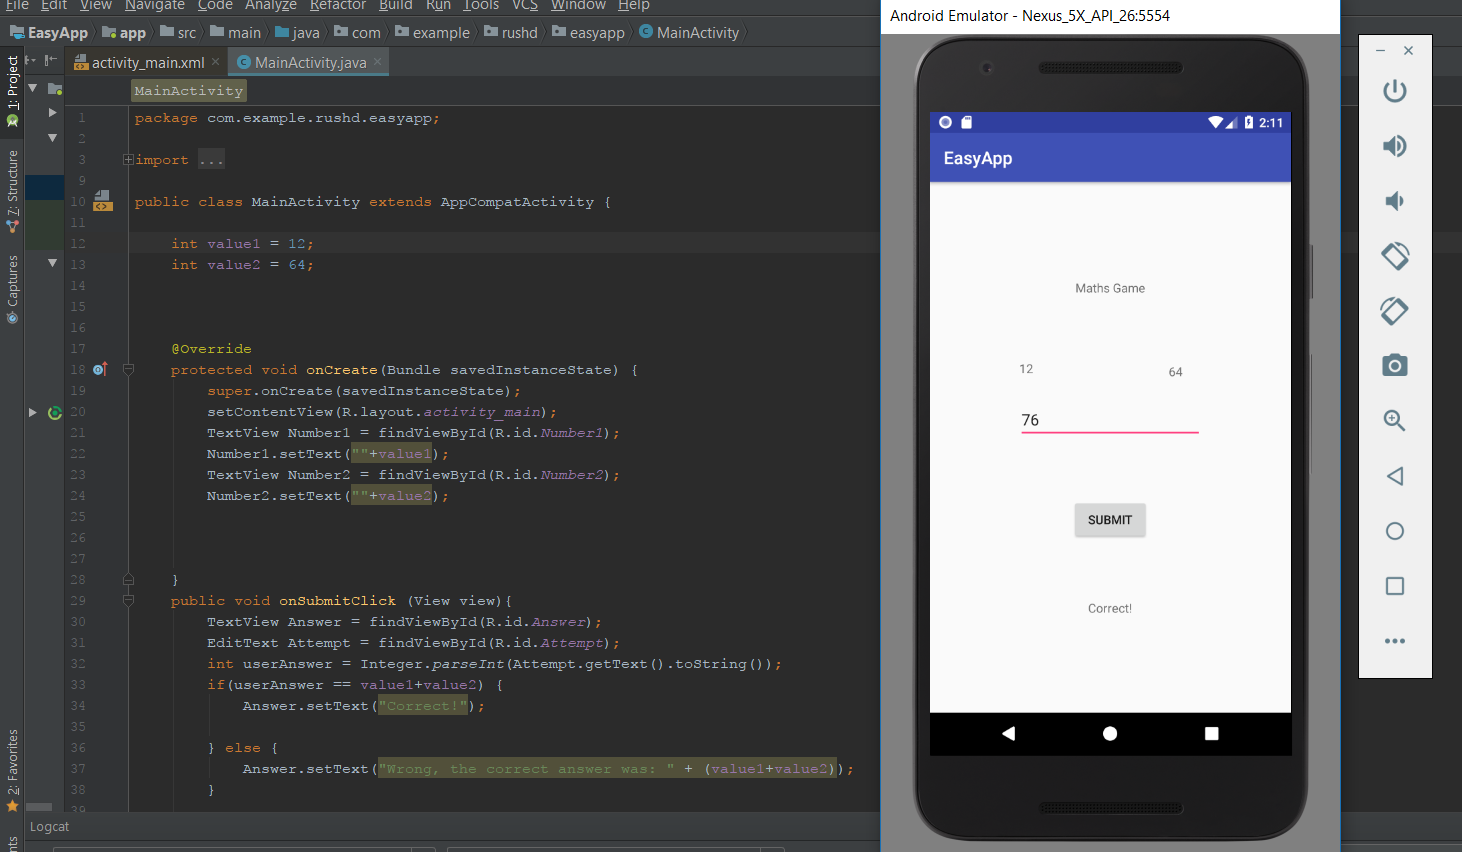
We can change that if we want. It would only take clearing the text each time the user clicked ‘Submit’ and changing the numbers to random values. I’m going to leave you with the code to do that. You should be able to figure it out from there!
Tip: The code has been added to a new method of our own creation, which can then be referred to anywhere in the code simply by referencing it by name.
public class MainActivity extends AppCompatActivity {

    int value1;
    int value2;

    @Override
    protected void onCreate(Bundle savedInstanceState) {
        super.onCreate(savedInstanceState);
        setContentView(R.layout.activity_main);
        setNewNumbers();
    }

    public void onSubmitClick (View view){
        TextView Answer = findViewById(R.id.Answer);
        EditText Attempt = findViewById(R.id.Attempt);
        int userAnswer = Integer.parseInt(Attempt.getText().toString());
        if(userAnswer == value1+value2) {
            Answer.setText("Correct!");

        } else {
            Answer.setText("Wrong, the correct answer was: " + (value1+value2));
        }
        setNewNumbers();

    }

    private void setNewNumbers () {
        Random r = new Random();
        value1 = r.nextInt(999);
        value2 = r.nextInt(999);
        TextView Number1 = findViewById(R.id.Number1);
        Number1.setText(""+value1);
        TextView Number2 = findViewById(R.id.Number2);
        Number2.setText(""+value2);
        EditText Attempt = findViewById(R.id.Attempt);
        Attempt.setText("");

    }
}
There it is! Give it a go and let us know what you think about this first app project in the comments down below. Good luck with your coding!