Affiliate links on Android Authority may earn us a commission. Learn more.
Get to know your audience better with Firebase Analytics
If you haven’t taken a look at the Firebase developer platform yet, then you should, as it’s shaping up to be a swiss army knife of tools aimed at helping you better understand your users. And the more you know about the people who are using your app, the better decisions you can make about how to keep them happy!
In this article I’m going to show you how to add Firebase features to your Android app. The Firebase platform includes a wide range of services, but I’m going to focus on Firebase Analytics as – with very little setup – this service can gather lots of useful information about how users are interacting with your app, as well as give you some insight into who exactly is using your application. Think of it as the mobile app equivalent of Google Analytics!
The best bit is that once you’ve setup your project to support Firebase, it’s easy to add additional Firebase features, such as Firebase Cloud Messaging (FCM) and Firebase Notifications, which is a service that allows you to send notifications to specific segments of your user base. So, by the end of this article not only will you have Firebase Analytics up and running, but you’ll have a project to which you can easily add additional Firebase features.
Why you should care about Firebase Analytics
Firebase Analytics tracks two types of data:
- Events – Firebase Analytics can automatically track up to 500 in-app events, including user interactions, system events and errors.
- User properties – These are attributes that help you identify, analyse and target specific sections of your user base, such as a user’s age, their device model, and the version of Android they have installed.
Firebase Analytics logs various events and user properties automatically, so once you’ve added Analytics to your project you don’t need to write any additional code – Firebase will start recording events and user properties, and this data will appear in your online Firebase Console, as if by magic.
The events that Firebase Analytics tracks automatically are:
- first_open – The user launches your app for the first time. Note, simply downloading your app won’t trigger this event – the user also needs to open your application.
- in_app_purchase – The user completes a transaction that’s processed by Google Play. This event doesn’t include any information about subscription revenue, in-app purchases or refunds (if you want to track this kind of information, you’ll need to create a custom event).
- session_start – A user engages with your app for more than the minimum session duration.
- app_update – The user installs a new version of your app and then launches this new version – again, the user needs to actually launch your app in order to trigger this event. This app_update event differs from the ‘Daily upgrades by device’ information you’ll find in your Google Play Developer Console, as the latter doesn’t depend on the user launching your app after they’ve updated it.
- app_remove – This event allows you to pinpoint users who uninstall your app – a useful first step in discovering why anyone would ever delete your application!
- os_update – A user updates to a new version of the Android operating system.
- app_clear_date – The user clears or resets all your application’s data.
- app_exception – Your app has crashed or thrown an exception. This event is a heads-up to do some digging and find out exactly what’s caused this problem.
Analytics also automatically tracks some behaviour related to Firebase’s dynamic links. Dynamic links are smart URLs that can help you provide a better experience for your users, by displaying different content depending on the user’s device.
These events are:
- dynamic_link_first_open – This event is triggered when a user opens your app for the very first time via a dynamic link.
- dynamic_link_app_open – This event is triggered every time a user opens your app via a dynamic link.
Firebase Analytics also automatically reports on several events that are related to Firebase Notifications. The Firebase Notification service allows you to send targeted messages to specific segments of your user base – a well-timed notification can be just the thing for re-engaging a user who hasn’t launched your app in a while, for example you could send them a notification about some new features they might want to try, or offer them a free upgrade.
Firebase Analytics automatically tracks several notification-related events:
- notification_foreground – This event is triggered when the user receives a Firebase Notification while your app is in the foreground.
- notification_receive – The user has received a Firebase Notification while you app is in the background.
- notification_open – The user has opened one of your Firebase Notifications.
- notification_dismiss – The user has dismissed one of your Firebase Notifications.
If you want to track an event that Firebase doesn’t support by default, you can always create custom events. However, information related to these events won’t appear in Firebase Analytics – you’ll need link your app to a BigQuery project in order to access this information.
Setting up Firebase
Before we get started, open the Android SDK Manager and make sure the following packages are up to date:
- Google Play services.
- Google Repository.
You should also be running Android Studio version 1.5 or higher.
Once you’ve checked that your development environment is up to date, boot up your web browser and sign up for a free Firebase account. At this point you’ll be logged into the Firebase Console, which is where you can access all the data Firebase collects for you.
In order to use Firebase features in your app, you’ll need a Firebase project and a Firebase configuration file. Since we’re already logged into the Console, let’s take care of these two things now:
- Click the ‘Create New Project’ button.
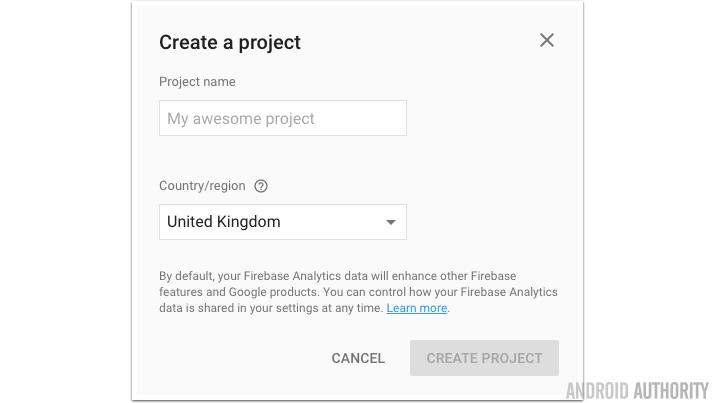
- Give your project a name, enter your location, and give ‘Create Project’ a click.
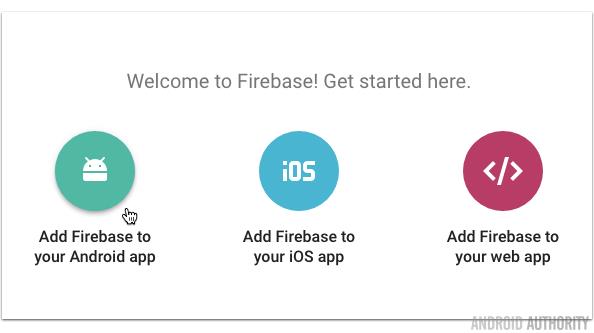
- Select ‘Add Firebase to your Android app.’

- Enter your project’s package name (if you’ve forgotten what this is, simply open any of your project’s Java class files – the full package name appears in the first line).
- At this point you can also enter your app’s SHA-1 fingerprint, which is created when you digitally sign your application. If you’re in the early stages of a project you may not have gotten around to signing your app yet, so if you don’t have a SHA-1 then just leave this field blank.
- Click ‘Add App.’
The Firebase configuration file (google-services.json) will now be downloaded to your computer. You need to add this file to your Android project, so flick back to Android Studio and make sure you have the ‘Project’ view open.
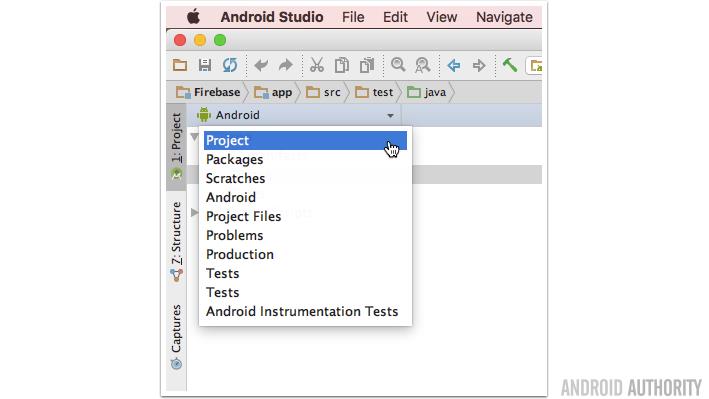
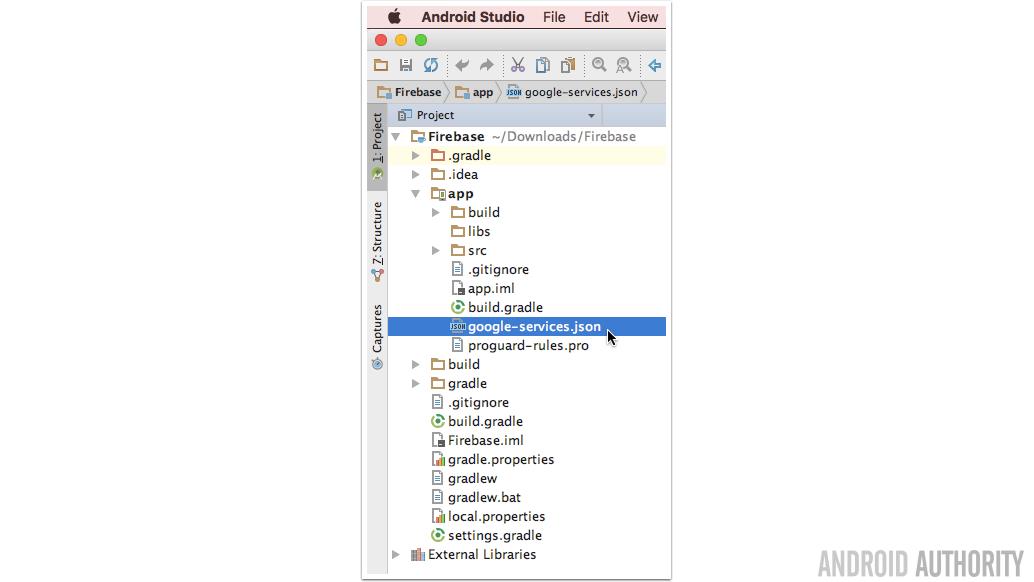
Drag the google-services.json file into your project’s ‘app’ folder.
Open your project-level build.gradle file and add the google-services plugin to the dependencies section:
dependencies {
    classpath 'com.google.gms:google-services:3.0.0'
}
Next, open your module-level build.gradle file and add the plugin to the bottom of this file:
apply plugin: 'com.google.gms.google-services'You’ll also need to add the dependencies for the Firebase library (or libraries) you want to use. There’s ten libraries in total, but since we’re focusing on Firebase Analytics I’m only going to add the firebase-core library:
dependencies {
compile fileTree(dir: 'libs', include: ['*.jar'])
compile 'com.google.firebase:firebase-core:9.2.1'
...
}
Since you’ve updated your Gradle files, perform a Gradle sync, either by selecting ‘Sync Now’ from the bar that appears, or by selecting ‘Tools > Android > Sync Project with Gradle Files’ from the toolbar.
Nip back to your browser and click the ‘Finish’ button to let Firebase Console know that you’ve completed this part of the setup process.
Adding Firebase Analytics
Now you’ve added the Firebase SDK to your project, you can start adding specific Firebase services – including Firebase Analytics.
To add Analytics to your project, open its MainActivity.java file, declare the Firebase Analytics object and initialize it in your project’s onCreate() method:
//Add the Analytics import statement//

import com.google.firebase.analytics.FirebaseAnalytics;
……
……
public class MainActivity extends AppCompatActivity {

  //Declare the FirebaseAnalytics object//

  private FirebaseAnalytics mFirebaseAnalytics;

  @Override
  protected void onCreate(Bundle savedInstanceState) {
    super.onCreate(savedInstanceState);
    setContentView(R.layout.activity_main);

    //Initialize Firebase Analytics//

    mFirebaseAnalytics = FirebaseAnalytics.getInstance(this);
  }
}
Accessing your data
You can view all of your Analytics data in the Firebase Console, which is updated periodically throughout the day:
- Log into your Firebase account.
- Select the project you want to take a closer look at.
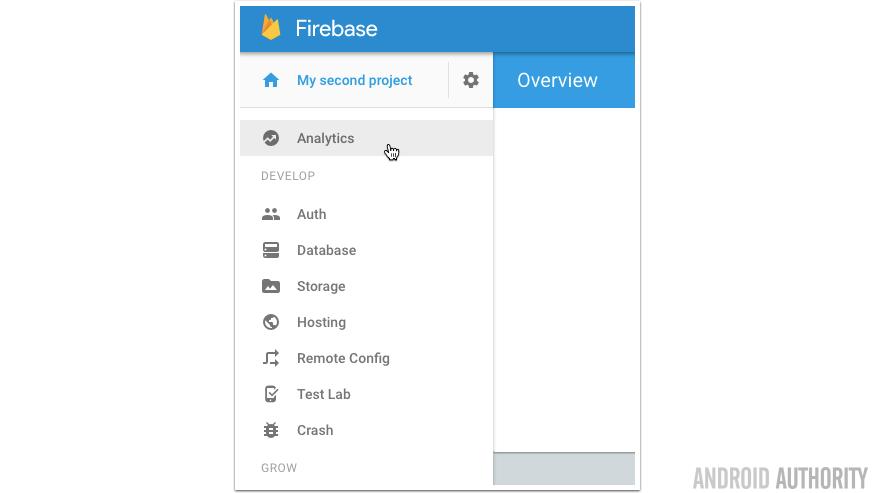
- Select ‘Analytics’ from the left-hand menu.
- The Firebase Analytics dashboard is divided into multiple tabs. You’ll find all of your event data under the ‘Events’ tab (who’d have thought it?)
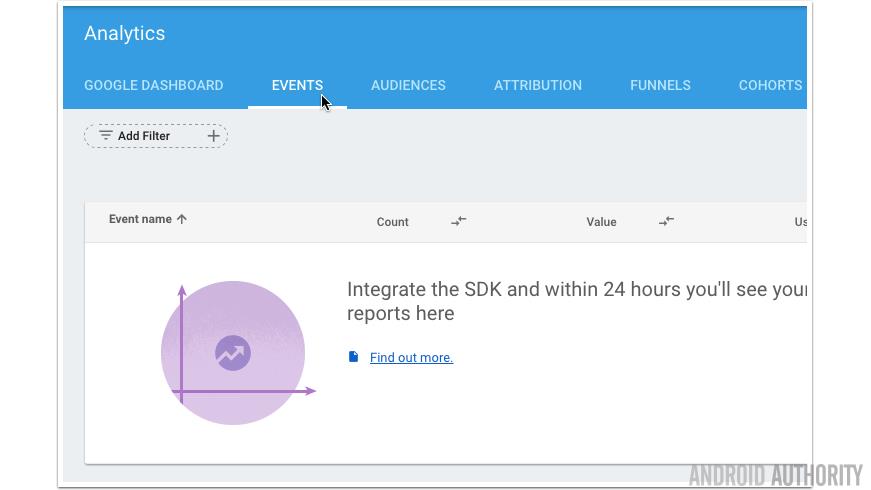
This tab contains the following information for each event:
- The total number of times the event has been triggered.
- The total number of users who’ve triggered this event.
Check that events are being logged properly
It can take up to 24 hours for data to start appearing in the Firebase Console – that’s a long wait to find out whether you’ve setup Analytics correctly! If you don’t fancy waiting 24 hours, you can test whether your app is logging Firebase events correctly right now, by enabling verbose logging and then checking the log messages that appear in Android Studio’s ‘LogCat’ tab.
Before you start, make sure the app you want to test is installed on either an attached Android device or an Android Virtual Device (AVD). You’ll also need to issue some Android Debug Bridge (adb) commands, so open your Mac’s Terminal (or Command Prompt if you’re a Window’s user) and change directory (cd) so it’s pointing at your computer’s platform-tools folder. For example, my command looks like this:
cd /Users/jessicathornsby/Library/Android/sdk/platform-toolsThen run:
adb shell setprop log.tag.FA VERBOSEAndroid Studio will start tracking logs from this point onwards, so restart your app. Then, run the following commands:
adb shell setprop log.tag.FA-SVC VERBOSE
adb logcat -v time -s FA FA-SVC
Back in Android Studio, select the ‘Android Monitor’ tab along the bottom of the screen, followed by the ‘LogCat’ tab.
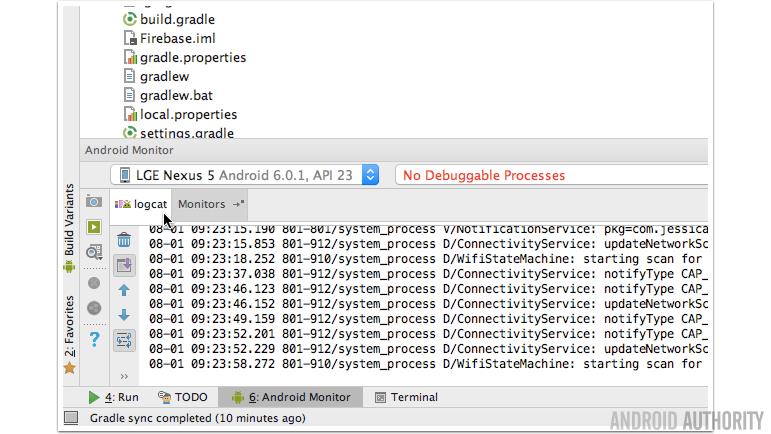
All the information about your Firebase events will now appear in LogCat (along with a bunch of other messages, so you may want to filter the LogCat output). Spend some time triggering different events in your app, and reading through your LogCat messages to make sure these events are being logged correctly.
Wrap-up
Once you have integrated Firebase you should be able to better understand your users. With the information you can discover more about the people who are using your app and make better decisions to keep them happy. What’s your opinion of the relaunched Firebase and Firebase Analytics? Will you be using it to analyse your app’s performance?