Affiliate links on Android Authority may earn us a commission. Learn more.
How to change your username in Windows 11: A simple guide
Windows 11 makes changing your account username to anything you want easy. Just remember that your username, especially if it’s your Microsoft account name, is what people will see when they log into your computer or use any Microsoft services. Also, while changing your username is quick and straightforward, steps differ depending on whether you’ve set up a local-only account or signed into Windows with your Microsoft account. Either way, here’s how to change your username in Windows 11.
QUICK ANSWER
To change a local account's username in Windows 11, go to Control Panel > User Accounts, ensure your profile is selected, and choose Change your/the account name. If Windows is linked to a Microsoft account, go to Settings > Accounts > Your info > Manage my accounts. This should open a Microsoft webpage. Click on the Your info tab, then Edit name.
JUMP TO KEY SECTIONS
How to change your local account name in Windows 11
Remember that you can only try this method using a local Windows account. You won’t see these options if you’re signed into a Microsoft account.
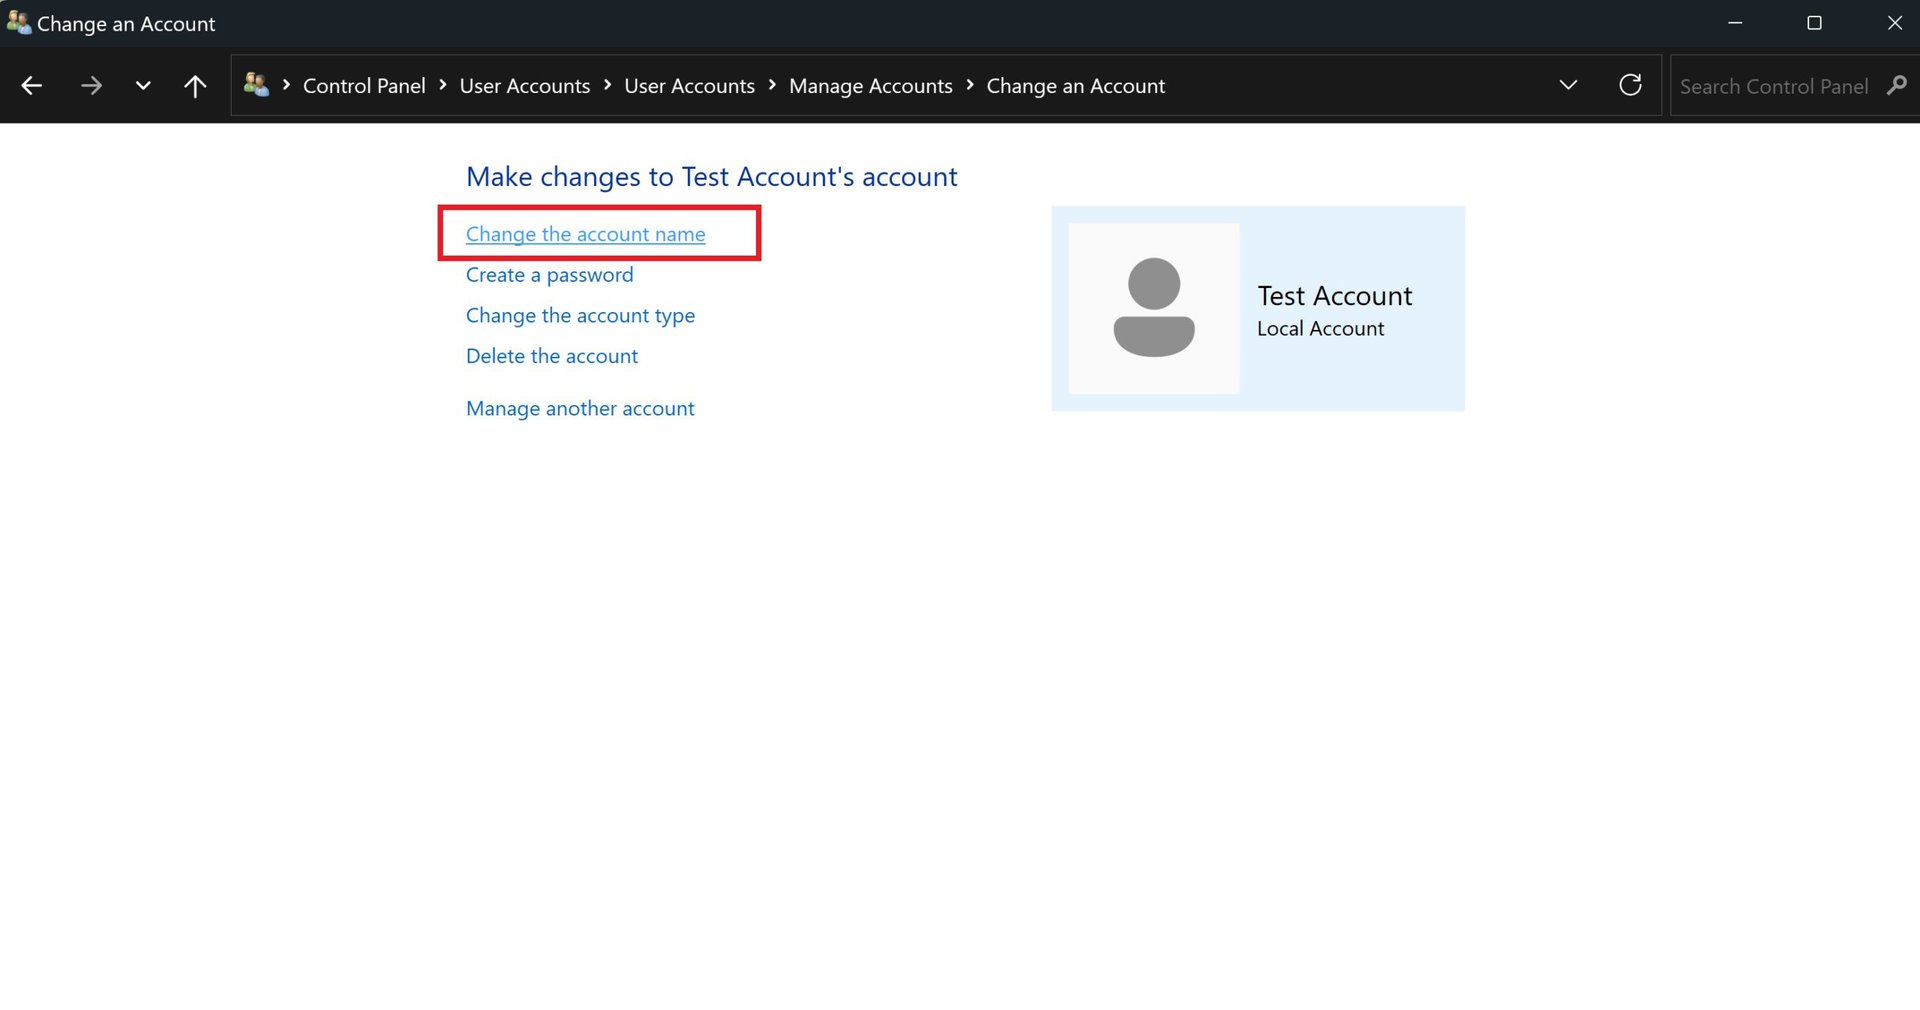
Use the Search field in the taskbar to find and open Control Panel. Click on User Accounts, and make sure your profile is selected. Click on Change your/the account name. What you’ll see may vary based on your version of Windows and whether multiple accounts are present.

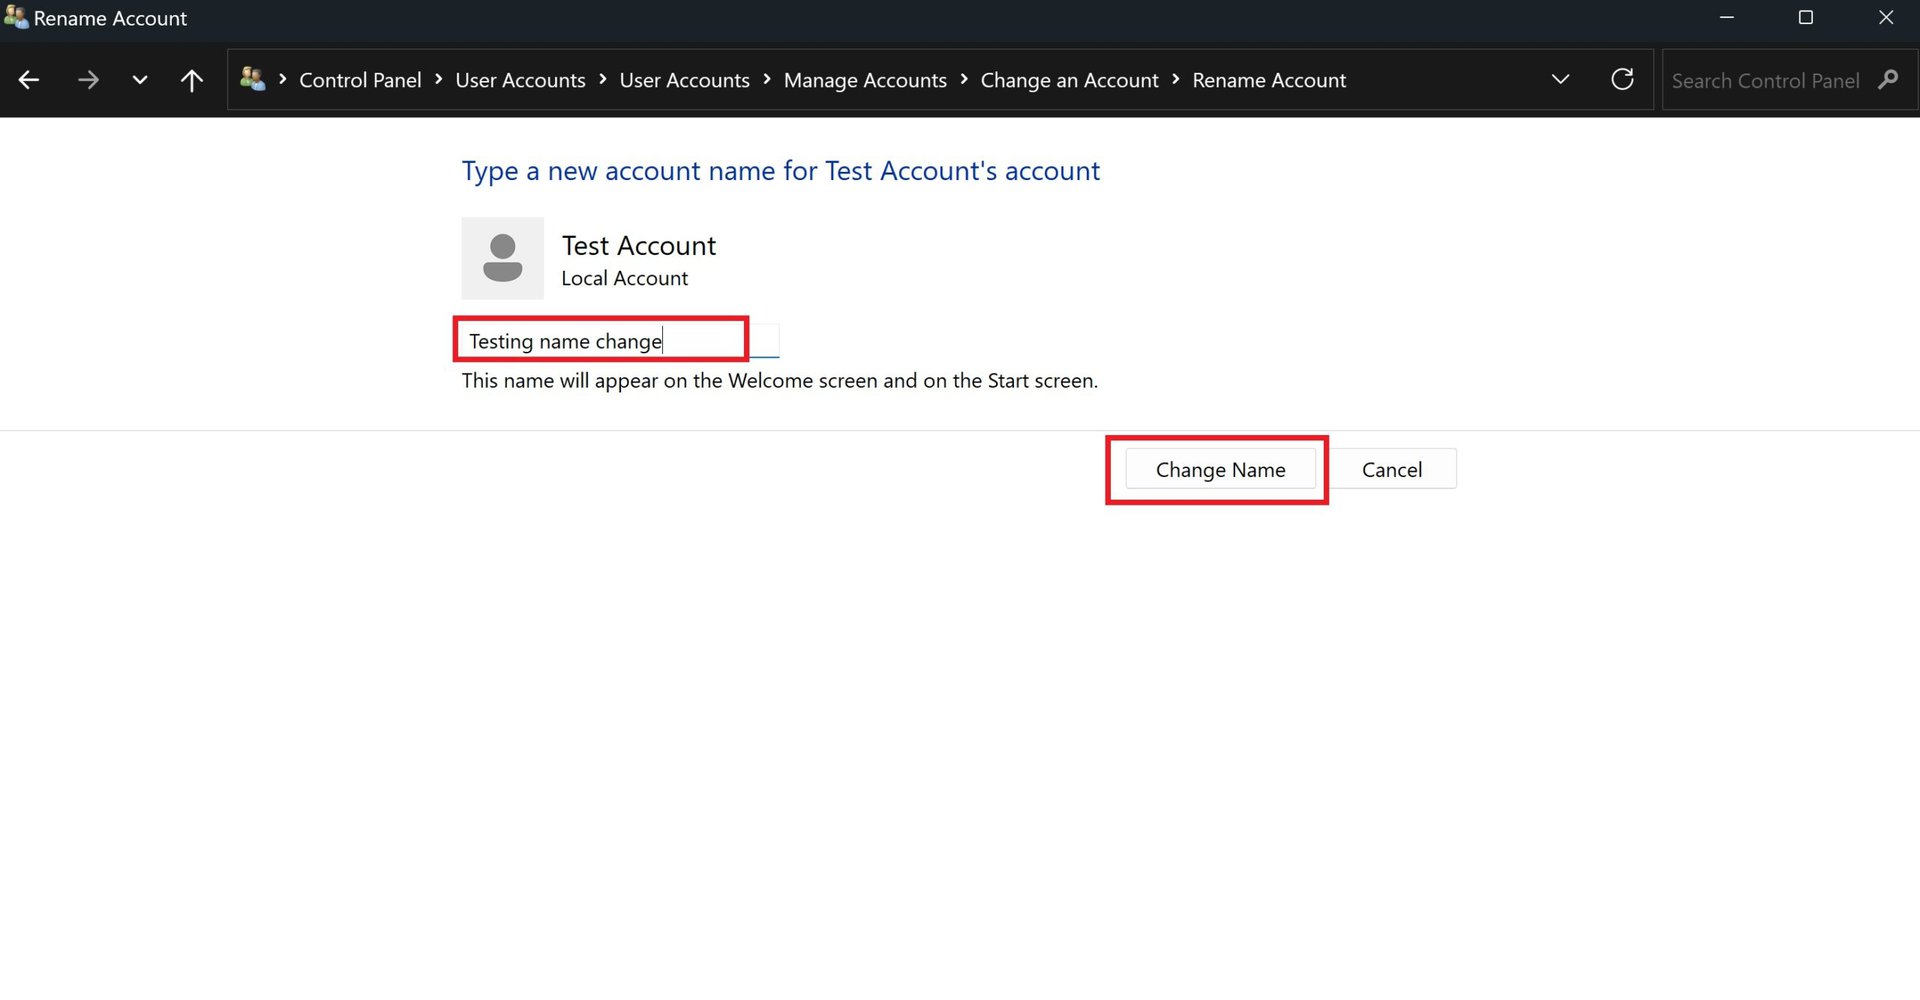
Type in the new account name you want and click Change Name. You should see the new username on the Welcome and Start screens.

How to change your Microsoft account name in Windows 11
Most likely, this is the path you need to follow. You probably created or signed into a Microsoft account during Windows setup, and the company encourages users to stick with the cloud for both sync and shopping purposes. Follow these steps:
- Open the Settings app, normally launched via a gear icon in the taskbar. Otherwise, use the Search field to find it.
- Click on Accounts in the app’s sidebar, then Your info.
- Click on Accounts/Manage my accounts. This will open a Microsoft account page in your web browser. If necessary, sign in. You can skip earlier steps and go straight to the webpage if you have the link.
- Click on the Your info tab at the top of the page.
- In your profile info, click Edit name.
FAQs
Yes, you can change both local and Microsoft usernames to anything you want within character limits. There’s a 20-character limit for local usernames and a 64-character limit for first and last names when you change the name linked to your Microsoft account.
The Microsoft account name and local usernames are just the display names that others will see. The primary alias is the account option (an email address or phone number) used to sign into Microsoft devices like a computer or an Xbox. While you can change your usernames as often as you want, you can only switch the primary alias twice a week.