Affiliate links on Android Authority may earn us a commission. Learn more.
Archero guide: Best heroes, abilities, talents, tier lists, and more!

Archero is a deceptively simple game, but pushing into new chapters can be very difficult without the right knowledge. To help you progress we’ve put together this Archero guide, covering everything from basic gameplay to hero and ability tier lists for beginners and veterans alike.
Without further ado, here’s everything you need to know about Archero gameplay, heroes, abilities, talents, and more!
Note that many of these tips are still worthwhile in Archero 2. That game only has a few minor changes, so I wouldn’t blame anyone who wants to stick to the original!
How to dodge enemy attacks
The very first thing you’ll need to master in Archero is dodging enemy attacks. Dealing more damage can help you finish levels more quickly, but if you run out of health it’s game over!
The trick here is to keep your eyes on your hero. You might be tempted to look around the screen or follow specific attacks, but this is a mistake. If you are focusing on a single bullet, the odds of getting hit by another are much higher than if you watch your own character, especially as things get more hectic in later levels.
Keep your movements as short as possible.
When you do move, try to keep your movements as tight as possible. A short swipe is often all it takes. If you hold on and run all the way across the screen, you’re more likely to run into multiple bullets and quickly deplete your HP.
Obviously, as you play you will also learn the attack patterns of enemies, which makes dodging much easier. Also, certain types of Archero equipment and abilities can boost the stat called dodge (causing attacks that hit you to occasionally miss), but you should never rely on this. Learning how to move your character effectively will pay huge dividends later on.
Archero devil: How to summon and when to skip

The Archero devil is the only way to access certain powerful abilities (including duplicate Multishots, Through The Wall, and Extra Life), although they will come at a significant cost to your maximum HP (20%). But before we get into that, you should first know how to summon him.
To guarantee an appearance from the Archero devil after a boss fight, you have to beat the boss without getting hit by any attacks. He may still appear if you do get hit, but most of the time, it will spawn the spinning wheel instead.
Once he does appear, you need to decide whether or not it’s worth it to sacrifice a percentage of your max HP for a single ability. If your max HP is already low, you may open yourself up to a quick death from hard-hitting opponents. For fairly run-of-the-mill abilities you may want to pass.
You can guarantee a devil appearance by defeating the boss without getting hit.
We have a full Archero ability tier list later in this guide, but as a general rule, you should always take Extra Life and try to take Through The Wall and Water Walking where possible. These last two not only make it much easier to dodge attacks, but they also boost damage by 15%.
It’s worth mentioning that there are situations where you don’t want to summon the Archero devil. If you don’t want to sacrifice max HP or are trying to farm up gems, take a hit just before finishing the boss to reduce its chance of spawning.
Angels: Abilities or health?
Unlike the Archero devil, angels offer two good choices every time you meet them. One is a minor ability or max HP boost, and the other is raw healing.
Although the abilities on offer aren’t very powerful, always try to grab them when you arrive at an angel. They add up in the long run, and you can always pick up more healing red hearts in later stages.
The major exception is when you are very low on health. If you think you might die in the next room, healing is a better choice. That said, if you’ve managed to collect an Extra Life ability your health will be fully restored anyway.
Archero talent guide
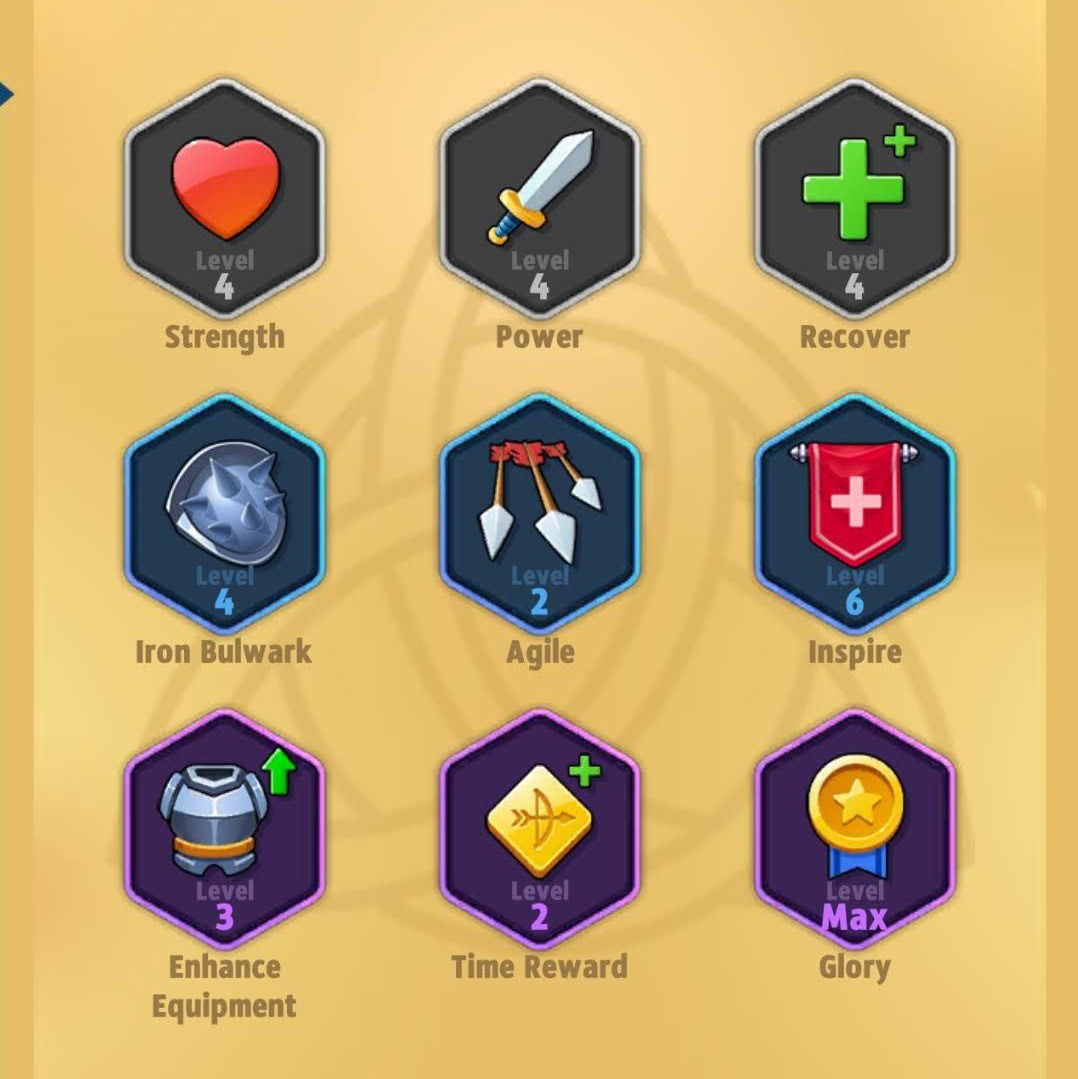
Archero talents are by far one of the most critical elements of progressing in the game. Not only can they provide stat bonuses you can’t get anywhere else like enhanced equipment bonuses and healing upon level up, but they also persist across every Archero hero and run.
You can’t choose which talents to unlock, but they do unlock in a particular order. Your first upgrade will unlock Glory, which is easily the best talent in the game. It provides a single ability at the start of each run, which can be game-changing for boss-heavy areas like Chapter 7. Unlike other talents, it maxes out at level one.
Coins spent on talents are always well spent.
Other Archero talents max out at level 10, and are unlocked in a specific order. The exact order doesn’t really matter, but you should try to upgrade a total of 22 times as soon as possible, as this unlocks the final talent: Time Reward. This will build up coins and scrolls over time, even when you’re not playing the game!
As a general rule, though, upgrading Archero talents is never a bad idea. Consider them coins well invested in your progression.
Archero hero mode: Is it worth it?
Hero mode is a harder game mode that unlocks early in the game. In it, each stage is filled with more obstacles and spikes, and some enemies are significantly stronger.
Despite this, the rewards are exactly the same as normal mode. If you’re just looking to farm coins and gems, there is no reason to run hero mode over normal mode.
That said, hero mode does have its own clear rewards, so once you’re strong enough, you should still try to clear each chapter once to collect them. Just don’t make it a priority.
Archero gem spending guide

Gems are the most precious resource in Archero, so you should be careful about spending them. Before you start shelling out for temporary deals on equipment and scrolls, you should know that there are many better things to save up for.
The best things to buy with gems are heroes. Two of the three Archero heroes that you can purchase with gems are top tier (Helix and Meowgik), but they cost 1500 and 1800 gems, respectively. It can take several weeks to farm up enough gems for just one of these heroes, but it’s more than worth it.
Next up, you should pick up extra hatchery slots. This will greatly speed up how quickly you can hatch eggs and increase the strength of your monsters.
Once you’ve picked up these two heroes and upgraded your hatchery, the best uses of gems are extra attempts of Ancient Maze if you’re farming or equipment chests. Saving up for the Obsidian Chest x10 is obviously the best value, but it can be difficult to save 2600 gems. Another option is opening individual Obsidian Chests, which provide a discount on subsequent opens. This means that by saving a more reasonable 840 gems you can open three Obsidian Chests in a row.
Best Archero hero

Any Archero guide wouldn’t be complete without talking about heroes. Next to your weapon, the Archero hero that you pick will have the biggest impact on your gameplay. This also means that like weapons, the best Archero hero for you will depend largely on your preferences.
It’s also worth noting that you should try to upgrade all heroes to level 20, even if you don’t intend on using them.
Still, some heroes have more potential than others. We’ve dropped a full Archero hero tier list below (listed in order of strength), but you’ll be relieved to know that some of the best Archero heroes can be unlocked without spending any real-world money. It’s also worth noting that while a lot of this is subjective, everyone in the community agrees that Atreus is the worst of the lot, so pick up a new hero as soon as you can!
| Pros | Cons | |
|---|---|---|
Meowgik | Pros -Passive attacks can pass through walls -High base stats and growth values -Can be unlocked for free | Cons -Takes time to save up 1800 gems |
Shingen | Pros -Very high base stats and growth rate -Unique and useful abilities | Cons -Costs (a lot of) real money |
Sylvan | Pros -Very high base stats -Best growth values in the game -Elemental attacks increase base damage | Cons -Costs (a lot of) real money |
Melinda | Pros -Highest base stats and growth rate in the game -Excellent ability | Cons -Costs (a lot of) real money |
Helix | Pros -Rage ability is always useful -High base HP -Fairly easy to unlock | Cons -Takes time to save up 1500 gems |
Phoren | Pros -Flame effect boosts damage -Unlockable with only coins | Cons -Low base stats -Spending coins delays other upgrades |
Ophelia | Pros -High base stats and growth rate -Ability increases strength passively | Cons -Costs real money -Unreliable ability |
Iris | Pros -Very high HP stat -Useful ability -Unlockable with shards | Cons -Middling attack -Shards hard to collect |
Rolla | Pros -High base attack -Growth values and bonuses favor attack | Cons -Costs real money -Freeze can throw off attack patterns |
Shade | Pros -High base stats and growth rate -Interesting ability | Cons -Costs real money |
Taranis | Pros -Solid base stats and growth rate -Lightning effect boosts damage | Cons -Easily the worst hero that costs gems |
Bonnie | Pros -High base stats and growth values | Cons -Costs real money -Skill not useful against bosses |
Ryan | Pros -Built-in Extra Life -High HP -Unlockable with shards | Cons -Low attack -Hard to collect shards |
Shari | Pros -Unique ability -Unlockable for free with shards | Cons -Low base stats -Hard to collect shards |
Onir | Pros -High base stats and growth values | Cons -Holy effect is situational at best -Costs money -Easily the worst pay-to-play hero |
Urasil | Pros -Unlocked for free in chapter 2 | Cons -Low base stats and growth values |
Atreus | Pros -Starting hero | Cons -Low base stats and growth values -No ability |
Best Archero abilities/skills
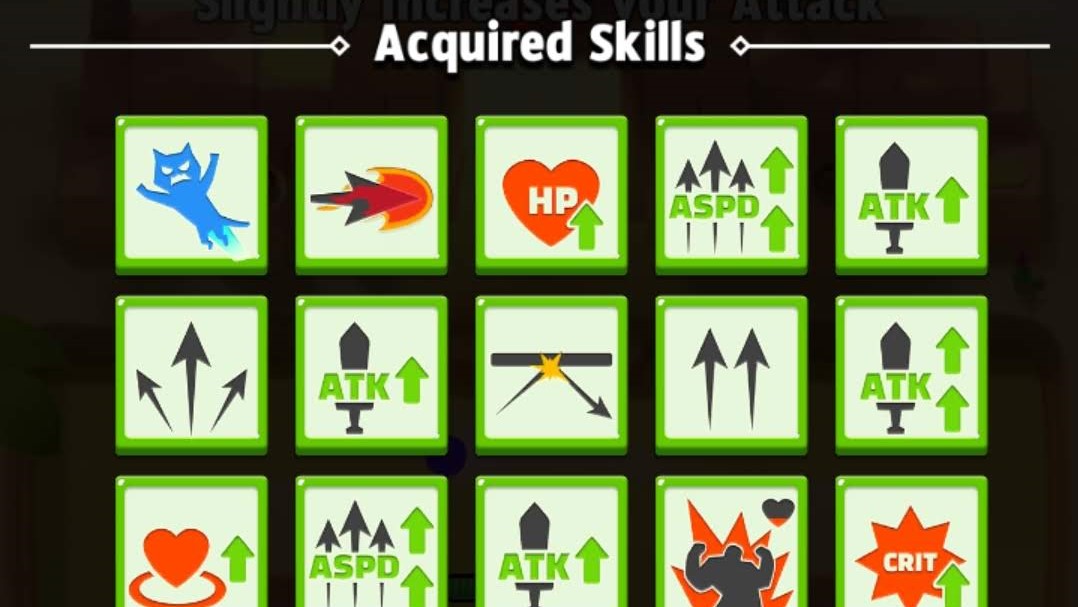
The final thing we’ll touch on in this basic Archero guide is abilities (or skills). Which abilities you pick up in any given run can have a major effect on your chances of success. A few lucky options early in a run can set you up for an easy downhill ride to the end of the chapter.
While there are good and bad Archero abilities, ideal choices will depend on your weapon. Tornado, for example, already has a built-in pierce and bouncy wall effect, so adding those skills again will actually reduce overall damage.
Here is a simple Archero ability tier list, focusing just on the abilities that are worth picking up. Others excluded from the list, like Spirit Attack boosts, Meteors, Sword abilities, and Smart, are generally not worth prioritizing in any situation. Again though, personal preferences play a big role, so focus on what you enjoy using.
| Tier | Ability | Effect | Notes |
|---|---|---|---|
| Tier SSS | Ability Multishot | Effect -Adds an extra attack -Reduces damage by 10% -Reduces attack speed by 15% | Notes -Top tier -Duplicates can be obtained from the devil |
| Tier SSS | Ability Extra Life | Effect -Revives hero at 100% HP upon death | Notes -Only obtained from devil -Always pick this up |
| Tier SSS | Ability Rage | Effect -Increases damage by a percentage of missing health | Notes -Always pick this up -Helix starts with this ability |
| Tier SS | Ability Front Arrow | Effect -Adds an extra arrow shooting forward -Reduces base damage by 25% | Notes -Excellent choice for most weapons -Do not pick up with stalker staff |
| Tier SS | Ability Wingman | Effect -Pets block incoming projectiles | Notes -Best defensive ability -All pets have the same hitbox |
| Tier SS | Ability Invincibility Star | Effect -Become invincible for two seconds every 10 seconds | Notes -Great defensive option in all chapters |
| Tier SS | Ability Slow Projectile | Effect -Slows down enemy projectices | Notes -Great defensive option |
| Tier SS | Ability Ricochet | Effect -Projectiles bounce to up to three enemies -Damage reduced by 30% per bounce | Notes -Great for clearing hordes of enemies -Pick this up early to speed up any run |
| Tier S | Ability Dwarf | Effect -Increase crit rate by 10% -Decrease character size | Notes -Makes it easier to dodge enemy attacks |
| Tier S | Ability Pierce | Effect -Projectiles pass through enemies -Damage reduced by 33% per enemy | Notes -Slightly worse than ricochet, but still good -Do not pick up with tornado, as it reduces damage |
| Tier S | Ability Bouncy Wall | Effect -Projectiles bounce off of walls -Damage reduced by 50% per bounce | Notes -Great for chapters with many obstacles -Do not pick up with tornado, as it reduces damage |
| Tier S | Ability Diagonal Arrows | Effect -Fires two additional arrows diagonally | Notes -Very strong, especially with stalker staff -Synergizes well with bouncy wall |
| Tier S | Ability Attack Boost, Attack Speed Boost, and HP Boost | Effect -Increases damage by 30%, attack speed by 25%, or max HP by 20% -Damage and attack speed are additive bonuses | Notes -Attack speed boost is generally the best choice -First pick up of attack boost and attack speed boost offer the biggest increase |
| Tier S | Ability Crit Master | Effect -Crit chance increased by 10% -Crit damage increased by 40% | Notes -Synergizes well with brave bow -Gets stronger the more you pick up |
| Tier S | Ability Dodge Master and Agility | Effect -Increases dodge by 20% (Dodge Master) -Increases dodge by 0.3% per 1% missing health (Agility) | Notes -Good passive defensive options -Synergizes well with dodge equipment |
| Tier A | Ability Rear Arrows and Side Arrows | Effect -Shoots one arrow backwards (rear arrows) -Shoots one arrow to each side (side arrows) | Notes -Synergizes well with bouncy wall -Great choice with stalker staff |
| Tier A | Ability Elemental abilities | Effect -Adds elemental effect to your arrows -Currently five different types | Notes -Synergize well with ricochet or piercing shot -Freeze element is the least useful |
| Tier A | Ability Headshot | Effect -12.5% chance to kill mobs instantly -Triggered by ricochet, pierce, and even pet attacks | Notes -Good choice for chapters with many enemies -Unreliable |
| Tier A | Ability Shield Guard | Effect -Two shields rotate around you, blocking projectiles | Notes -One of the weaker defensive options, but still useful |
| Tier A | Ability Strike abilities | Effect -Summons a sword dealing 150% damage and applying an elemental effect | Notes -Freeze is the worst option |
| Tier A | Ability Crit Aura and Speed Aura | Effect -Greatly increases crit chance or attack speed for two seconds every eight seconds | Notes -Synergize well with each other -Generally worse than flat bonuses |
| Tier B | Ability Bloodthirst | Effect -Restores 1.5% of max HP per kill | Notes -More reliable than strong heart ability |
| Tier B | Ability Plus abilities | Effect -Increases attack, attack speed, max HP, or crit when a room is cleared without getting hit -Does not work on angel rooms | Notes -Higher max bonus than flat bonuses, but unreliable -Not good for short chapters |
| Tier B | Ability Water Walker and Through the Wall | Effect -Allows you to walk through walls or over water -Through the Wall also allows you to walk over spikes -Increases damage by 15% | Notes -Only available from devil -Makes it easier to dodge attacks -Some weapons can fire while inside walls |
| Tier B | Ability Holy Touch | Effect -Attacks that connect send two projectiles perpendicularly dealing 60% damage | Notes -Decent for hordes of enemies -New projectiles can look like enemy attacks |
Thank you for being part of our community. Read our Comment Policy before posting.