Affiliate links on Android Authority may earn us a commission. Learn more.
Reduce data usage, turn on data compression in Chrome - Android customization
Did you get around to turning tabs back on in Chrome through last week’s Android customization post? If your Recents list is a little cluttered, you might want to give it a go. This week, we continue to tweak Chrome, in an effort to help you reduce data consumption, speed up web page load times and even reduce your battery usage, let’s look at Chrome’s Data Compression tool.
Before we begin
You will need to be running a relatively recent release of Chrome on your relatively recent Android phone or tablet running a recent release of Android. No other requirements are necessary at this time, except, you may get mixed results if you are operating over a VPN. For most of us though, you should be ready to follow along.
I will note once again that this week’s piece will be considered a beginner’s tool by many, I’ll have some good info for you below, but nothing ground breaking if you are already a frequent user of the advanced settings of Chrome. And one last thing, please don’t get caught up on the fact that my Chrome data usage was so small this month, I’ve been using Chrome Dev for my browsing.
About data compression in Google Chrome on Android
As mentioned earlier, data compression on Google Chrome for Android serves a few important roles. The main priority of the service is to reduce the amount of data your device needs to download in order to load a web page.
In reducing the amount of data being downloaded, web pages load faster, and your radios turn off sooner, saving battery.

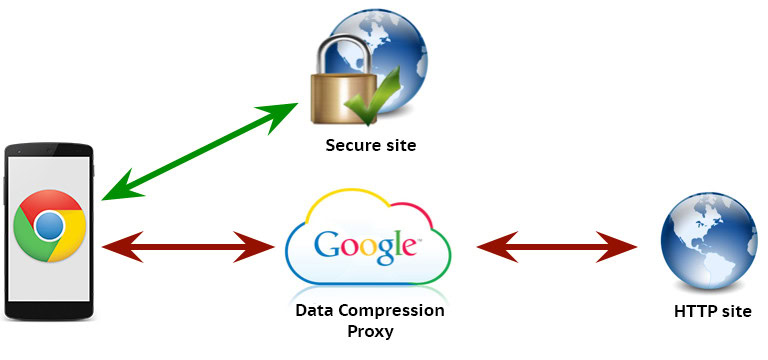
What happens here is that Google acts as a middle man to all of the websites you visit. (Warning: Google sees every site you visit, but they pretty well see that already, so, please don’t panic.) They collect the web data as provided by the original web server, then manipulate the web page to optimize for Android.
In effect, your device needs only connect to Google servers, which is potentially a faster and more reliable connection than the original site offers. Also, where possible, Google can cache images and data from these sites, they will even reformat the content if possible, streamlining the largest pieces to any web page.
Please note, this only works for normal un-encrypted connections, your HTTPS sessions go straight to the web server.
Turn on data compression in Chrome for Android
Now that I’ve talked your ear off, let’s keep this simple. Start by opening Chrome on your Android phone or tablet. (This can also be used on your pc with an extension, if you want.)
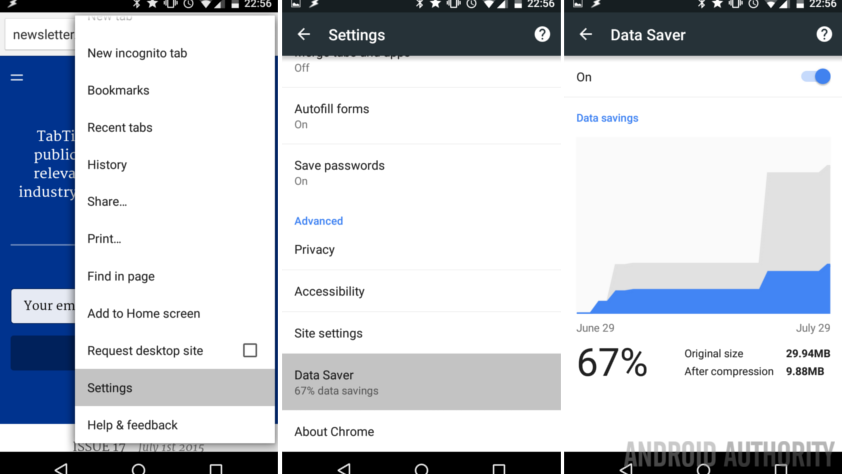
Tap the three dots menu button.

Choose Settings.
Choose Data Saver.
Tap the toggle in the top right to turn it on, then exit back to your favorite story on Android Authority, or any other web page you might be enjoying.
What’s next
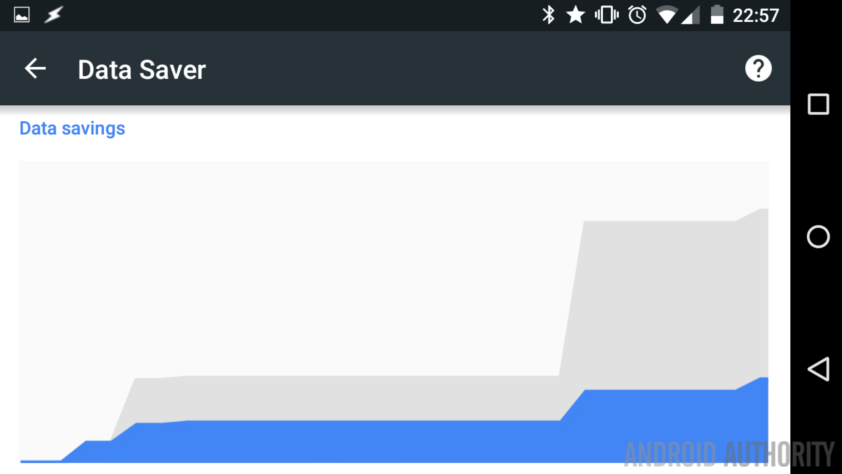
Google wants you to be sure that you are getting value out of the service, as such, you can head right back into the Data Saver settings page at any time to see your accumulated data savings.

Chrome is not the only browser out there with this sort of data saving capabilities, check in with Opera and more to see what compression settings and services they offer.
For more info, includign a detailed rundown of the technology at work, head on over to Google’s Chrome data saver resources page.
Next week
I hope you don’t mind we kept it pretty simple again for this week’s Android customization post, but I do hope that you can take advantage of Chrome’s data compression tool. Next week we’ll shift gears, but still keep it pretty simple, let’s look at using your phone as a mobile hotspot to connect your other gear on the go.
How much data has Chrome’s data compression tool saved you?