Affiliate links on Android Authority may earn us a commission. Learn more.
A SQL primer for Android app developers

SQL stands for ‘Structured Query Language’. This is basically a declarative language used for storing and retrieving data in a database.
If you’ve heard of SQL, it’s probably in the context of MySQL, SQL Server, Oracle, or SQLite. You may even have assumed these were programming languages in and of themselves. In reality, these are simply database types which use SQL. Each has slightly different syntax, but it’s essentially a single language with multiple applications.
This is powerful stuff and it’s well worth learning if you’re at all interested in Android development.
In Android development, we tend to use SQLite which is ideal for mobile applications and particularly useful for permanently storing data. MySQL is more commonly installed on servers where it can be used by web apps. Either way, using databases to store information allows us to organize that data in a far more logical and structured manner, and then access and manipulate that information dynamically.
Databases allow us to apply algorithms across huge data sets and even to monetize the data we’ve collected from users. While there are other ‘non-SQL’ options for communicating with a database, SQL has very much become the industry standard (succeeding Codasyl). This is powerful stuff and it’s well worth learning if you’re at all interested in Android development.

SQL basics
If you’ve just learned Java and you’re currently reeling from the ordeal, don’t worry. SQL is not a full programming language in the same sense as Java. It’s closer to something like HTML or perhaps the logic of a spreadsheet. It’s mainly used for putting data into a table and then extracting that data based on different filters.
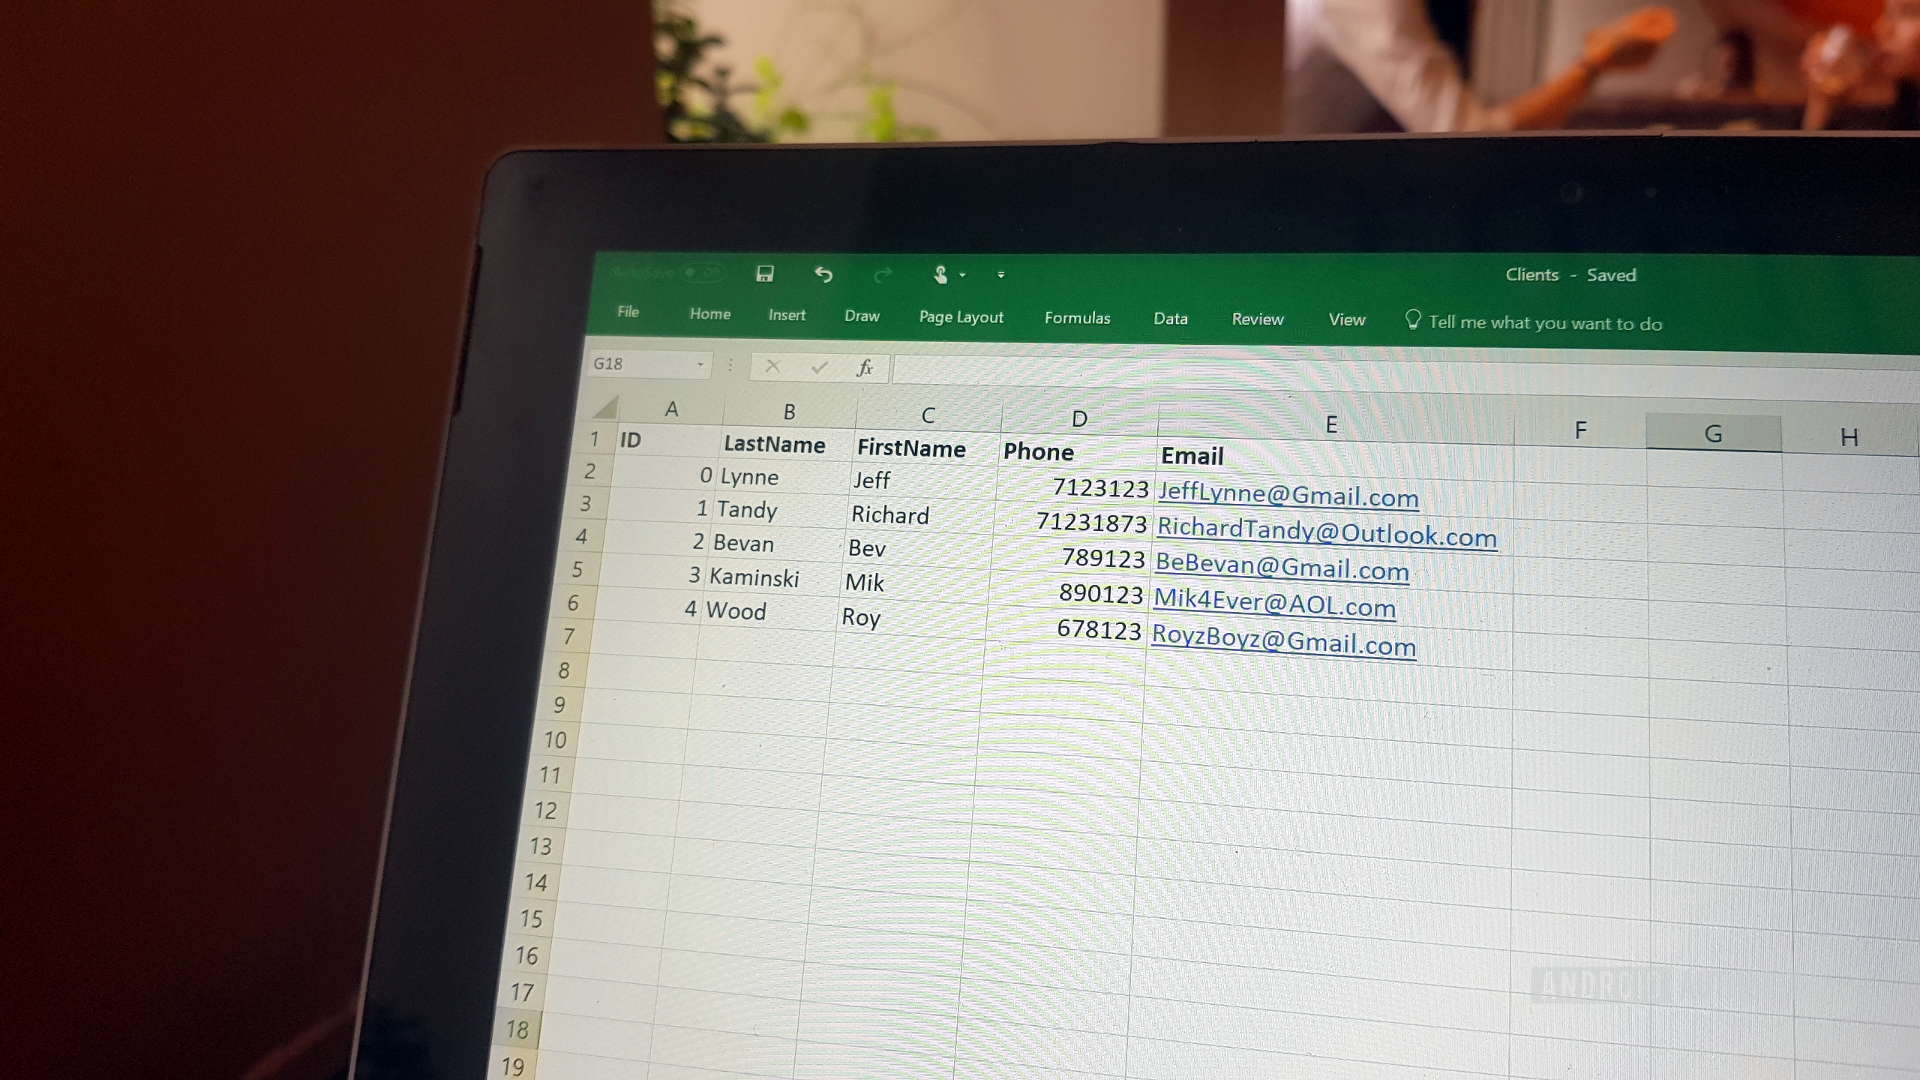
The best way to start out is to picture a relational database. This is essentially a series of tables like in Excel. This structure allows us to organize data into columns and rows, which in turn allows for a lot of different operations.
You might use a database to store a list of clients... Or we might go big and use a server to collect shopping preferences from thousands of apps and then sell that database on!
For instance, you might use a database to store a list of clients. You could fill out their data across rows in your table so that you have their names, ages, contact details, genders, and any other pertinent information. Pulling out a particular name will bring all their details, readying you to call them up and woo them into buying your product.
You could also pull out all of the contacts of a particular age, or all of the contacts located in a particular city. If you were building a contact management app, then you’d essentially just be creating a pretty UX for accessing that database. SQL would then be acting as a go-between for your Java and the database. In the case of Android development, that might be an SQLite database stored on the device as a text file. Likewise, we might do something similar as a convenient way to store player data like high scores or go big and use a server to collect shopping preferences from thousands of apps and sell that database.

SQL syntax
So, you have your program and you have your database with client details, usernames and passwords, or players and high scores. There are a number of different actions you might wish to perform to get to this point and to make use of the database going forward.
These actions are performed via statements. So, for example, in order to create a new table, we do so by using CREATE TABLE. To add more data, we use INSERT INTO. To delete data, we use DELETE.
When using any of these commands, it is useful to keep a ‘picture’ of your table in mind and remember that you’re mostly referring to specific rows and columns.
For the most part, it’s fairly intuitive. In a moment we’ll explore how to use each statement and what it can do in more detail.
As in any computer language though, these statements need to be written in the correct way in order to be understood and to function properly. Statements are not case sensitive, so writing select works just as well as writing SELECT. However, it can be a good habit to use capitals in order to differentiate the statements from the names and the data at a glance. Columns and rows meanwhile are separated by commas and often brackets are used to group data together. Some databases will require you to use a semicolon at the end of your statements to signify the end but others do not. This is an example of the slight variation in syntax that can crop up when you move from one system to another. In this case, we’ll be using the syntax for SQLite3, as that’s probably what you’ll use when developing for Android.
As in any computer language though, these commands need to be written in the correct way in order to be understood and to function properly.
When using any of these commands, it is useful to keep a ‘picture’ of your table in mind. Remember you’re mostly referring to specific rows and columns.

Useful SQL statements
There are a great many different SQL statements that you can use to manage your databases. However, most Android developers will find themselves relying on a few key statements.
The first thing you’ll need to do is to create your database. Some databases will let you do this with CREATE DATABASE, but in SQLite3, you use $sqlite, followed by the database name. You’ll probably do this using a Java class, depending on how you want to go about it. But once you’ve done that, you’re good to get started with a whole range of different statements.
CREATE TABLE
A database needs tables. The next step then will be to use CREATE TABLE in order to build one. This is again pretty straightforward, as long as you can imagine the table being built in columns.
CREATE TABLE Clients (
    rowid integer PRIMARY KEY,
    LastName text,
    FirstName text,
    Phone text,
    Email text
    );
Here we are creating our table called ‘Clients’ before defining each column with the data we want. The type of data we’re storing is indicated by ‘text’ and ‘integer’. If you have any coding experience you’ll be familiar with the term ‘int’— meaning ‘integer’, a whole number. Having one row for ID made up of integers is important as it allows us to grab a lot of rows without knowing what other data they contain, as well as move through the data sequentially. This integer will increase incrementally on its own because we made it the ‘PRIMARY KEY’, so it will go up by one with each new entry. If you think of your Excel spreadsheet, just imagine that the numbers down the side are your ID. You don’t have to include this column but it will give you more flexibility with your data.
Text is a string. In other words, it lets you enter words, symbols, and numbers— up to 65,535 characters. In other databases you might see this written as ‘varchar(255)’. This means the same thing, and the number 255 in brackets is the length of the string (we often put 255 here as this is the longest number of characters that can be counted with an 8-bit number). For now let’s stick with ‘text’.
As you get more advanced, there are plenty more options, like the ability to create a new table using rows from an old table.
INSERT
Now you’ve got a database with an empty table called ‘clients’. The next thing you’ll probably want to do is to put some data in there! To do this we use INSERT INTO. Here, you’ll insert into your specific table and then you’ll list the columns in brackets, followed by the values.
INSERT INTO table_name (column1, column2, columm3) VALUES (value1, value 2, value3);You’ll be able to insert information into some columns and not others. We can also insert multiple rows of data using just a single statement, by using lots of brackets separated by commas.
For example, if we wanted to update our clients table, then we would do something like this:
INSERT INTO Clients (LastName, FirstName, Phone, Email) VALUES
     (‘Lynne’, ‘Jeff’, ‘07123123’, ‘JeffLynne@Gmail.com’),
     (‘Tandy’, ‘Richard’, ‘071231873’, ‘RichardTandy@Outlook.com’),
     (‘Bevan’, ‘Bev’, ‘0789123’, ‘BeBevan12@Gmail.com’),
     (‘Kaminski’, ‘Mik’, ‘0890123’, ‘Mik4Ever@AOL.com’),
     (‘Wood’, ‘Roy’, ‘0678123’, ‘RoyzBoyz@Gmail.com’);
What’s happened here, is that all of the members of the greatest band on Earth have signed up to our mailing list (A No-Prize to whoever can name the band in the comments below).

Note that I’ve added new lines here in order to make this more readable. You can do the same when using your own statements. The new line doesn’t denote a new statement until the semi colon appears right at the end.
Also note the use of the quotation marks for our strings, much like Java.
DELETE
DELETE is for deleting rows from tables. To use delete, the correct syntax is:
DELETE FROM table_name WHERE condition;So, if we wanted to delete a single record, we could use:
DELETE FROM Clients WHERE FirstName=‘Roy’;Roy Wood wasn’t in the band for very long, so he doesn’t get to stay on the list. We could also use this to delete anyone over a certain age.
If you just use DELETE FROM table_name; then you’ll end up deleting the entire contents of the table. Be very sure before you do that! If you want to delete the contents of the table and it’s structure, then you’d use DROP TABLE. Be even more careful when doing that.
UPDATE
Adding and removing data is straightforward enough. Occasionally, you’ll just want to update some information. Maybe you just need to change the email address but you don’t want to delete and reinsert the entire record.
In that case, you can use UPDATE in the following manner:
UPDATE Clients
SET Email = ‘Micky4Eva@AOL.com’
WHERE Email = ‘Mik4Ever@AOL.com’;
You can also change records using other fields, for example:
UPDATE Clients
SET Email = ‘Micky4Eva@AOL.com’
WHERE rowid = 3;
In this case, we’re updating the email column, only for rows with the ID ‘3’ or the Email ‘Mik4Ever@aol.com’. (This is why it’s so handy to have that autoincrementing rowid!)
This same feature can be used to change multiple rows at once (for example if we used the condition WHERE country). If you forget to use WHERE then you’ll update every single record… so be careful!
SELECT
Using these statements will build your database up nice and big. But that’s pretty useless until you can also retrieve that information back.
SELECT is used to return a set of results from one or more tables. If we wanted to retrieve someone’s name or a list of clients aged 21, then we would use SELECT and follow this up with some specific details to define precisely the kind of data we want to retrieve.
SELECT column_name FROM table_name;This would allow us to select a whole bunch of different columns from our specific table.
FROM is a clause that changes the behavior of the SELECT statement. In this case, it defines which table we want use. FROM is a required clause in any SELECT statement. However others like WHERE are optional. WHERE allows us to filter the rows that have been retrieved by a ‘predicate’ – a true or false statement. Imagine my client contact details table had another column in it for ‘age’ and we wanted to find clients older than 21. In that case we would type:
SELECT FirstName FROM Clients
WHERE age > 21;
The ‘>’ symbol is an operator meaning ‘greater than’. So we are only selecting records where the integer in the ‘age’ column is greater than 21.
A quick example
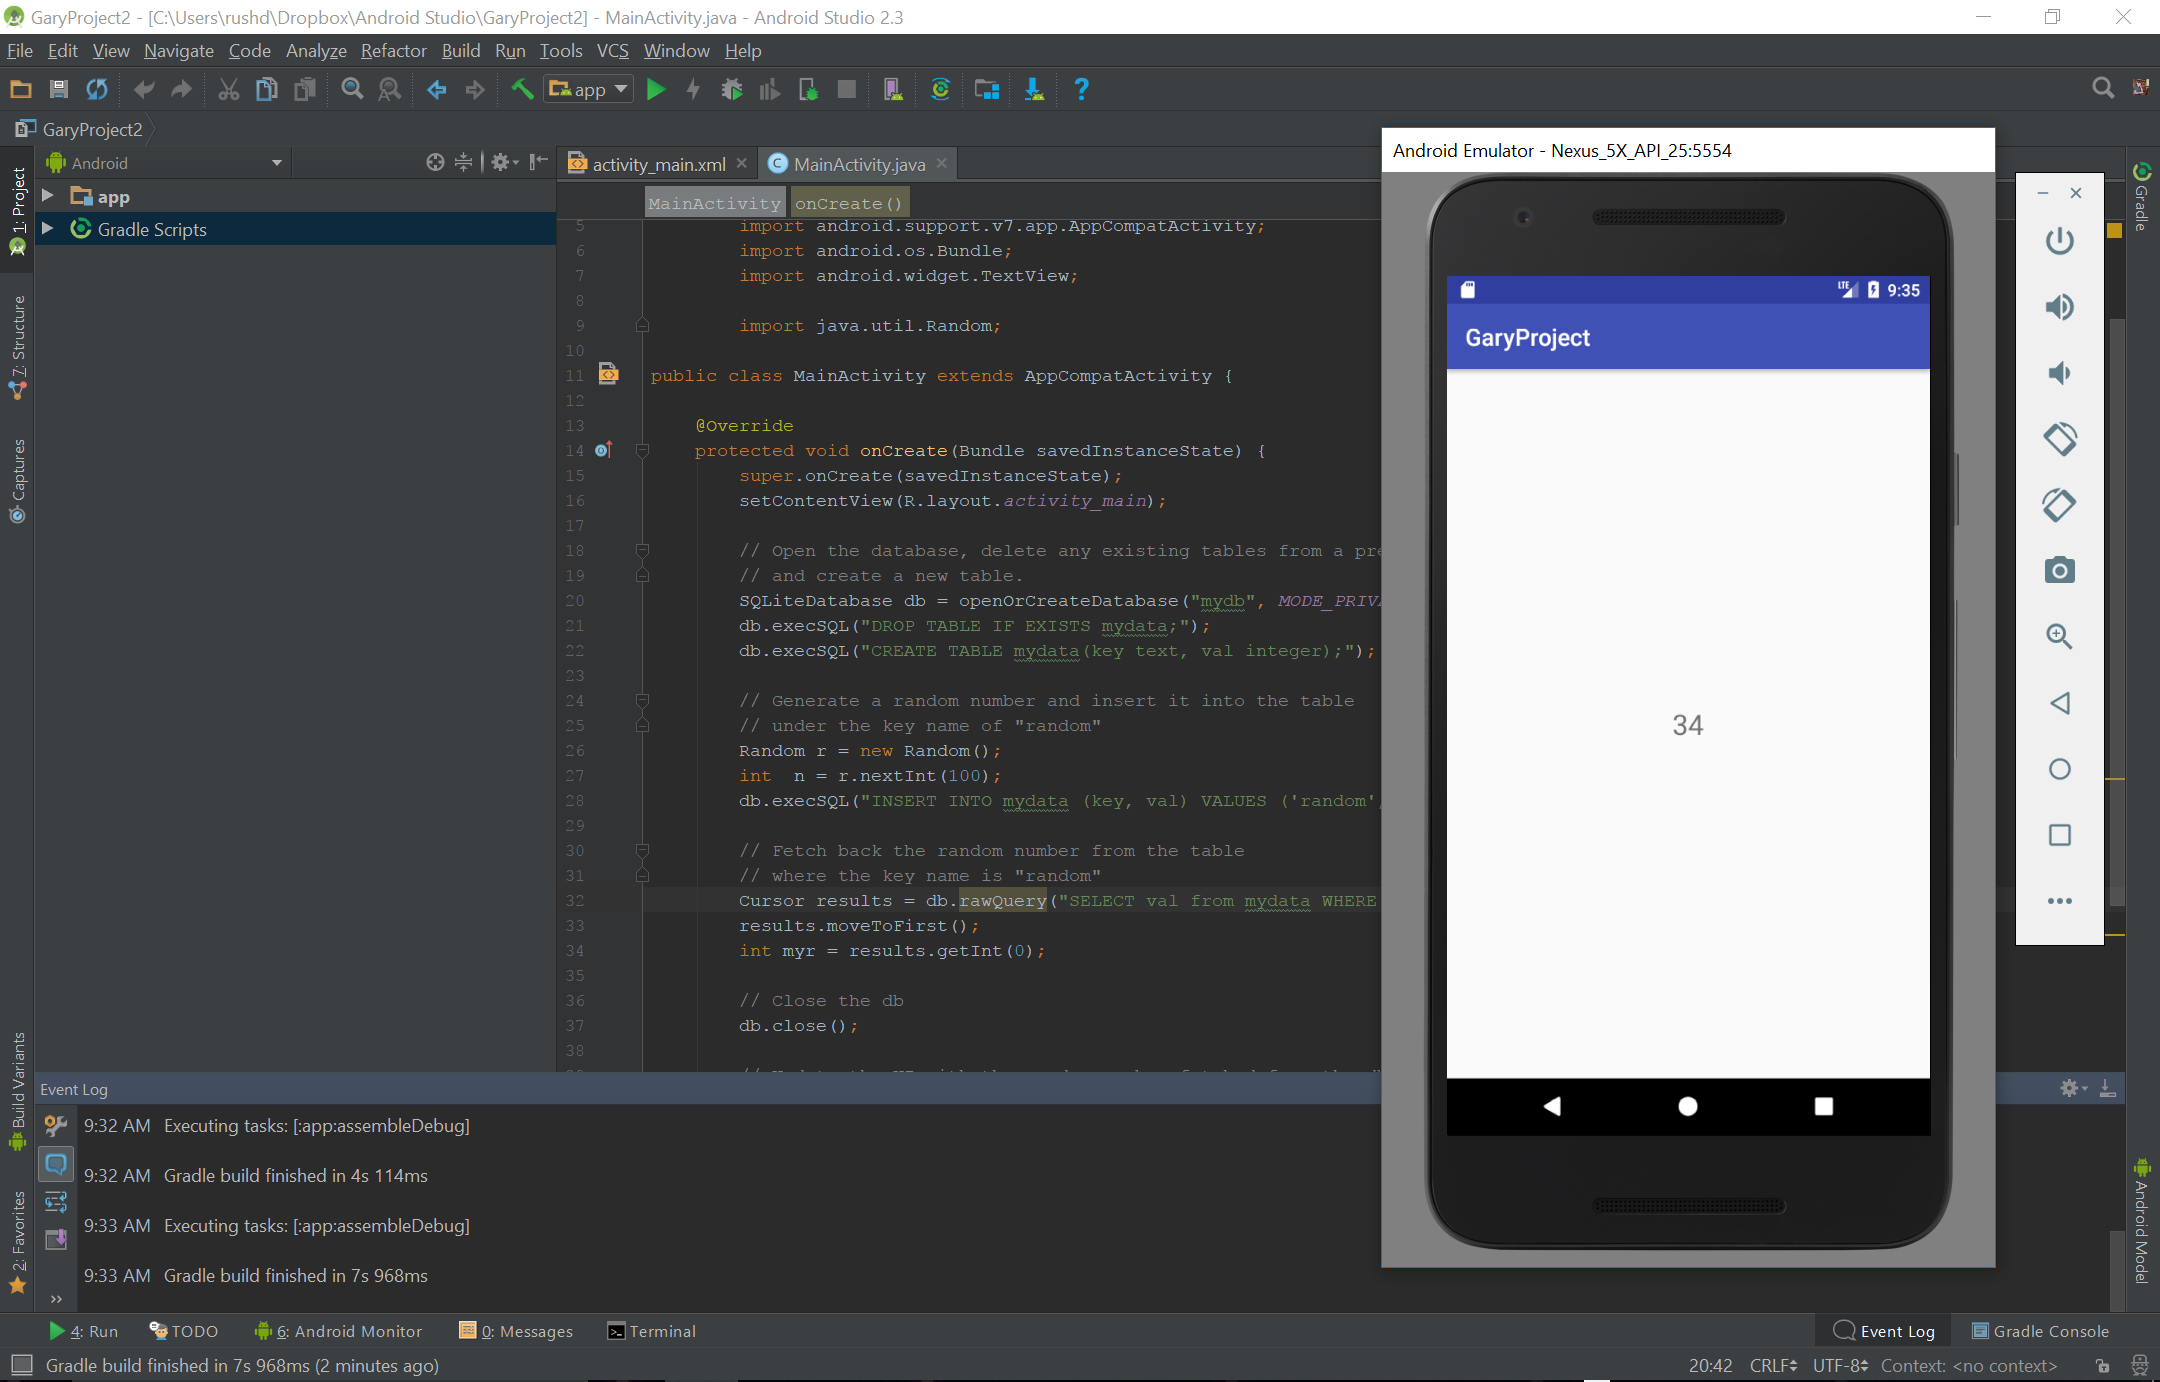
To see how this might work in practice, here’s a project from Gary that puts SQLite into use in the context of an Android app:
import android.database.Cursor;
import android.database.sqlite.SQLiteDatabase;
import android.support.v7.app.AppCompatActivity;
import android.os.Bundle;
import android.widget.TextView;

import java.util.Random;

public class MainActivity extends AppCompatActivity {

    @Override
    protected void onCreate(Bundle savedInstanceState) {
        super.onCreate(savedInstanceState);
        setContentView(R.layout.activity_main);

        // Open the database, delete any existing tables from a previous run
        // and create a new table.
        SQLiteDatabase db = openOrCreateDatabase("mydb", MODE_PRIVATE, null);
        db.execSQL("DROP TABLE IF EXISTS mydata;");
        db.execSQL("CREATE TABLE mydata(key text, val integer);");

        // Generate a random number and insert it into the table
        // under the key name of "random"
        Random r = new Random();
        int  n = r.nextInt(100);
        db.execSQL("INSERT INTO mydata (key, val) VALUES ('random', " + n + ");");

        // Fetch back the random number from the table
        // where the key name is "random"
        Cursor results = db.rawQuery("SELECT val from mydata WHERE key='random';", null);
        results.moveToFirst();
        int myr = results.getInt(0);

        // Close the db
        db.close();

        // Update the UI with the random number fetched from the db
        TextView t = (TextView) findViewById(R.id.myTextView);
        t.setText(Integer.toString(myr));
    }
}
Here we’re creating a new database (mydb) and then a new table called ‘mydata’ after checking if it exists and deleting it if so (DROP TABLE IF EXISTS). Then we’re inserting data in two columns— one that names the data ‘random’ and one that consists of a randomly generated integer. Finally, it’s displayed on the screen via a TextView called “myTextView”.

In an upcoming post, we’ll explore another way to achieve a similar effect.
More statements, more possibilities
There are many more statements you’ll likely find yourself using frequently. For example, ALTER can allow you to add new columns. AS allows you to rename columns and tables. COUNT lets you count entries. HAVING is similar to WHERE. GROUP BY lets you group your results.
Of course, this is by no means a comprehensive guide. There is a lot to learn here. You can even use extensions in order to perform complex statements like If, Then, and others (though most of this can also be done through Java if you’re using SQLite for building apps).
Eventually, you’ll need to familiarise yourself with Cursors in order to really make the most of SQL.
Eventually, you’ll need to familiarize yourself with Cursors in order to really make the most of SQL. Cursors allow us to move through rows of data incrementally and then perform operations or tests on that data. For those with a coding background, it basically allows us to perform loop operations. This isn’t always necessary, as tools like ‘WHERE’ allow us to filter the data more easily. If you ever end up using big data for machine learning, you’ll want to perform some pretty custom actions and that’s when you’ll need some beefier coding chops.
My recommendation is to focus on building your table, adding data, and retrieving it. When you need to do something more complex, pull up Google and do some reading.

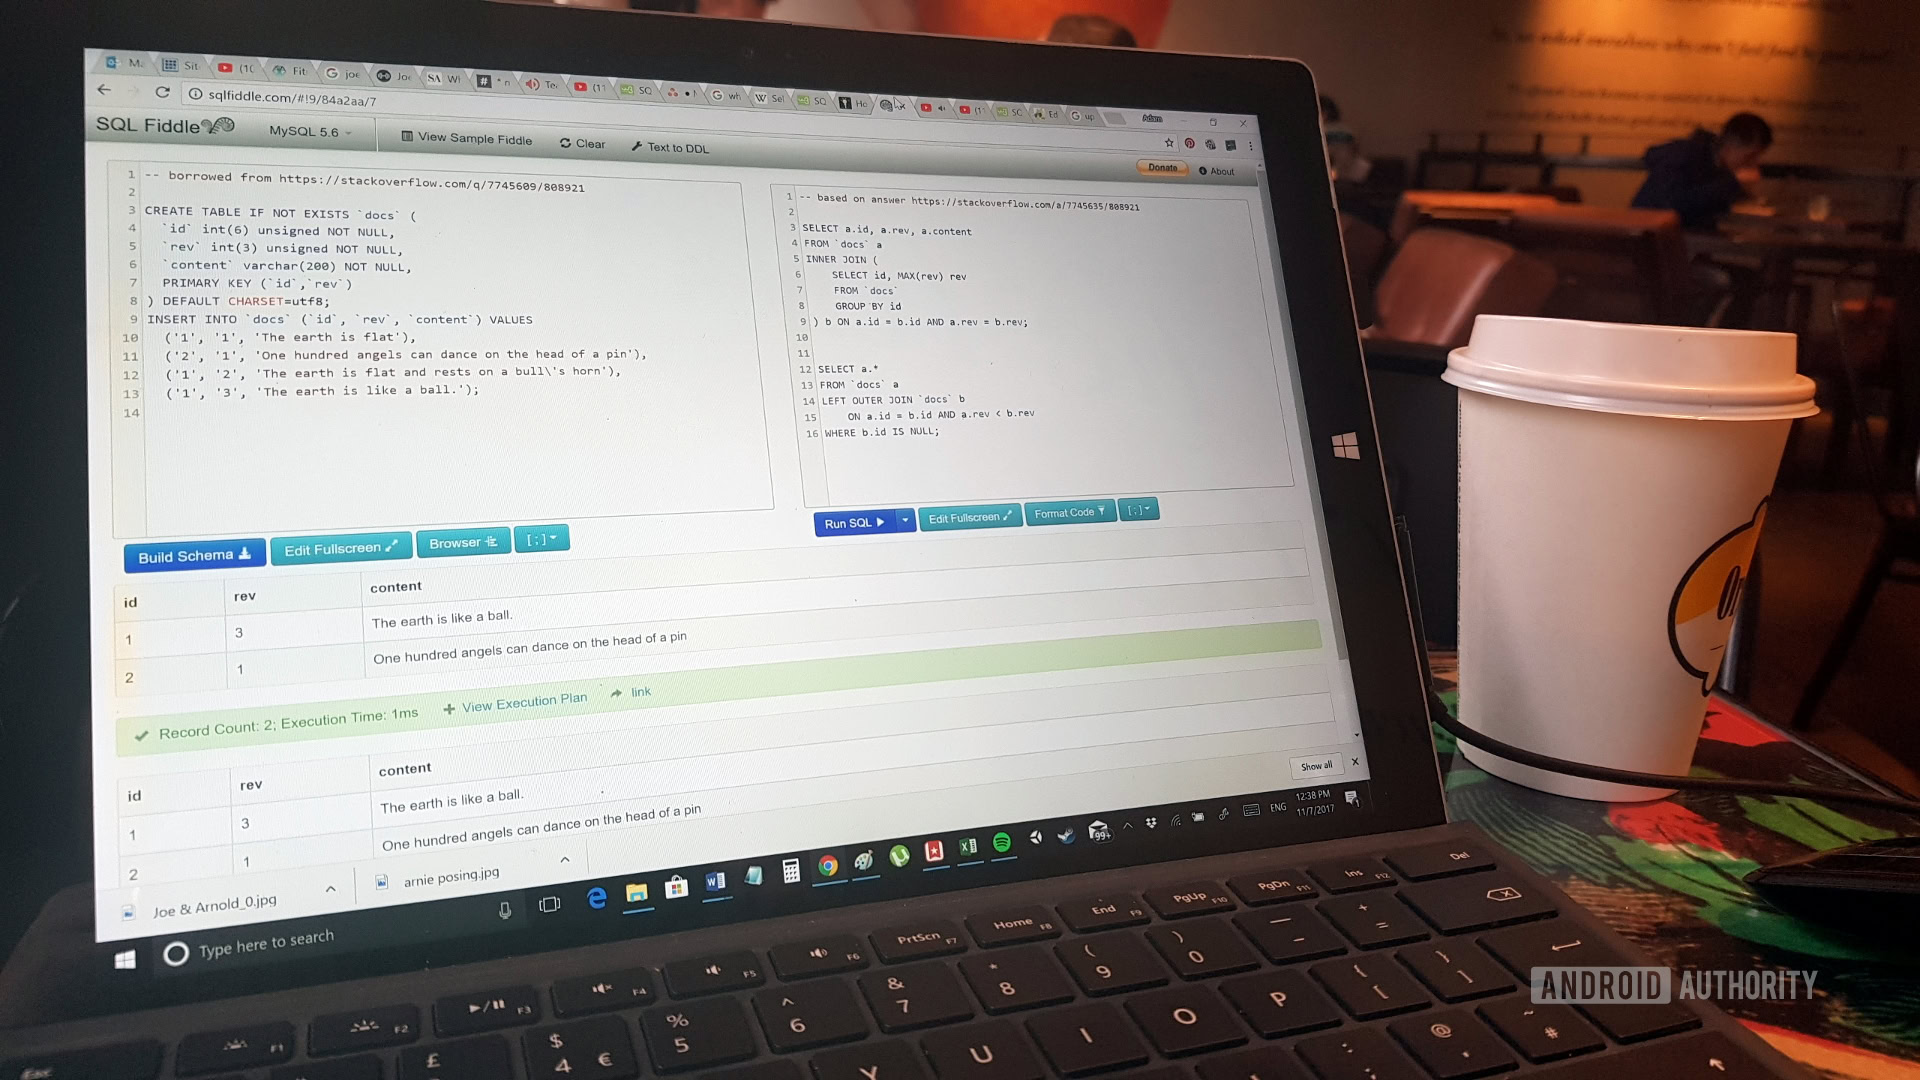
There will be another post coming very soon to discuss the use of SQLite in Android using the SQLiteOpenHelper class, which will show you how to implement this in your code in a relatively straightforward manner. Until then, I also recommend heading over to SQLFiddle.com which is a great tool for testing SQL statements in-browser.