Affiliate links on Android Authority may earn us a commission. Learn more.
mbed - Everything you need to know
ARM’s range of Cortex-A processors power a bewildering range of devices from Single Board Computers, like the Raspberry Pi 2, to massive servers like HP’s Moonshot servers. You also find them in phones, tablets, media players, and Chromebooks – they are everywhere. But ARM also makes a range of microcontrollers, which are just as popular, maybe even more so. In 2014 alone, ARM’s partners shipped some 4.4 billion Cortex-M microcontrollers.
A microcontroller is like a microprocessor (i.e. the Cortex-A range) in the sense that it is a CPU, but with some bits missing. You won’t find a microcontroller using a GPU, nor a complex memory management unit (MMU), for virtual addressing. They normally run at speeds of around 100MHz (or less) and they only have a few Kilobytes of memory.
[related_videos align=”center” type=”custom” videos=”595056,588495,601421″]
So what are they for? Basically for all the jobs that are beneath a full blown microprocessor. For example, the display on a oven or the control circuits of your washing machine will use a microcontroller, rather than a microprocessor. Some wearables, like the FitBit, use microcontrollers, as do various touch screen medical devices. You will find them in cars, in toys, in ceiling fans, in smart locks, in musical instruments, and in entertainment systems. In fact, the list just goes on and on.
For hobbyists and developers, probably the most interesting area for microcontrollers at the moment is the Internet of Things (IoT). The ability to connect everyday devices to the Internet, and use the data they send to make intelligent decisions.
Anyone with high school level programming experience can start programming an mbed board.
Now you might think that microcontrollers sound quite complex and inaccessible. But actually they aren’t. Thanks to ARM’s mbed platform you can get hold of a small board with a microcontroller on it for around $10 or $12. There are even whole IoT starter kits which provide network enabled microcontroller boards, and the software you need to start sending sensor data up into the cloud.
Cortex-M
Before going on, it is worth mentioning the different microcontrollers in ARM’s Cortex-M range. There are current 6 Cortex-M microcontrollers: Cortex-M0, M0+, M1, M3, M4, and M7. The M0 is the smallest and the silicon for the chip can fit onto the cross section of a hair!
As you go up the range the microcontrollers increase in complexity and speed. The M3’s microarchitecture includes branch speculation and 32-bit hardware divide, while the M4 adds DSP extensions and the ability to add a floating point unit (FPU). The M7 is ARM’s latest microcontroller and offers greater performance, and more features. For example, it offers 2 times the DSP performance than the M4.
The Development Environment
The key thing about the mbed platform is that all you need is a web browser and a USB connection to start programming. The development environment is all web based. From within your web browser you can write code and compile it to give you a binary. When you plug the board into your computer, via USB, it will appear as a flash drive. To copy your program on to the board all you need to do is drag-and-drop the binary from your downloads folders drive. Hit the reset button on your board and your program will start running.
The language of the mbed platform is C and C++. That means anyone with high school level programming experience can start programming an mbed board. And you don’t need to worry about re-inventing the wheel, the mbed platform provides a whole range of libraries so that your board can communicate with other peripherals and with the outside world. For example, there are libraries for networking, USB, LCDs & displays, audio, motors, actuators, sensors, NFC, barcodes, DSPs and so on.
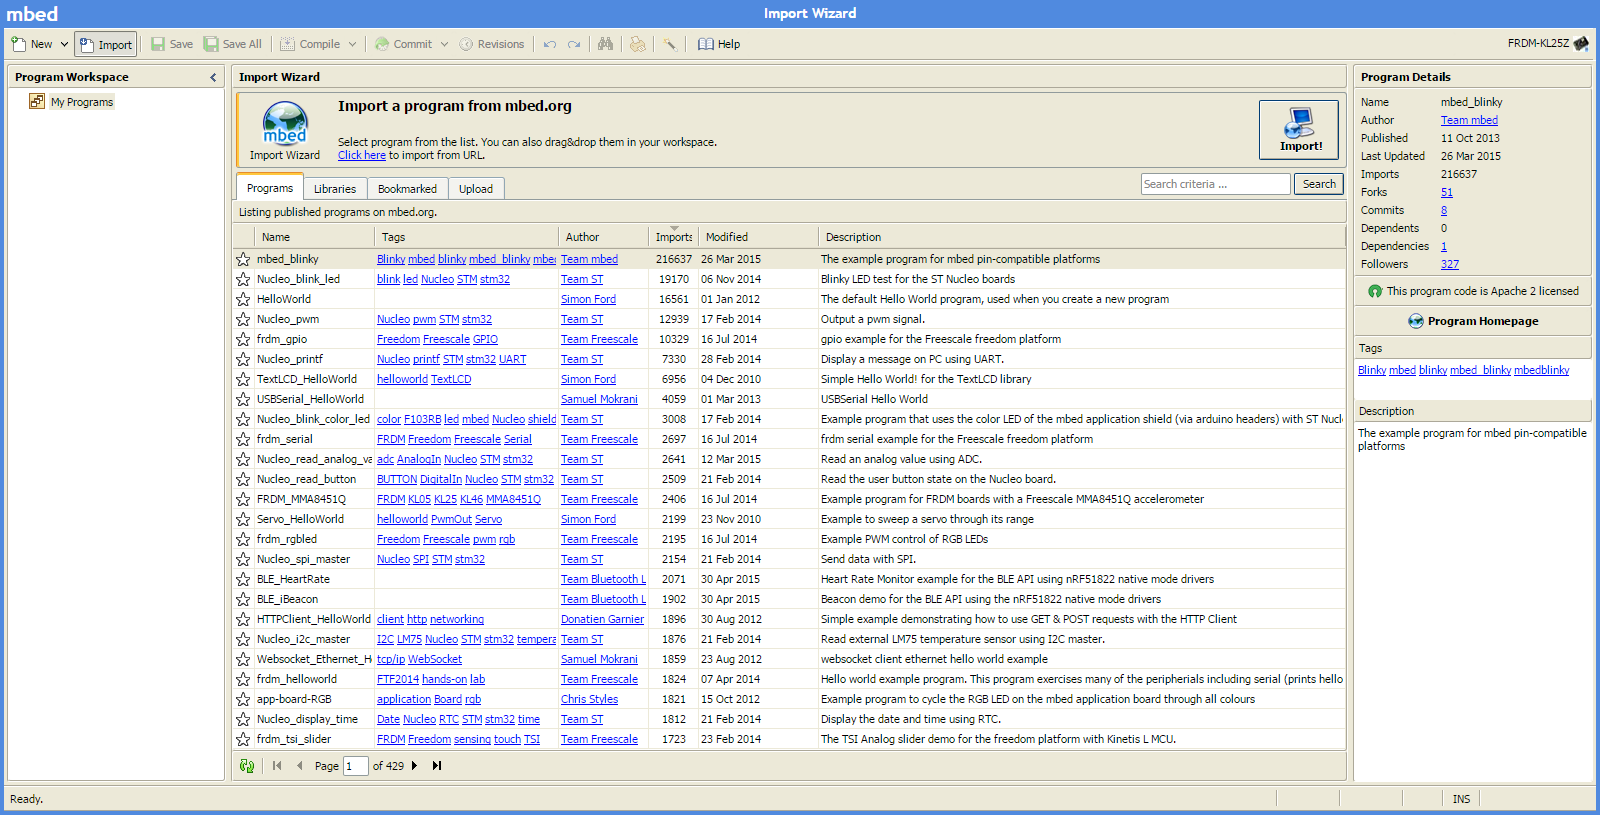
If you don’t like the sounds of developing via the web for a long term project, then no problem. All of the code and libraries can also be exported for use by other tool chains, including the GCC compiler.
Later this year ARM will release the next iteration of its mbed platform which will include mbed OS and the mbed client. mbed OS is a new operating system designed for IoT devices, that enables them to securely connect to the rest of the world. It will be open source and is designed specifically for ARM’s Cortex-M range of microcontrollers. The mbed Client is a set of core libraries which will allow mbed OS programs to be ported to Cortex-A based computers and boards running Linux. In other words, you can develop an IoT or other network aware program using mbed OS on a Cortex-M microcontroller, and then simply (with just a quick recompile) port it to boards like the Raspberry Pi or the ODROID C1.
The Boards
At the time of writing there are over 50 different mbed boards available. Everything from simple Cortex-M0 based boards with no integrated peripherals, to boards with built-in displays, accelerometers, networking, Wi-Fi. There are boards with cellular connectivity, boards with Bluetooth and even a robot.
To help give you an idea of what is possible with the mbed platform I am going to look at four boards and see what each one is capable of doing. The first board is the FRDM-KL25Z from Freescale.
FRDM-KL25Z
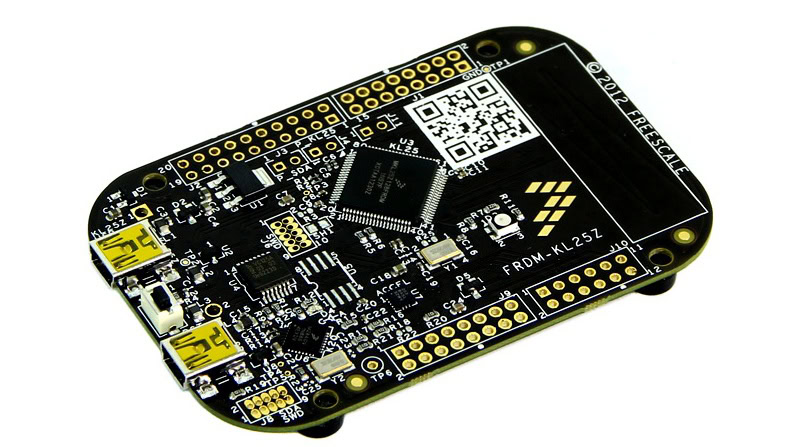
The KL25Z uses a Cortex-M0+ Core clocked a 48MHz, and includes 16KB of RAM plus 128KB of flash. It comes with a built-in 3 color LED, a 3-axis accelerometer, and a capacitive touch sensor. This makes it a great starter board. You can pick one up for just $13.
In the world of microcontrollers the simplest program you can write is one that will flash a LED on and off. It is equivalent to the “Hello, World” program that is so often used during programming language tutorials.
To write the “blinky” program for the the KL25Z, in fact to write it for almost any mbed board, you go to developer.mbed.org and login. Click on the “Compiler” button at the top-right of the page and wait for the compiler window to open.
On the top right of the IDE, above “Workspace Details”, you will see your current selected mbed device. If this is the first time you are using mbed then it will simply say “No device selected.” Click on it and then click “Add Platform.” This will then open the platforms page on the mbed.org website. Click on the FRDM-KL25Z, and then on “Add to your mbed compiler.” Back at the compiler, click the currently selected device again (or “No device selected”) and click on FRDM-KL25Z. Last step, click on “Select Platform.”
To get the source code for the blinky example, click on the Import icon from the toolbar. Find and select mbed_blinky, and then click “Import!” Once the import is done you will see the following C program:
#include "mbed.h"

DigitalOut myled(LED1);

int main() {
    while(1) {
        myled = 1;
        wait(0.2);
        myled = 0;
        wait(0.2);
    }
}
The line DigitalOut myled(LED1); defines a variable called myled which is linked directly to a pin on the board. The pin in this case is LED1, which as you have already guessed is the LED. Because mbed knows about the board, this is sufficient at this time, you don’t need to know exactly which pin it is. When you buy the board you will get a small card with all the pins listed.
The rest of the code is simple. The program enters an infinite loop and repeatedly sets myled to 1, then pauses, then sets it to 0, then pauses and so on. This, of course, makes the LED flash.
To compile the program click on “Compile” in the toolbar and then drag and drop the resulting .bin file to the board. Hit the reset button and the program will start to run.
Nordic nRF51822
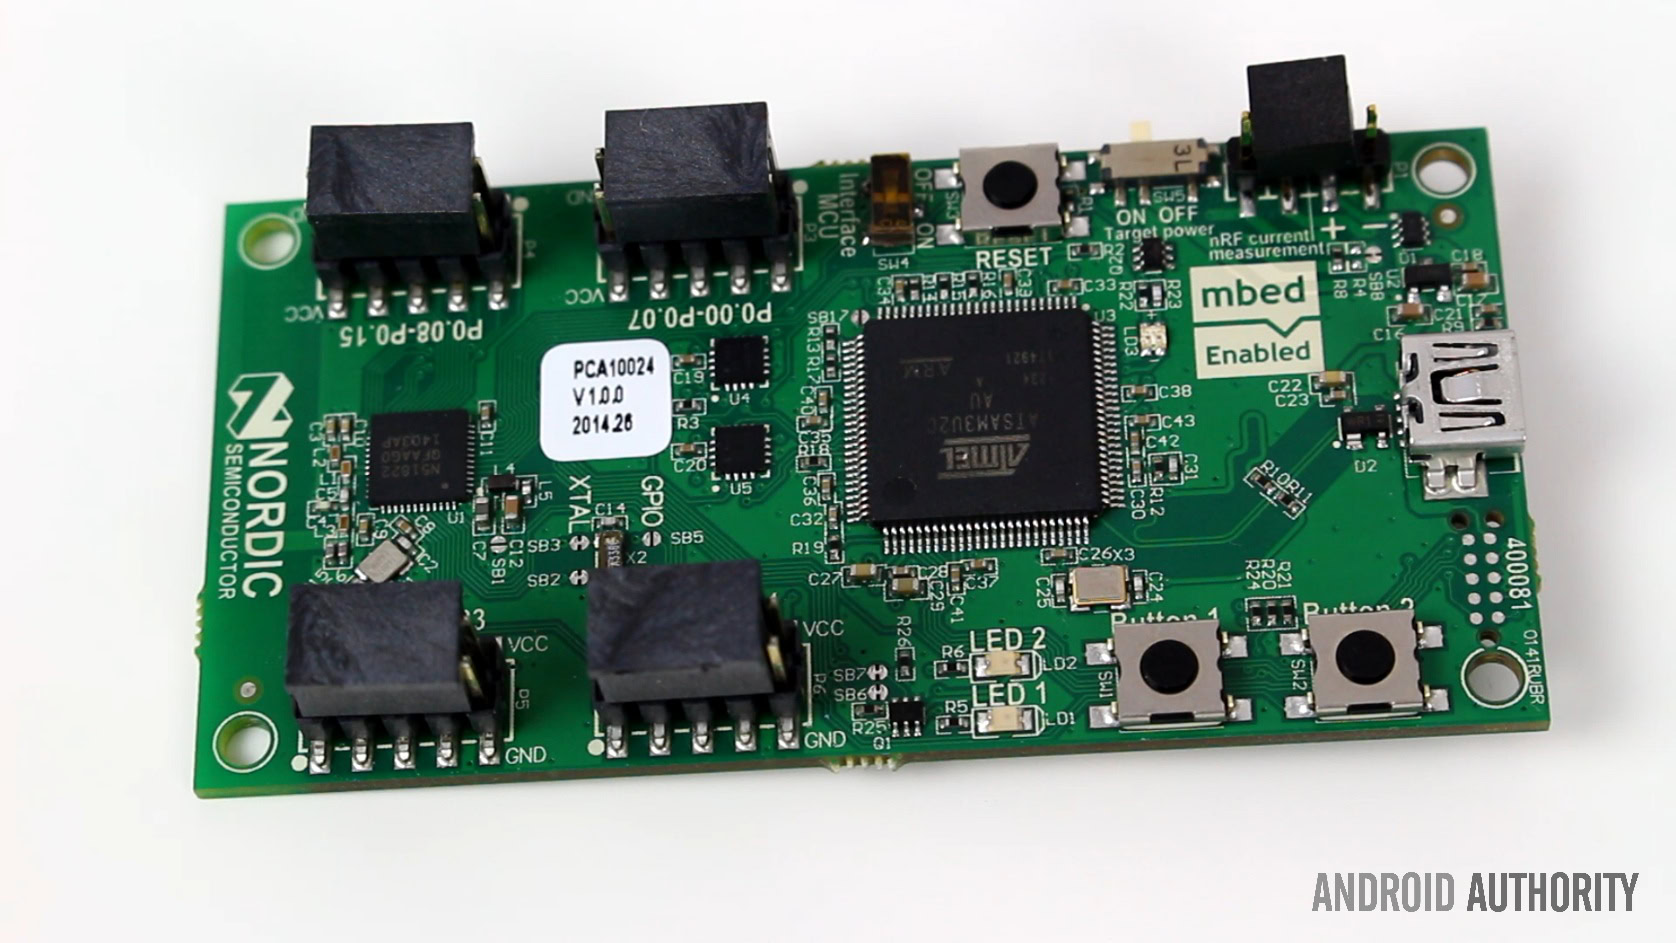
The nRF51822 uses the Cortex-M0 microcontroller clocked at just 16MHz and includes 16K of RAM plus 128K of flash. In terms of performance, that might seem like a step backwards when compared to the KL25Z, but the nRF51822 is special in that it has built-in Bluetooth 4.1 and includes a battery slot so that the board can be independently powered by a single 2032 coin-cell battery. The Cortex-M0 is designed for the lowest possible power usage and is therefore perfect for standalone Bluetooth applications.
And this is where Android is important, like a FitBit or other wearables, this board is the perfect building block for a device that communicates with an Android handset over Bluetooth Low Energy (BLE).
One of the example programs given on the mbed site is a Bluetooth Low Energy heart rate monitor. The program configures the board to send out (fake) heart beat information using the standard Bluetooth profile. It is actually quite simple to add an actual heart beat monitor. To test it you can use a program like Pixels Perception’s BLE Scanner. The scanner will search for BLE devices in range of your phone and then allow you to access the information that the board is transmitting, in this case a (fake) heart beat.
Getting yourself up and running with the BLE example is very similar to the way you get blinky running. You need to make sure you have the nRF51822 selected as your platform, and you need to import the BLE_HeartRate program. Once the program has been compiled and loaded on to your board, start the BLE scanner app on your Android phone and look for the device. It will be called “HRM1.”
mbed LPC1768 + application board
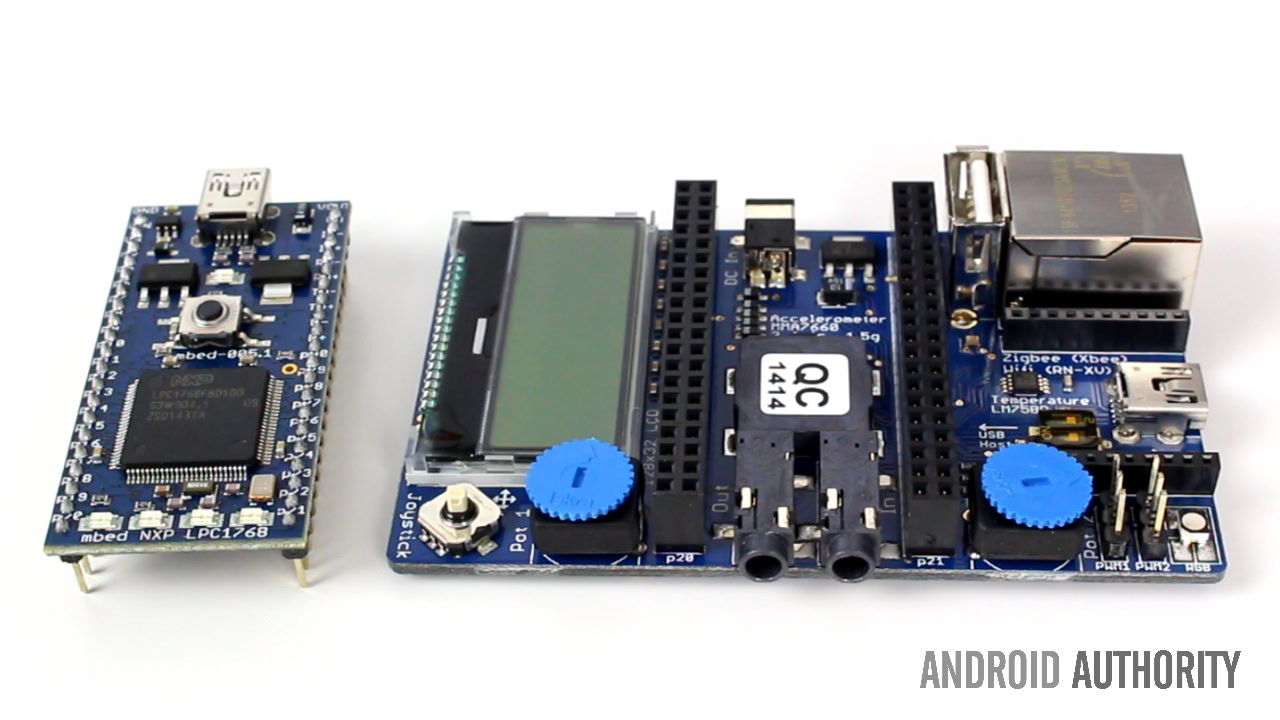
The LPC1768 doesn’t look like much on the outside, but on the inside it is quite different. As well as sporting a Cortex-M3 processor, it has 32KB of memory and 512K of flash, but more importantly it has built-in support for Ethernet and USB (as a host or a device). The power of the LPC1768 can be seen when you connect it to its application board. The board comes with an impressive set of peripherals and sensors included a 128×32 graphics LCD, a RJ45 Ethernet connector, a 5 way joystick, 2 x potentiometers, a speaker, a 3 axis accelerometer, 2 x servo motor headers, a temperature sensor, and a socket for a Zigbee.
Although you wouldn’t build a finished product around the application board in this prototype form, it certainly makes a good springboard for building something like an IoT device. For example, you can use the temperature sensor on the board together with the Ethernet connection to periodically upload the current room temperature to a cloud service like ThingSpeak.
It would also be possible to integrate the board with your Android device, again using a service like ThingSpeak. You could write an app to send commands to your LPC1768 to perform home automation tasks, ask it for specific sensor data, or even get it to perform a task for you like Tweet something or send an email. In fact the only limit is your imagination.
mBot
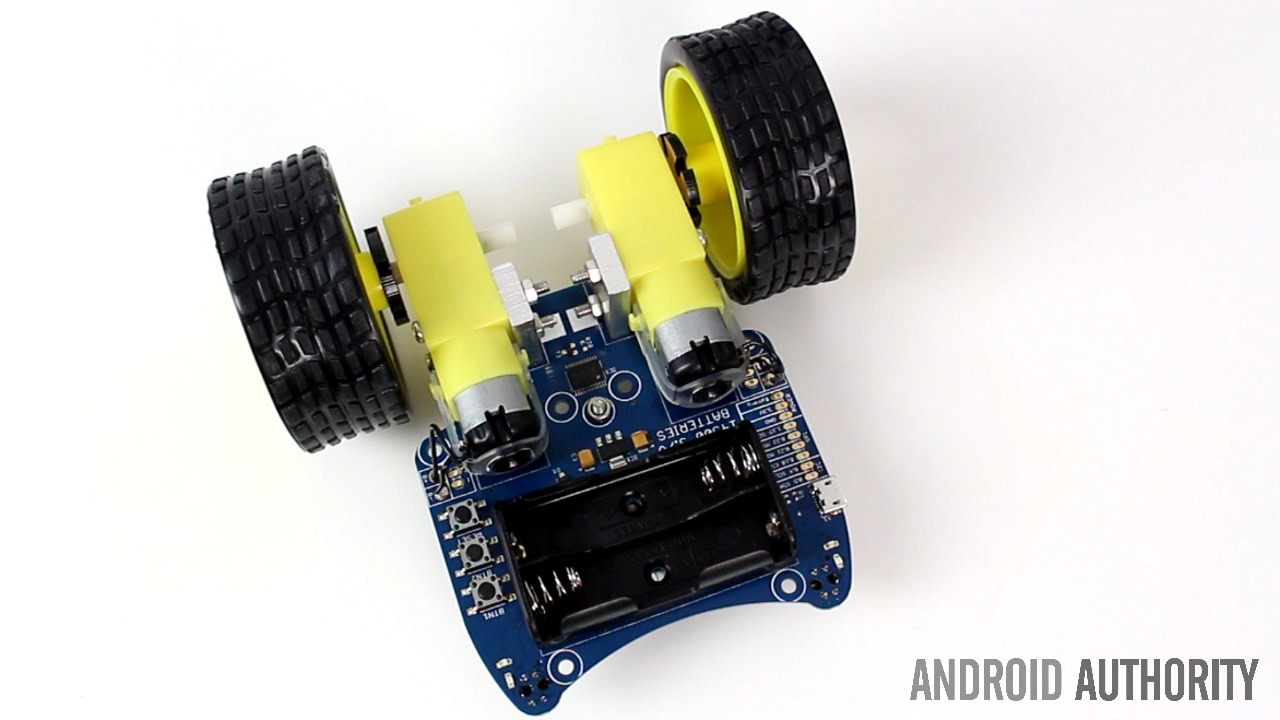
If you want something that is a bit more fun than IoT devices then I recommend the mBot from Outrageous Circuits. It is an mbed enabled robot with reflective sensors, LEDs and a buzzer. On first power up, mBot is loaded with software that makes it dance on a table without falling off. It does so by reading the two reflective sensors on the front. If it detects no reflection, it knows that it is off the edge of a table and it will backup and turn.
It only costs $30 and provides a great introduction to microcontroller programming. Outrageous Circuits provide all the source code for the default program and it also provides full documentation including schematics, pin-outs and hacker guides.
Wrap up
As I mentioned earlier, there are over 50 boards available that support mbed. These four are really just a brief overview of some of the things you can do with a Cortex-M microcontroller and the mbed platform. Once you add in communication with your Android smartphone, or connectivity with the cloud, then the possibilities are endless.
Have you tried mbed? Do you have a neat IoT idea? Please let us know in the comments below.