Affiliate links on Android Authority may earn us a commission. Learn more.
How to Setup an Email Signature on your Android Device
How manyof you use your Android device for work, business, or to stay connected while on the move? If you’re anything like me, you are always adding a signature with your name, title, and place of work to the bottom of your emails. If you”re looking for a quick time saver, then add a signature.
Sure, some of us just want to show off that we are emailing you from our awesome Android phones, but there’s obvious time saving benefits to this too, and it’s pretty simple and easy to do and to change, if you wish.
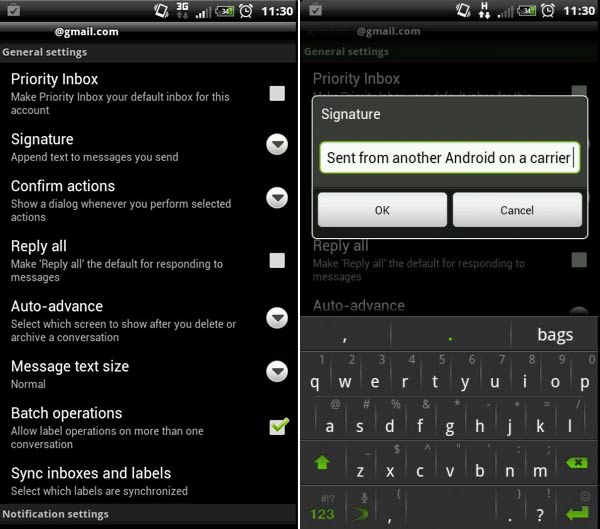
Gmail App:

- Open your Gmail App
- Click Menu
- Tap More
- Tap Settings
- Click on your email address listed in the settings
- Click Signature
- Enter your signature and click OK.
- You have just set your signature for that particular email account in Gmail.
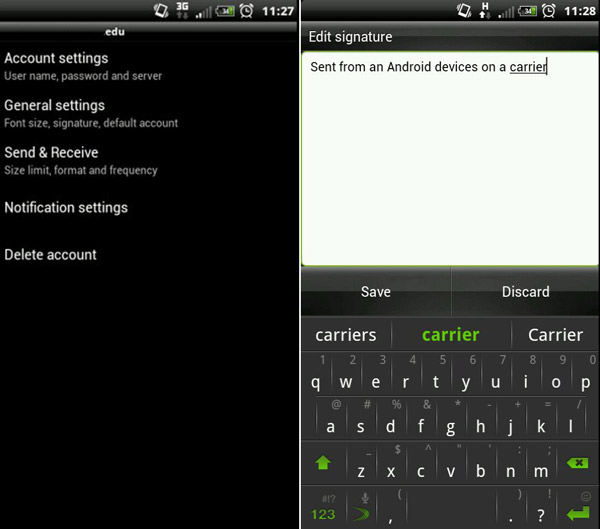
Stock Email App:

- Open your Email App
- Click Menu
- Click More
- Tap Settings
- Choose “General Settings”
- Check “Use Signature” to On.
- Tap Signature and enter the signature you desire for that particular account.
Now wasn’t that easy? Yes it takes some time if you have many email accounts on your phone, but how much easier can it get? Remember these signatures will be on every outgoing email message you send, including messages to your boss, girlfriend, father, uncle, ex-wife, etc.
Keep it locked to Android Authority for plenty more awesome how to’s and other tips to help you in the Android ecosystem.
Also, feel free to leave comments below letting us know what kind of how-to’s you are looking for and we will deliver!