Affiliate links on Android Authority may earn us a commission. Learn more.
How to get and use location data in your Android app
Using Location in your app has incredible potential in making your app seem intelligent to end users. With location data, your app can predict a user’s potential actions, recommend actions, or perform actions in the background without user interaction.
For this article, we shall discuss integrating location updates into an Android app, with a focus on fetching the latitude and longitude of a given Location only. It is worth pointing out that Location can (and does) contain much more than just latitude and longitude values. It can also have values for the bearing, altitude and velocity of the device.
Preparation
Before your app can receive any location data, you must request location permissions. There are two location permissions, ACCESS_FINE_LOCATION and ACCESS_COARSE_LOCATION. We use ACCESS_FINE_LOCATION to indicate that we want to receive as precise a location as possible. To request this permission, add the following to your app manifest:
<manifest xmlns:android="http://schemas.android.com/apk/res/android"
    package="com.sample.foo.simplelocationapp" >
    <uses-permission android:name="android.permission.ACCESS_FINE_LOCATION" />
</maniifest>
We also need to select which of the location providers we want to use to get the location data. There are currently three providers:
- GPS_PROVIDER: The most accurate method, which uses the built-in GPS receiver of the device. GPS is a system of satellites in orbit, that provides location information from almost anywhere on earth. It can sometimes take a while to get a GPS location fix (generally faster when the device is outdoors).
- NETWORK_PROVIDER: This method determines a device’s location using data collected from the surrounding cell towers and WiFi access points. While it is not as accurate as the GPS method, it provides a quite adequate representation of the device’s location.
- PASSIVE_PROVIDER: This provider is special, in that it indicates that your app doesn’t want to actually initiate a location fix, but uses the location updates received by other applications/services. In other words, the passive provider will use location data provided by either the GPS or NETWORK providers. You can find out what provider your passive provider actually used with the returned Location’s getProvider() method. This provides the greatest battery savings.
Layout
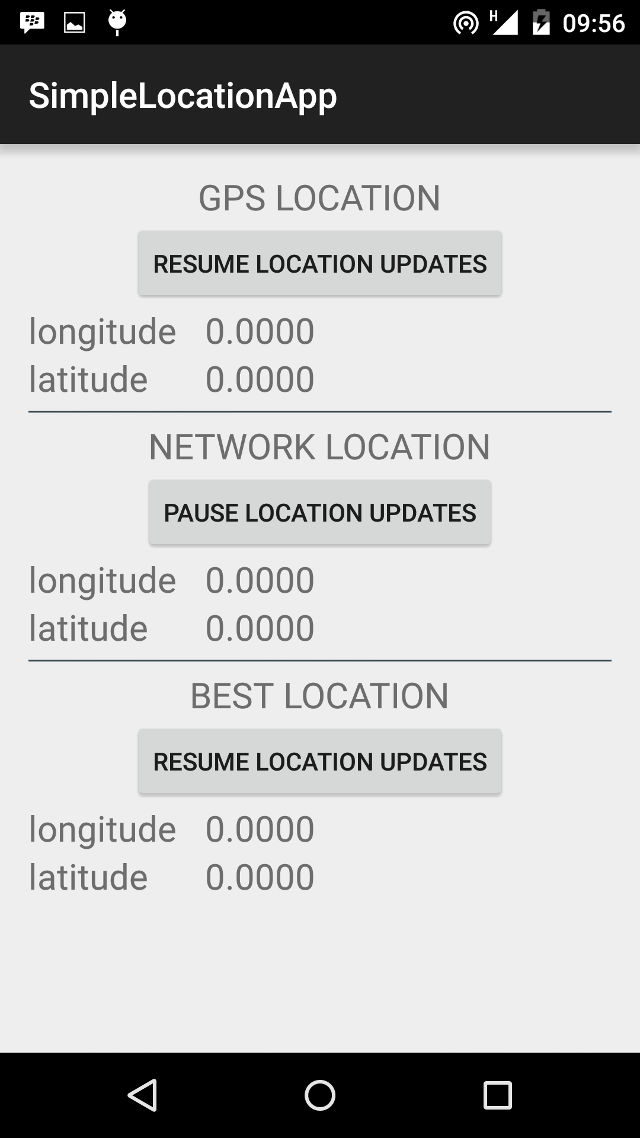
For our app, we are going to fetch location data using the GPS provider, the NETWORK provider, and also by asking the device to decide which is the best available provider that meets a given set of criteria. Our layout has three identical segments, each of which contains:
- A title for the section, such as GPS LOCATION
- A Button to resume and pause location updates for the section/provider
- Longitude Value
- Latitude Value
The code snippet for the GPS section, from our layout/activity_main.xml file is shown below
<TextView
            android:id="@+id/titleTextGPS"
            android:layout_width="wrap_content"
            android:layout_height="wrap_content"
            android:layout_centerHorizontal="true"
            android:text="GPS LOCATION"
            android:textSize="20sp"/>

        <Button
            android:id="@+id/locationControllerGPS"
            android:layout_width="wrap_content"
            android:layout_height="wrap_content"
            android:layout_centerHorizontal="true"
            android:layout_below="@id/titleTextGPS"
            android:text="@string/resume"
            android:onClick="toggleGPSUpdates"/>

        <TextView
            android:id="@+id/longitudeTextGPS"
            android:layout_width="wrap_content"
            android:layout_height="wrap_content"
            android:layout_below="@id/locationControllerGPS"
            android:text="longitude"
            android:textSize="20sp"/>

        <TextView
            android:id="@+id/longitudeValueGPS"
            android:layout_width="wrap_content"
            android:layout_height="wrap_content"
            android:layout_below="@id/locationControllerGPS"
            android:layout_toRightOf="@id/longitudeTextGPS"
            android:paddingLeft="@dimen/activity_horizontal_margin"
            android:text="0.0000"
            android:textSize="20sp"/>

        <TextView
            android:id="@+id/latitudeTextGPS"
            android:layout_width="wrap_content"
            android:layout_height="wrap_content"
            android:layout_below="@id/longitudeTextGPS"
            android:text="latitude"
            android:textSize="20sp"/>

        <TextView
            android:id="@+id/latitudeValueGPS"
            android:layout_width="wrap_content"
            android:layout_height="wrap_content"
            android:layout_below="@id/longitudeValueGPS"
            android:layout_toRightOf="@id/longitudeTextGPS"
            android:paddingLeft="@dimen/activity_horizontal_margin"
            android:text="0.0000"
            android:textSize="20sp"/>
MainActivity
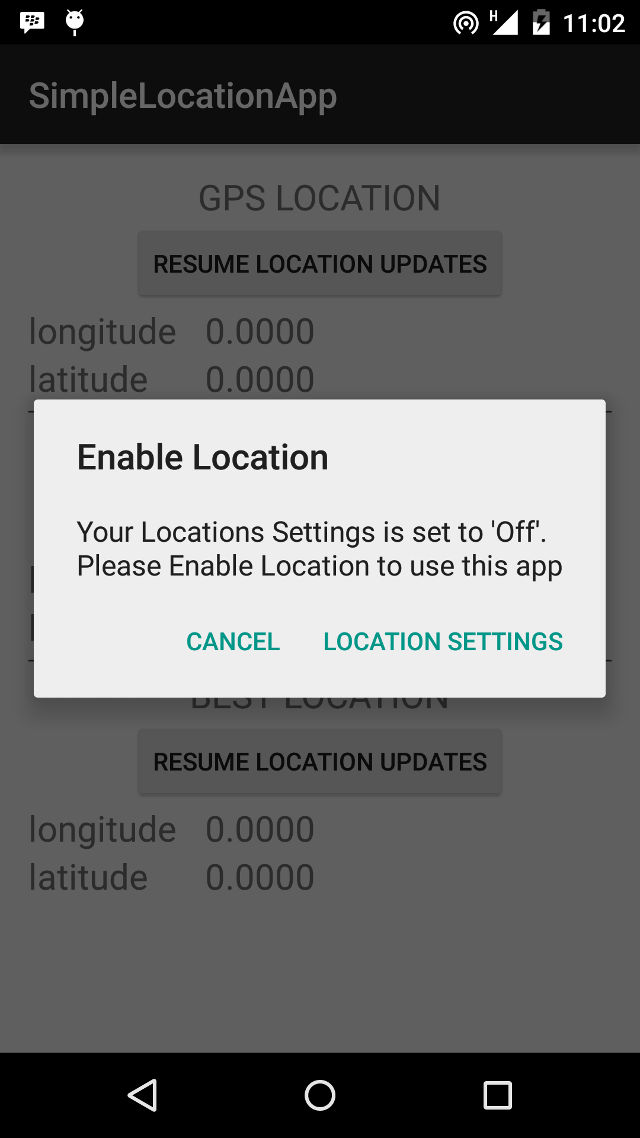
It is possible that the user has their device Location settings turned off. Before requesting location information, we should check that Location services are enabled. Polling for location data with the settings turned off will return null. To check if Location is enabled, we implement a method, called isLocationEnabled(), shown below:
private boolean isLocationEnabled() {
        return locationManager.isProviderEnabled(LocationManager.GPS_PROVIDER) ||
                locationManager.isProviderEnabled(LocationManager.NETWORK_PROVIDER);
We simply ask the LocationManager if either the GPS_PROVIDER or the NETWORK_PROVIDER is available. In the case where the user has Location turned off, we want to help them get to the Location screen as easily and quickly as possible to turn it on and get back into our app. To do this, we implement the showAlert() method.
private void showAlert() {
    final AlertDialog.Builder dialog = new AlertDialog.Builder(this);
    dialog.setTitle("Enable Location")
            .setMessage("Your Locations Settings is set to 'Off'.\nPlease Enable Location to " +
            "use this app")
            .setPositiveButton("Location Settings", new DialogInterface.OnClickListener() {
                @Override
                public void onClick(DialogInterface paramDialogInterface, int paramInt) {
                    Intent myIntent = new Intent(Settings.ACTION_LOCATION_SOURCE_SETTINGS);
                    startActivity(myIntent);
                }
            })
            .setNegativeButton("Cancel", new DialogInterface.OnClickListener() {
                @Override
                public void onClick(DialogInterface paramDialogInterface, int paramInt) {
                }
            });
    dialog.show();
}
The most interesting line in the snippet above is within the setPositiveButton() method. We start an activity using the Settings.ACTION_LOCATION_SOURCE_SETTINGS intent, so that when the user clicks on the button, they are taken to the Location Settings screen.
Getting location updates
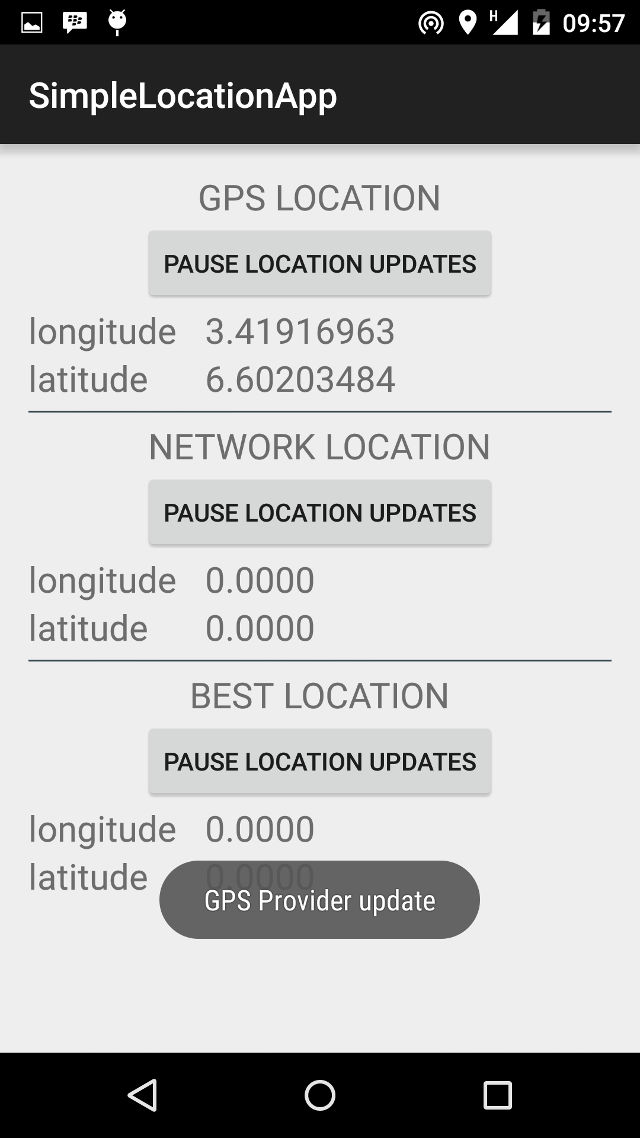
To get GPS and Network location updates, we use one of the LocationManager’s requestLocationUpdates() methods. Our preferred is requestLocationUpdates(String provider, int updateTime, int updateDistance, LocationListener listener). updateTime refers to the frequency with which we require updates, while updateDistance refers to the distance covered before we require an update. Note that updateTime simply specifies the minimum time period before we require a new update. This means that the actual time between two updates can be more than updateTime, but won’t be less.
A very important point to consider is that Location polling uses more battery power. If your app doesn’t require location updates when in the background, consider stopping updates using one of the removeUpdates() methods. In the code snippet below, we stop/start location updates in response to clicking on the relevant Button.
public void toggleGPSUpdates(View view) {
    if(!checkLocation())
        return;
    Button button = (Button) view;
    if(button.getText().equals(getResources().getString(R.string.pause))) {
        locationManager.removeUpdates(locationListenerGPS);
        button.setText(R.string.resume);
    }
    else {
        locationManager.requestLocationUpdates(
                LocationManager.GPS_PROVIDER, 2 * 60 * 1000, 10, locationListenerGPS);
        button.setText(R.string.pause);
    }
}
For both NETWORK_PROVIDER and PASSIVE_PROVIDER, simply replace GPS_PROVIDER above with your desired provider.
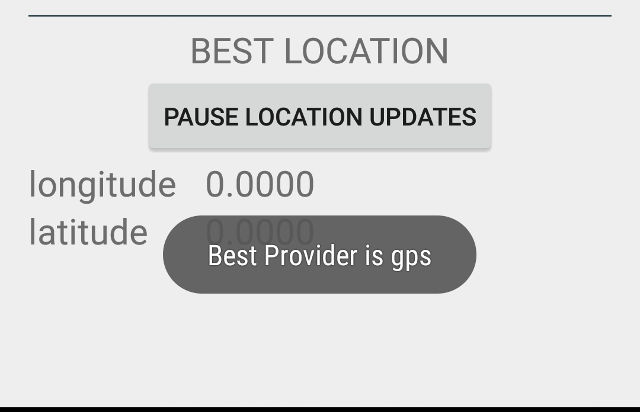
In the case where you just want to pick the best available provider, there is a LocationManager method, getBestProvider() that allows you do exactly that. You specify some Criteria to be used in selecting which provider is best, and the LocationManager provides you with whichever it determines is the best fit. Here is a sample code, and it’s what we use to select a provider:
Criteria criteria = new Criteria();
criteria.setAccuracy(Criteria.ACCURACY_FINE);
criteria.setAltitudeRequired(false);
criteria.setBearingRequired(false);
criteria.setCostAllowed(true);
criteria.setPowerRequirement(Criteria.POWER_LOW);
String provider = locationManager.getBestProvider(criteria, true);
if(provider != null) {
    locationManager.requestLocationUpdates(provider, 2 * 60 * 1000, 10, locationListenerBest);
    button.setText(R.string.pause);
    Toast.makeText(this, "Best Provider is " + provider, Toast.LENGTH_LONG).show();
}
Using the above code and Criteria, the best provider will be GPS_PROVIDER, where both GPS and NETWORK are available. However if the GPS is turned off, the NETWORK_PROVIDER will be chosen and returned as the best provider.
LocationListener
The LocationListener is an interface for receiving Location updates from the LocationManager. It has four methods
- onLocationChanged() – called whenever there is an update from the LocationManager.
- onStatusChanged() – called when the provider status changes, for example it becomes available after a period of inactivity
- onProviderDisabled() – called when the user disables the provider. You might want to alert the user in this case that your app functionality will be reduced
- onProviderEnabled() – called when the user enables the provider
We implement only the onLocationChanged() method for this sample, but in a production app, you will most likely want to perform an appropriate action for each situation.
private final LocationListener locationListenerNetwork = new LocationListener() {
    public void onLocationChanged(Location location) {
        longitudeNetwork = location.getLongitude();
        latitudeNetwork = location.getLatitude();
        runOnUiThread(new Runnable() {
            @Override
            public void run() {
                longitudeValueNetwork.setText(longitudeNetwork + "");
                latitudeValueNetwork.setText(latitudeNetwork + "");
                Toast.makeText(MainActivity.this, "Network Provider update", Toast.LENGTH_SHORT).show();
            }
        });
    }
    @Override
    public void onStatusChanged(String s, int i, Bundle bundle) {
    }
    @Override
    public void onProviderEnabled(String s) {
    }
    @Override
    public void onProviderDisabled(String s) {
    }
};
Conclusion
The complete source code is available on github, for use (or misuse) as you see fit. Just be mindful of the following:
- Integrating location tracking in your apps drains the battery.
- Google recommends apps request updates every 5 minutes (5 * 60 * 1000 milliseconds). You might need faster updates if your app is in the foreground (fitness/distance tracker).
- Users can have location turned off. You should have a plan for when location settings is turned off.
Have fun building Android apps, and watch out for our upcoming tutorial where we make use of Android device location data and web APIs to build something even more fun and challenging.