Affiliate links on Android Authority may earn us a commission. Learn more.
Android customization - how to connect a USB flash drive to your Android device
Last week on our Android customization series, we rounded out a string of Tasker and Zooper Widget tutorials that made it possible to rock your Homescreen with custom widgets. With the software customizations we’ve been working with, perhaps it is time to look at something a little more physical, like connecting a USB flash drive to your Android device.
Flash drives spent a good amount of time as the number one way to take your files with you wherever you needed to go. As some of that has changed with Android devices and cloud storage, many of us still have those USB flash drives kicking around looking for a good use.
Let us take a good look at connecting a USB flash drive to your Android device, but fair warning, you’ll need to purchase a new cable to proceed.
Before we get started
As mentioned, connecting a USB flash drive to your Android device will more often than not require a special cable called an USB On-The-Go or OTG cable. I will be using a simple $1.47 OTG cable from Monoprice today, but you may be more comfortable looking at this $1.09 cable from Amazon.
Beyond the basic OTG cable, you can step it up to a powered Y-splitter OTG cable. Be aware that this is not intended to charge your device, rather it is to power your connected USB peripheral. You shouldn’t need this for your basic USB flash drive, but it is highly recommended if you are attempting to connect a full external hard drive or anything that will draw more than 500mA of power.
If you do not already have a flash drive or ten kicking around, you may consider one of the OTG capable USB flash drives or card readers already on the market. Equipped with a micro USB connector, these unit will attach directly to your Android device.
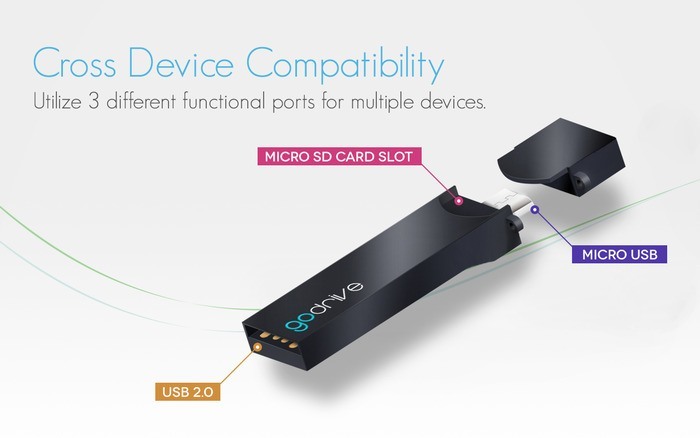
There are also some folks over on Kickstarter that have taken the OTG Flash drive all-in-one approach to the next level, creating a microSD card reader that can plug into either your computer or Android device, plus much more. Feel free to head on over to Kickstarter to learn more about the project, then, if it appears slightly beyond your drone flying, GoPro packing, smart TV flash drive needs, maybe this simpler USB OTG microSD card reader will better suit your needs.
This is the easy part. For best results, plug your USB flash drive into your USB OTG cable first, then plug the OTG cable into the micro USB port on your device.
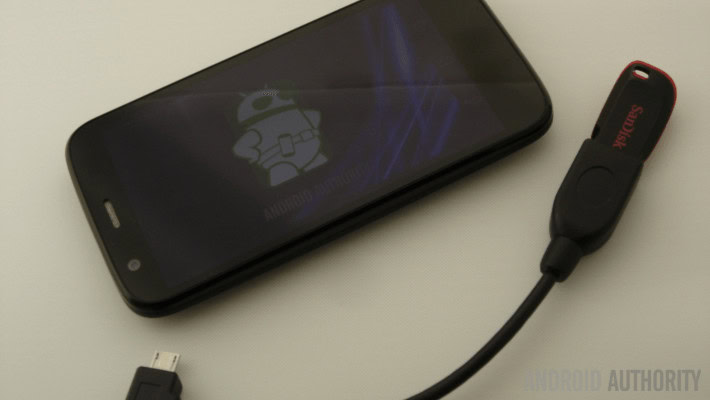
With the right cable, connecting a flash drive to your Android device is a simple thing, but what do you do now?
Apps that can read USB flash drives
Once your USB flash drive is connected to your Android device, you’ll need to use specific apps to be able to access the data. There are a number of options here, of which I will cover just two.
ES File Explorer
In addition to being one of the few apps that can take advantage of your installed microSD card on device, ES File Explorer can also read and write to your connected USB flash drive. Best of all, no root required.
With your USB flash drive connected, open up ES File Explorer, you will be greeted with a permissions screen. Click OK to allow ES File Explorer to access your USB flash drive.
Now, swipe in from the left hand side to access the side menu. Open the Local section and choose your USB flash drive, mine was named “USB1002” but this is not the first time I’ve connected it.
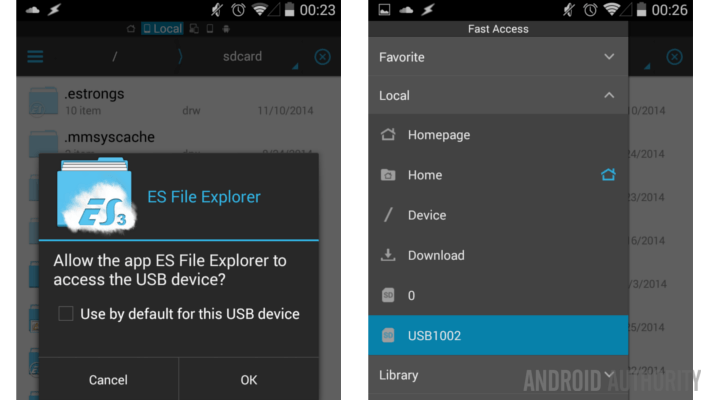
To eject, simply close out of ES File Explorer then unplug. If your USB flash drive is equipped with an indicator light, make sure that it is not flashing before you unplug.
Special note: Although I’ve used ES File Explorer today, you should find that most file explorer apps will perform the same task in their own way. Check out our list of favorite file explorer apps for suggestions.
Nexus Photo Viewer and Nexus Media Importer
Don’t let the names fool you, these apps should work on any USB Host enabled Android 4.0+ Android device.
Nexus Photo Viewer is a simplified free version of Nexus Media Importer. Do try out Nexus Photo Viewer before spending the $4 on Nexus Media Importer. Both apps should connect to the media on your OTG cable connected USB flash drive.
As above, simply connect your USB flash drive to your OTG cable, then plug the OTG cable into your Android device. These apps will act on the USB attached intent and will immediately ask if you would like to connect. Click OK to proceed.
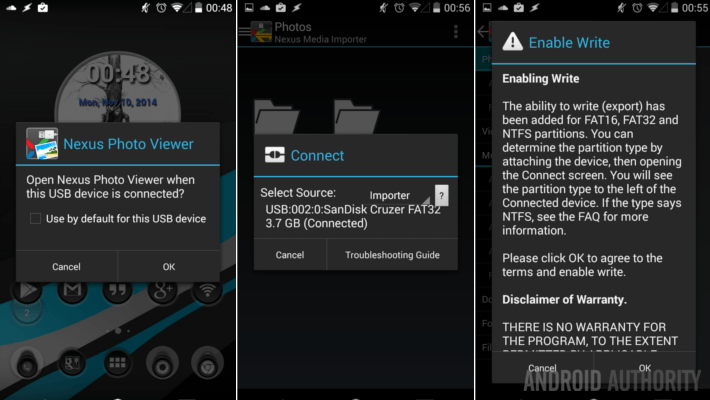
Once in either Nexus Media Importer or Nexus Photo Viewer, you will be able to view your stored content, with extra features such as a photo slide show available in the paid version. There is also a basic file explorer too, so you will be able to transfer files to and from your USB flash drive.
Disconnecting from Nexus Photo Viewer and Nexus Media Importer is done by accessing the menu button in the top right, then choosing disconnect. Then simply unplug.
What’s next
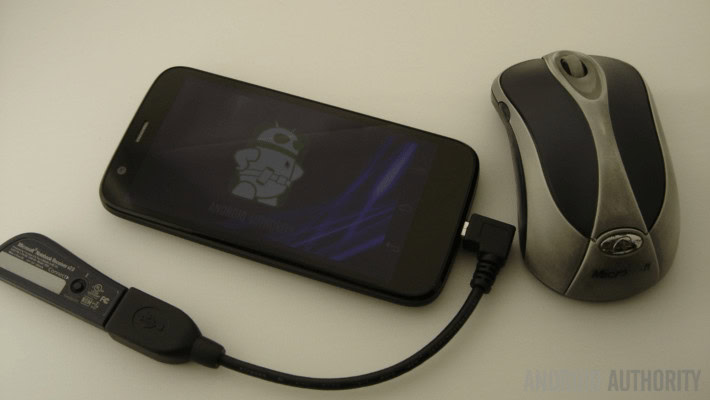
Do not think that a USB flash drive is the extent of devices that you can connect to your Android device. I have successfully tested several powered external hard drives, USB mice and keyboards. Just keep in mind that 500mA limit, as we’ve heard reports of high draw USB peripherals causing damage to phones. Personally, I’ve been lucky in that my device has rebooted on me, without causing any noticeable harm. I was attempting to connect a webcam, just for fun, but it didn’t work.
Next week
I’ll give you some time to play around with this week’s Android customization post, let you try attaching all of your USB components to your Android devices. I’ll give you some time, let’s say, on week. Next week, I’d like to use Tasker timer widgets to mess around with music. A sleep timer and an alarm clock should be a good start.
Have you found any fancy USB devices that have unexpectedly connected to your Android device?