Affiliate links on Android Authority may earn us a commission. Learn more.
Windows 11 Start menu not working? Here's the fix!
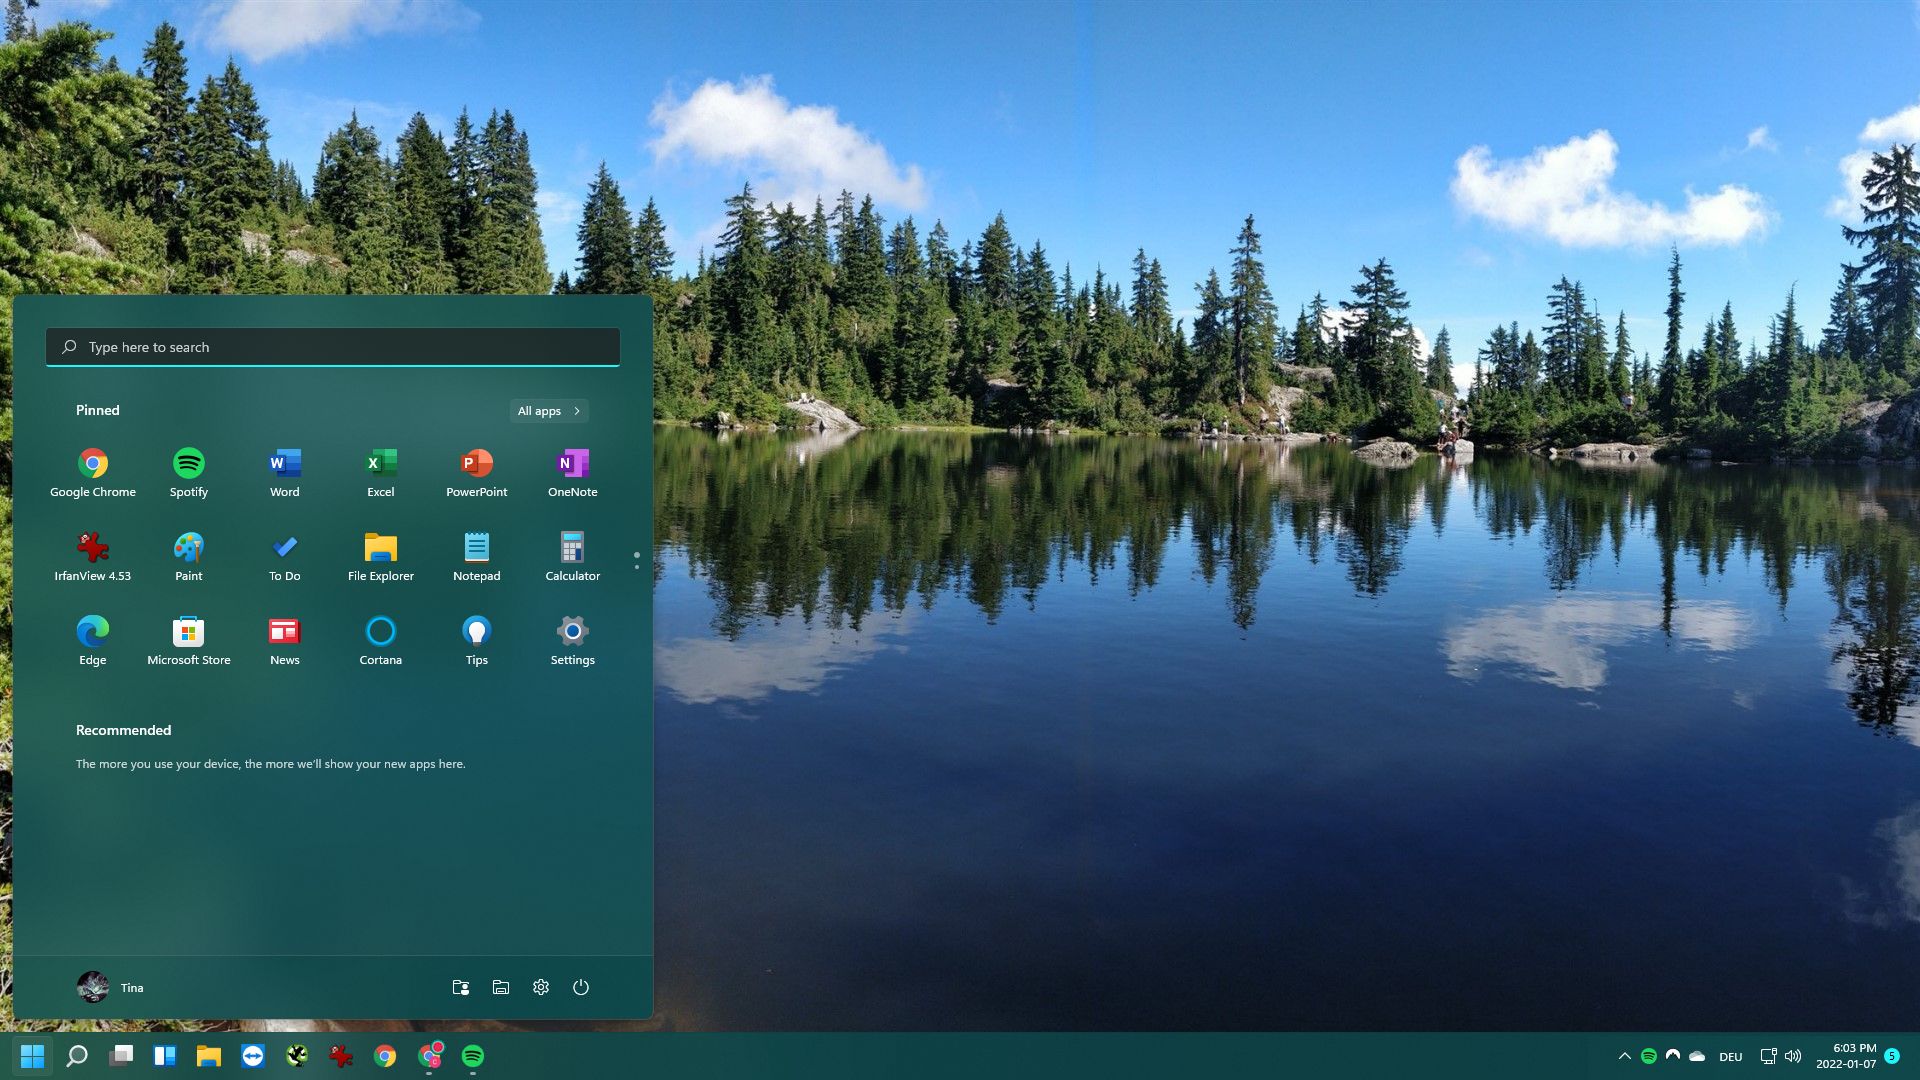
It is a common issue when the Windows 11 Start menu is not working. The causes are manifold, from simple problems like a hung-up system process to more complex ones like corrupted systems files. We’ll go through all the possible reasons and fixes in order, from the most promising and easy solutions to more profound ones. One of them will fix your Windows 11 Start menu. Before trying any of the tips below, save your work first, as you’ll need to restart Windows.
THE QUICKEST FIX
The easiest way to fix most Windows issues is to reboot your computer. The next best thing you can do to resolve issues with the Windows 11 Start menu or button is to restart Windows Explorer. Right-click the Windows Start button (or press Ctrl + Alt + Del) and select Task Manager. In the Processes tab, right-click Windows Explorer and select Restart. If that doesn't work, try killing the process with End Task instead. To restart the process, go to File > Run new task, enter explorer.exe, and click OK.
OTHER WINDOWS 11 START MENU NOT WORKING FIXES
Restart the Windows Explorer
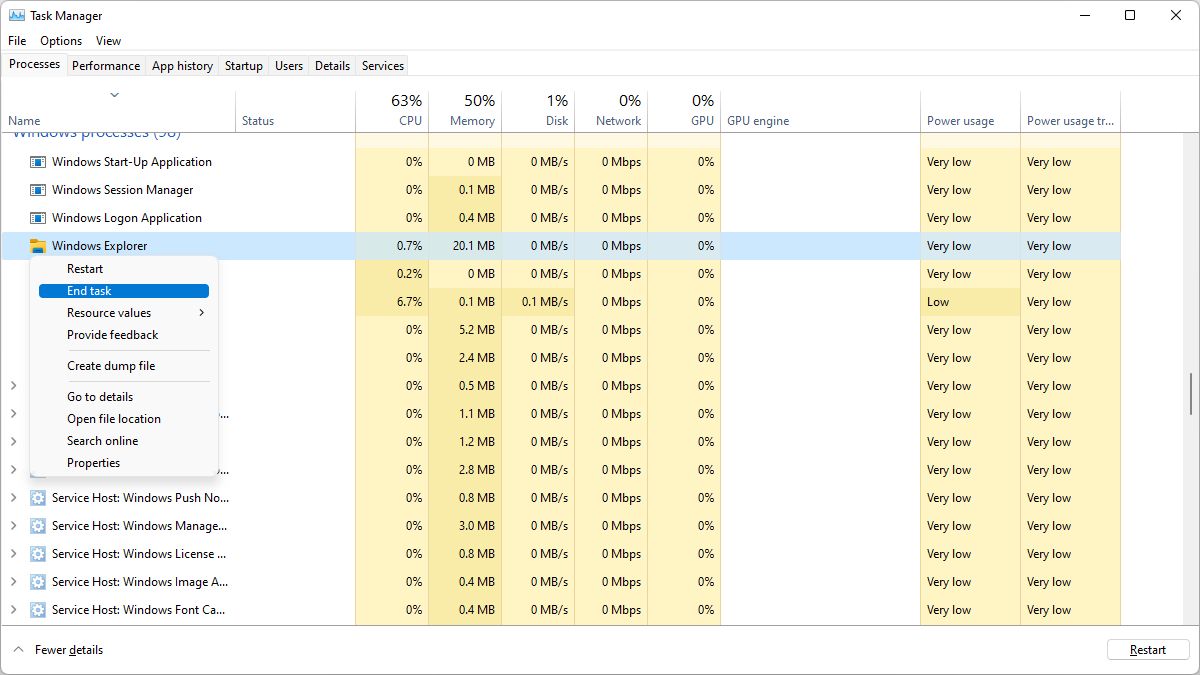
Restarting Windows Explorer is almost as good as rebooting your computer to fix issues with the Windows Start menu and Taskbar. And it’s much less hassle as all your open windows will stay put.
- Right-click the Start button (or press Ctrl + Alt + Del) and select Task Manager.
- Find the Windows Explorer process within the Processes tab. If it’s not listed under Apps, you should find it under Windows processes; be sure to sort the list by name.
- Right-click Windows Explorer and select End Task, though Restart should work, too.
- To restart the task, navigate to File > Run new task, enter explorer.exe, and click OK.
Restart Windows background services

Several Windows services that run in the background can affect the Start menu. To restart a Windows background service:
- Head to the Task Manager (via a right-click of the Start button or pressing Ctrl + Alt + Del).
- Switch to the Details tab, and track down the respective service, starting with StartMenuExperienceHost.exe.
- Right-click it, and select End task. A warning message will pop up.
- Click End process to confirm.
Typically, the process will restart automatically. If it doesn’t, you can start it via File > Run new task as we did with the Windows Explorer above. As a last resort, press Ctrl + Alt + Del, select the power button in the bottom right, and click Restart.
If restarting StartMenuExperienceHost.exe failed to fix your problems with the Start menu, repeat the process with the following background services:
- SearchIndexer.exe
- SearchHost.exe
- RuntimeBroker.exe
Update your graphics drivers
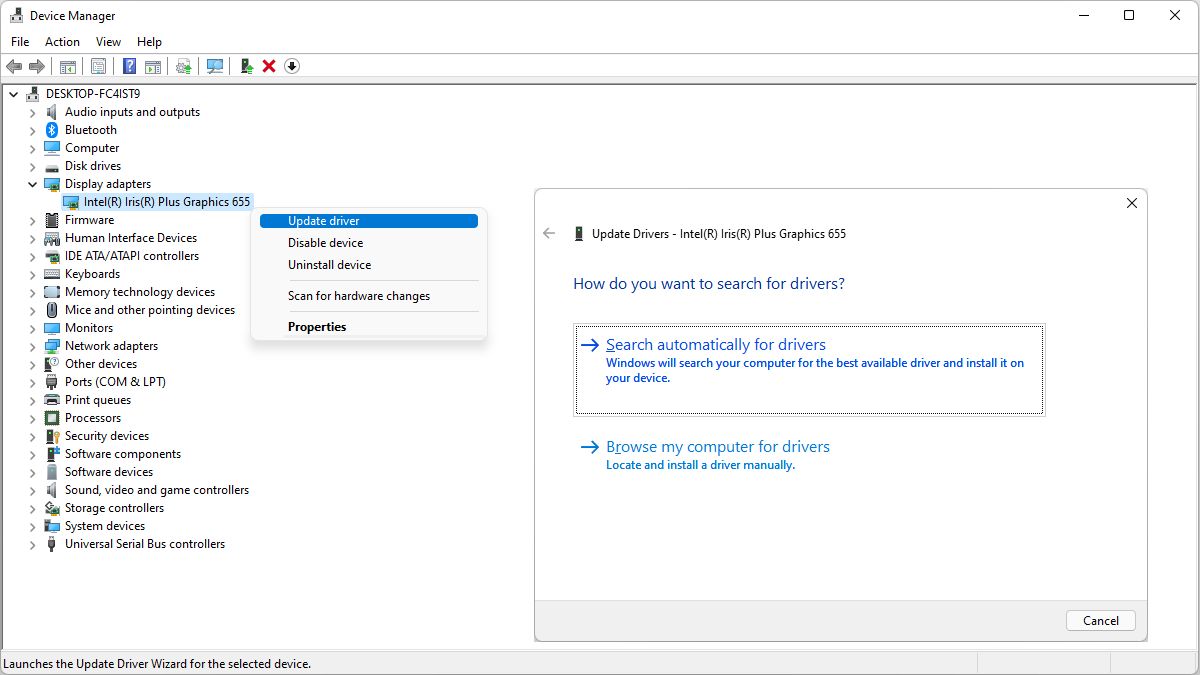
Outdated graphics drivers could mess up Windows UI elements, including the Start menu. Fortunately, updating drivers is a quick fix.
To update your graphics drivers:
- Right-click the Start button (or press Windows key + X) and select Device Manager.
- Expand the Display adapters branch, right-click your graphics card, and select Update driver.
- From the dialogue, select Search automatically for drivers and wait until this process completes. If you have already installed the best drivers, click the Search for updated drivers on Windows Update option.
- Close the window if your driver was updated successfully.
If you have more than one display adapter, repeat the above process for each.
Re-register the Start menu Shell experience packages
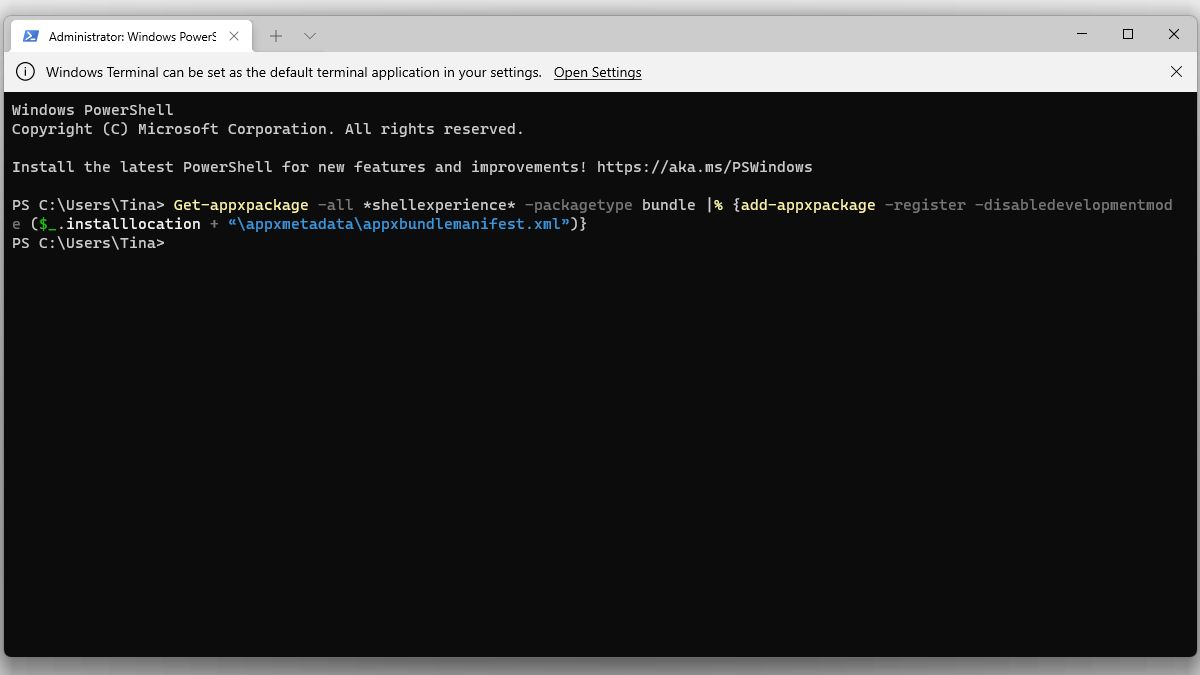
This sounds more complicated than it is. The Shell experience handles all universal apps and graphical elements of the Windows interface. What we’ll do here is re-register the packages that are responsible for displaying the Start menu.
Right-click the Start button (or press Windows key + X) and select Windows Terminal (Admin). Paste the command below into the Windows Terminal window:
Get-appxpackage -all *shellexperience* -packagetype bundle |% {add-appxpackage -register -disabledevelopmentmode ($_.installlocation + “\appxmetadata\appxbundlemanifest.xml”)}Hit Enter and let the process complete.
This tip goes back to Windows 10 and was first shared on the Microsoft Community forum. I have adjusted it for the Windows 11 interface. If you can’t open the WinX menu to access the Windows Terminal, follow the steps listed in the forum article to open the PowerShell window instead.
Rebuild the Windows search index
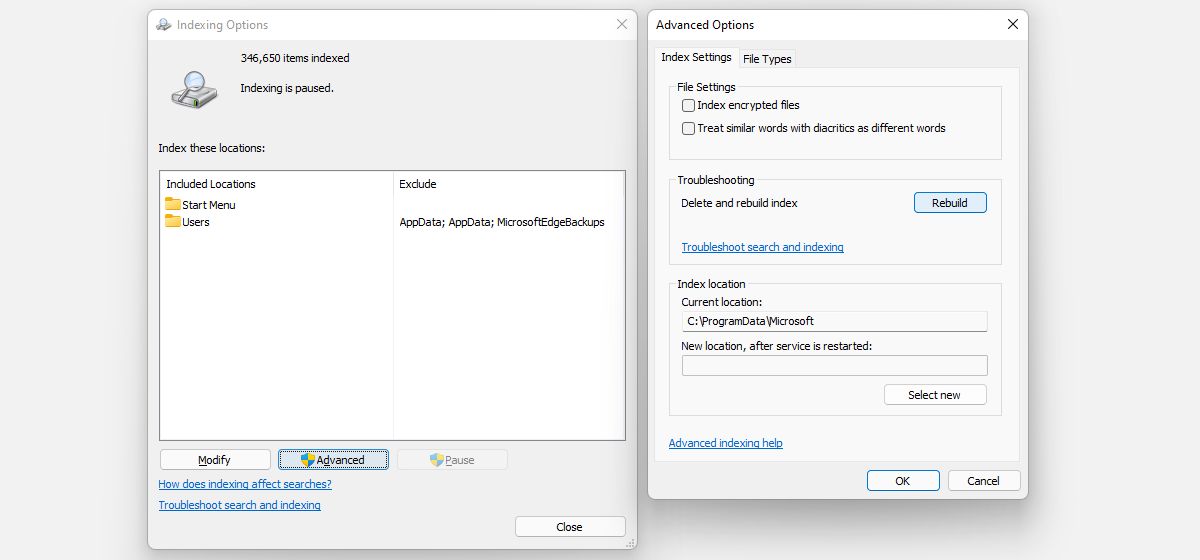
Search is a core feature of the Windows Start menu. If you’ve come this far, you’ve already restarted the search-related Windows background services. Next, let’s try to rebuild the search index entirely.
Press the Windows key + R, paste the text below, and hit Enter.
control /name Microsoft.IndexingOptions- This will bring up a window titled Indexing Options. Click Modify, which will open a new window.
- In the Indexed Locations window, click Show all locations, uncheck all locations, then click OK.
- Back in the Indexing Options window, click Advanced, which will open yet another window.
- In the Advanced Options window, click Rebuild.
Windows will notify you that while rebuilding the index, which can take some time to complete, some views and search results might be incomplete. Click OK, and the rebuilding will commence. You can also close the Indexing Options window. When Windows has finished rebuilding the index, reboot and recheck your Start menu.
Remove Start menu tweaks
Many people dislike the new Windows 11 Start menu and have tried to customize or replace it. Meanwhile, some hacks, such as returning the old Start menu, have stopped working and might have come back to haunt you. If you have dabbled in Start menu hacks, we recommend that you retrace your steps and roll back those changes; below are the most common ones.
Disable the Start menu XAML process
This is a catch-all fix for issues with the Start menu caused by messing with the registry.
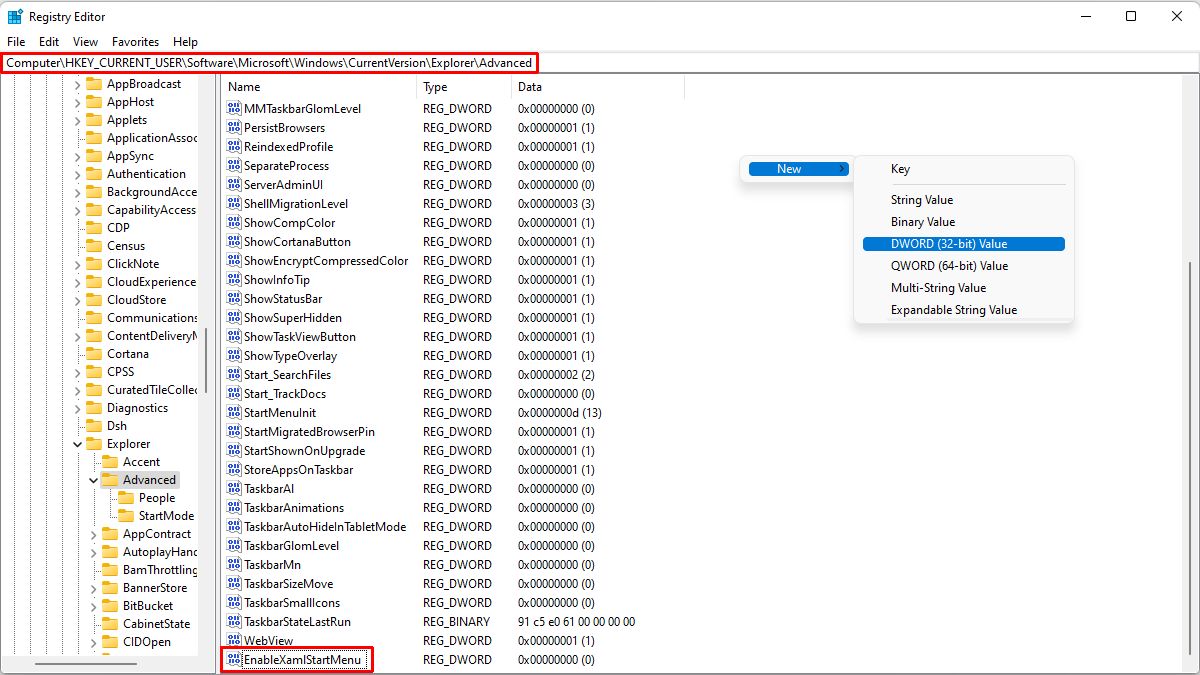
Press Windows + R to launch the Run menu, enter regedit, and press OK. Copy the destination below, paste it into the Registry Editor’s address bar, and hit Enter:
Computer\HKEY_CURRENT_USER\Software\Microsoft\Windows\CurrentVersion\Explorer\AdvancedRight-click into the void on the right in the Advanced folder, select New > DWORD (32-bit value) and name it EnableXamlStartMenu. Double-click the new value and ensure the Value data field is set to 0, which should be the default setting. Restart Windows Explorer or Windows to test whether this worked.
Remove Windows registry entry to bring back the classic Start menu
While in the registry, let’s remove one specific hack that no longer works. In the same location as outlined above, right-click the Start_ShowClassicMode value, and click Delete. If you can’t find this value, you’re good. After you delete it, also restart Windows or Windows Explorer.
Uninstall third-party Start menus
Open the Settings app (press Windows key + I), go to Apps > Apps & features, find the third-party Start menu app, click the three-dot button on the right, and select Uninstall.
Common Start menu alternatives include:
- Open-Shell-Menu (aka Classic Start)
- Start11
- StartAllBack
- StartIsBack++
- Start Menu X
Try one of these generic Windows fixes
The tips above were more or less directly related to the Start menu. If your Windows 11 Start menu still isn’t working, we’ll have to dig a little deeper. The following fixes are basic but might do the trick.
Boot into Safe Mode
If you’re hesitant to uninstall anything, boot into Safe Mode instead. In Safe Mode, Windows runs only essential apps and services. If this resolves the issue, a third-party app is likely interfering with the Start menu. In that case, go back and uninstall suspicious third-party apps, such as alternative Start menus, or perform a malware scan.
To boot into Safe Mode:
- Go to Settings > Windows Update > Advanced options > Recovery and click Restart now. Windows will remind you to save unsaved work.
- Click Restart now again, which should bring you to the Recovery screen.
- Click Troubleshoot > Advanced options > Startup Settings and press F4 to boot into Safe Mode.
Uninstall a recent Windows Update
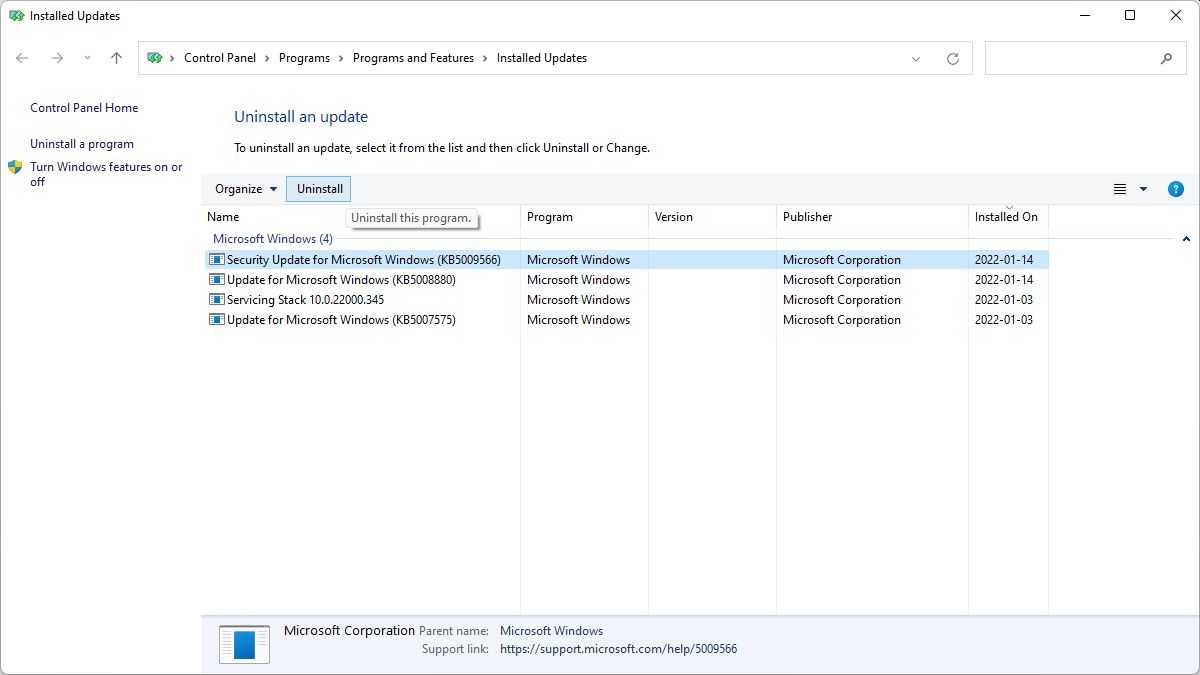
If the issue occurred right after you ran a Windows Update, roll it back. Head to Settings > Windows Update > Update history > Uninstall updates. This will launch the Control Panel. Select the most recent one from the list of updates and click Uninstall. If you have more than one update from the same day, rinse and repeat.
Update Windows 11
Sometimes, a Windows Update really fixes things. Head into Settings > Windows Update, click Check for updates and apply any pending.
Sign in to Windows with a local admin account
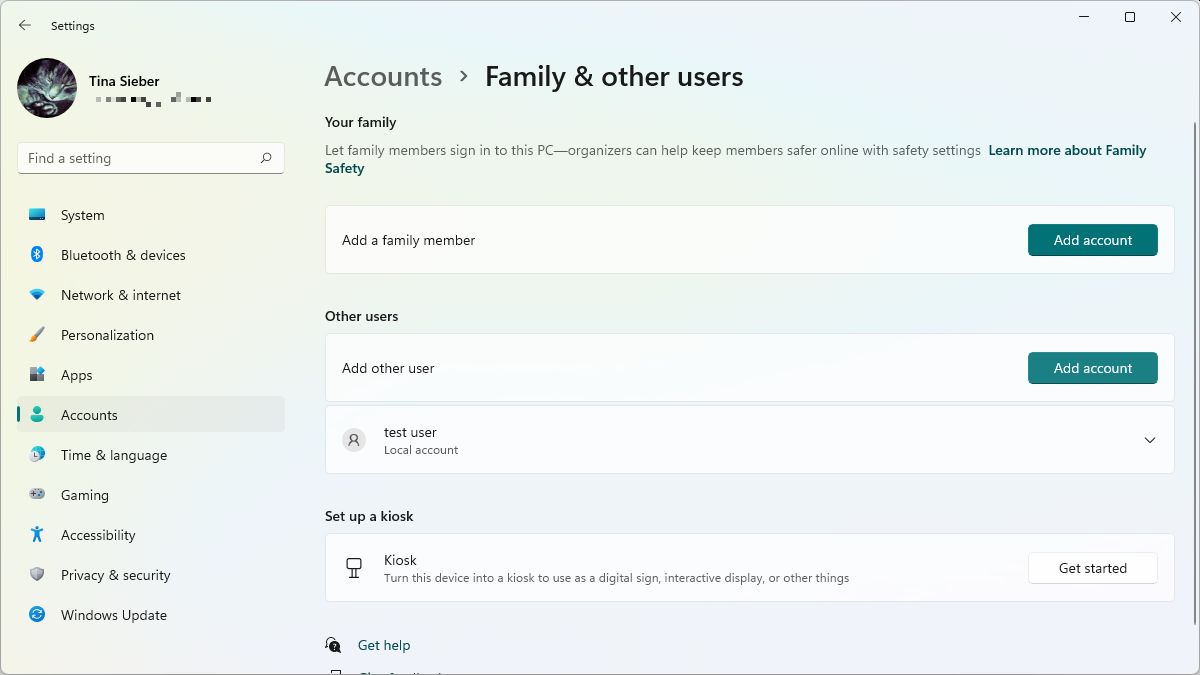
There’s a chance that the issue is with your account. An easy way to check this is to create a new local admin account.
Go to Settings > Accounts > Family & other users and select Add account under Other users. You want this to be a local account, so click I don’t have this person’s sign-in information in the window that pops up. Microsoft wants you to create an account, but you can get out of this by clicking Add a user without a Microsoft account. Finally, set a name and password for the new user, set security questions, then click Next.
You’ll have to sign out of your current account and into the new account to test whether the Start menu works there. You can switch user accounts or repair your Windows installation if it is.
Run the System File Checker (SFC)
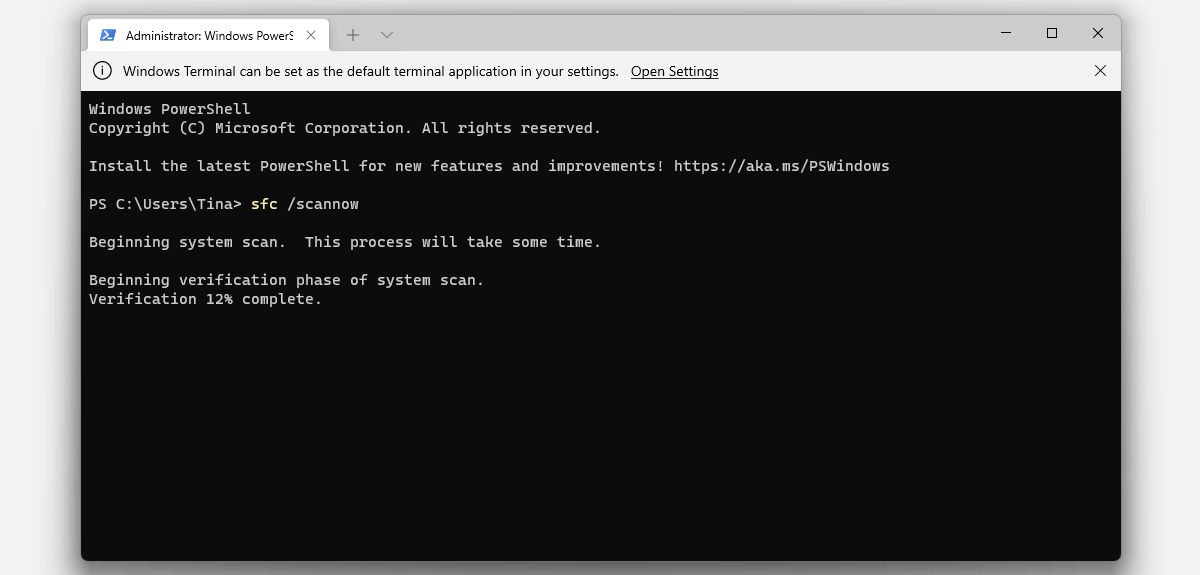
SFC is a Windows tool that can detect and repair corrupted files. Press Windows key + X, select Windows Terminal (Admin), and run the command below:
sfc /scannowWhen the process has been completed, restart Windows and see whether the issue persists.
Repair the Windows System Image with DISM
If SFC fails to fix your problem, try the Deployment Image Servicing and Management (DISM) tool, which repairs the Windows system image. Enter the following command into the Windows Terminal with admin privileges:
Dism /Online /Cleanup-Image /RestoreHealthWait for the process to complete, then restart Windows.
Reset Windows 11
The brute force solution to all Windows issues is reinstalling the operating system from scratch. Fortunately, you can reset Windows 11 without losing everything.
- Launch Settings, go to Windows Update > Advanced options > Recovery, and click Reset this PC.
- In the next window, choose Keep my files, which will remove apps and settings but won’t delete your personal files. Follow the on-screen instructions and cross all your fingers and toes; this must work.
Windows Start menu still not working?
You can always fall back on a third-party Start menu if all else fails. Many will argue it’s the best thing to do in the first place. My recommendation is Start Menu X because it’s free and fully customizable.
Read more: How to move the Start menu in Windows 11
FAQs
Microsoft has retired the Start menu troubleshooter, but you can still download it from sites like Softpedia. While the troubleshooter was designed for the Windows 10 Start menu, Windows 11 is quite similar, so you could try it. When we tested the Start menu troubleshooter on Windows 11, it seemed to run without a hitch. However, it claimed “required applications are not installed correctly,” although our Start menu worked fine. It was unable to fix the nonexistent issue.
To move the start menu you’ll want to open the Settings menu (found in the pinned items in the Start Menu). Go to Personalization > Taskbar > Select Taskbar Behaviors. From there you can change the Taskbar alignment from Center to Left. Unfortunately, you can’t move the taskbar to other sides of the screen like in previous versions of Windows.
You’ll neeed to download the Explorer patcher from GitHub. Once downloaded, you’ll immediately get the Windows 10 taskbar. To get the old Start Menu you’ll want to right-click on your taskbar and select properties. Select Start Menu and you’ll see it default to Windows 11 style. Simply change it to the Windows 10 option. Below this ensure Position on Screen is set to At Screen Edge.