Affiliate links on Android Authority may earn us a commission. Learn more.
Raspberry Pi - Everything you need to know

Computers come in all shapes and sizes. Back in the day, a “computer” was a huge machine that filled a room and could be only found in a few places around the world. Today, we have everything from smartphones to supercomputers (which don’t just fill a room, but an entire warehouse) and everything in between.
One popular type is the Single Board Computer (SBC) which, as its name implies, is a computer on a single printed circuit board. These boards are very low level. No case, no bundled peripherals, just the board, and lots of connectors! They are great for hobbyists, makers, enthusiasts, and professionals alike. Probably the most famous SBC is the Raspberry Pi. Here is our guide to everything you need to know about the Raspberry Pi!
What is a Raspberry Pi?
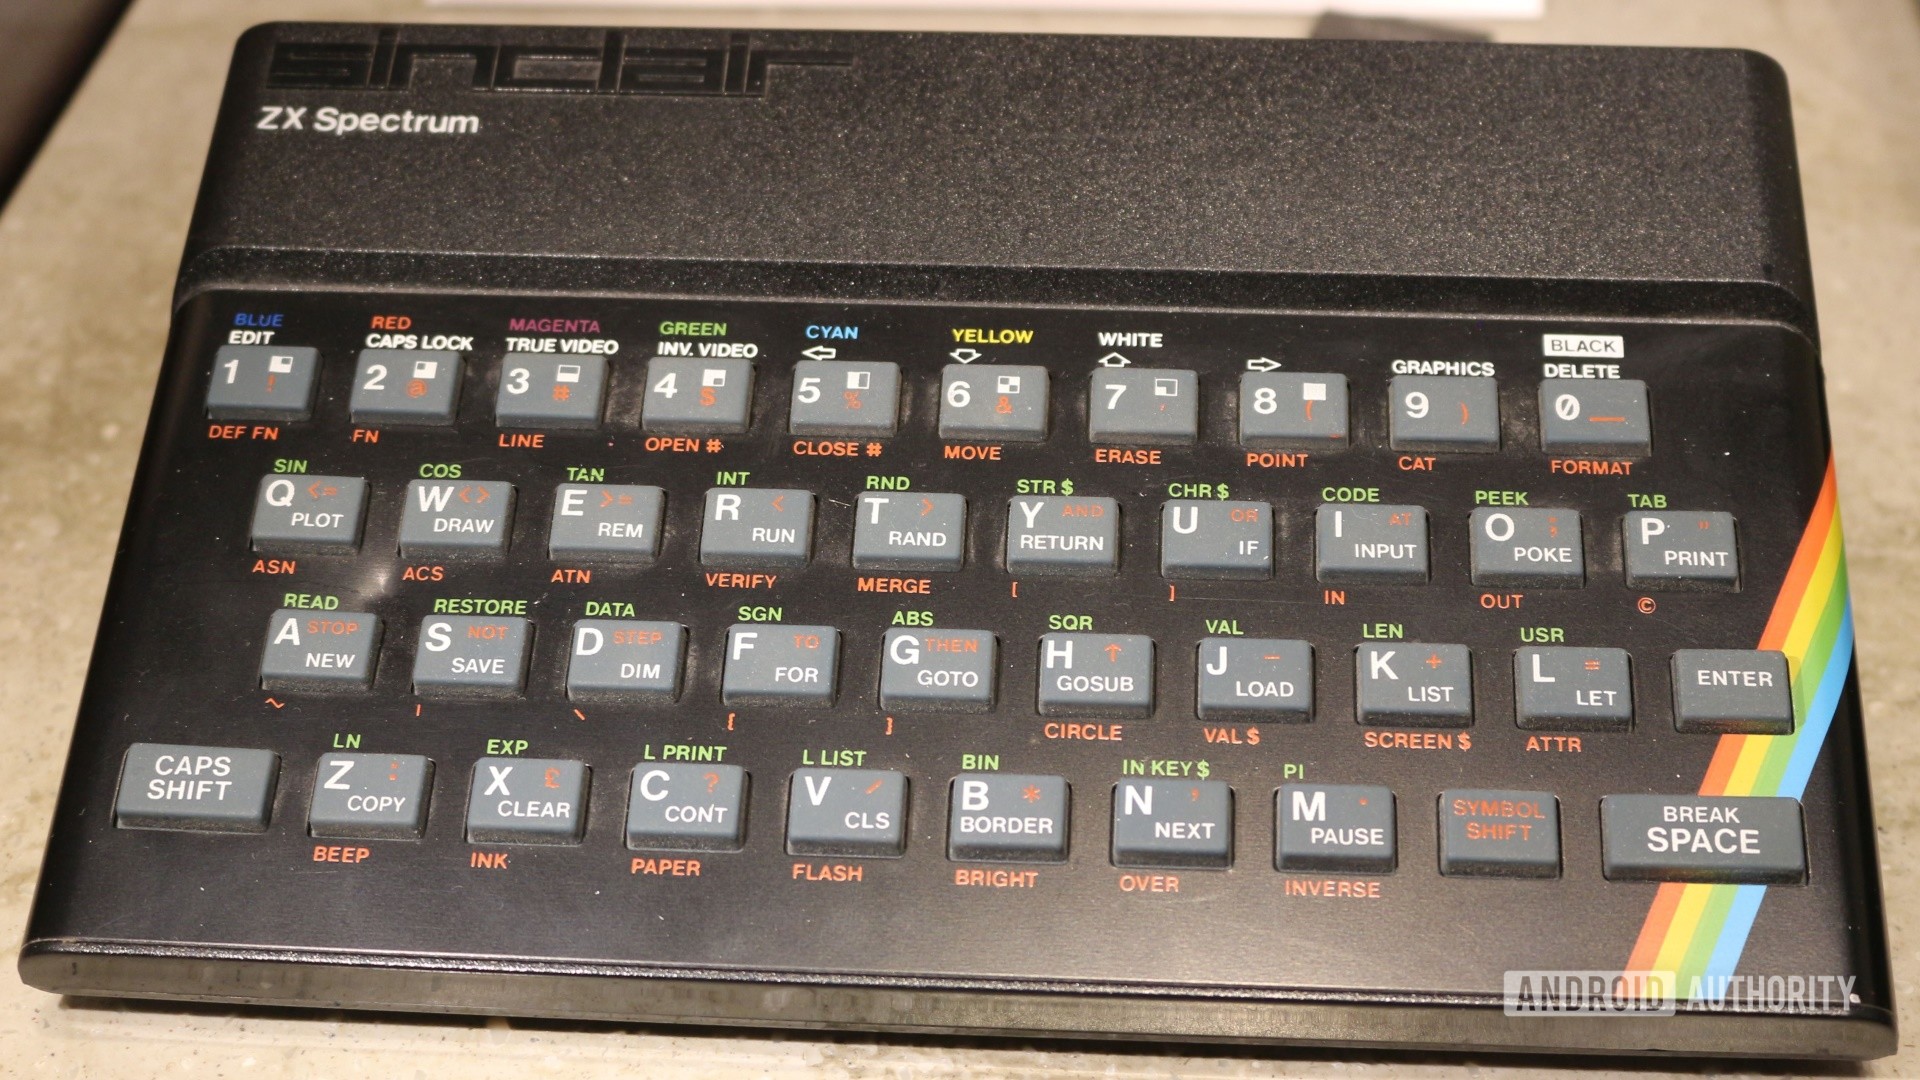
The first Raspberry Pi boards were released in 2012. They were designed to fill a gap left by the passing of the home computer revolution of the 80s and 90s. Several significant home computers were launched in the 1980s including the Commodore 64, the Sinclair ZX Spectrum, and the BBC Micro. These machines (along with many others) spawned a revolution that brought computing into the home. As a result, many children from those decades grew up around computers. This in turn sparked an increase in the number of people applying to study computer science-related courses at university. Yet, once the home computer revolution faded away and was replaced by the PC era, the number of people studying computer science decreased.
Eben Upton, a child of the home computer revolution, decided to see if this decline could be reversed by introducing a low-cost, powerful, and flexible computer. And so the Raspberry Pi was born.

The original Raspberry Pi (called the Raspberry Pi Model B) was released in February 2012. It used an Arm-based processor from Broadcom with a single-core ARMv6 CPU clocked at 700MHz and a Broadcom VideoCore IV GPU running at 250 MHz. It originally included 256MB of RAM, but that was quickly upgraded to 512MB. There were two USB 2.0 ports (for the keyboard and mouse) and an HDMI port to connect the board to a TV or monitor. There was also a fast Ethernet port. It was powered using a fairly standard micro-USB phone charger and could run several operating systems including the official Linux distribution known as Raspberry Pi OS (previously called Raspbian).
For those wanting to learn programming and software development, the Pi supports a multitude of programming languages including C, C++, Rust, Go-lang, and Javascript (to name a few). However, Python is the semi-official language of the Pi, with much of the documentation focusing on how to use the board from within Python.
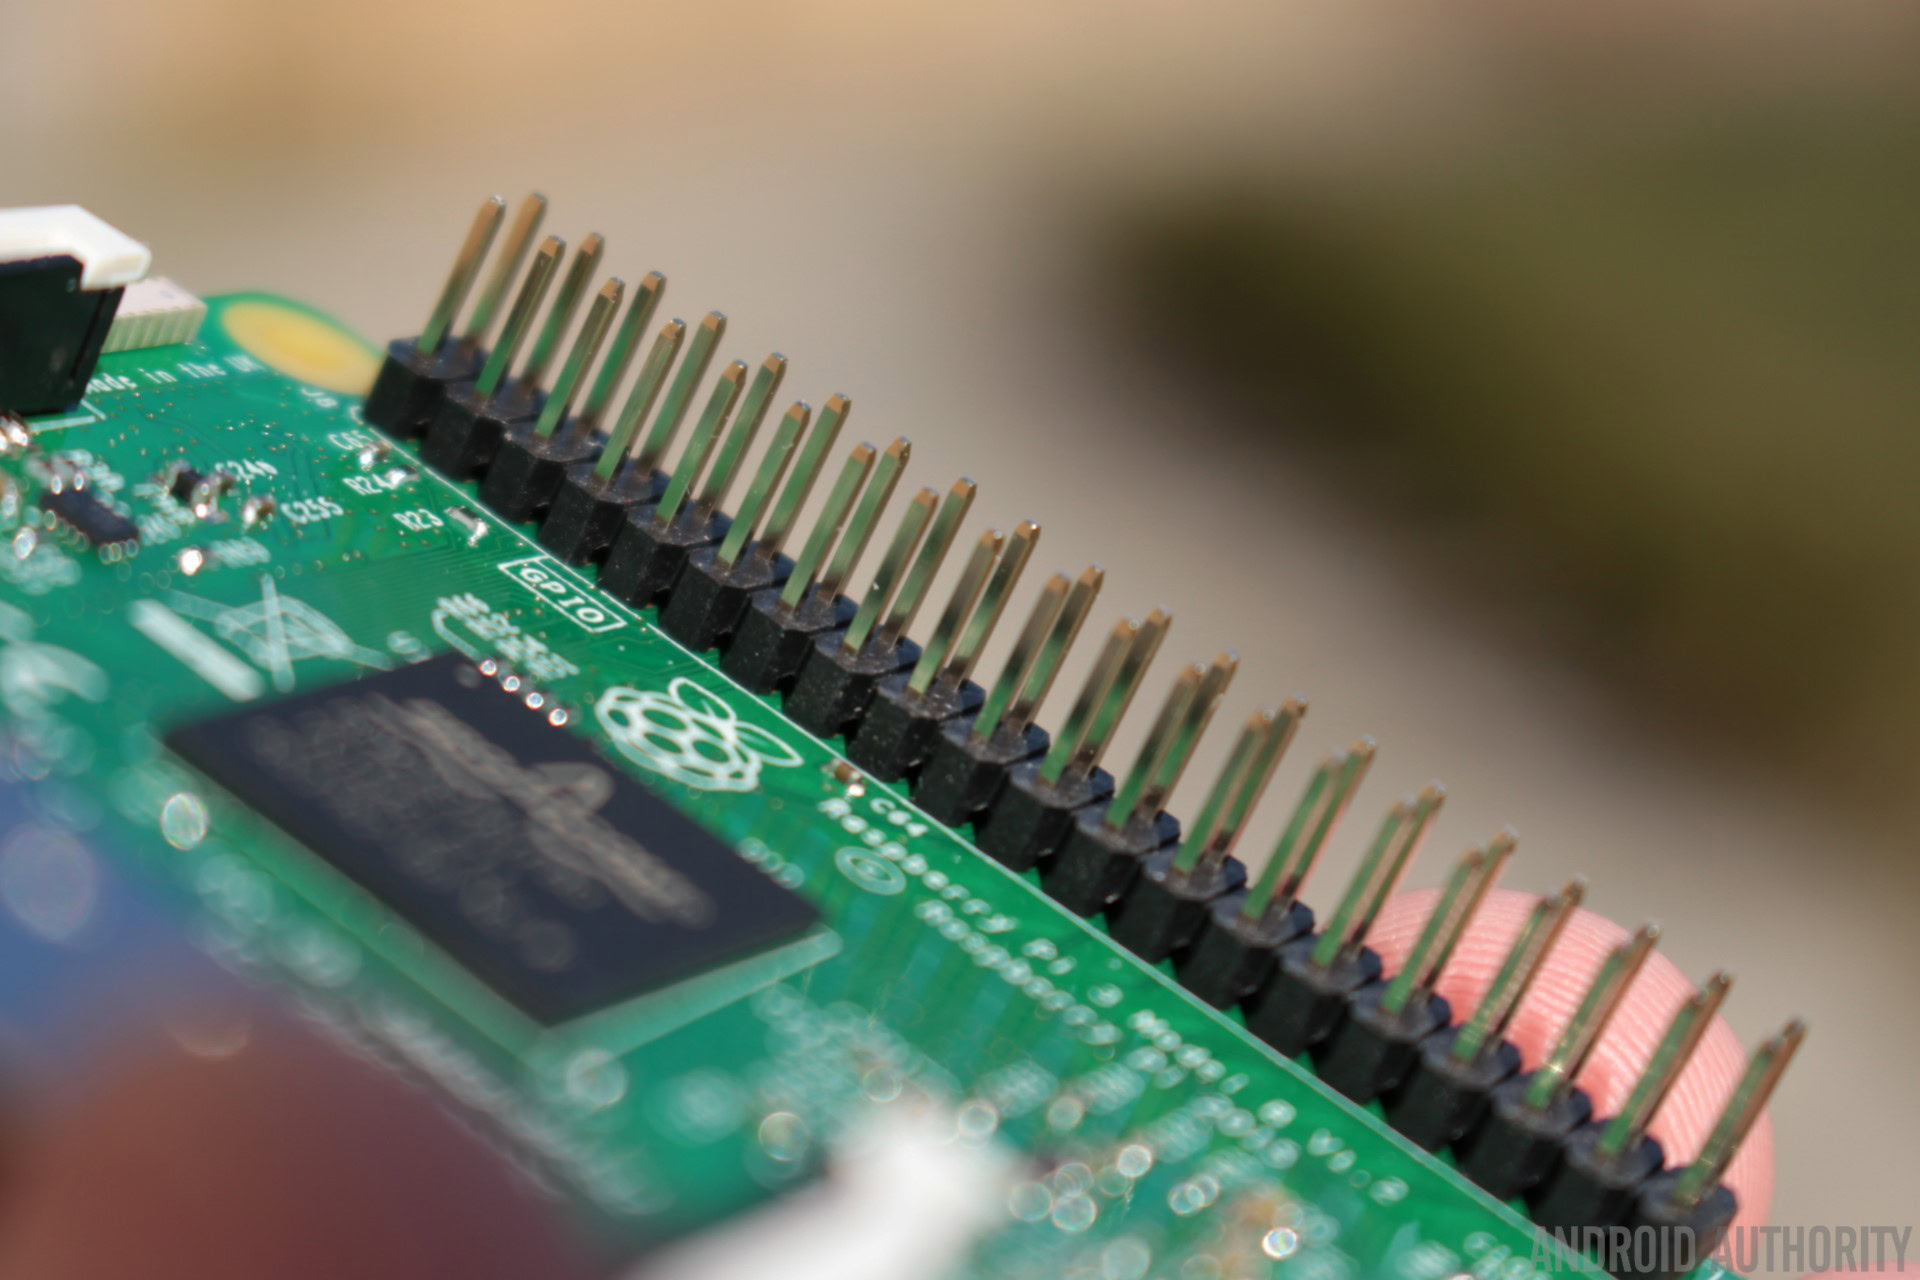
The Pi differs from other common computers (smartphone, laptops, desktops, etc) because it includes pins which can be used to control electronic circuits. These are known as the General-purpose input-output (GPIO) pins. There were 26 of them on the original Pi, and the number was increased to 40 pins for all subsequent boards. These pins allow the board to interact with hardware — from a simple LED to complex motors and robotics. It can not only control these external devices but also read data from them. This means that the board can use sensors (everything from temperature sensors to cameras) and then react according to the data it received.

The Raspberry Pi has different variants in each series (starting with the original Pi). The models are differentiated using the names “Model A”, “Model B”, “Model B+”, etc, which are all references to the BBC Micro which came in different models with a similar labeling scheme. The BBC Micro was developed by Acorn, which eventually morphed into Arm. It is no coincidence that the Raspberry Pi boards use Arm-based processors.
The very first Pi was the “Model B”. This was followed by a simpler (with fewer ports) and cheaper “Model A”. By 2014 the Raspberry Pi range included Models A, A+, B, and B+, each with different levels of complexity while maintaining the same general level of functionality.
Different Raspberry Pi models
The success of the original Raspberry Pi allowed the Raspberry Pi Foundation, the not-for-profit organization responsible for the Pi, to develop a successor — the Raspberry Pi 2. The Pi 2 was a huge upgrade from the Pi 1. The CPU was upgraded from a single-core ARMv6 to a quad-core ARMv7 clocked at 900MHz, plus the RAM was upped to 1GB.
In 2016, the Raspberry Pi foundation released the Raspberry Pi 3 Model B and the Pi took the leap to 64-bits. The new model included a 64-bit quad-core ARMv8 processor running at 1.2GHz, plus onboard 802.11n Wi-Fi, Bluetooth, and the possibility to boot from the USB port (rather than the built-in micro-SD card slot). On Pi Day (March 14) 2018, the Raspberry Pi 3 Model B+ was launched with a faster 1.4 GHz processor, faster Ethernet, and dual-band Wi-Fi. The Pi Foundation has committed to manufacturing the Pi 1, Pi 2, and the Pi 3 until at least January 2026.
Also see: Raspberry Pi 3 Model A+ Review & Raspberry Pi 3 Model B+ review
The current model is the Raspberry Pi 4. It was released in June 2019 and offers significant improvements over the Pi 3.
What is the difference between the Raspberry Pi 3 and the Raspberry Pi 4?
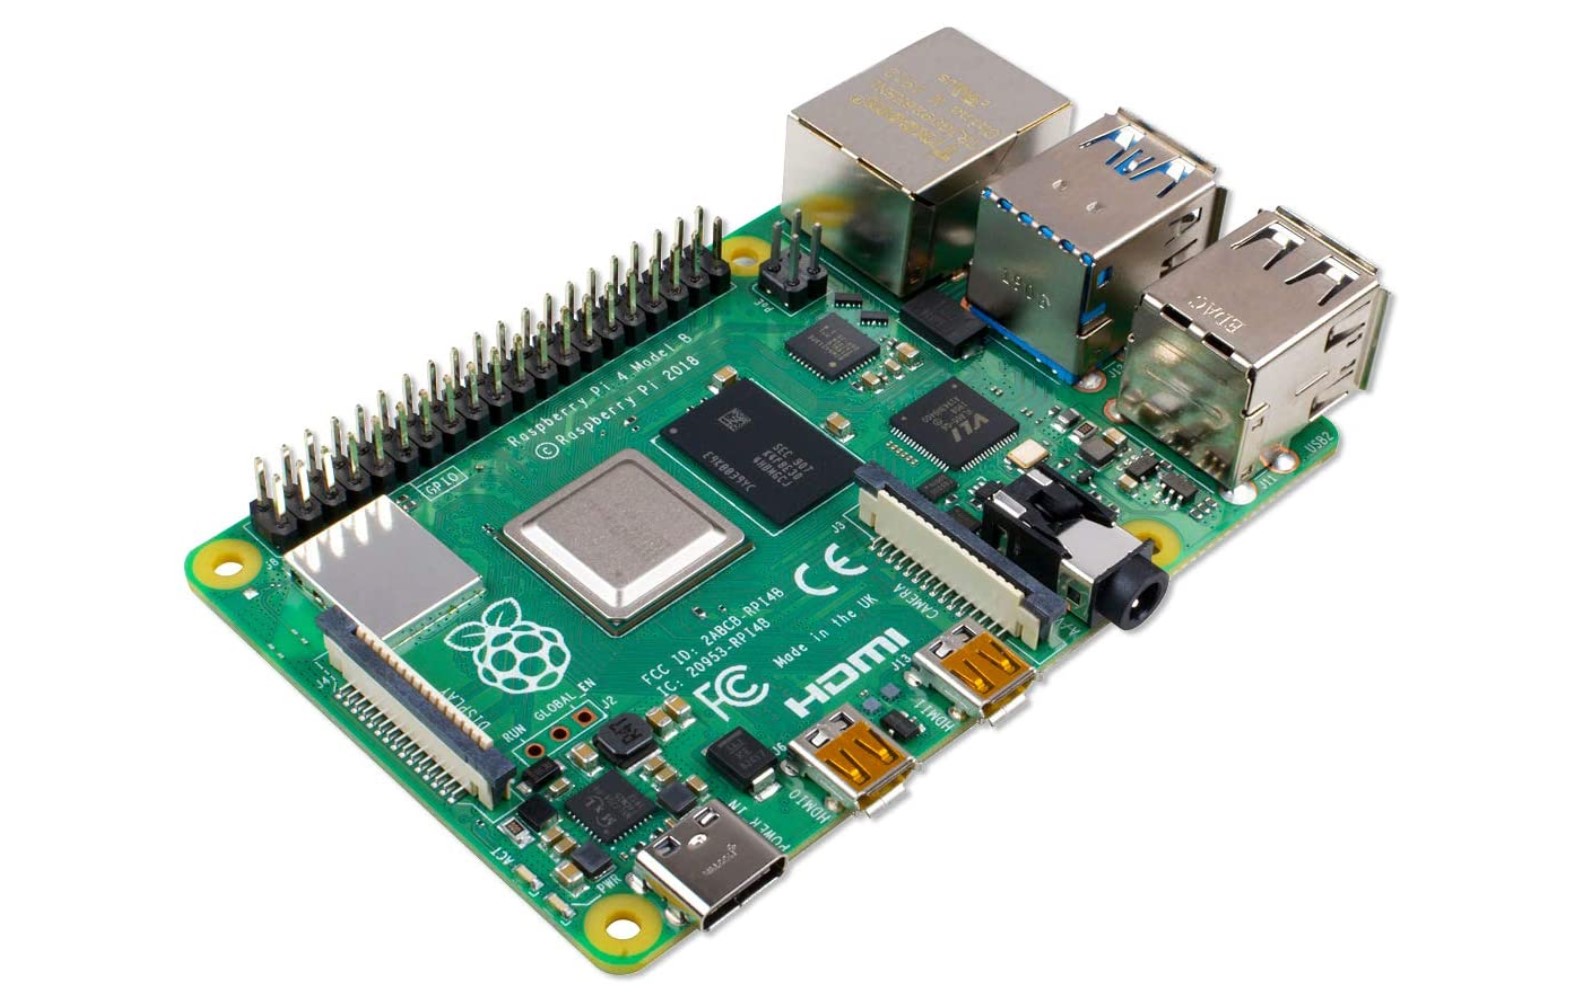
The Raspberry Pi 4 included several important improvements compared to the Raspberry Pi 3. First, the processor was upgraded from the Cortex-A53 based Broadcom BCM2837 to the newer Broadcom BCM2711 SoC. It uses a 1.5 GHz 64-bit quad-core ARM Cortex-A72 processor. The new processor also included a better GPU, the Broadcom VideoCore VI clocked at 500 MHz. In other words, the Pi 4 is significantly faster than the Pi 3. The RAM was also upgraded. The initial rollout included 1GB, 2GB, and 4GB models. It subsequently was improved further to 2GB, 4GB, and 8GB.
The Pi 4 also used USB 3.0 ports for the first time, while the Ethernet was upgraded to true Gigabit Ethernet. The power for the board now comes via USB-C rather than micro-USB, and the board now has two HDMI ports (both micro-HDMI) which together can drive two 4K monitors simultaneously.
In short: faster, with more RAM, better Ethernet connectivity, and 4K video!
The Raspberry Pi 400: A starter computer just like in the 1980s
As mentioned earlier, Eben Upton was a child of the home computer revolution. Back then, home computers looked very different from the desktop PCs of today. The ZX Spectrum, the Commodore 64, the BBC Micro, the Vic 20, the Acron Electron, the Commodore Amiga, the Atari ST, and even the Apple II, all had one thing in common: the keyboard was part of the case. It was part of the plastic mold and the actual computer internals lived underneath. Peppered around the case you would find the various ports, including power, but no keyboard port, because it wasn’t needed, the keyboard was part of the design.
Knowing that, it isn’t hard to see where Eben got the inspiration for the Raspberry Pi 400. Unlike its other name-sakes, the 400 is a complete computer, including a built-in keyboard. You just connect it to a TV or monitor and you are ready to go, just like the home computer classics.
Read the full review: Raspberry Pi 400: The perfect starter computer for young tech learners
The Pi 400 is slightly faster than the Raspberry Pi 4. Clocked at 1.8Ghz (up from 1.5Ghz in the Pi 4) it includes 4GB of RAM, a microSD card slot for the OS, 2x USB 3.0 ports (plus a USB 2.0 port), 2x micro HDMI, Gigabit Ethernet, dual-band (2.4GHz and 5.0GHz) IEEE 802.11b/g/n/ac Wi-Fi, and Bluetooth 5.0.
Since this is a Pi, you still get access to the 40-pin GPIO, but there is no audio port, or camera interface. Compared to a traditional Raspberry Pi, the Pi 400 is easier to set up, and is less intimidating. It is a great gift for encouraging younger enthusiasts to expand their tech horizons.
What is the difference between the Raspberry Pi 4 and the Raspberry Pi Zero?
The naming scheme of the Raspberry Pi is easy enough. We have the renamed-in-retrospect Raspberry Pi 1, then the Raspberry Pi 2, then the 3, and now the Raspberry Pi 4. But there is also another member of the family, the Raspberry Pi Zero. It is quite different from the other Pi boards, but just as useful and fascinating.
The form factor and design of the Pi Zero differ from the other boards. Rather than the almost credit-card sized design (85mm by 56mm) of the mainline Pi boards, the Pi Zero is just 65mm by 30mm (about 2.5 inches by 1.2 inches). The GPIO pins aren’t populated (but the holes are there if you want to solder in your own header), there is no wired Ethernet, nor USB-A ports. Just a single micro-USB port that can be adapted and attached to a regular USB hub. Also, the processing power is similar to that of the Raspberry Pi 1 (actually it is slightly faster) and doesn’t come with the quad-core luxuries of the later Pi models. However, it is an incredible value for money. The basic Pi Zero sells for just $5, and for $10 you get a version with built-in Wi-Fi and Bluetooth.
What is the Raspberry Pi Compute Module?
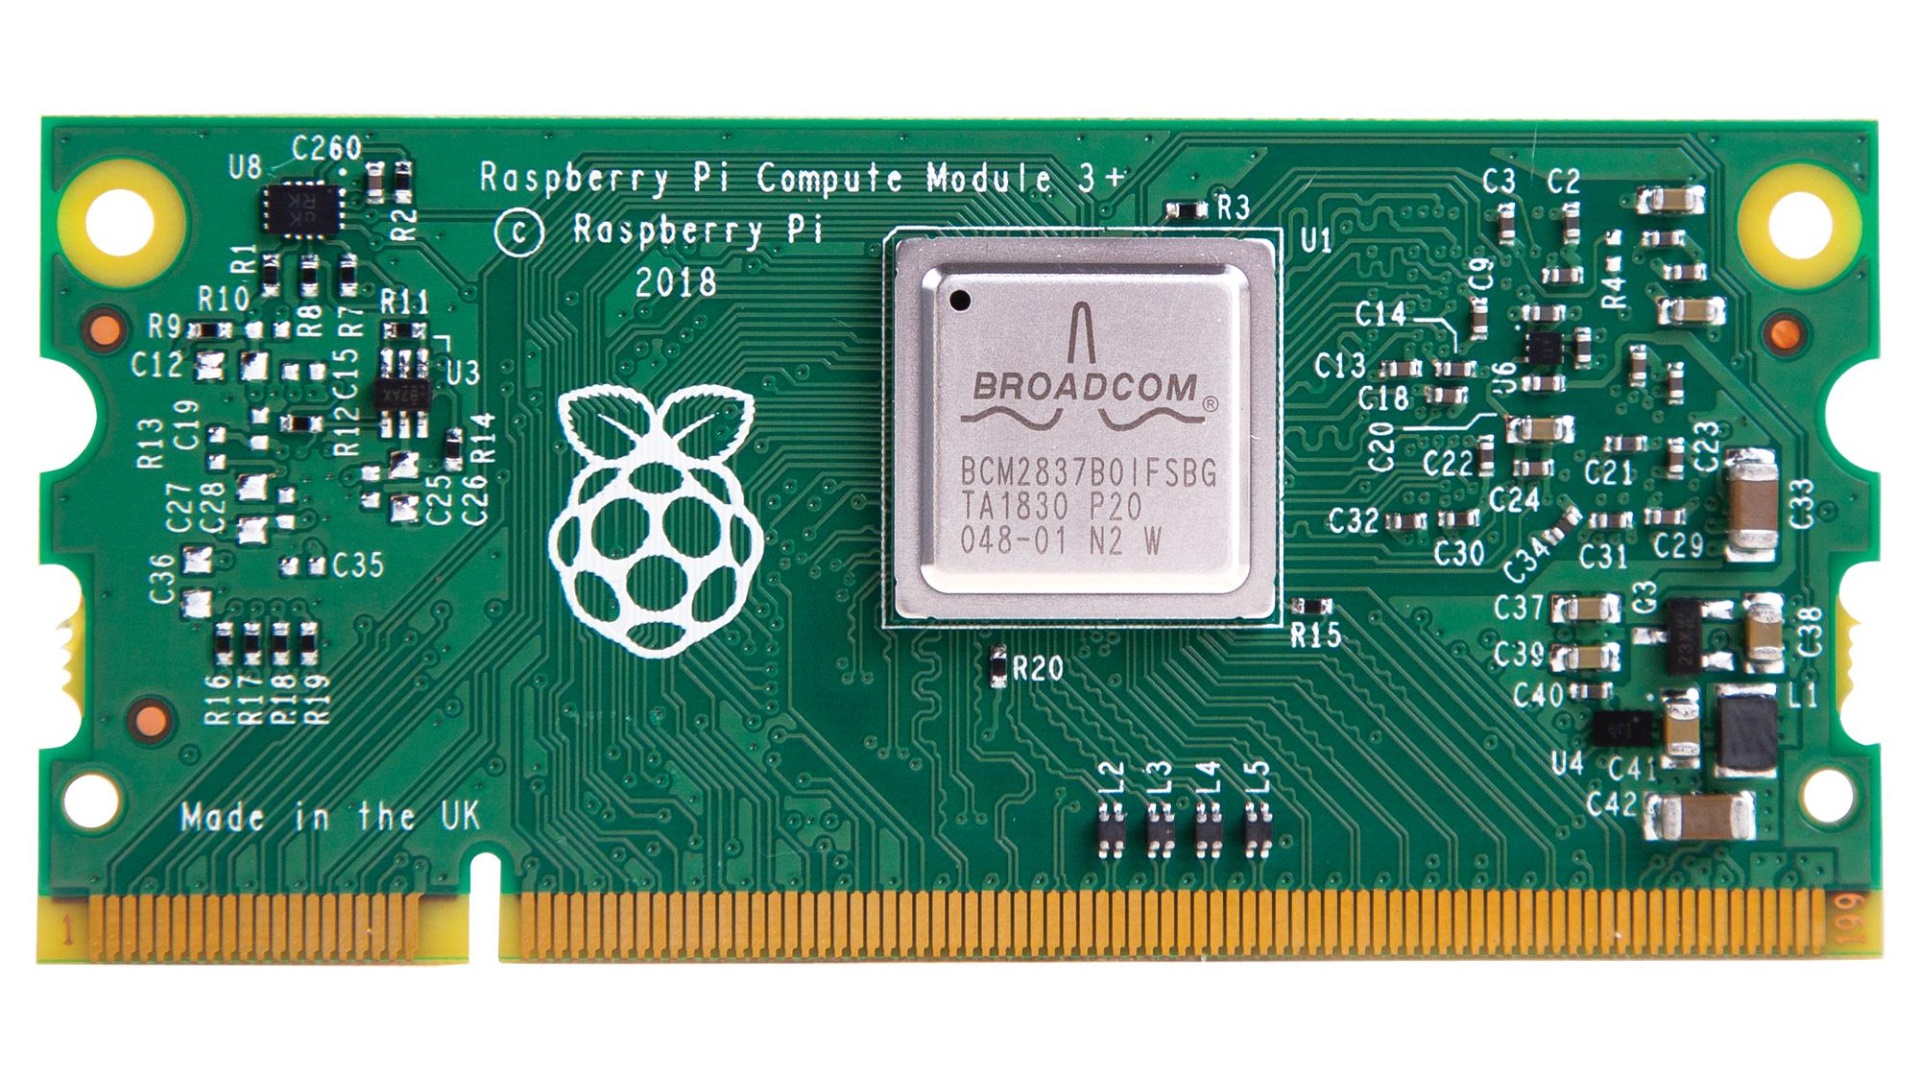
While the normal Pi boards are great for hobbyists and makers, all those ports and pins can be a bit annoying for embedded hardware designers or industrial engineers. Not because they don’t want all the ports, but because they want to be able to use the Pi in custom projects where the position of the ports, how the board is powered, etc., need to be altered according to the application. In other words, hardware engineers know how to design boards for their projects. They just want the power of the Pi on a board with an edge connector that they can slot into their design.

What is the difference between a Raspberry Pi and an Arduino?
Another popular board with makers and hobbyists is the Arduino. Like the Raspberry Pi, it isn’t one board, but rather a whole family. The Arduino is a microcontroller board that allows you to write software (using the Arduino IDE) and upload it to the board to control external circuits. Like the Pi, that means you can control anything from LEDs to stepper motors or relays.
The big differences between the two ecosystems are that the Arduino uses a microcontroller, not a fully-fledged CPU. That means that the Arduino runs at much lower clock speeds, anything from 16MHz to 80MHz, and has small amounts of RAM (from 2K to 32K). It can’t run a modern OS like Linux either, but rather runs the software programmed directly on it via the Arduino IDE. However, the advantages of these simpler systems are that they use much less power, plus they boot in just a second or two. Perfect for standalone projects that need very low power, fast boot times, and reliability.
While some Arduino boards have Wi-Fi built-in, if you want to do anything beyond very simple networking then you will need a Raspberry Pi. Since it runs Linux then you have access to a multitude of technologies from databases or webservers to Docker or Kubernetes.
Arduino clones from China tend to be quite cheap and the official Arduino boards cost anywhere from $10 to $60. A Raspberry Pi Zero W, with built-in Wi-Fi and Bluetooth, costs around $10.
What can you do with a Raspberry Pi?
The different ways to use a Raspberry Pi are potentially limitless. Anything and everything from learning to write computer programs in Python to tracking aircraft traffic over your house. In general, there are three main categories of usage:
- General computing – This includes using the Pi as a desktop computer. You can surf the web and use social media, consume media including watching videos and listening to music; play games, including the original version of Minecraft which is free on the Pi. Just about anything else you can do on a normal desktop or laptop.
- Learning about software and hardware – The Pi is a great tool for learning about writing programs. You can learn to program in C, C++, Python, Rust, Go, Javascript, etc; plus you can interact with hardware including LEDs, buzzers, switches, sensors, motors, relays, and more, using Python. There is also a dedicated camera connector for use with a compatible Pi camera which allows you to explore even more, including image recognition, and machine learning.
- Controller and hub – The Raspberry Pi works with lots of interesting peripherals including 3D printers, cameras, and ADS–B receivers, to name just a few. Using a Pi to control and monitor an external peripheral means you don’t have to have a PC switched on all the time. No noise and a lower electricity bill!
If you are looking for some fun projects for your Raspberry Pi then check out our article on the top Raspberry Pi projects.
Getting started with the Raspberry Pi
The Raspberry Pi comes with the bare minimum, just the board. To get it up and running you are going to need a few extra things:
- A microSD card: Use a microSD card with at least 16 GB capacity, and at least class 10.
- A power adapter: A 5V power adapter is needed to power the Pi. If you have a Raspberry Pi 4, it needs to have a USB-C port, for the others it needs micro-USB. You can use a good phone charger, but note that it needs to be rated for at least 2A for a Pi Zero, Pi 1 or Pi 2; or 2.5A for the Pi 3; or 3A for the Pi 4. If in doubt get the official power supply.
- A TV or monitor with HDMI – It is possible to run a Pi “headless” (that is without a monitor) but for beginners, using a monitor is essential.
- HDMI cable – You connect your Pi to your TV or monitor using an HDMI cable. Depending on the model, you may need an adapter to mini-HDMI (Pi Zero) or micro-HDMI (Pi 4).
- USB Keyboard & USB Mouse
- Internet connection – To get the most out of your Pi you will need an Internet connection (although it isn’t strictly necessary). The large Raspberry Pi models have a standard Ethernet port to connect them to the internet. Also, the Raspberry Pi 3, 4, and Pi Zero W can connect wirelessly to the internet.
Before you power up the Pi you need to copy the Raspberry Pi OS onto the microSD card. The easiest way to do this is with the Raspberry Pi Imager. Download it from the Raspberry Pi downloads page and install it.
Insert your micro SD card into your computer and start the Raspberry Pi Imager. Select the OS that you want to install (i.e. Raspberry Pi OS) and the SD card you would like to install it on. Click “Write” and wait for the process to finish.
You also might want to take a look at How to Use the Raspberry Pi Imager — a quick how-to tutorial about the Pi’s SD card imager (including an important tip that saved me loads of time and stress).
Insert the freshly minted microSD card into your Pi and power it on. You should see a red LED light up on the board. As it boots, raspberries will appear in the top left-hand corner of the screen. After a few seconds, you will see the desktop. Congratulations!
Since this is your first boot, you will see the “Welcome to the Raspberry Pi” app. It will guide you through the rest of the setup, including selecting your country, language, and timezone. You can set a password, configure the networking, and install the latest updates.
The Raspberry Pi Foundation has some excellent documentation and tutorials on setting up your Pi. Your first stop should be: Get started with Raspberry Pi. There is also a help section and a troubleshooting guide.
Where to buy
If you’ve reached this point, you’re probably itching to get your hands on a Raspberry Pi of your very own. The good news is that there are plenty of ways to pick one up. Your best bets for hardware are Amazon and Best Buy, as both retailers carry a number of starter kits and projects to try.
However, the secret to a successful project often relies on a bit of hands-on instruction, which is where Tech Deals comes in. The site is jam-packed — pun intended — with Raspberry Pi learning kits as well as a few projects of its own. You can dig into quite a few Complete Raspberry Pi bundles or grab the Ultimate Raspberry Pi eBook bundle if you want to read along at your own pace.
It’s tough to recommend which kit you should start with, but you can always take the simple approach and go for the Raspberry Pi 4. Check it out at the widget below:
