Affiliate links on Android Authority may earn us a commission. Learn more.
What is NVIDIA Broadcast? How to set up and use it
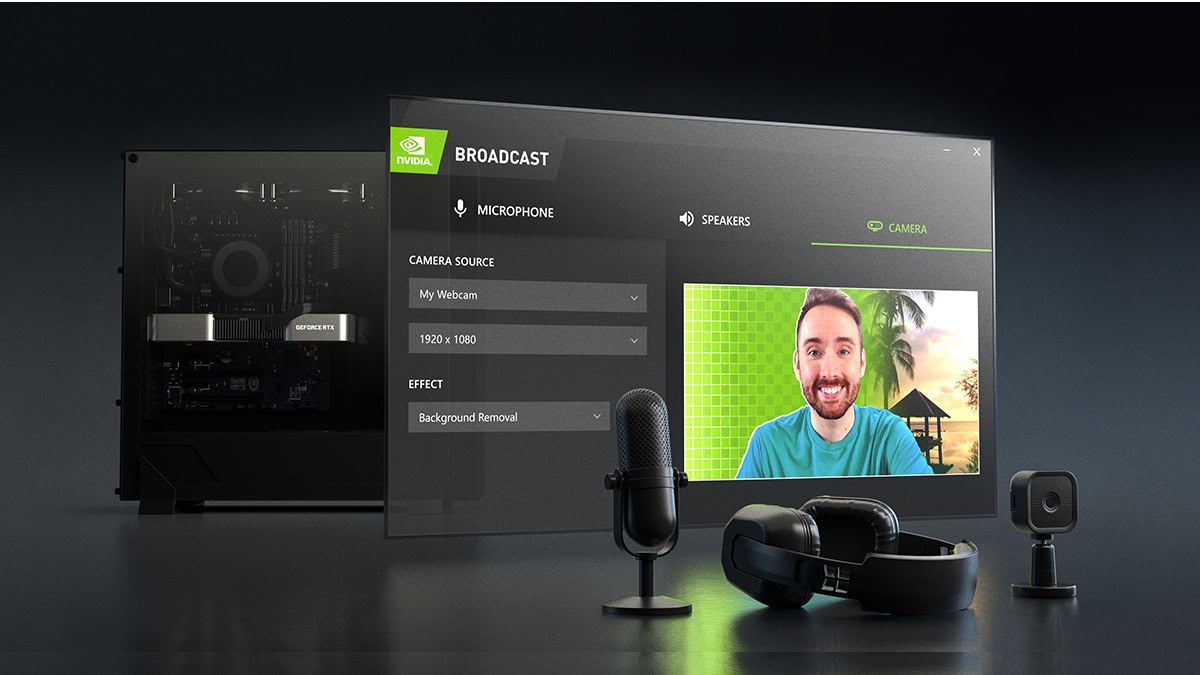
NVIDIA is one of those companies that is great at giving additional software functionality for its hardware. Your GPU can do more than just output a display signal and game, and NVIDIA helps you do precisely that. NVIDIA Broadcast is a great example, and it can use your GPU’s power to improve your streaming and conferencing experience. Here is what NVIDIA Broadcast is, and how you can set up and use it.
JUMP TO KEY SECTIONS
What is NVIDIA Broadcast?
NVIDIA Broadcast is an AI-powered app that helps improve the quality of your video and audio for streaming, calls, and video conferencing. NVIDIA says it can help you transform your room into a home studio, which isn’t entirely accurate. But it can certainly help you improve the quality of your video and audio output. It started as RTX Voice, with the audio features, and then graduated into a fully-fledged audio and video effects software.
It offers features like microphone noise and room echo removal, virtual background, webcam auto frame, and video noise removal. However, this doesn’t work with every NVIDIA GPU. NVIDIA Broadcast relies on the Tensor cores found in RTX GPUs to deploy these AI features. So you’re going to need an RTX-capable GPU to use NVIDIA Broadcast. Below are the minimum system requirements to run NVIDIA Broadcast.
| NVIDIA Broadcast system requirements | |
|---|---|
GPU | NVIDIA GeForce RTX 2060, Quadro RTX 3000, TITAN RTX or higher |
RAM | 8GB RAM or higher |
CPU | Recommended: Intel Core i5 8600, AMD Ryzen r5 2600 or higher |
Driver | NVIDIA Studio Driver 462.46, Game Ready Driver 465.89, NVIDIA RTX Enterprise Driver 462.59, and above |
Operating System | Windows 10 64-bit |
Read more: What is NVIDIA G-Sync?
How to set up and use NVIDIA Broadcast
If your PC meets the minimum system requirements, follow these steps to get started with NVIDIA Broadcast. Head over to the official NVIDIA Broadcast website. Download and install it, and run it when done.
Microphone noise and echo removal
In NVIDIA Broadcast, click the Microphone tab towards the top. Select your default microphone under Microphone Source by clicking the drop-down box.
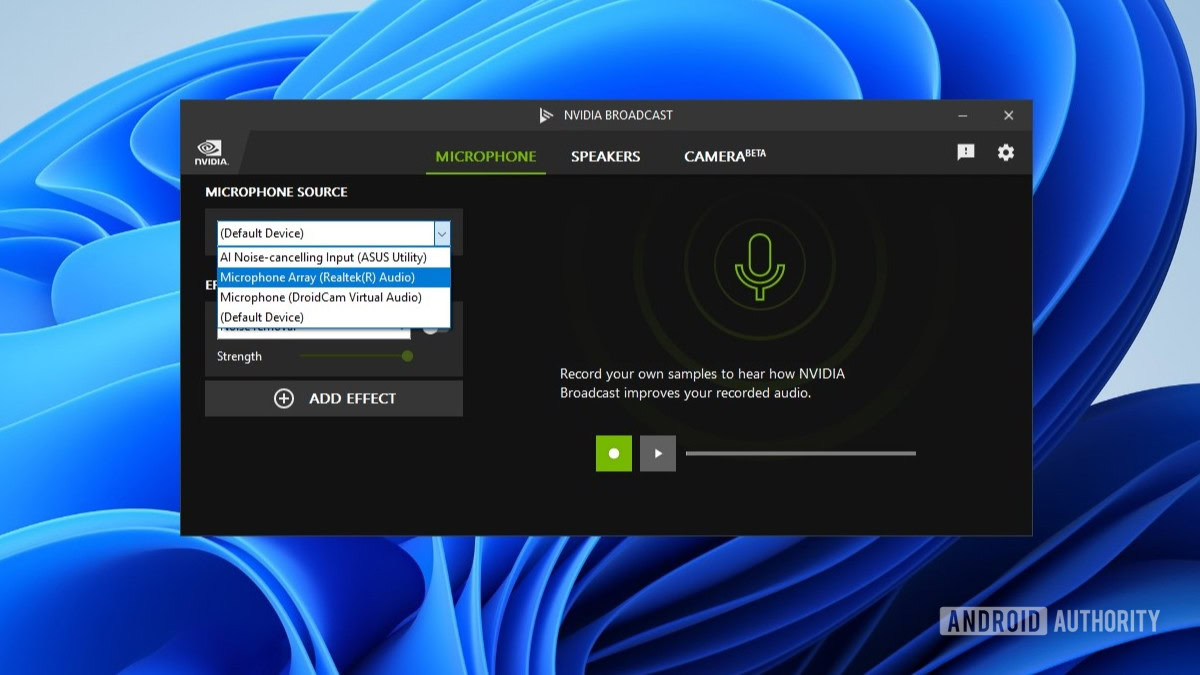
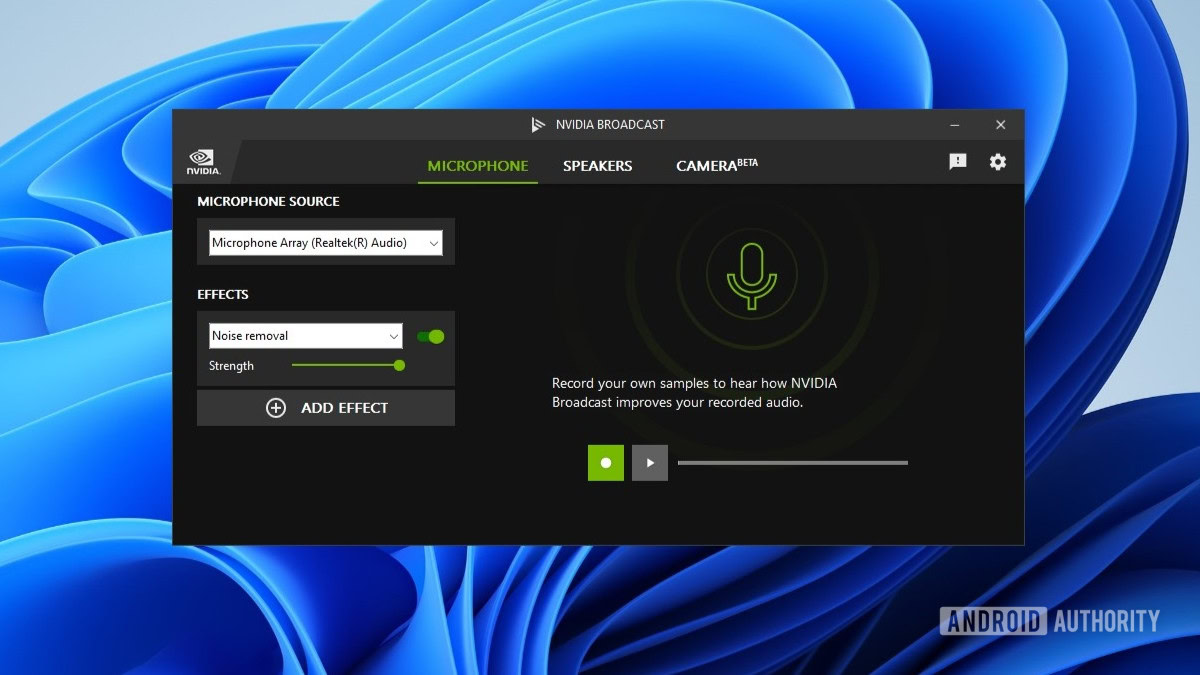
Once done, you can select the desired effects from the same screen. Noise removal will be shown under Effects by default. Click the toggle next to it to enable it.
Click the Add effect button under the noise removal tab to enable echo removal. The Room echo removal (beta) effect will appear automatically selected. If not, click the new drop-down that has appeared, and click Room echo removal (beta). Click the toggle next to it to enable it.
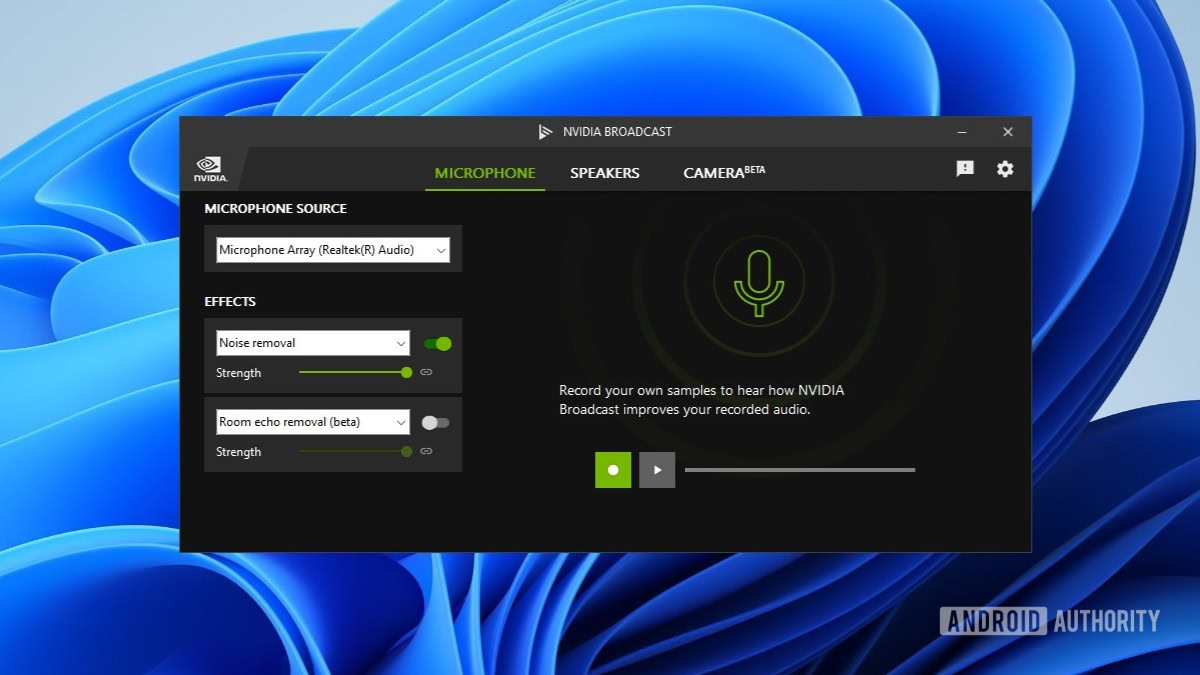
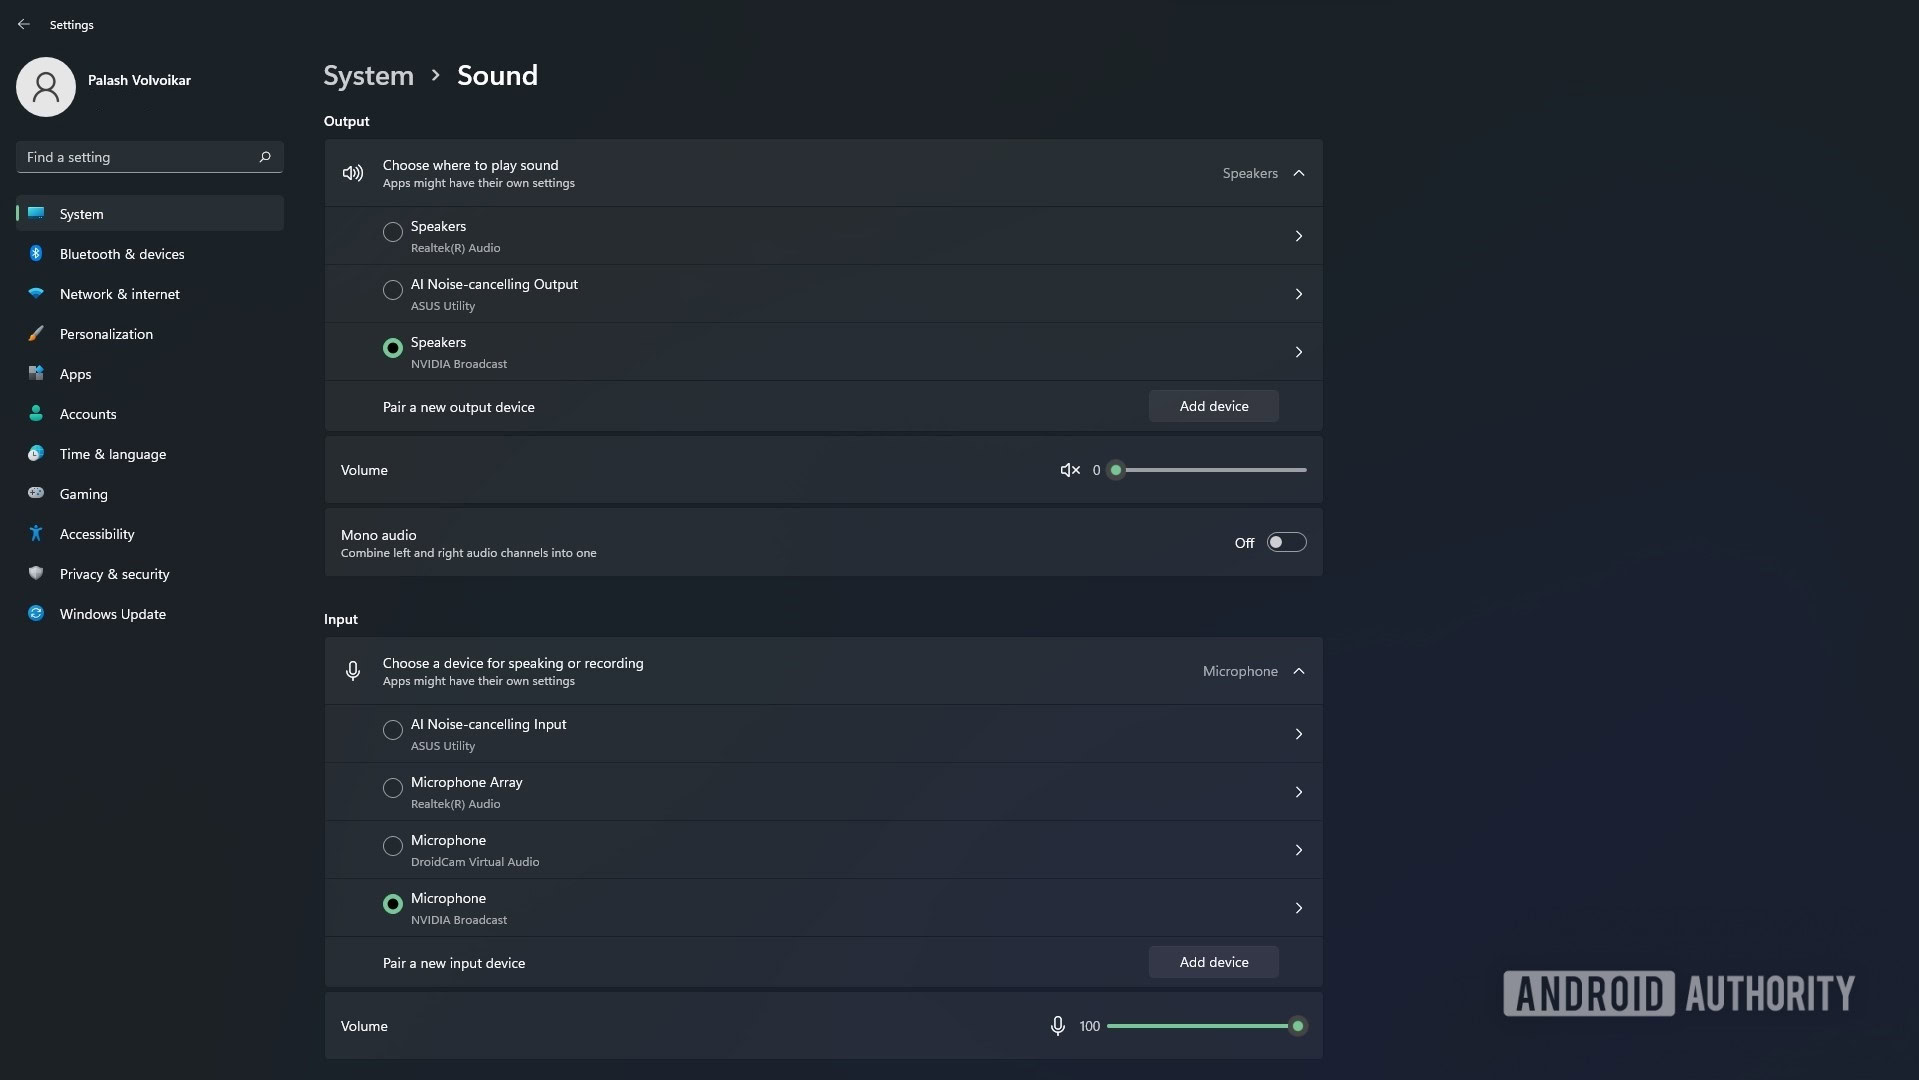
To disable one or both of these enhancements, click the toggle next to the effect. Once you’ve enabled the effects in Broadcast, you will need to make sure Microphone (NVIDIA Broadcast) is selected as the default microphone in the apps in which you want to deploy these effects. To set it as the default microphone systemwide in Windows 10 or 11, you can select it in Settings -> System -> Sound -> Input.
Speaker noise and echo removal
NVIDIA Broadcast has the same noise and echo removal effects for output audio. These are useful to use along with the microphone effects, especially if you use speakers or open-back headphones. The process to enable the effects is similar to the microphone effects.
Click the Speakers tab towards the top. Select your default speaker device under Audio Output, by clicking the drop-down box and selecting the right one from the list.
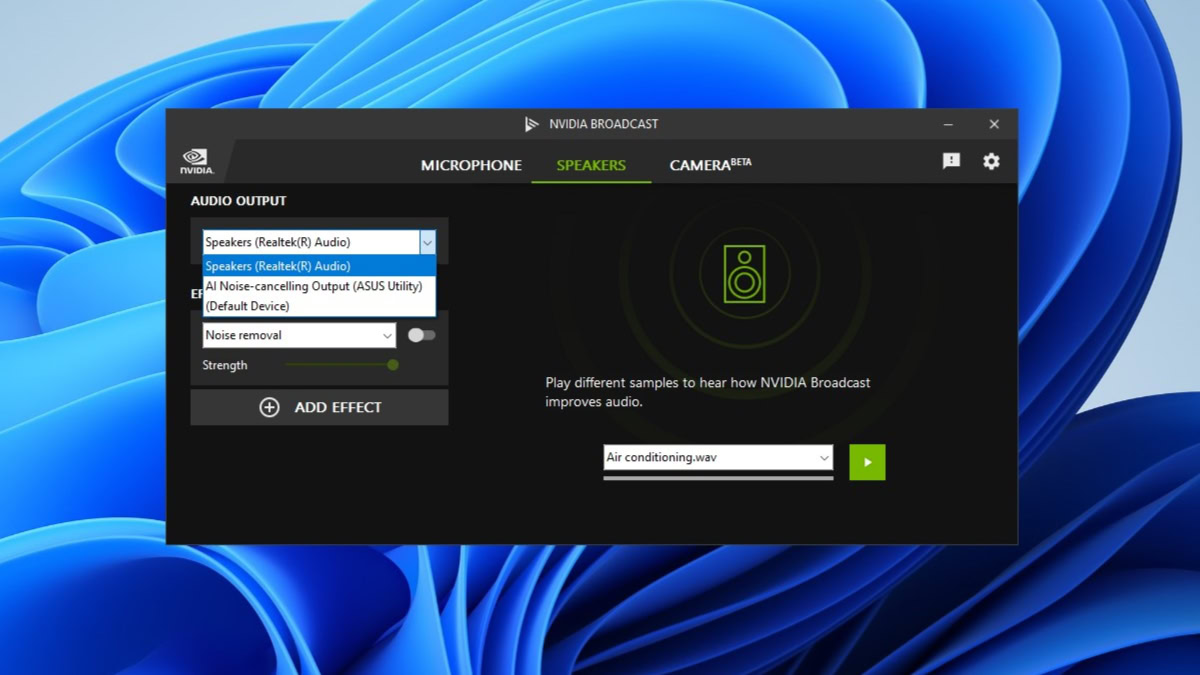
Next, select the effects from the same screen. Noise removal will appear by default. Click the toggle next to it to enable it. To enable echo removal, click the Add effect button. The Room echo removal (beta) should appear in the new tab. If not, click the drop-down and Room echo removal (beta). Click the toggle next to it to enable it.
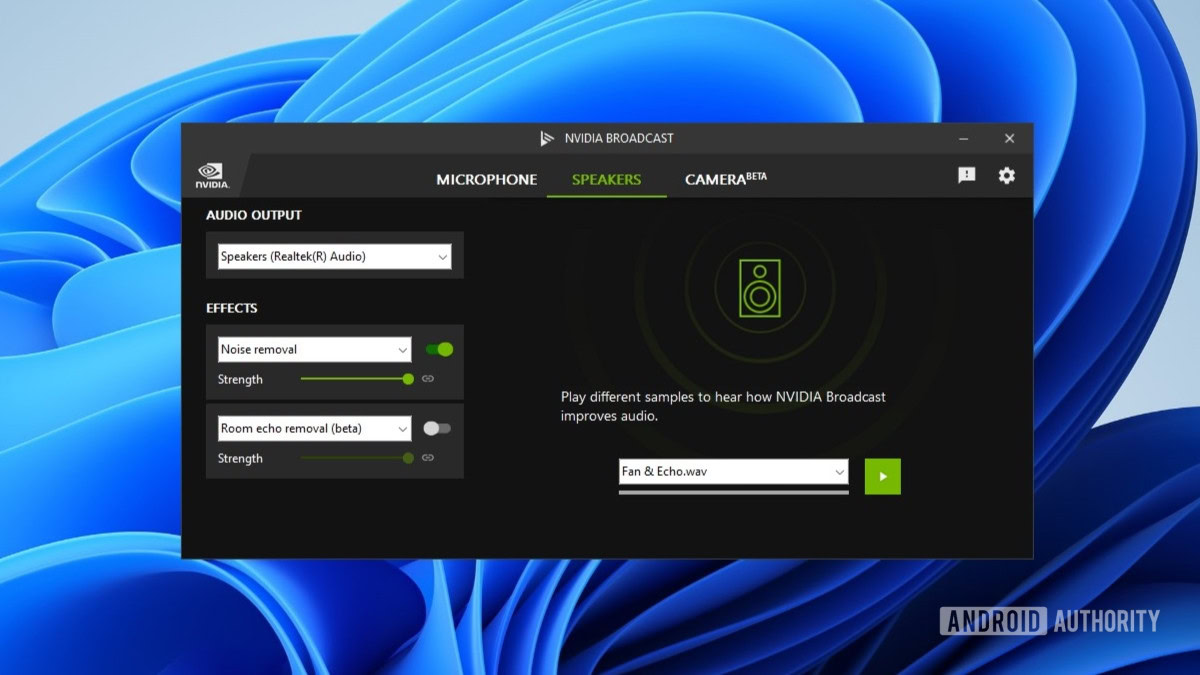
You can click the toggle to disable the effects as well. Ensure that NVIDIA Broadcast is selected as the default speaker option in your preferred apps. To set it as the default speaker systemwide in Windows 10 or 11, you can select it in Settings -> System -> Sound -> Output.

Using the webcam features in NVIDIA Broadcast
The method of using the camera features is a bit different. Select the default camera from the drop-down under Camera Source. You can also select the resolution and frame-rate mode from the second drop-down.
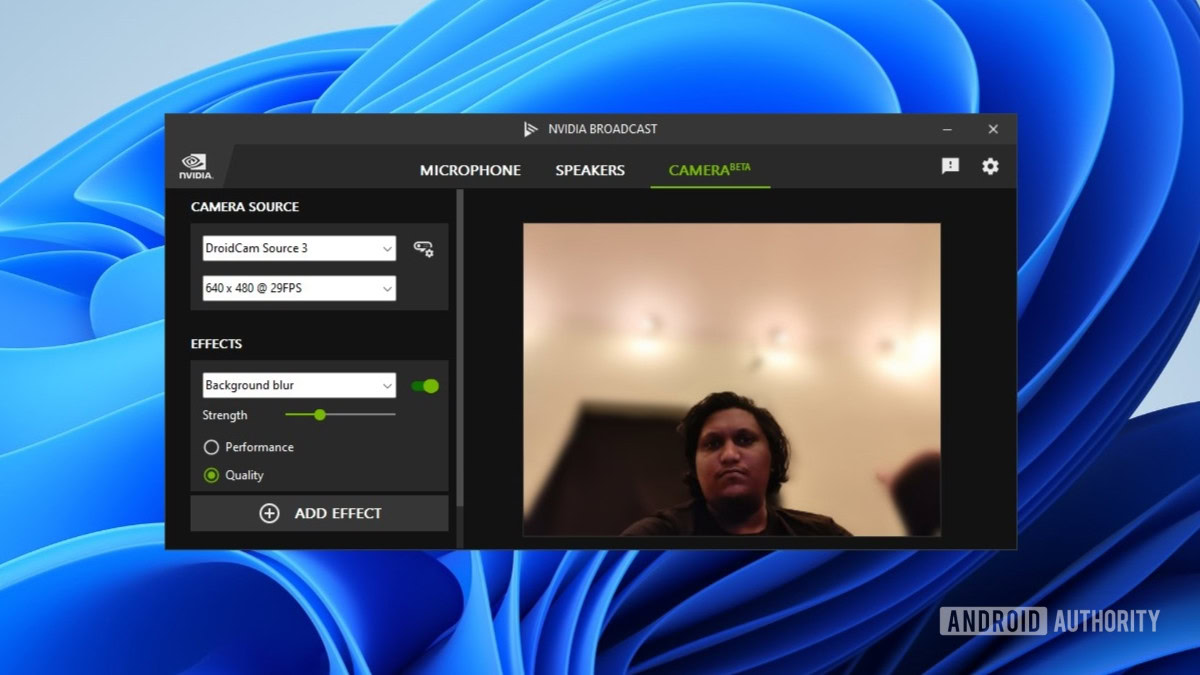
You can only use two camera effects at once. The background effects, i.e., background blur, background replacement, and background removal, cannot be used simultaneously. You can only use one background effect at a time. The first tab under Effects will have the Background blur effect selected. Click the toggle to enable it. You can adjust the blur level using the Strength slider, and toggle between Performance and Quality modes.
Click the drop-down to select Background removal or Background replacement. Background replacement will allow you to select an image as a replacement. It loads up the default NVIDIA image and gives you the option to browse your PC for more images. Background removal replaces the background with black space.
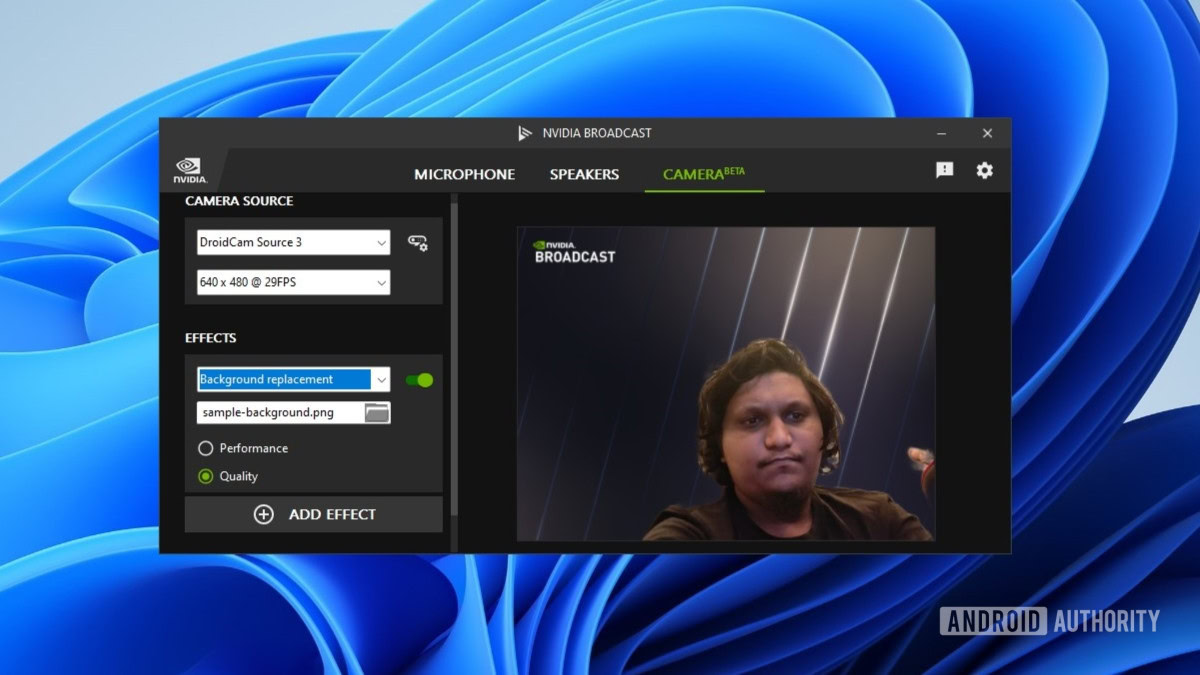
Click the add effect button to add your second effect. Auto frame is like Apple’s Center Stage, zooming in and tracking your face and moving the frame so that your face is always at its center, even if you move. You can adjust the zoom level using the slider. You can also pick Video noise removal if your camera has too much noise, choosing between Strong and Weak modes.

Once you’ve configured the effects you want, you can move on to the app you want to use your webcam and select NVIDIA Broadcast as the camera. Note that you may hear the fans of your PC ramp up as we’ve noticed that NVIDIA Broadcast can take quite a lot of juice to run. If you see your GPU performance taking a hit, quit NVIDIA Broadcast from the system tray, which you can access by clicking the up arrow on the right side of your Windows taskbar.
FAQs
Yes, you do. Broadcast doesn’t support non-RTX NVIDIA GPUs or other brand GPUs at the moment.
No, it does not. Broadcast requires Tensor cores, which are absent on the GTX range of GPUs.
Yes, it may affect performance while it’s running, especially if you’re using multiple effects at once.