Affiliate links on Android Authority may earn us a commission. Learn more.
An introduction to the Google Play Console for Android Developers

If you want to be a successful app developer, learning how to code and build apps is only part of the challenge. For anyone to buy your creation, you also need to upload it to the Google Play Store. Then there’s the busy work of responding to reviews, handling updates, monitoring sales, and looking out for bugs. All of this is handled through the Google Play Console (aka Developer Console).
The Developer Console has grown and changed a lot over the years. It has become very powerful, user-friendly, and intuitive. A well-versed developer can use all this to boost sales and improve users’ experiences.
In this post, we’ll go over what you need to know and how to make the most of this control center for Android devs.
What is the Google Play Console?

The Google Play Console is the back-end interface that Android developers and publishers can use to upload new apps, manage existing ones, and monitor performance. It also introduced a more modern, Material Design-influenced interface, keeping with Google’s other products.
Some of the things you can do from the Google Play Console include:
- Upload and publish apps
- Create/modify store listings
- View sales and statistics
- Manage different versions of your app
- View ratings and reviews (and respond)
- View crash reports
Getting started with the Play Console
To get started, you need to create a developer account. You can do this using your existing Google account. However, it would be best to remember that you will need to pay a one-time fee of $25 (which is significantly less than the $99/year Apple charges, so let’s count ourselves lucky!). Developers must also be over 18. If you want to move forward, you can sign up for a Google Play Console account here.
Once that’s done, you’ll be able to upload your first app. Start by clicking Create app in the top right corner, and then begin entering the details for your application. Here, you can set your app name, language, price, and more before uploading an APK, key certificate, and more. These are all things we can discuss in future posts, along with the process of uploading a new app creation. Here are Google’s policies and distribution agreement if you want to learn more about what Google allows and doesn’t allow.
Once you’ve built your app, you’ll need to wait several hours until it goes live. This is due to a mostly automated review process.
The search giant also launched the Google Play Console Publishing Overview. It gives a better idea of when to expect your app or update to go live, which is useful for marketing and announcements. You can see which changes are approved and which are still under review, as well as decide when you want to go live with those updates.
The app upload process includes several more steps to create a store listing. Developers will need to write a description for their app, for example. Additionally, you will need to add icons, screenshots, a cover image, and more. All of this will help to make your app stand out and increase discoverability.
The dashboard

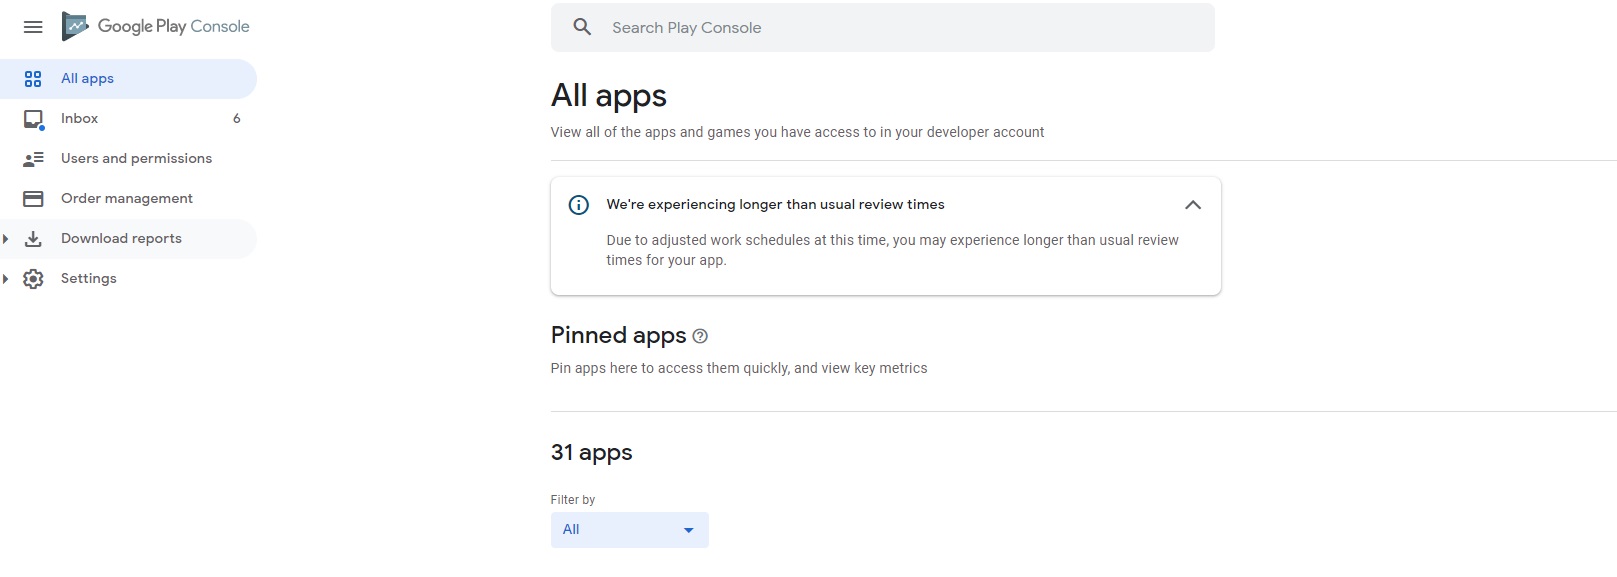
Once you have uploaded an app, you’ll be able to log into the Play Console and see it listed on the All apps page. This first page shows a list of all your applications along with at-a-glance details. For example, you can see the date of your last upload, the number of active users, and the app’s status (whether it is currently live).
Click on any of the apps these apps, and you will be taken to a dashboard. Here, you’ll see an icon in the top left indicating which app you are currently viewing, and you’ll be presented with several new options in the menu on the left.
These options include:
- Dashboard: A control center where you can see a number of other key details about your app. Most useful are the “KPIs” or “Key Performance Indexes.” They give you an idea of how your app is performing.
- Inbox: Important/useful updates about your app that need your attention.
- Statistics: More detailed data regarding your users, growth, etc.
- Publishing overview: The aforementioned page lets you see the status of your new updates.
- Releases overview: This shows you a history of your app versions and releases. You can also see whether apps/updates are in production or testing.
- Production: The Production menu is specifically for managing production releases of your app. You can also get data regarding stability for that particular release.
- Testing: Internal tests can be made accessible via Managed Google Play, which we will get to in a moment. Testing is very useful for developers who are planning large roll-outs of complex apps. This can help you to find device-specific bugs and other issues prior to going live.
- Device Catalog: This allows you to view compatible devices and manually restrict specific hardware.
- App bundle explorer: These days, apps can be uploaded in many permutations. Bundles allow Google to generate and serve optimized APKs for specific devices, thus saving space on a user’s device and avoiding compatibility issues. Bundles are created in Android Studio and can’t be run natively on Android devices.
Controlling store presence through the Google Play Console
Beneath these options, you’ll find several more menu items specifically for handling your app’s “store presence.” In other words, this is where you can make changes to the store listing — such as app name, icon, screenshots, etc.
A Custom store listings page lets you create tailored store listings for specific regions, for example. Store listing experiments allow you to run A/B tests on your listing. These tests let you run two slight variations of your store listing side-by-side. They then compare how each one performed. This is useful because it enables you to see which changes positively impact your number of downloads.

Store settings allow you to manage more options, such as app category and contact details. You can also order a translation service, view store performance metrics (conversions, traffic sources), and manage Play Games Services.
Under Quality, you will be able to see reviews and ratings. It’s important to respond to reviews in order to appear responsive and to manage your reputation. Remember, though: the customer is always right! Take the high road, and it will pay off in the long term.
Android vitals refers to performance metrics such as battery usage, stability, load time, etc. Here, you can get information about Crashes, allowing you to improve performance across Android devices.
Finally, the Monetize menu includes a range of options for controlling monetization. These include not only the direct pricing of the app itself but also the management of in-app products, subscriptions, and more. This is also where you’ll be able to see your financial reports.
Some advanced options
Depending on the type of developer you are, you may also want to dive into some of the more advanced settings hidden under the hood. Most of these are, unsurprisingly, located in the Advanced settings menu (found under Setup).
The Play Console offers features for B2C services, advanced optimization, and more.
One helpful option here is Managed Google Play. What this allows you to do is to give access to a private app for specific organizations. This is useful for developers providing clients with bespoke apps that enhance workflow. Also useful is Carrier targeting, which allows you to restrict your app’s access to specific carriers.
As you can see, the Play Console is crucial for Android developers who want to reach the broadest possible audience. It offers features for B2C services, advanced optimization, and more. Hopefully, this Google Play Console guide has given you a good idea of what you can find here and just how powerful and valuable the platform is.
Those who want to create better apps should also take a look at our Google Play Services guide. It’s a bridge to help developers build better, more optimized, more battery-efficient apps without unnecessary work.
