
Once you have a pretty good grasp of Excel basics, such as formulas and graphs, you’re ready to try automation. Called Macros, these functions save time by automating repetitive tasks. Here are a few tips on how to create a Macro in Excel. This is one of the most advanced tasks we’ve covered so far, so don’t worry if you struggle the first time through.
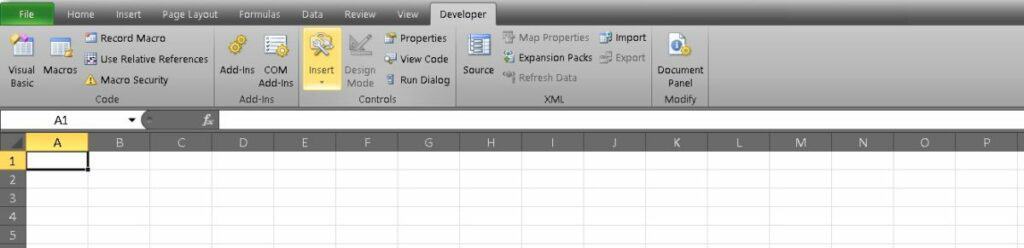
Macros are an advanced Excel feature, and therefore they reside under the Developer tab. In case you’ve never used the Developer tab before, we’ll start with tips to set it up.
Table of Contents
How to enable the Developer tab
1. Right-click anywhere on the ribbon of tabs at the top of your screen and select Customize the Ribbon.
You can also go through the menu using File > Options > Customize Ribbon, but it’s all up to personal preference.
2. Select the Main Tabs option on the menu. It will probably be selected by default, but double-check to make sure. Now add a check in the box next to the Developer option.
The spreadsheet used above to enable the Developer tab is not the sheet we’ll use to create our Macro, but the steps remain the same.
How to create a Macro in Excel
Add a Command Button
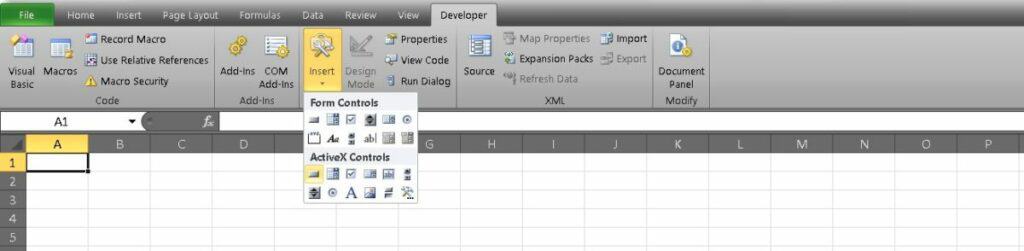
The first thing we have to do when creating our Macro is to add a Command Button. The Command Button is how you activate the Macro once it’s assembled.
1. Go to the newly added Developer tab and find the Insert section.
2. Open the menu and locate Command Button under the ActiveX Controls section.
3. Drag your Command Button onto your spreadsheet wherever you want to place it.
Assign a Macro
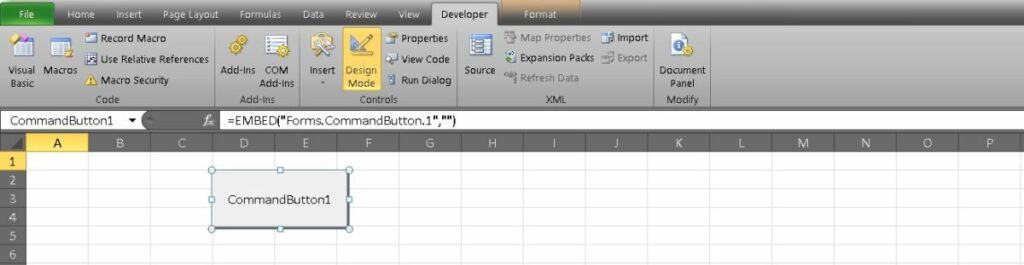
Now that you have a Command Button, it’s time to make the button work.
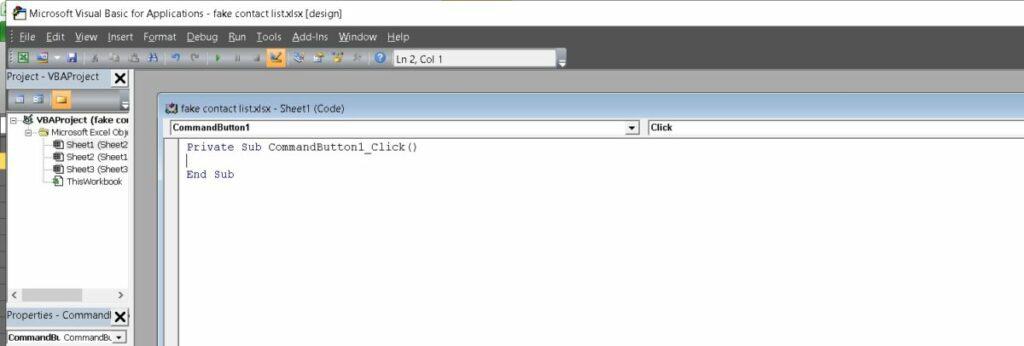
1. Head to the Controls section of the Developer tab. Select Design Mode.
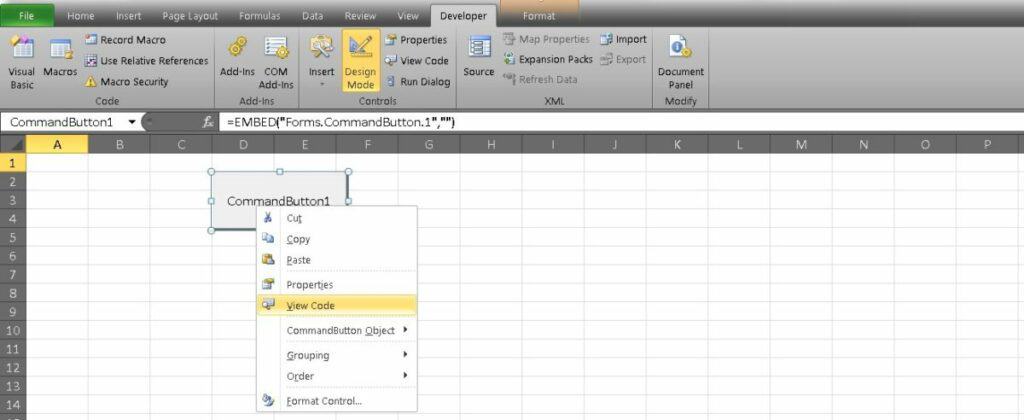
2. Right-click on your button and select View Code. This will open the Visual Basic Editor.

3. Move your cursor to the Visual Basic Editor and select the line between Private Sub CommandButton1_Click() and End Sub.

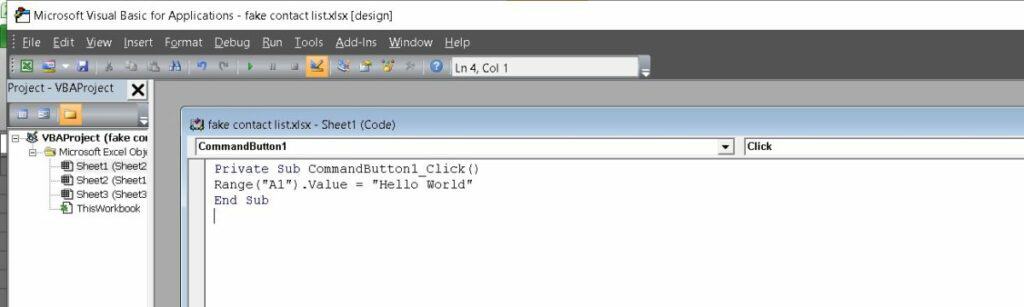
4. Enter this line of code: Range(“A1”). Value = “Hello World”
This code will add the phrase Hello World to cell A1 any time you click on the button.
5. Now close the Visual Basic Editor and deselect the Design Mode option.
6. Test your Macro by clicking on the Command Button.
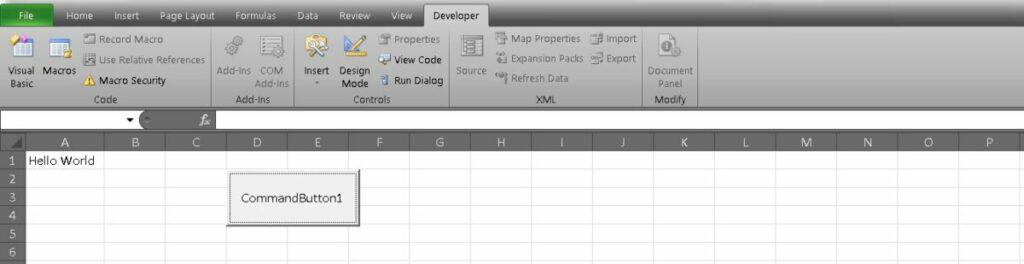
This is far from an advanced Macro, but it does give you an idea of how the process works. If you want to know how to create an advanced Macro in Excel, you’ll need a bit more training.
Related: How to calculate age in Excel
How do I learn more?
As mentioned above, this tutorial is the most basic introduction to using VBA in Excel. If you want to start writing advanced Macros or using PivotTables, you might want to look at some in-depth instruction. You can get this at a great price with a new learning kit that’s on offer from Tech Deals right now.
It’s called the Complete Excel Pro Tips Certification Bundle, and it includes six modules to help you get started. You can study more content on data visualization and analytics or explore other functions such as PivotTables. The skills you can pick up will not only look great on your resume, but they’ll actually be useful in real life.
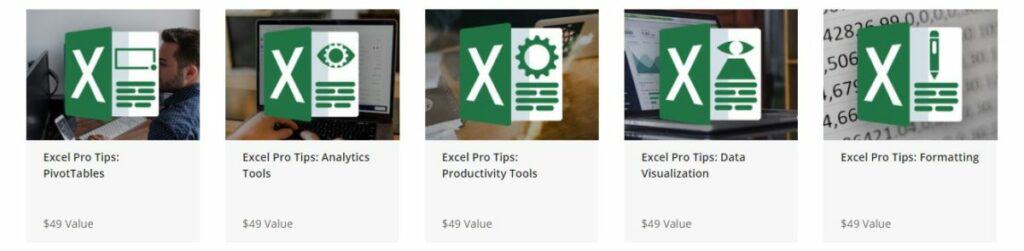
The six modules in the Complete Excel Pro Tips Certification Bundle have a combined retail value of $294, but you can get started right now for just $19. It’s a great opportunity to spruce up your skills and save some money. You can join the 2,000 people who have already signed up below.